CB 360 backward timing! Can't figure out...

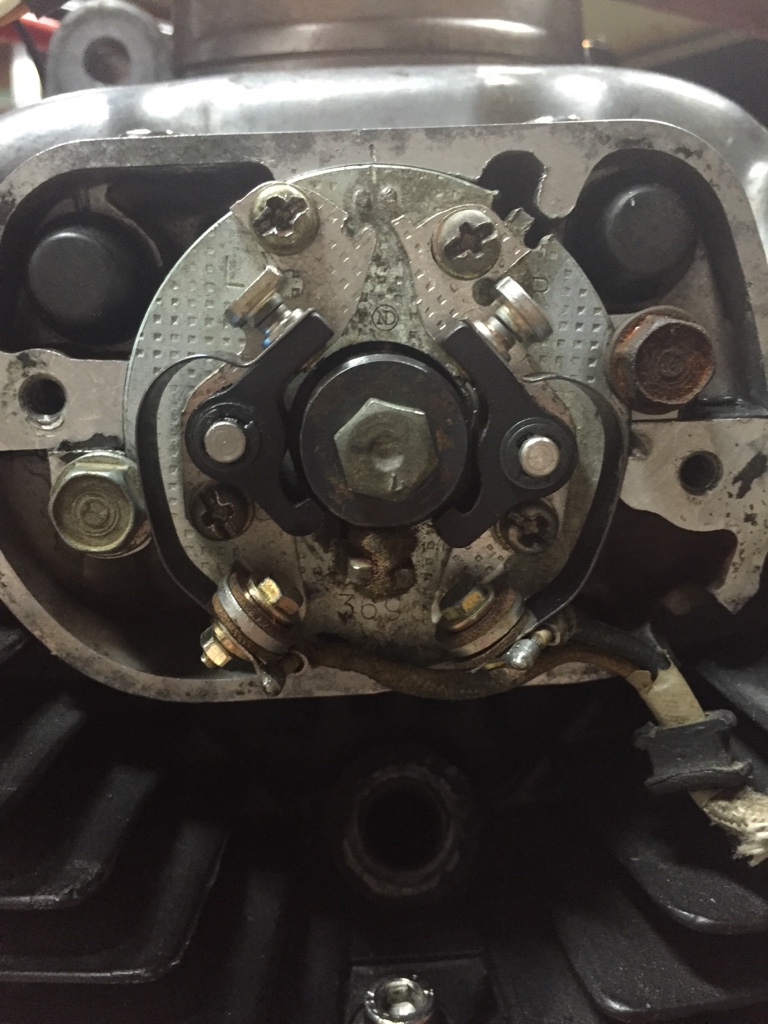
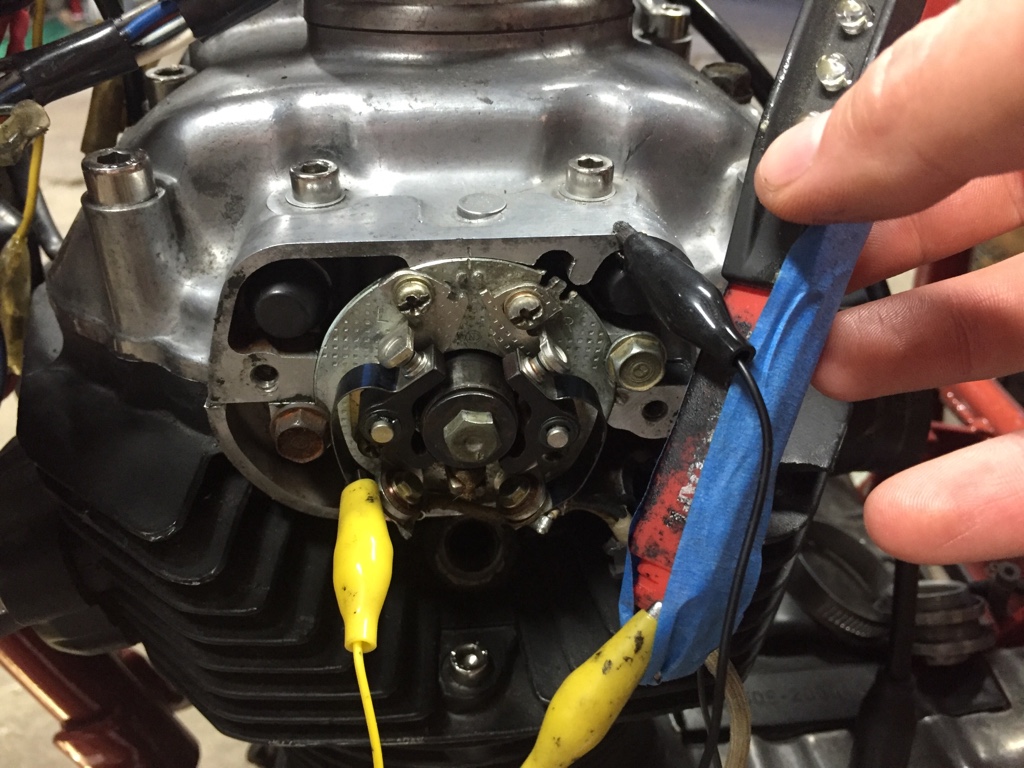
So I'm completing a rebuild of my cb360 engine and I ran into this issue while adjusting my points. When using a continuity light the left point is lighting close to the F mark and the right point is lighting at close to the LF mark...... Backwards from normal! The light then goes off at LF and F.

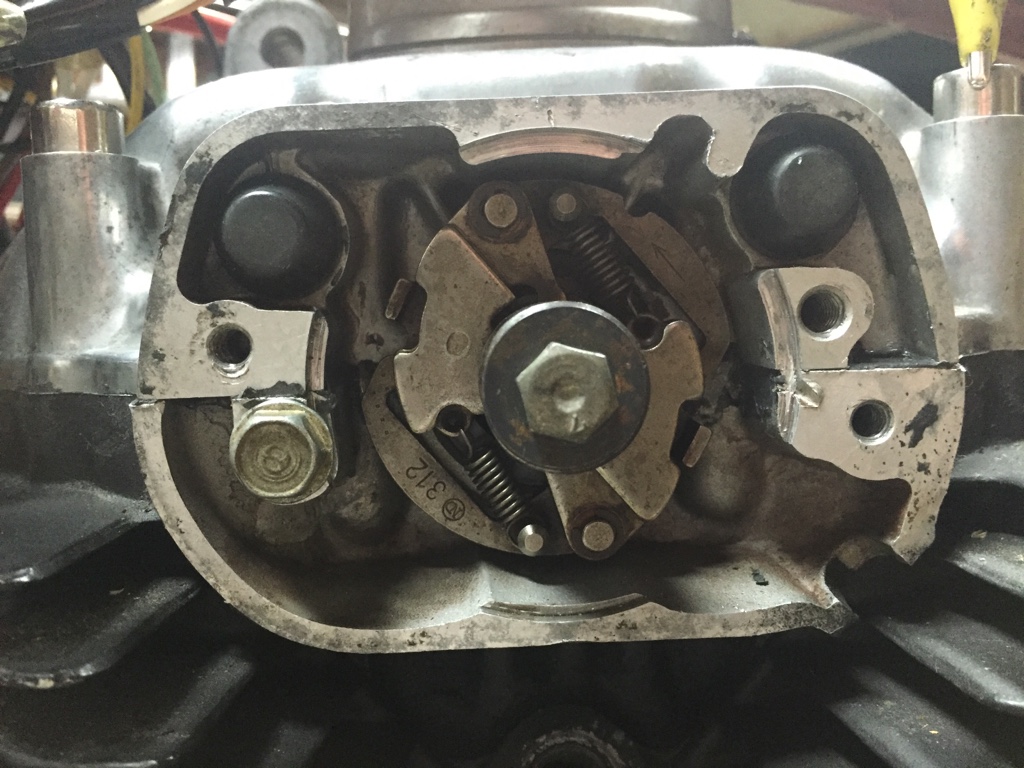
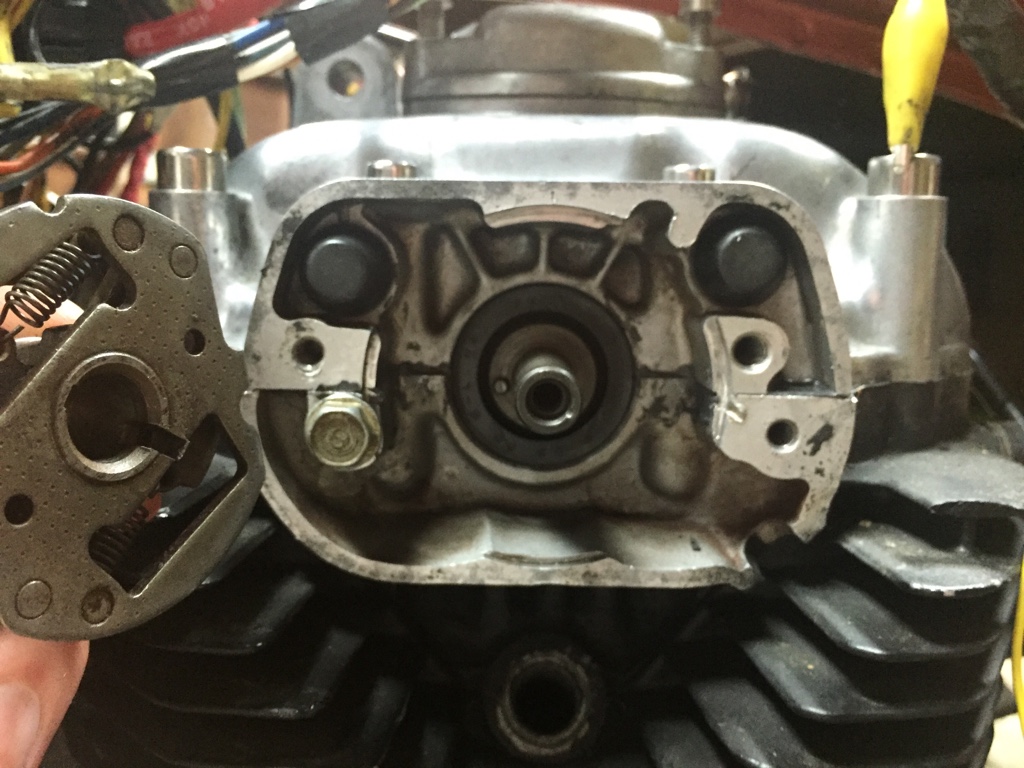
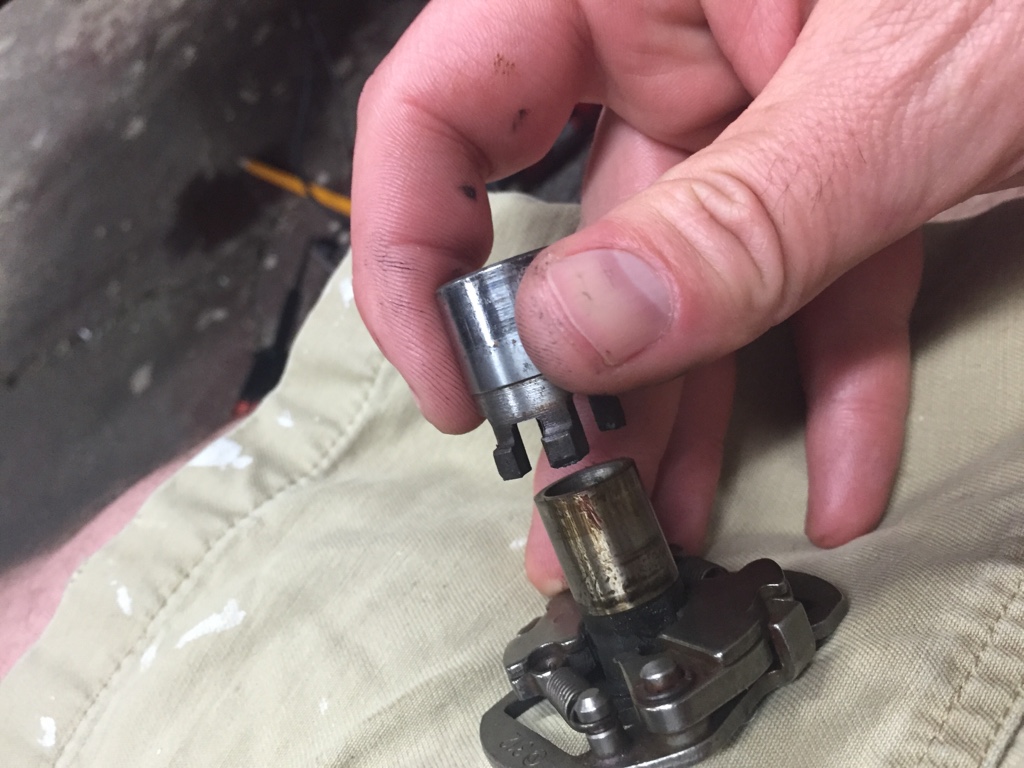
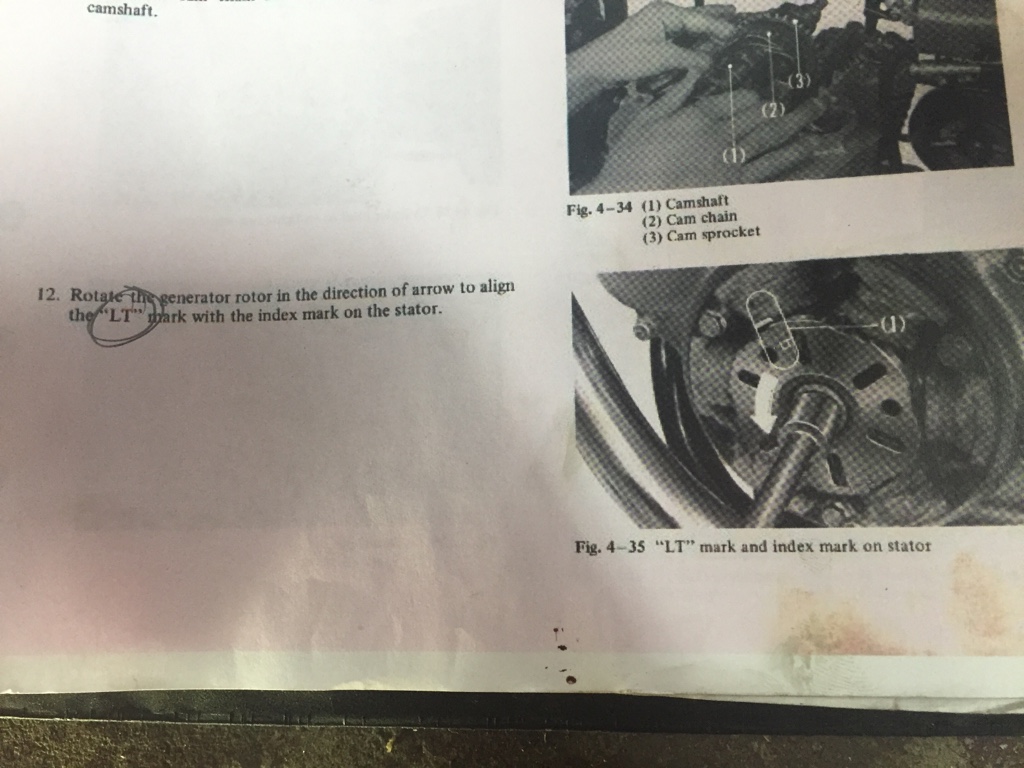
I followed the instructions in the manual when installing the camshaft. I installed the camshaft with the engine at LT with the camshaft marks horizontal.
bc870589a20e0fa97abd38f24ac35b81.jpg


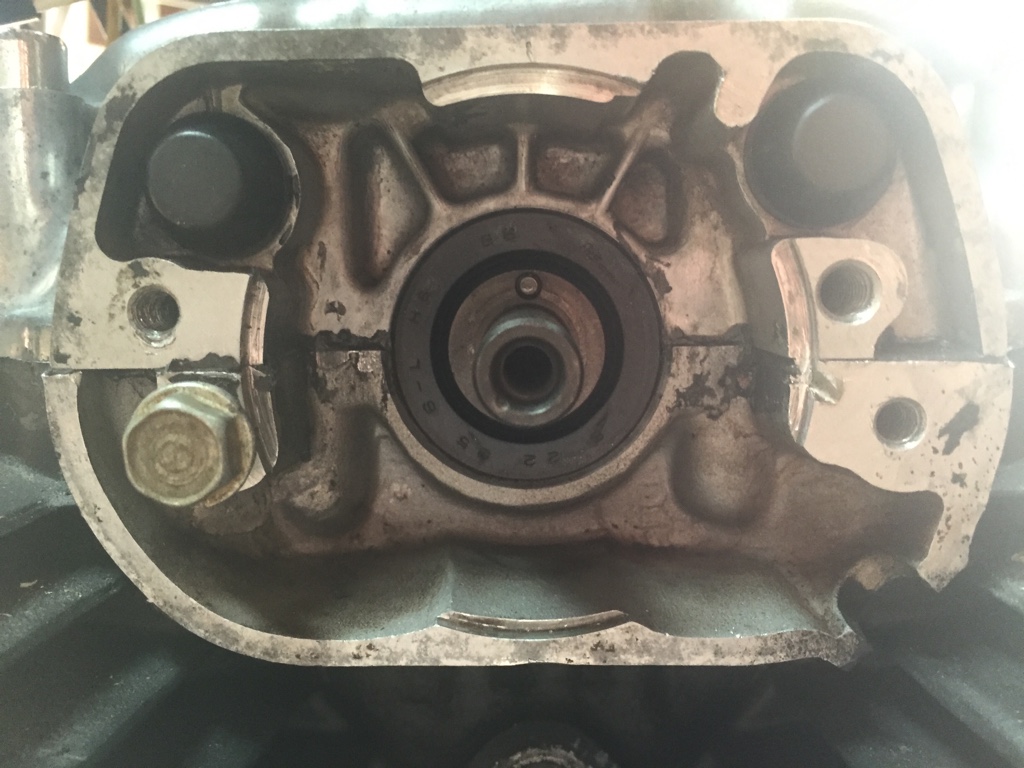
I have also attached a photo of the cam position at LT. The pin on the end of the cam shaft faces straight up or straight down at LT.

0f7641ffef4562d18d8dde006255fa03.jpg


Is it possible that the manual is wrong? Should I have installed the camshaft at T instead of LT??

Am I totally missing something else?


Sent from my iPhone using DO THE TON
 
Check that your advancer mechanism is installed correctly...its probably not. That will cause the timing to be opposite, happened on my 360.

If you lined up the - - marks on the timing chain sprocket when the index mark was at LT, that is all good.
 
Okay, I took another look at that advancer, and the bushing actually comes off, and I can rotate it 180 degrees! I don't remember rotating this why I took it off the bike, but maybe that is one of the many reasons why the bike didn't run.

27f0d49597d71d72f4811c5883c70439.jpg


I'm going to put it back together and check the points again. Thanks!


Sent from my iPhone using DO THE TON
 
Back to square one..... I tried rotating the bushing on the point advancer 180 degrees but I'm still getting left continuity on F and right continuity on LF. The only difference is that that left point now has continuity on the right compression stroke.

Is it possible that the camshaft is actually 90 degrees off?


I'm about to open up the top of the case and look at the cam installation again if I can't come up with any better ideas.


Sent from my iPhone using DO THE TON
 
Swap the wires going into the points, make sure the left coil goes to left point and right to right.

You shouldn't need to open the top end, we already ruled that out.

Sent from my iPhone using DO THE TON
 
I'm taking the reading off the point itself using just a continuity light. I don't have the points plugged in or power to the system since I'm kickstart only.

Could the problem be that I'm just using a continuity light and not a voltage tester light with engine power? When the manual says that the points "open" at LT does that mean my simple continuity light would actually turn off?

6c7098b2ad9bbe089febec16e340ef06.jpg


Sent from my iPhone using DO THE TON
 
shade tree mechanic said:
I'm taking the reading off the point itself using just a continuity light. I don't have the points plugged in or power to the system since I'm kickstart only.

Could the problem be that I'm just using a continuity light and not a voltage tester light with engine power? When the manual says that the points "open" at LT does that mean my simple continuity light would actually turn off?

6c7098b2ad9bbe089febec16e340ef06.jpg


Sent from my iPhone using DO THE TON

The points shouldn't open at LT. They should open at F mark.

But yes. If your light is on when you have continuity, you're wanting the light to turn off just as the crank rotates past the F mark.
 
Thanks guys! I set the points correctly last night using this method. I've been working on this bike for a couple years but I'm still learning exactly how everything works. Makes a lot more sense now.


Sent from my iPhone using DO THE TON
 
Looks like someone has been filing away and nicking at the valve cover. Everything fits in there centered, flush and straight, right? Also, be aware of the position of your wire connectors to the points. They can hit the cover in a certain position, which the right looks close. When you run it, it'll bog when they ground out and you can see where they're arcing on the inside of the cover. Some people run two gaskets under the cover for good measure. I make mine out of a thicker cork gasket for that cover. Others paint inside of the cover with the paintable rubber insulation.
 
shade tree mechanic said:
Back to square one..... I tried rotating the bushing on the point advancer 180 degrees but I'm still getting left continuity on F and right continuity on LF. The only difference is that that left point now has continuity on the right compression stroke.

Is it possible that the camshaft is actually 90 degrees off?

Sent from my iPhone using DO THE TON

Only if you take the valves out ;D
Disconnect the wires at the coils then use the points wire for continuity check
You could have shorted condenser giving permanent continuity
shade tree mechanic said:
Okay, I took another look at that advancer, and the bushing actually comes off, and I can rotate it 180 degrees! I don't remember rotating this why I took it off the bike, but maybe that is one of the many reasons why the bike didn't run.

27f0d49597d71d72f4811c5883c70439.jpg


I'm going to put it back together and check the points again. Thanks!


Sent from my iPhone using DO THE TON

There is a tiny 'dot' on the end of points cam that kinda matches with a cutaway on advancer backplate.
It isn't mentioned in any service manual, I had to figure it out long time ago and posted here couple of years back.
You did remove all the rust and use some grease on the pivot shaft?
BTW, that isn't a bush, it's the points cam.
Rotate the motor about 90 degrees and set the points gap to 0.014" before you do any more damage
 
I had/have a very similar issue. Let me know if you figure it out.

http://www.dotheton.com/forum/index.php?topic=59409.0
 
Back
Top Bottom