Follow along with the video below to see how to install our site as a web app on your home screen.
Note: This feature currently requires accessing the site using the built-in Safari browser.
We noticed you are blocking ads. DO THE TON only works with community supporters. Most are active members of the site with small businesses. Please consider disabling your ad blocking tool and checking out the businesses that help keep our site up and free.
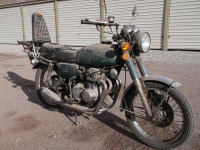
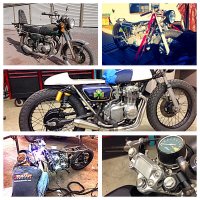
Hi everyone my names Ryan i'm from Orange County Ca, I purchased a 1973 cb350f from a friend last year for $400 as a complete barn find. It sat in Parker Az in a wood shop for the last 10 years. Bike was originally from Costa mesa Ca where it was a daily driver and has 30k miles on it. I grew up riding Hondas all dirt bikes and still ride my 2009CR450x and 2 stroker CR250r. Ive never posted on here but have had alot of inspiration to build a bike after a close friend passed away from cancer and knew he wanted to always build a bike. So this is a build in memory of my close friend Brent Graham, a hard working your guy who stived at being a fireman and was taken in 2011 on st pattys day of cancer. Hope you enjoy what i have done.
The build is alost done just need a few odds an ends i really think of posting on here until most of my friends said how well it was turning out. So the photos i have are not in any sort of order.
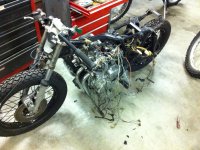
This was after i tore it down an cleaned, and its still not perfect.
also had the wheels powder coated at PPE in anaheim. 50$ score!
I also started gutting all the wiring too in this pic
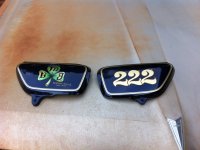
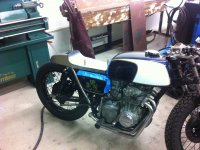
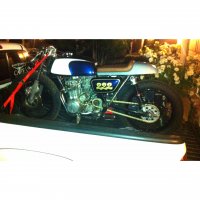
A friend who worked for Troy lee designs for 13 years did the paint for me. House of Kolor metalic blue with HK gold flake. 222 is my grandpas numbers and the 3 leaf is my buddys memorial for st patties and his intials. I had the honda 350f logos filled in obiously.
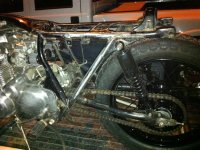
cut off the rear foot pegs an frame ears. Just need to smooth the metal out and prime and paint it or if i get the urge to tear it all apart i will do a satin black powder coat. This is a budget build of less than $2400.
I dont know how to post the entire build in one post so ill keep adding photos. I didnt feel like spending a ton of money on head light mounts and no one really made someting that i liked so i made these on the plasma table at my buddys shop and used shaft collars to fit the 33mm dia of the forks
tig welded of course.
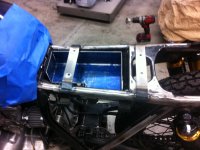
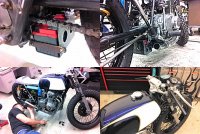
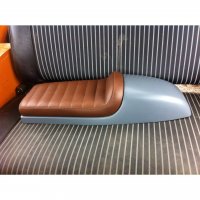
bike sat for about 4 months with out me touching it. I have a friend that does amazing sheet metal work here in anaheim doing all hot rods and restorations. this was his first seat/fender with no template he was able to take the lines and shape of the tank flow into a nicely fit seat/fender. the rear frame was cut and filled and some straps were added to support the seat at the right height and to bolt it down.
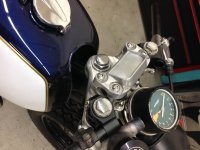
the dash was filled in so i can run 2 flush mounted buttons for the head light and the started and a small toggle in between for the hi beam. I didnt want any clutter on the bars.
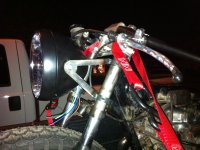
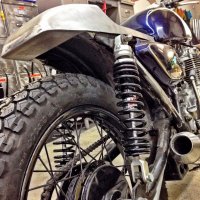
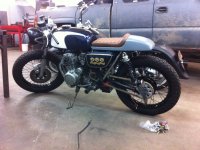
More recent picture. I went to Cone engineering in Los alamitos and purchased there 12in reverse stainless cone and a 2 1/2 to 2 reducer for the 4-1 collector. the guys at Cone engineering are great and know alot. The shocks i had a tough time finding something with in my budget and someting that would look good and perform well. After trial an error i bought a set of cheap $80 piggy back air shocks off ebay..they were shit, they looked cool but are mainly for scooters or golf carts. These on the other hand are very nice rebuildable shocks from Klaus at YSS suspension over on the east coast in new jersey. He builds to order and sets them to your rider weight. im very please the way they fit and look. the only issue i had was the spring being so long the lower clevis wasnt tall enough to give me the right clearance for the chain. After talking with Klaus he sent me a new set of lower spring retainers that are much taller and gave me the clearance i needed. 290$ for the pair not bad comparing them to a works shock but half the price. ill find out how well they do once i start putting miles on them.
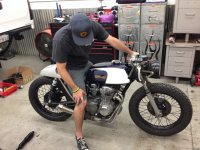
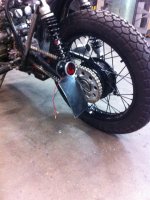
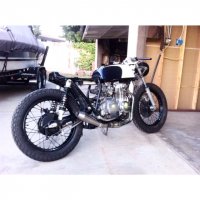
Here is the bike with the new 520 conversion from moto-madness and the seat on to see how she looks with some padding now. Bike is going to the shop to get the lucas brake light and plate frame bent an mounted to the rear axel and also make a few tabs to fasten the TM designs chain roller on the swing arm. I had some more clearance issued with the chain after i put the longer 14 in shocks on. It changed the angle of the chain alot an now its just a few hairs to close to the battery box. so the chain guide/roller with look cool keep my chain from smackin the battery box and it add a bit of my motocross flair to it i guess.
Great lookin bike. That seat looks fantastic! (although to be honest there was something kind of appealing about that big sissy seat hehe). Looking forward to seeing more.
I made a plate and light bracket tonight did a small radius and mounted her up. I think it's ugly to have a plate but it's the law so I guess this will do.
Thanks btw that sissy bar was sweet back in 1973 haha
This site uses cookies to help personalise content, tailor your experience and to keep you logged in if you register.
By continuing to use this site, you are consenting to our use of cookies.