Follow along with the video below to see how to install our site as a web app on your home screen.
Note: This feature currently requires accessing the site using the built-in Safari browser.
We noticed you are blocking ads. DO THE TON only works with community supporters. Most are active members of the site with small businesses. Please consider disabling your ad blocking tool and checking out the businesses that help keep our site up and free.
Thanks! I'm just using Duplicolor 500* Engine paint.... I thought about using the Eastwood 2 part engine paint kit but it has mediocre reviews and the Duplicolor has tons of positive reviews for the most part... of course each situation is different and I figured a decent paint job is 90% prep and 10% paint choice anyway.
I am definitely of the belief that it is all in the prep work. As long as the paint has the ability to go off nice and hard and can take oil being spilt on it
Thanks! I'm just using Duplicolor 500* Engine paint.... I thought about using the Eastwood 2 part engine paint kit but it has mediocre reviews and the Duplicolor has tons of positive reviews for the most part... of course each situation is different and I figured a decent paint job is 90% prep and 10% paint choice anyway.
It's a bit fragile until fully cured (which seems to take a bit of forever.) It's decently oil/gas/heat though. The 2K stuff can take dings and knocks a little better, that's really all you gain.
Wow, that is a shame - though I have to say predictable. Anything propelled by compressed air will very commonly get driven past all kinds of seals - even ones that keep oil inside the engine, like the shifter shaft seal and clutch push rod seal. Keep this in mind if you take your bike (or anything else)to a car wash that has a pressure washer system. You can drive water into places very easily that should never get wet under normal situations. Depends a lot on how much air pressure you have and how you aim your media, but I think you take quite a chance at this point if you don't take it all apart to be sure. That glass will not be at all friendly to many things inside. It is pretty easy to completely clean all the parts (I routinely glass bead carburetor bodies) but the parts have to be bare.
Still debating. I'm tempted to say that it's worse than it looks - I squirted some oil in the bearing to force any beads out and everything seems to spin freely without any offensive noises.
I had been planning to flush the case with oil before reassembly anyway to wash out any contaminates. I may reserve my decision until after that.
Basically I have a couple gallons of old oil I plan on filtering and then fill the case with it to flush anything out. Then open the plug and let it drain, filter, and repeat a couple times.
At the very least, I already have a new tube of Hondabond. :-\
Dude really doing all that will be more work than splitting them and cleaning.
open them up and clean well w diesel fuel. Wipe machined surfaces w acetone to dry, flip the whole thing upside down, reassemble w hondabond and done.
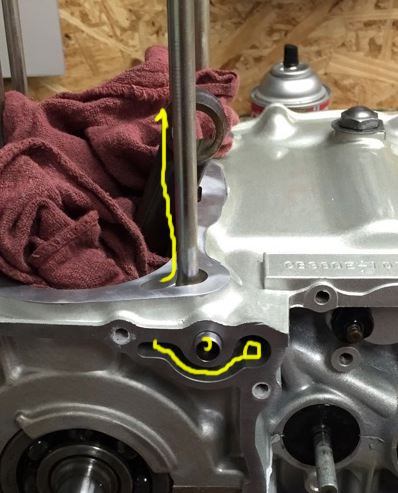
That way you can double ensure entire oil system is flushed and spotless. Top to bottom. The oil journal holes in the top case feeding through the jugs (bolts) are tiny and anything will clog them. While you got them open you can drill em out 1/32" larger than they are now. Dont recall what size they are... other than really small.
If those two little holes get clogged. You got no oil going to the whole top end.
And I know when you pull the side covers off everything is remarkably clean. Mine was too. But in the bottom of the pan it had a coat of black gooey sludge.
Do all the bolts I can see on the case need to come out? I have been nervous to take all of them out for fear of dropping something out of place inside the case.
Also, I'm sure it's a search away but do you know of a resource that lists out all the torque specs?
yep including these two on the bottom. But, dont remove cam chain tensioner bolt.
Take good shots of the gear selector mech behind the clutch basket. you can see w cases assembled.
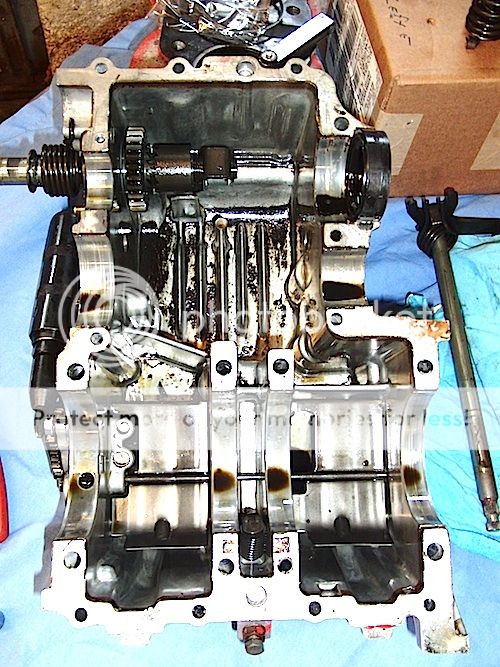
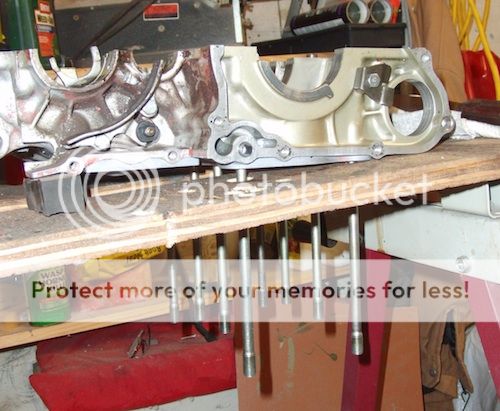
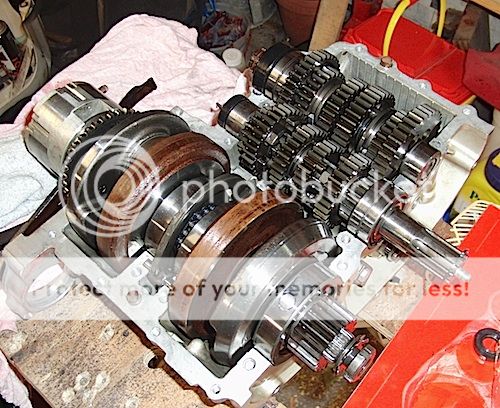
disassemble upright. pop cases apart. Take lots of reference shots. tranny, shift fork locations and how they sit together. flip top over upside down. I carefully pulled transmission gears on their shafts and flipped them and laid them right back into top case. making sure shift forks went in correctly and gears meshed properly and all that.
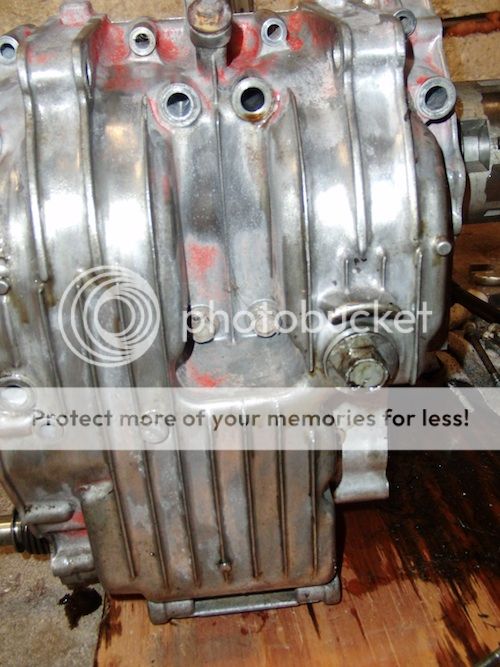
Also, I never did disassemble or remove the kickstarter stuff from lower case. As you can see in my pics I posted. I just washed em as best I could.
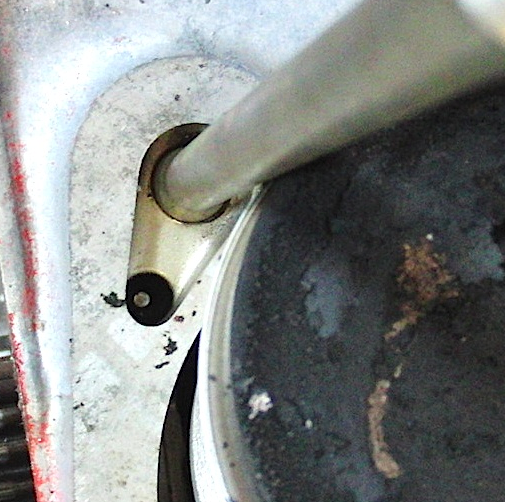
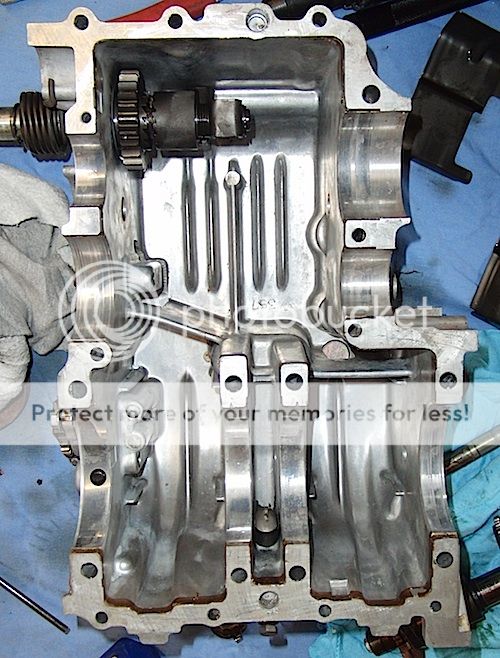
Pull the rods holding the oil splash shields in the bottom case to access for cleaning. Then put em back in the same way the came out.
ensure the oil journals are all clean and clear. Do this in the head too before you install it but that comes later. 8)
Dont bother removing the spring bolt for the cam chain tensioner. Just flush it clean as best you can. It can be a tough son of a bitch but compress it down to make reassembly of the cam chain slide easier, later.
I took mine out. and left out one of the 2 springs. (theres 2 one you can see and a smaller one inside. I found it laying on the table underneath. Found after I had them hondabonded and bolted up. had to start over and take them completely apart.
If you remove the kick starter for any reason PM me I will send you a new circlip, I bought about 100 when I rebuilt mine and you should replace em whenever you take them off anyways. That one is especially dangerous if it fails.
trek97 said:
heres the link to the post I made...Kinda funny today...was not funny then.
I think I split the cases on Luna 3 times before running it LOL.
I use a piece of corrugated cardboard and draw a sketch of the top and bottom noting the front of the engine and make marks where all the bolts "should be". Make an X with a razor and stick the bolt in there. Do it for the top and bottom and you know exactly where everything is when you go to reassemble.
Got my table all cleaned off, fresh piece of cardboard down, got the clutch off... don't have a oil filter wrench. I knew this day would come, just didn't think it would happen so soon :
Does anyone have the part number for the oil filter?
It seems pretty difficult to find... This one (http://4into1.com/emgo-honda-kawasaki-oil-filter/) looks like a good bet, especially for the price, but the CB360 isn't listed.
Any ideas?
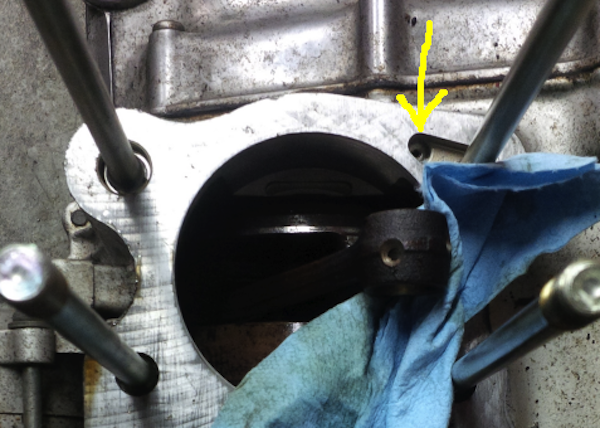
Also, does the "cap" in front of the filter (right behind the c-clip) unscrew or just pull out?
This site uses cookies to help personalise content, tailor your experience and to keep you logged in if you register.
By continuing to use this site, you are consenting to our use of cookies.