cb400f no spark with all new parts.

Rydog400f

Been Around the Block
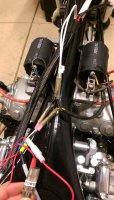
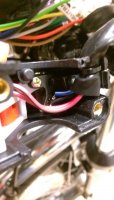
So I just got my Spark Moto wiring harness in and can't seem to get a spark. Everything reads 12v when checked but the start button does nothing. Also it doesn't spark after kick too. I'm using new plugs, 5.0ohm coils, and dynatek ignition. Any help is much appreciated! Thanks.
 

Attachments

  • IMAG0645.jpg
    IMAG0645.jpg
    1.7 MB · Views: 183
First, the yellow wire on the left coil liiks like it might be grounding on the coil armature.

Are your points opening an closing?
 
Yellow wire wasn't touching but I moved it a bit anyways. No points with the dynatek electronic ignition. Still nothing.
 
I've heard of people bypassing it but I don't think I know how. Killswitch turns it off while running, and it wont kickstart without the button in the "on" position.
 
Try to find a point with no continuity with the volt meter....i doubt its the dynatek.... Could be a switch wire or the switch hard to say without testing it....seems there is a connection somewhere thats wrong or off
 
I'm pretty sure something isn't wired right because everything up to the switch has power but since I bought the harness instead of built it I don't know which wire does what.
 
Solenoid should be wired into a black wire on one side and then to the thin red wire on the other. The thin red wire leads to the front of the harness and connects to the starter button, which should ground out and complete the circuit when you press it.

Have you tested the starter button to ensure a good ground? It's not uncommon after a rebuild to lose your ground through the bars. More than one person I know has had to run a separate grounding wire.
 
Sonreir said:
Solenoid should be wired into a black wire on one side and then to the thin red wire on the other. The thin red wire leads to the front of the harness and connects to the starter button, which should ground out and complete the circuit when you press it.

Have you tested the starter button to ensure a good ground? It's not uncommon after a rebuild to lose your ground through the bars. More than one person I know has had to run a separate grounding wire.

This and the actual button inside can get corroded with no use. you can take them apart and clean the contact points all up and fix it. even if it looks clean it can have enough oxidation to no longer pass ground to complete the circuit. emery cloth and dielectric grease is you friend.

Edit: I just found your build thread, nice work so far, but you have painted clipons and I believe the start button on the CB400F grounds at the bars so you need to either add a ground wire, or sand the paint off the clipons where the control is, your switch won't work without it
 
Maritime said:
This and the actual button inside can get corroded with no use. you can take them apart and clean the contact points all up and fix it. even if it looks clean it can have enough oxidation to no longer pass ground to complete the circuit. emery cloth and dielectric grease is you friend.

Edit: I just found your build thread, nice work so far, but you have painted clipons and I believe the start button on the CB400F grounds at the bars so you need to either add a ground wire, or sand the paint off the clipons where the control is, your switch won't work without it


.....good eye man.....
 
Sonreir said:
Solenoid should be wired into a black wire on one side and then to the thin red wire on the other. The thin red wire leads to the front of the harness and connects to the starter button, which should ground out and complete the circuit when you press it.

Have you tested the starter button to ensure a good ground? It's not uncommon after a rebuild to lose your ground through the bars. More than one person I know has had to run a separate grounding wire.

So it makes its ground from being clamped to the bar?
 
Here's the inside of the switch, I'm running an aftermarket on/off switch. The blue and black control the starter button. Blue connects to the solenoid, black connects to the ground.
 

Attachments

  • IMAG0650.jpg
    IMAG0650.jpg
    1.2 MB · Views: 184
  • IMAG0651.jpg
    IMAG0651.jpg
    1.3 MB · Views: 184
Back
Top Bottom