Follow along with the video below to see how to install our site as a web app on your home screen.
Note: This feature currently requires accessing the site using the built-in Safari browser.
We noticed you are blocking ads. DO THE TON only works with community supporters. Most are active members of the site with small businesses. Please consider disabling your ad blocking tool and checking out the businesses that help keep our site up and free.
the seat/fender that i have planned is the ONLY thing i'm happy with...and that i can control (as i'll make it myself) but yeah, the lines have to be flattter...
Right oh!
Finally got paid this month.. so time to spend. Also to do some small clean up jobs that I can do while waiting for my welder to be arranged...
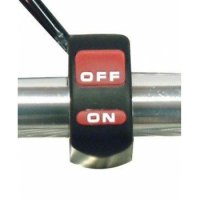
Handle bar controls... I'm not going for any fake-ass retro look here.. I'm a quite inexperienced rider so I want real simple idiot controls with big STOOPID buttons... I will aslo have IDIOT LIGHTS.
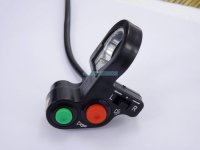
heres what I chose... they are ordered , just waiting for delivery... meanwhile i'll clean up the handle bars and brake, throttle, clutch....repaint bars.
yep..its kinda cool innit..like a fisher price toy... its free delivery to the UK, i'm in spain but my brother will post it onwards. I'ms sure there are other suppliers.
yep.. bargain! i've worked out that many "regular" suppliers are simply buying stock from china and marking it up as much as 5 times the price BUT they're often so lazy that they dont even change the description of the item from the original..
GOOGLER.
At the end of my project I'll list all my suppliers fer sure.
Man! just checked out your MB5... thats some great work thier.. really brought that little bike up to date! I have book marked you seat build as it seems to be the cleanest use of fibreglass I ever seen1
Thanks, appreciate the comments. Fiberglass on that seat is pretty thin since it doesn't really have to support any weight due to the face that the tank runs right underneath and the seat just conforms to the tank shape. Seat is unbelievably light because of this.
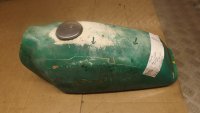
few minor dings but no hard creases... interior is okaaaaaaaaaaaay.. a little rust but nothing some takerite shouldnt fix.
its got at least 3 coats of awful paint on it which will soon come off.. only problem is the mounting lug.. BUT as I'm gonna have to "make" this fit on the DR.. that shouldnt be too much of a problem.
Also.. while at the office I got to thinking of color schemes.. (a little early maybe?) but I like to imagine the finished bike in my head..
As its a 1989 bike most suzuki enduros of that time were a hideous blue/yellow combo.. nasty.. so on a hunt for 80's colour schemes I wanted to keep some yellow as a nod toward suzuki anyway.
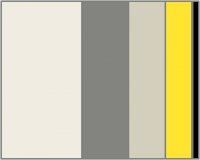
Below is the color scheme.. the block represent the ammount of each color as it will appear on the bike...
As you can see I've gone right off the flake idea!!
1) ignore the first block... of pale grey...
frame: grey
engine: greyer
tank: same as frame
seat black
tank: grey/yellow
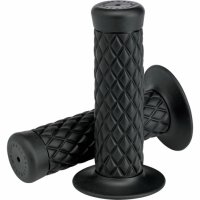
controls and grips black.
also found some Biltwell grips in diamnd pattern tomatch the diamond seat.
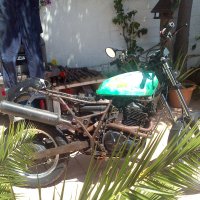
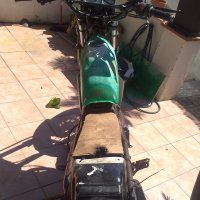
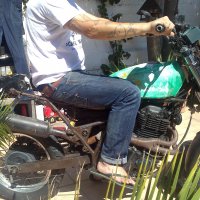
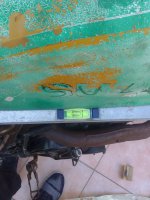
It sits nice and flat (but a little high at the back). I may need to gently hammer the back end underside (sounds nasty) just a little to make it sit better at the rear.
I noticed that DEUS seem to get away with this quite a lot.. but i dont like that "plonked on the frame and fancy paint look".
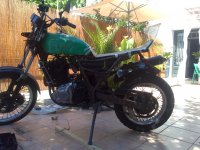
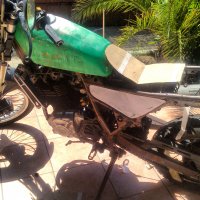
here's some fotos.. loving the slim/low look.
Any one got any ideas or tips on how I could make the high gap at the back work for me?
I think the gap is fine. If you lower the back of the tank, it will not match the angle of the subframe and engine cylinder. Just use dark colors on the frame and make your seat top line up with your tank bottom for a nice flow. Look great so far, keep it up!
I think the gap is fine. If you lower the back of the tank, it will not match the angle of the subframe and engine cylinder. Just use dark colors on the frame and make your seat top line up with your tank bottom for a nice flow. Look great so far, keep it up!
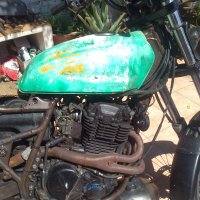
here below is some progress.. I think youre right...the seat pan/foam will cover a lot of the "gap"... and with a dark grey frame and a dark grey tank stripe on the same "eye line" will help pullit a together...
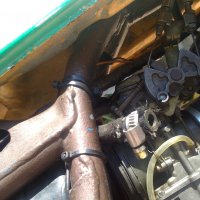
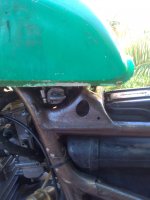
I had a a few worries with the petcock hitting the frame and the fuel line being rather tight.. but wth some jiggling its work really well and sits nicely inside the curve of the original tank mounting.
On the left side i will use the same curve for the ignition key switch...(at the moment ist mounted on the headlight bracket for some PO reason)
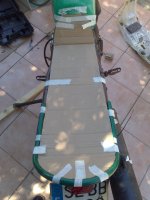
i've done a little seat pan work..and i think using part of the original palstic pan, with some fibre glass mods I should be able to get that and the foam to draw the eye in a starightish line.
here are some fotos of progress on that area...
In the third foto where the seat meets the tank its looks a bit "right angle" but it will look more like the second foto and reflect the curve of the rear hoop...
for those who wanna know .. the hoop is some garden hose wit some stiff wire running through it for mock up purposes it works well as one can easily adjust the angle...
trying to book my welder" as i have no welding skills at all!
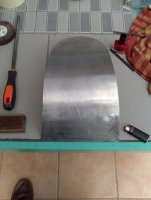
Just to show what else has been planned... I dont want to replce the airbox with a cone... rejetting may seem simple but its a maaaaaasive arse ache and I may never get it quite right!
so heres a mock up of the airbox cover/hider... using my source of steel... the od boiler cover (see prevoius posts)
hey rich.. yep the side covers... well. i'm going to need access to the airbox and battery somehow.. so I reckon i'll make the seat/pan removeable (bolted on rather than welded) then i can lift her out.
that means the side cover will probably be welded on, but "inside" the frame rather than "on" the tubes. I just bought a dremel to grind off the ugly welds at low rpms.
the big PROBLEM right now is finding a replacement gas cap for the tank.. i had to drill out the old one.! OEM is nearly $120!!!! any ideas welcome..!
the filler is 41mm ID and 61mm OD... with cam/bayonet.... struggling to find one.!
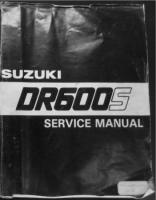
the holy grail of manuals.. good old carl slater had a version but it was in spanish and or german, then i contacted a guy on youtube but his was in italian!
Then,last night I couldnt sleep (too warm in Barcelona), so I got up at 4.30 am and starting sleep-surfing... I found this over on thumper talk...
at last... now i can move foward..its not quite the right year (mines 1989.. but it goes upto 1987.. so should be ok for my purposes)
This site uses cookies to help personalise content, tailor your experience and to keep you logged in if you register.
By continuing to use this site, you are consenting to our use of cookies.