
We noticed you are blocking ads. DO THE TON only works with community supporters. Most are active members of the site with small businesses. Please consider disabling your ad blocking tool and checking out the businesses that help keep our site up and free.
You are using an out of date browser. It may not display this or other websites correctly.
You should upgrade or use an alternative browser.
You should upgrade or use an alternative browser.
el burro pequeño - LS650 scrambler build
- Thread starter strang
- Start date


strang
yep
Re: Suzuki Savage LS650 Scrambled Egg
Ended up going for the GT185 tank. It has a few advantages:
- the Suzuki Savage petcock is an exact swap.
- said petcock fits without modification as it clears any obstacles on the left side and sits between engine and choke lever pretty much perfectly.
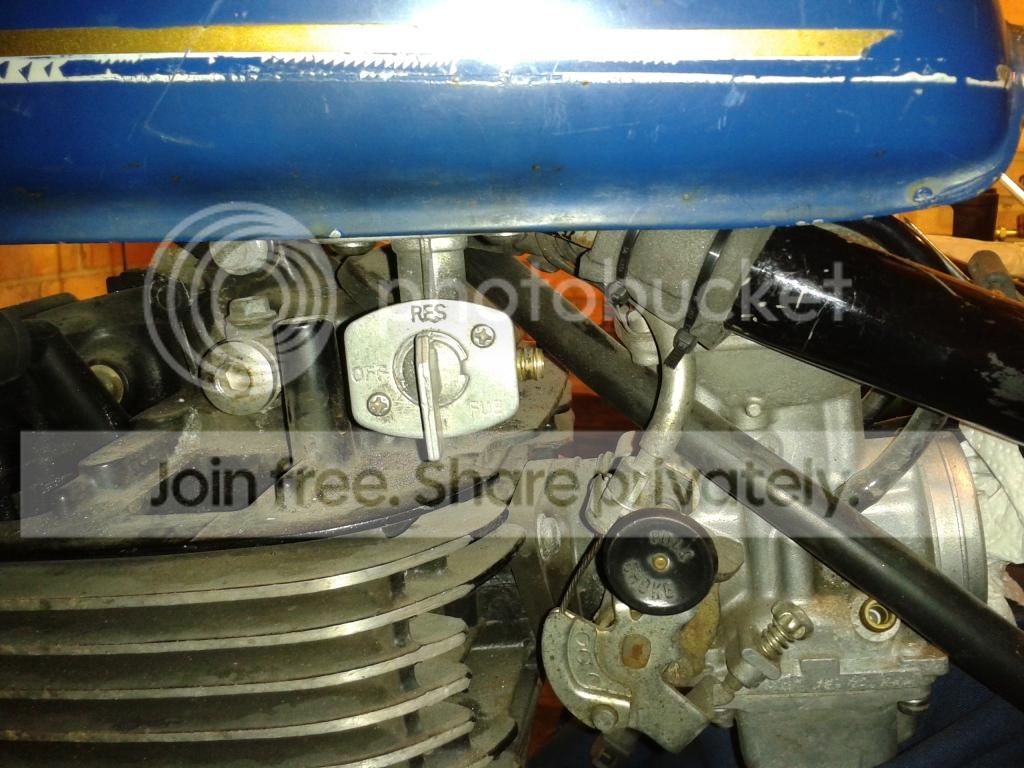
It also takes the LS650 front tank rubbers.
Also I wanted to be able to have passengers and therefore wanted a smaller tank length wise so we have little more arse room.
Yep the GT185 capacity isn't great but is actually a shade larger than the Ryca tank so I'm sure it will do as a round town bar hopper.
Following in others footsteps with slight variations, used the old tank mounting points and the old seat mount to create a holder for the GT tank hook. Works great:
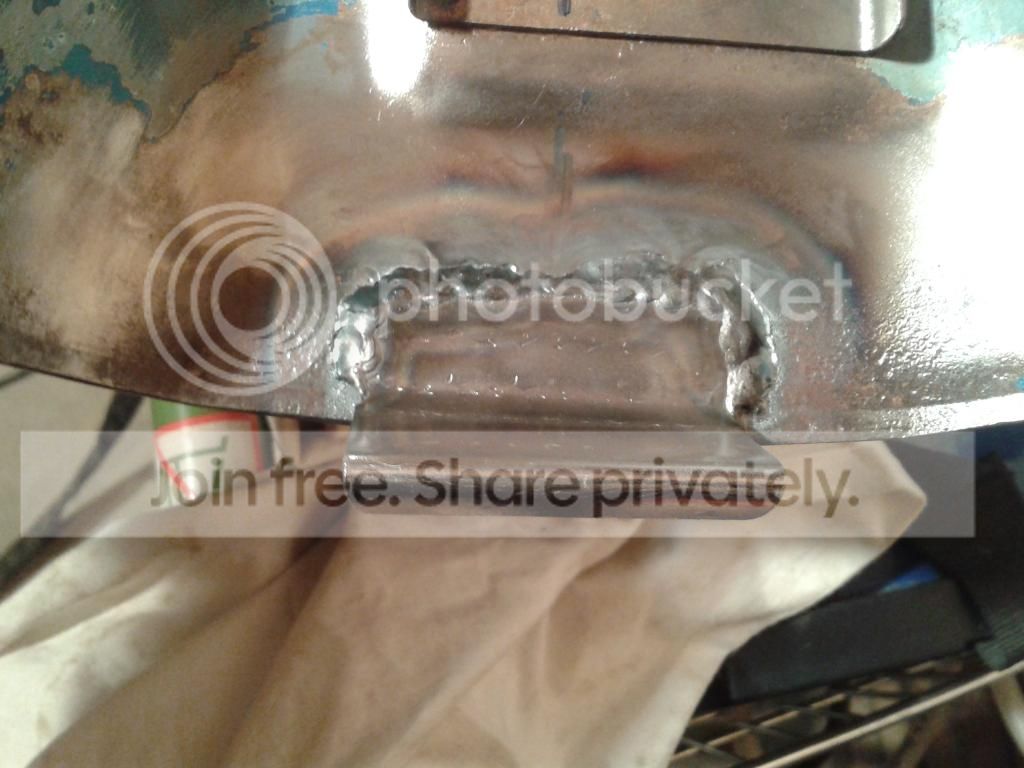
mid section just needed at bit of mouse mat to cushion the contact point:
welded a nut on each side at the front:
bit of threaded rod with a penny washer welded on to give the rubbers a bit more to hang on:

Ended up going for the GT185 tank. It has a few advantages:
- the Suzuki Savage petcock is an exact swap.
- said petcock fits without modification as it clears any obstacles on the left side and sits between engine and choke lever pretty much perfectly.

It also takes the LS650 front tank rubbers.
Also I wanted to be able to have passengers and therefore wanted a smaller tank length wise so we have little more arse room.
Yep the GT185 capacity isn't great but is actually a shade larger than the Ryca tank so I'm sure it will do as a round town bar hopper.
Following in others footsteps with slight variations, used the old tank mounting points and the old seat mount to create a holder for the GT tank hook. Works great:

mid section just needed at bit of mouse mat to cushion the contact point:

welded a nut on each side at the front:

bit of threaded rod with a penny washer welded on to give the rubbers a bit more to hang on:

strang
yep
Re: Suzuki Savage LS650 Scrambled Egg
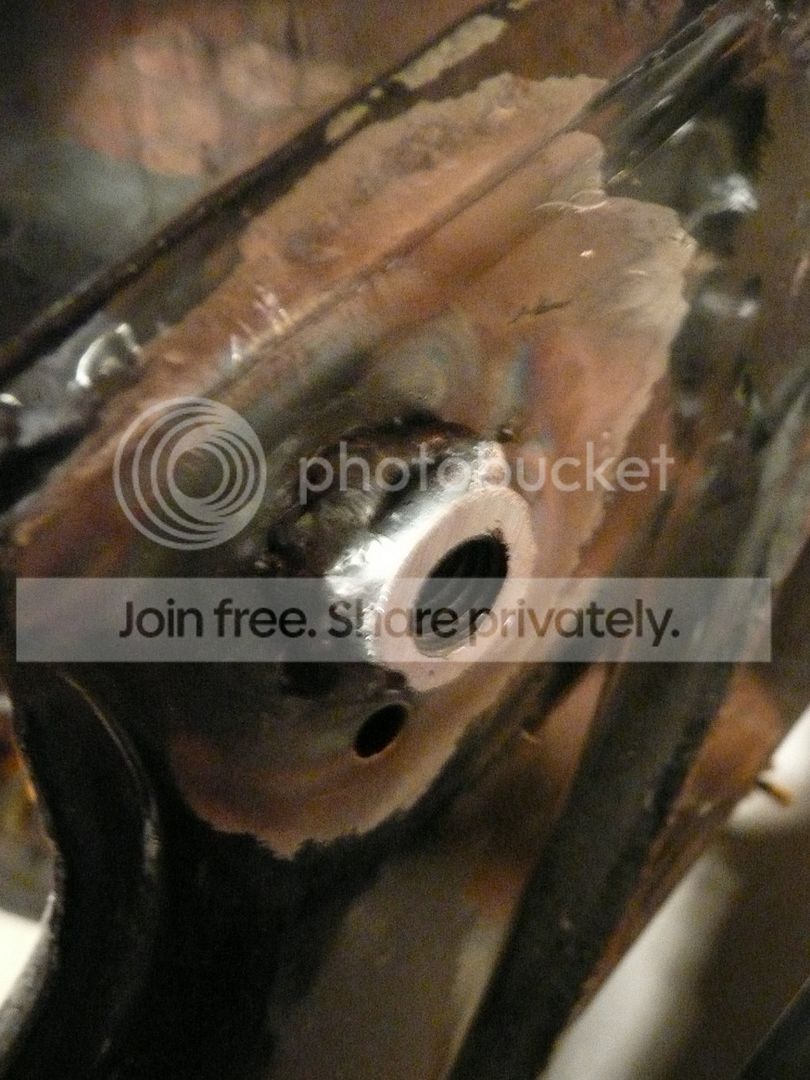
Support for rear subframe done. Nuts are welded on the underside so I can bolt the subframe on and off for a while while I sort out mounting brackets for mudguard etc. Much easier to weld on the bench than in situ with my level of skills methinking.
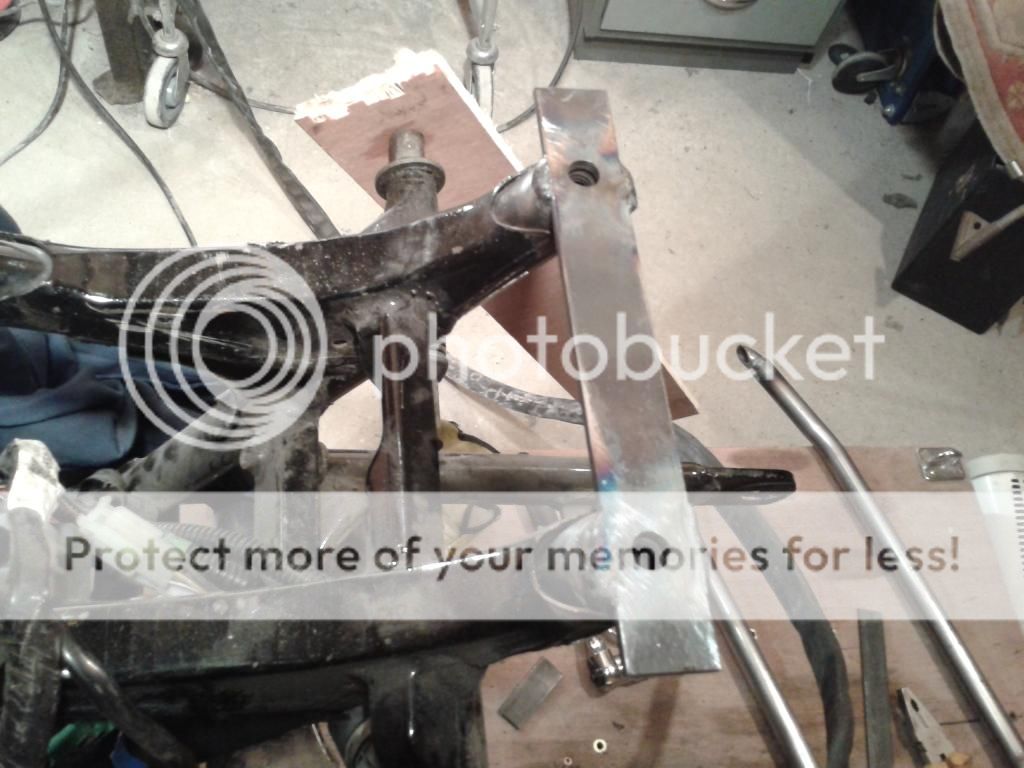
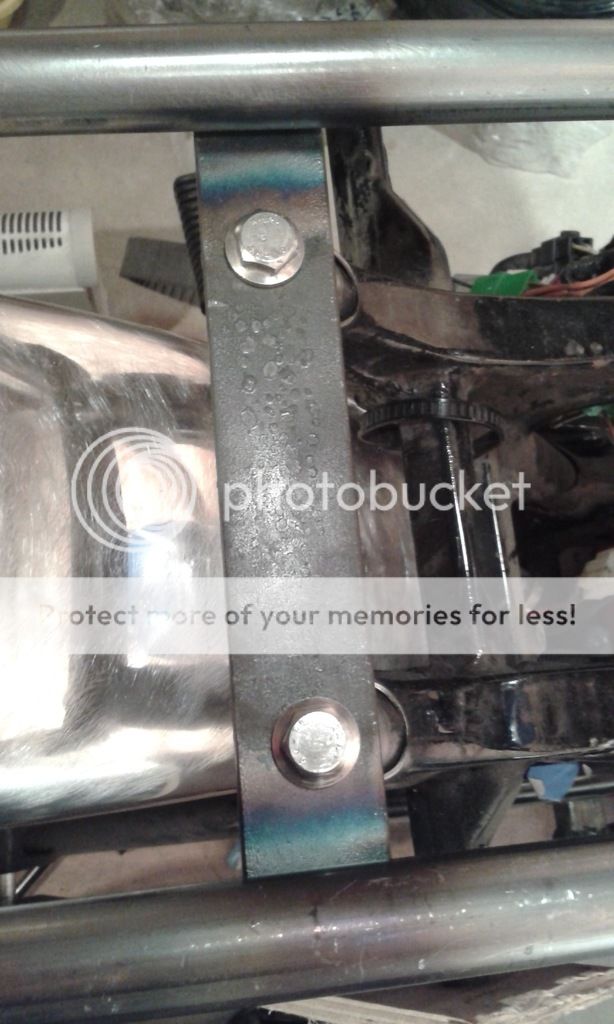
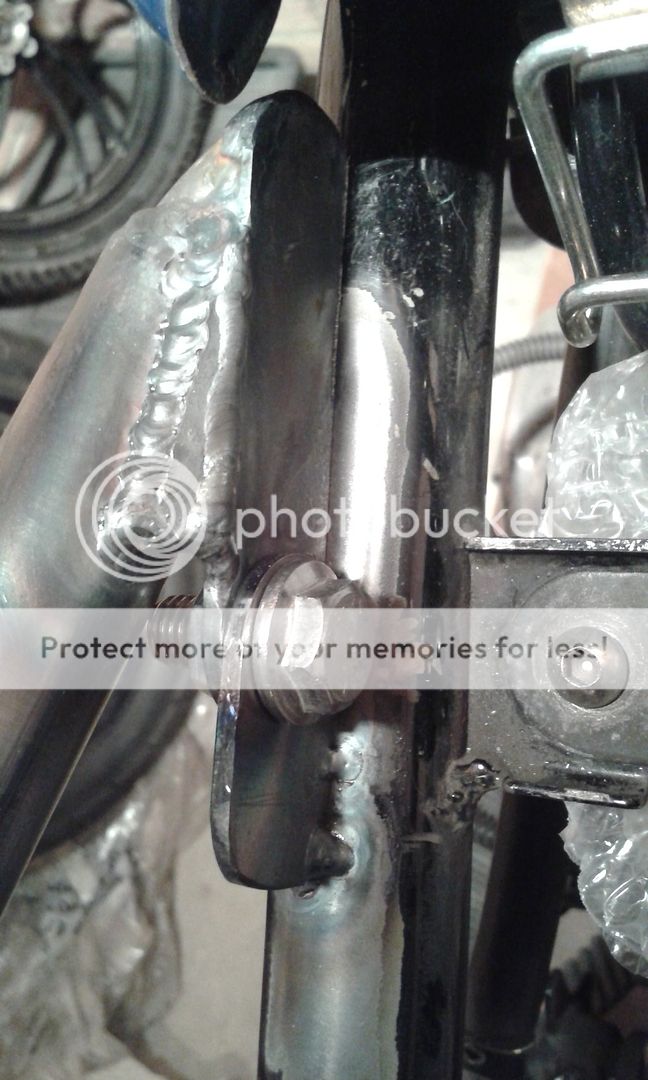
Support for rear subframe done. Nuts are welded on the underside so I can bolt the subframe on and off for a while while I sort out mounting brackets for mudguard etc. Much easier to weld on the bench than in situ with my level of skills methinking.


strang
yep
Re: Suzuki Savage LS650 Scrambled Egg
thanks xb.
I haven't done the shock checking - I'm not sure how to do this.
In terms of the rear of the bike, I have stuck to what Ryca have previously done - extended shocks to their advised max (12.5" if I remember) and cut the frame off the same way they do. I presumed if I stuck to their parameters it would be fine. Whenever I've looked at the back end I've always thought it had loads of clearance by eye - I will get a shot up of the bike as it stands with rear mudguard next time I'm in the garage.
Maybe you're right - am I missing something? How do I check I have enough clearance exactly?
Re: Suzuki Savage LS650 Scrambled Egg
take the spring/springs off a shock and mount it up and compress the rear all the way hard
or just mout one shock with spring setting on soft and rig up a ratchet strap inline with the shock and lash it down hard against the bottom out bumper
take the spring/springs off a shock and mount it up and compress the rear all the way hard
or just mout one shock with spring setting on soft and rig up a ratchet strap inline with the shock and lash it down hard against the bottom out bumper
neophyteCB450
Been Around the Block
Re: Suzuki Savage LS650 Scrambled Egg
love this thing! where did you score that rear fender from?
love this thing! where did you score that rear fender from?
strang
yep
Re: Suzuki Savage LS650 Scrambled Egg
AMD - I'm on the other side of the pond from you I think (UK) but it was an ebay.uk special. Searched "alloy mudguard" and it was one that came up.
Have been busy doing mid controls. Fucked them up 3 times but am on the right track now. will update v soon.
AMD - I'm on the other side of the pond from you I think (UK) but it was an ebay.uk special. Searched "alloy mudguard" and it was one that came up.
Have been busy doing mid controls. Fucked them up 3 times but am on the right track now. will update v soon.


FerousBastard
Active Member
Re: Suzuki Savage LS650 Scrambled Egg
Always dig a good Savage, keep up the good work sir.
Always dig a good Savage, keep up the good work sir.
strang
yep
Re: Suzuki Savage LS650 Scrambled Egg
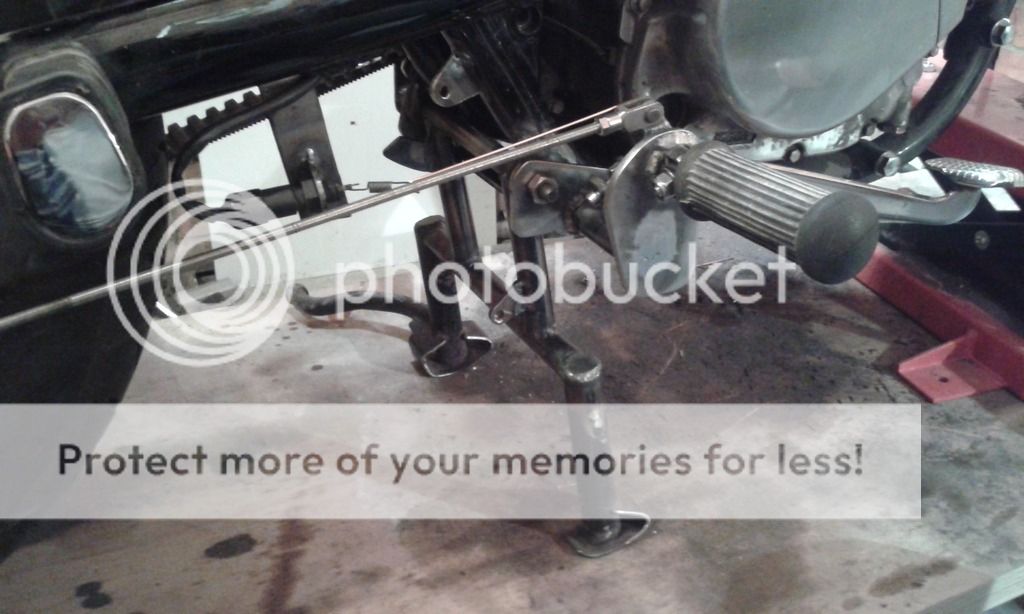
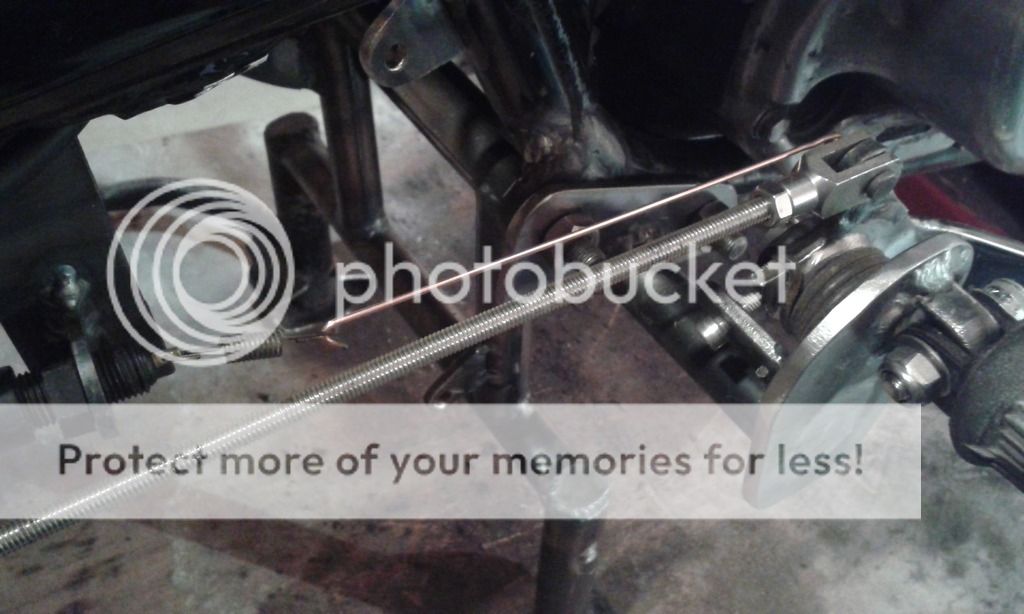
Finally finished the mid-controls and have incorporated a centre stand. My phone was running out of battery so will take some more pics tomorrow but I think you get the general idea.
Uses the central engine bolt location (but longer bolt) and chunky tab welded onto the frame about 2 inches towards the back. Same type of engine bolt goes through these two tabs. The centre stand pivots on this bolt in the space between the 2 welded tabs. There is also another flat bar going between the two mounting brackets, this provides rigidity and also a brace for the stand when in park position.
Centre stand is from a xs650 that I cut up and made to work.
Any advice on mounting the spring? I have tacked up 2 tabs but a spring that I tried just couldn't handle the load and unsprung itself. I need one about 55mm for how it's tacked at the moment. It seems the spring needs to expand quite a way when it's in park mode. What type of spring are these called?
Anyway it all works and clears the multiple obstacles within the savage setup.


