Follow along with the video below to see how to install our site as a web app on your home screen.
Note: This feature currently requires accessing the site using the built-in Safari browser.
We noticed you are blocking ads. DO THE TON only works with community supporters. Most are active members of the site with small businesses. Please consider disabling your ad blocking tool and checking out the businesses that help keep our site up and free.
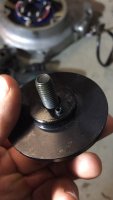
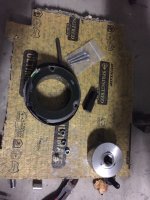
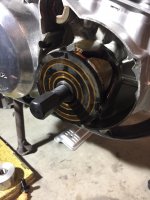
So once I released the stubborn bolt I then went about installing the Dynotek timing plate.
Note: in my previous attempts to wrench the bolt free I deformed part of the key way for the timing plate Dick head moment
Luckily for me I was able to pull the pin out of the Dynatek timing plate enough that it ended up seating snug with no movement
Once it was in I used the new Hex bolt and tightened it into position ( I’ll have to wait till a get an Allen key socket for my torque wrench then I’ll use some lock tight and torque it to spec)
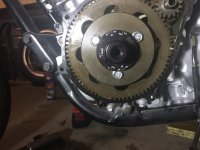
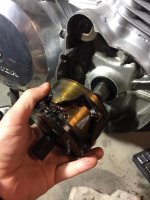
Next was the swapping the old ignition pulser assembly for the new Dynatek one, you use the original bolts
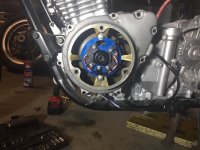
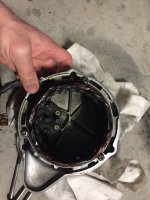
So next was the cycle x electrical charging system, so I remove the rotor stator cover, that was no dramas then I had to remove the centre bolt (a bit of a drama till I had the right tools)
Now my dilemma is that I’m not sure how to remove the magnet from the centre spline and the 3 screws are not really interested in coming out easily so I’ve hit the lot with WD40 while I read through the shop manual some more
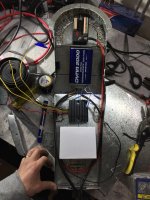
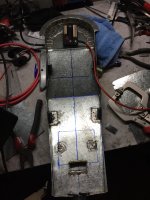
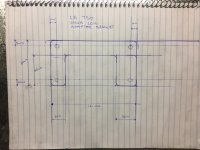
So while I’ve been swimming in wires I decided to make an adapter bracket for the new dyna coils as the current OEM mounts don’t match up and I want the coils to face down and towards the back of the bike.
I drew up this template then cut it out of some gal that I had laying about
Now I’m off to do the other side, then once in position I’ll make up the leads to suit
If my mind serves me correctly the left coil fires 1,4 and the right 2,3 but I’ll have to look that up
Alternatively, drill holes with a hole saw and if you have a mate with a lathe, get him to turn up some die punches. They don't need to be too fancy to work. I have even used one socket inside another. A bit crude, but a man's got to do what a man's got to do. Right?
Alternatively, drill holes with a hole saw and if you have a mate with a lathe, get him to turn up some die punches. They don't need to be too fancy to work. I have even used one socket inside another. A bit crude, but a man's got to do what a man's got to do. Right?
You can use a tapered socket like a 10MM from a 1/2 in drive set to do it too. they generally have a nice skinny to fat taper that would make a dimple in a press.
Not dimple dies, but more like beads. An easy way to do them, if you don't have the tool, would be to open a vice a 1/2" to 1", lay the metal over it and hit a wedge shaped punch in a row to make the bead. You can lay the 90° corner over the corner of the vice and hit it across your bracket every inch or so at a 45°.
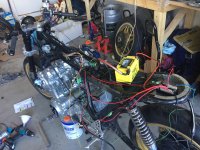
Well after a day stuffing around in the garage I managed to get the head lights, tail light, indicators, brake light, speedo and half the idiot lights working.
I even had time to play around with some of the settings in the M Unit, one that’s pretty cool is the single wire brake/tail light setting you just bridge the two wires into the one output and the M Unit does the rest.
The other setting was for the indicators the M Wave setting where the indicators pulse on rather that just on / off.
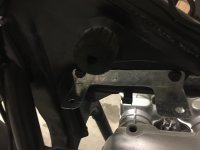
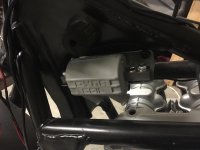
I also soldered some brackets to secure the antigravity battery (yet to arrive), the Dynatek ignition unit and the starter solenoid. I also put some other brackets to help route the wiring neatly.
Hopefully tomorrow get all of the wiring sorted and wrapped up into something that resembles a wiring loom then I’ll label all the wire ends before removing it all and then removing the engine.
She’s a while yet unfortunately, once the wiring is sorted I have to disassemble the motor to send the top end away to get some love and the cylinders to get bored out... then hopefully start up. I’d be wrapped if she turned over in October some time, ear to ear grins if that happens
Holy mackerel. You mate have the patience of a saint. I like your style, no sense in rushing a good thing. Man that bike's gonna give you the feels when it starts up the first time!
Holy mackerel. You mate have the patience of a saint. I like your style, no sense in rushing a good thing. Man that bike's gonna give you the feels when it starts up the first time!
Lol yea my neighbourhood walked over yesterday while i was in the shed and asked when it would be ready, to which I replied hopefully Christmas. He said what year ? It’s been nearly 2.5 years so far , half the fun is in the process.
Took me a few weeks of watching YouTube reading wiring diagrams and staring blankly at the bike but the wiring makes sense now.
This site uses cookies to help personalise content, tailor your experience and to keep you logged in if you register.
By continuing to use this site, you are consenting to our use of cookies.

 Dick head moment
  Dick head moment
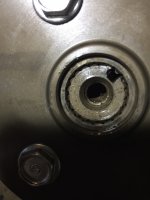
 small win but I’ll take it
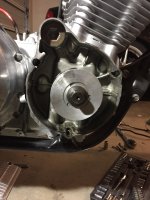
 exy I think I’ll have to look at another option