Follow along with the video below to see how to install our site as a web app on your home screen.
Note: This feature may not be available in some browsers.
We noticed you are blocking ads. DO THE TON only works with community supporters. Most are active members of the site with small businesses. Please consider disabling your ad blocking tool and checking out the businesses that help keep our site up and free.
So I thought I would post up my new project, having changed jobs recently where i can viably ride to work, i thought it would be a good excuse for a new bike build.
I want this to be a much faster build than my last one http://www.dotheton.com/forum/index.php?topic=43873.6 as I want to be riding it to work in the late spring! we'll see how this pans out.
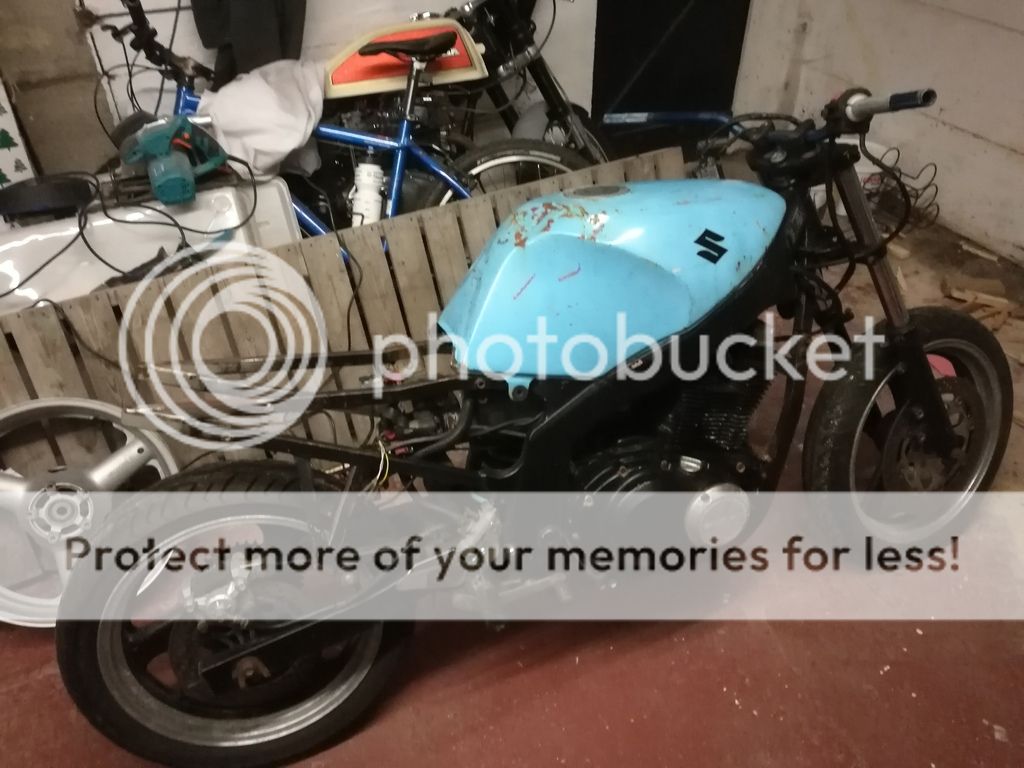
Im basing this build on a GS500 because they are cheap and plentiful, so parts are easy to come buy and I can do a decent enough resto of the rest of the bike as i go without breaking the bank!
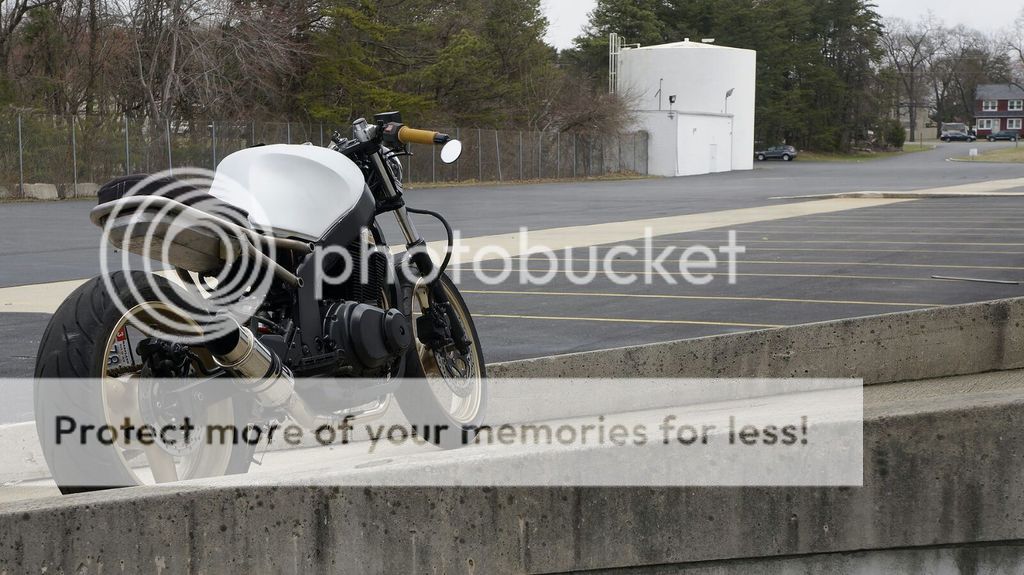
This is the inspiration:
I have no idea who built this, but i love the simplicity of the new sub-frame and it has inspired me to build something similar.
So ive started with a project bike and a spare frame, first thing that ive done is cut the nasty rear sub frame of the back of the bike, it really is a nasty bit of box section! Ive then welded some plates to fix up the frame and am currently waiting on some plasma cut brackets to weld on to it. Its looking better already!
knowing the limitations of my metal bending capabilities I found a friendly fabricator who made this seat frame up for me on eBay to my dimensions. You can see it below on the parts bike to give an idea of scale, its more rounded than the frame on the inspiration bike but i wanted it to be a softer look and a narrower seat to make the Tyre look wider.
Ive also machined up some brackets on lathe for the new bolt on subframe. I made these at HACKSPACE london, if any of you guys are UK / London based you seriously need to check out Hackspace, I cant praise it enough.
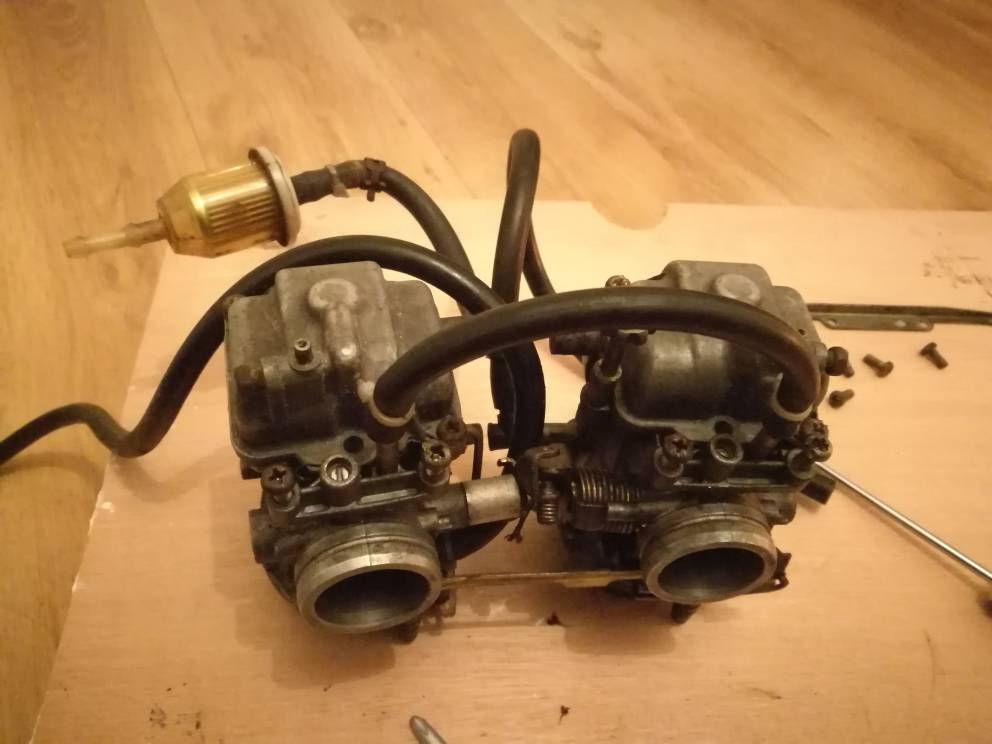
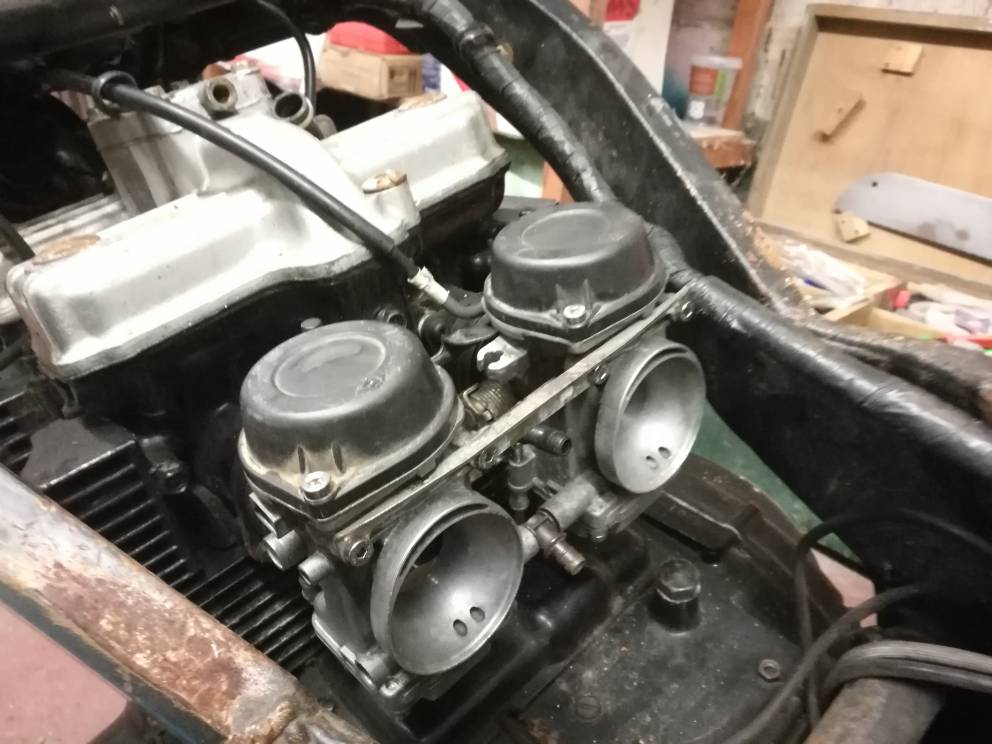
I've also rebuilt the carbs with a 147.5 main jet, new seals etc - I'll be putting on a Delkevic full exhaust system and pod filters so hopefully it won't be running too rich!
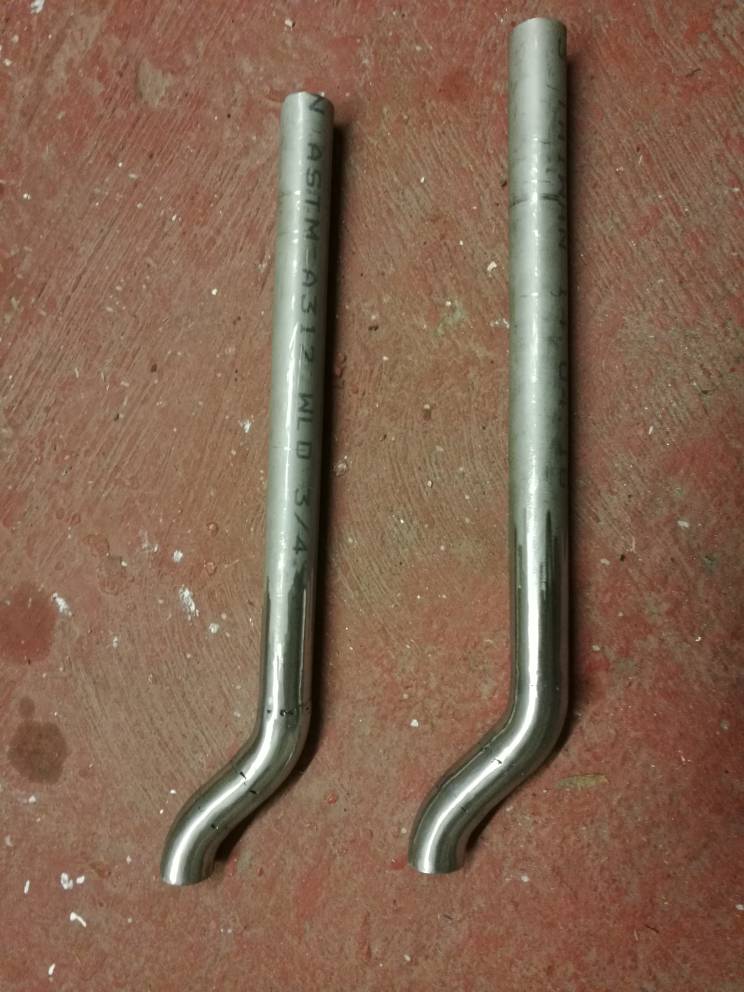
So I've welded up and ground down the lower subframe arms this evening, due to the angles involves they couldn't be bent in the garage so I've made them out of schedule 10 stainless bends and pipe - my first time working with stainless and probably my last
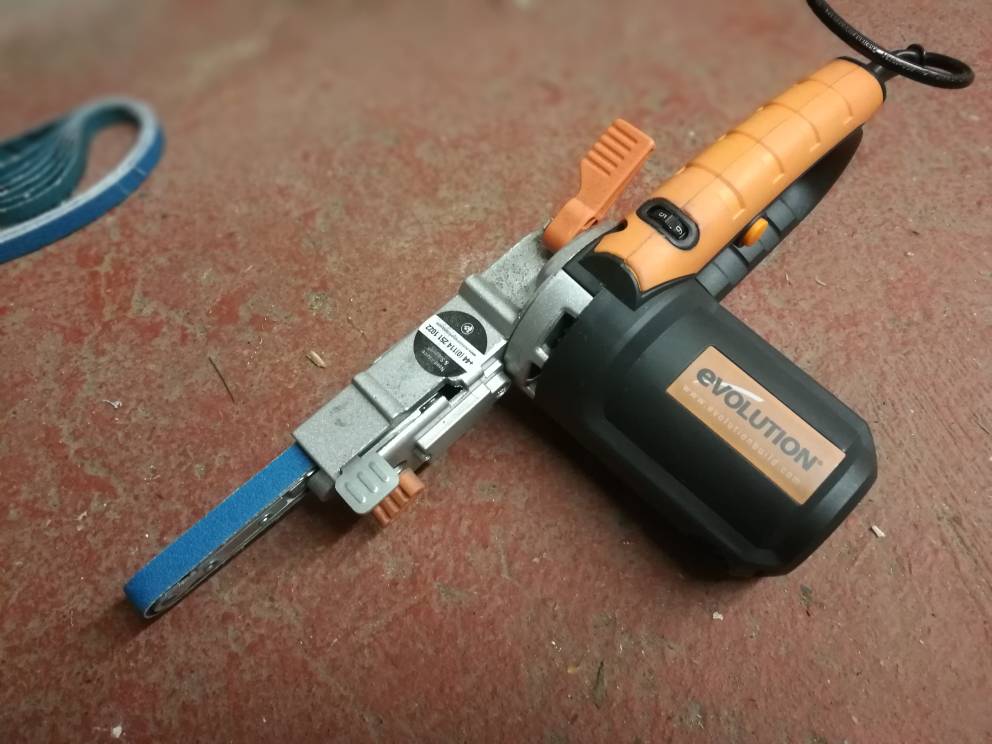
I did buy this little badboy the though, worth its weight in gold! And did a great job of finishing up the welds.
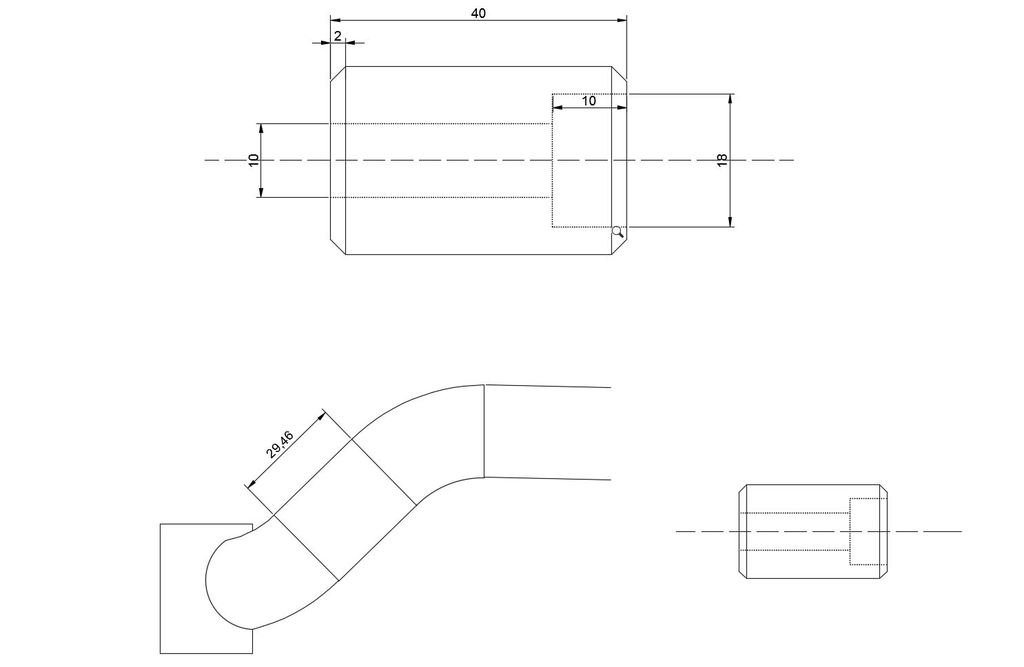
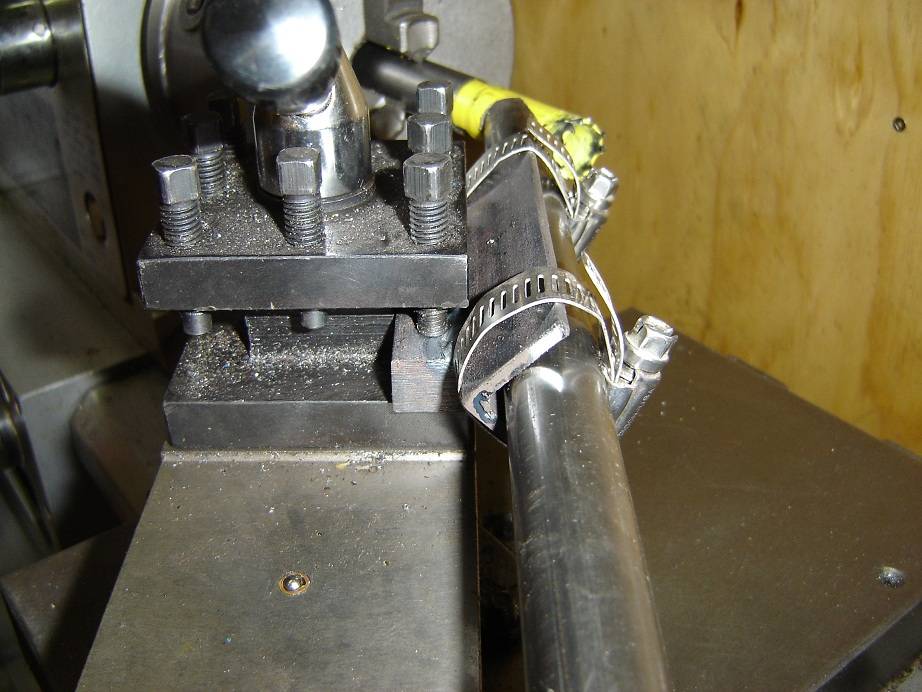
The next thing to do is notch the tubes to take the mounting lugs, I'm going to try and do this on a lathe as I need it to be accurate, and trying to do it manually is going to very hard work. So I've bought a 1" end mill and am going to have a pop at making a tube holder.
Good work. Like yourself I'm making a bolt on subframe. I started to notch the tube using a hole saw (22mm I'm using) and pillar drill. Unfortunately as the hole saw has large teeth, the cut was too rough and ended up pulling the chuck off the shaft of the drill.
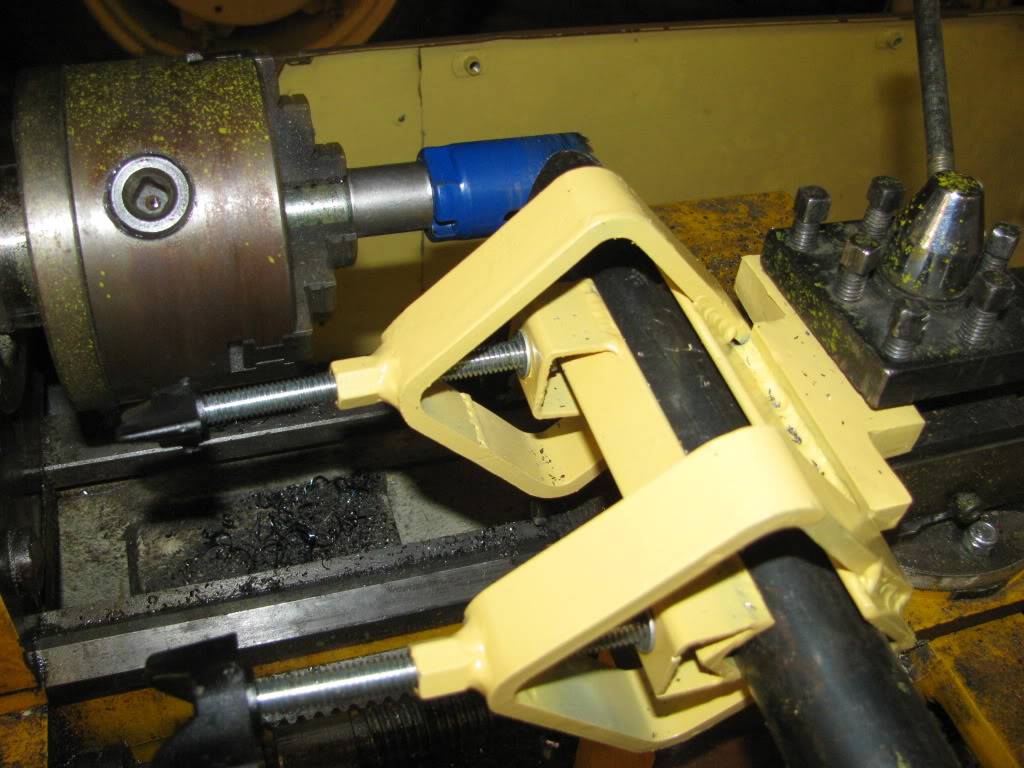
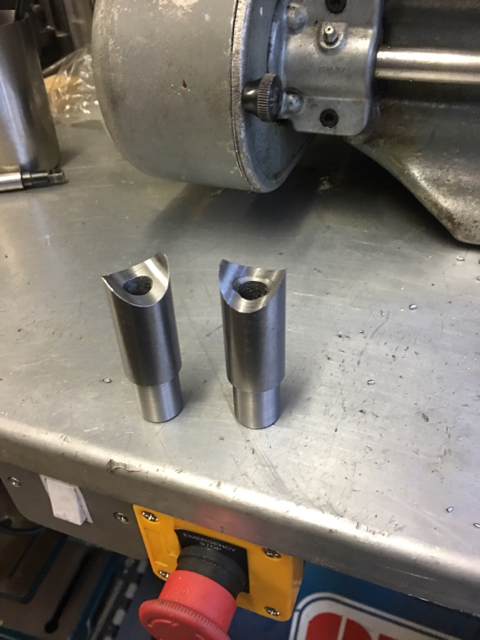
I hadn't thought of using the lathe to notch the tube, rather I've machined up some spigots and then notched these using an end mill.
My pleasure. Part of my reason for the spigots is that the seat hoop tube is now damaged from the hole saw incident, therefore I can chop the tube down a bit and use the length of the spigot to make the length of the tube back up.
Just looking at those tube notching mounts for the lathe. I quite like these as both the angle and offset can be altered. I'm now thinking I might revisit my spigot idea. The reason being is that I won't have the ring of weld to deal with if I just notch the tube. This would look neater. Not sure just yet.
This site uses cookies to help personalise content, tailor your experience and to keep you logged in if you register.
By continuing to use this site, you are consenting to our use of cookies.