Hey guys, I've been creeping around on the forums now for a couple months, figured I'll post what I got.
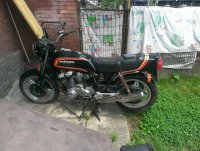
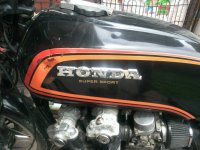
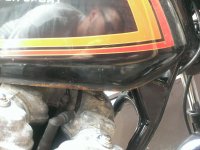
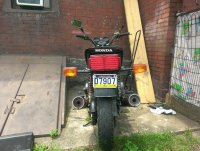
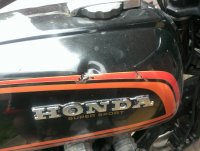
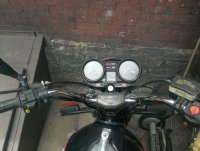
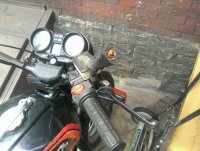
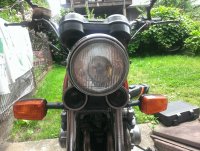
So about a month ago right after the semester ended, my friend out of boredom wanted to teach me to ride his motorcycle. He clearly knows me so well because as soon as I could get the bike going and actually ride it, I was hooked. So the search began for the right bike. I looked up and down craigslist for a good month and couldn't really find anything at my price point that caught my eye, until I saw her. Now I'm not sure if it was the fact that it was a "Supersport" that was stroking my man ego or what, but I fell inlove with the bike. She was dented, rusty, had dry rotted tires, and was torn up but in my eyes, it was character. So some haggling and a handshake and I walk out of there with the bike for around $840. As soon as it was a nice day out, I took her out. She ran okay, although I had to keep the choke wide open to keep her running. I got about 3 rides in before she started to quit on me, first thing I noticed was theres something wrong with the charging system as I'd have to charge the battery after every ride. Then on my last ride, as I was pulling into my backyard, the front tire started leaking a lot of air. Thank god nothing bad happened. And she's been in the backyard now for a week or so begging for new tires.
So my plan is to work in phases to keep everything manageable.
Phase 1:
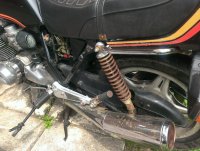
-Tires
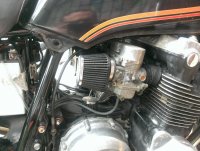
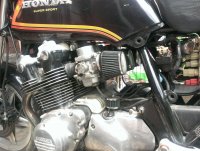
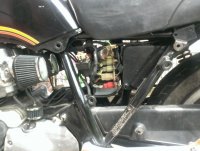
-Check Stator and r/r to locate the problem in the charging system
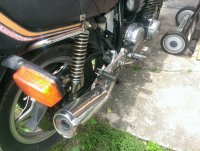
-New front break pads
-Fix the back brake (I think the master just needs rebuilt)
-Rebuild/Re-jet the carbs
-Fix any odds and ends I find as I'm working (I'm sure she's full of surprises)
-Clip ons
-End Mirrors
-All new turn signals (the 80's were a dark time in automotive/motorcycle design, did they really think square lights were coool ??? )
-New seat
-Clean up all the rust
-Clean/paint as much as I can
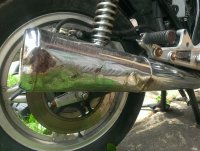
-New exhaust
Phase 2:
-rear hoop
-cafe or brat style seat
-new wiring harness
-wire tuck
-Micro battery
-Completely disassemble, clean, re-assemble
-New headlights
-New Gauges
-Check/fix any suspension problems
Phase 3:
-Tear into the engine
-Fix it
-New suspension
-Spoked wheels
-New fuel tank
-Paint her
-Finish up any odds and ends.
Realistically, I only plan to finish Phase 1 this summer as I just want to ride. Its my first motorcycle and I figured I'd have all winter to work on the meat of it. If all goes well, I'd like to complete some things in phase 2. Phase 3 may not happen for a while but its nice to have a plan. This isn't going to be one of those "heres my bike rusty, (four posts later) and heres my bike finished" threads, I'm a broke college student. I'm open to any advice/tips/suggestions as I don't really have a theme yet.
I haven't really touched the bike yet, but as I type this I have my Clymer Manual coming in the mail. I generally like to wait for the service manual, I've learned that it saves you from a lot of headaches.
As for today, I'm about to head out to habor freight, pick up some cheap tools and get those tires off. I also want to check the stator and the r/r, can anyone explain where the three yellow wires from the stator are and explain where the r/r is? Thanks in advance
So about a month ago right after the semester ended, my friend out of boredom wanted to teach me to ride his motorcycle. He clearly knows me so well because as soon as I could get the bike going and actually ride it, I was hooked. So the search began for the right bike. I looked up and down craigslist for a good month and couldn't really find anything at my price point that caught my eye, until I saw her. Now I'm not sure if it was the fact that it was a "Supersport" that was stroking my man ego or what, but I fell inlove with the bike. She was dented, rusty, had dry rotted tires, and was torn up but in my eyes, it was character. So some haggling and a handshake and I walk out of there with the bike for around $840. As soon as it was a nice day out, I took her out. She ran okay, although I had to keep the choke wide open to keep her running. I got about 3 rides in before she started to quit on me, first thing I noticed was theres something wrong with the charging system as I'd have to charge the battery after every ride. Then on my last ride, as I was pulling into my backyard, the front tire started leaking a lot of air. Thank god nothing bad happened. And she's been in the backyard now for a week or so begging for new tires.
So my plan is to work in phases to keep everything manageable.
Phase 1:
-Tires
-Check Stator and r/r to locate the problem in the charging system
-New front break pads
-Fix the back brake (I think the master just needs rebuilt)
-Rebuild/Re-jet the carbs
-Fix any odds and ends I find as I'm working (I'm sure she's full of surprises)
-Clip ons
-End Mirrors
-All new turn signals (the 80's were a dark time in automotive/motorcycle design, did they really think square lights were coool ??? )
-New seat
-Clean up all the rust
-Clean/paint as much as I can
-New exhaust
Phase 2:
-rear hoop
-cafe or brat style seat
-new wiring harness
-wire tuck
-Micro battery
-Completely disassemble, clean, re-assemble
-New headlights
-New Gauges
-Check/fix any suspension problems
Phase 3:
-Tear into the engine
-Fix it
-New suspension
-Spoked wheels
-New fuel tank
-Paint her
-Finish up any odds and ends.
Realistically, I only plan to finish Phase 1 this summer as I just want to ride. Its my first motorcycle and I figured I'd have all winter to work on the meat of it. If all goes well, I'd like to complete some things in phase 2. Phase 3 may not happen for a while but its nice to have a plan. This isn't going to be one of those "heres my bike rusty, (four posts later) and heres my bike finished" threads, I'm a broke college student. I'm open to any advice/tips/suggestions as I don't really have a theme yet.
I haven't really touched the bike yet, but as I type this I have my Clymer Manual coming in the mail. I generally like to wait for the service manual, I've learned that it saves you from a lot of headaches.
As for today, I'm about to head out to habor freight, pick up some cheap tools and get those tires off. I also want to check the stator and the r/r, can anyone explain where the three yellow wires from the stator are and explain where the r/r is? Thanks in advance
![IMG_20130523_172705[2].jpg](/data/attachments/31/31650-3209b0fe3e821ea327e32b017da714fa.jpg)
")