My first cafe build - '74 CL360

john.leach1991@gmail.com

Been Around the Block
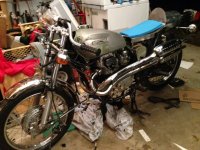
Hey everyone! I've been lurking for a while and decided to post my progress on my first cafe build.

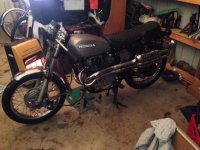
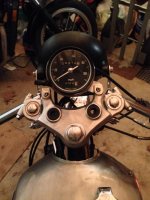
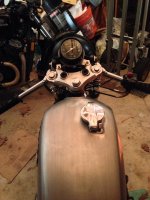
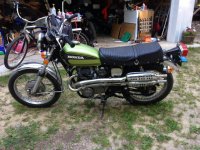
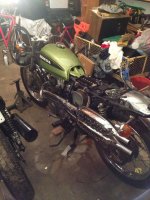
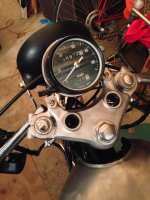
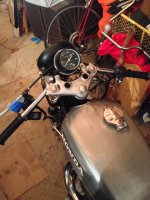
I picked up a 1974 CL360 Scrambler for pretty cheap on Craigslist. It definitely needed some work, but it ran when I got it. I really liked it as a scrambler, but I had been wanting a little cafe for a while. I decided to continue with the build, but keep it able to revert to stock as much as possible. Maybe I have commitment problems. I don't know. So I began to strip it down, fixing things as I went.
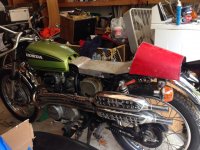
Like I said, it was in pretty good condition. Forks were crooked, bars weren't quite right, etc. Still took it zipping around the trails in my woods.
 

Attachments

  • stockcl360.jpg
    stockcl360.jpg
    125.8 KB · Views: 203
  • 1.jpg
    1.jpg
    105.5 KB · Views: 832
I started by cleaning up the front end a bit. The tach was pretty much done, so I unhooked that and ended up removing the headlight "hanger" as well, in order to use clamp on brackets. Also shined up the top tree. I began "fitting" the bike in order to decide the length of my new seat, as well as the seat/cowl ratio that looked right. I'm going to run clip on bars, but until those come in, I threw on some old bicycle bars I had lying around, just for fitting purposes.
 

Attachments

  • toptree.jpg
    toptree.jpg
    74.4 KB · Views: 934
  • fitting.jpg
    fitting.jpg
    107.8 KB · Views: 951
Got about 12 hours of solid work done the other day. I figured that none of the commercially available cafe seats would fit the way I wanted, so I am making my own. Plus I like the raw steel look, so here I go. Began making numerous mockups and spent a lot of time sitting on the bike making motor noises with my mouth. I plan on having a 3-piece seat. Pan, cowl, and rear "plug" for the cowl. I talked a buddy into welding the pieces together. Still tossing around ideas for a tail light and blinkers, if anyone has any suggestions for those, feel free to comment! So far, I've had good luck with a simple $7 LED ebay tail light on my other bike. Maybe another one of those? Who knows.
 

Attachments

  • mock4.jpg
    mock4.jpg
    105.8 KB · Views: 208
  • mock3.jpg
    mock3.jpg
    109.1 KB · Views: 207
  • mock2.jpg
    mock2.jpg
    109 KB · Views: 195
  • mock1.jpg
    mock1.jpg
    98.4 KB · Views: 194
One side note - all the original chrome was in awesome condition, so I am keeping all of it. It polished right up to the point where I could use it as a mirror.
 
Thanks! I have been waiting on tenterhooks for someone to reply. I need love and affirmation.

Got a tail light wired up. Still waiting on the weld to connect the cowl to the seat portion, but the light will be recessed inside the cowl just a bit.
 
That scrambler was pretty nice looking. Would have been rad with some knobbies and better handlebars. With all of that aside, this is a good place to have a build thread.
Does it run well? Has it sat for awhile? Just curious.
 
Runs well. Just need to clean the carbs. I did a lot of bombing around on it as a scrambler. I'm not permanently cutting or changing anything, so I can restore it if I get cold feet.
 
Got a speedo mount made up. Getting the front end kinda sorta together.

Did a search on the forum, but I couldn't find anything...The throttle controls won't clamp down properly now. Even when fully tightened, there is a 1/8th inch gap, and when it's tightened that much, the throttle tube doesn't rotate properly. Thoughts, anyone?
 

Attachments

  • spd1.jpg
    spd1.jpg
    92.6 KB · Views: 747
  • spd2.jpg
    spd2.jpg
    97.4 KB · Views: 737
Usually on those stock throttle housings there is a round peg that must locate into a hole drilled into the handlebar to keep it from spinning around the tube. If you look inside of the housing, are you seeing this? If so, drill a hole in the handlebar right where that peg contacts it and you're good to go.
 
1sttimer said:
Usually on those stock throttle housings there is a round peg that must locate into a hole drilled into the handlebar to keep it from spinning around the tube. If you look inside of the housing, are you seeing this? If so, drill a hole in the handlebar right where that peg contacts it and you're good to go.

Yep, already did all that. Even watched it go in the hole as I put it on. Still having fit issues that I didn't have on the other bars... Maybe I need to be more zen and become one with the throttle?
 
1sttimer said:
Agreed. What was your sanding process? Did you do it by hand or with an orbital sander?

Just stripped the paint (which was a shame because it was perfect except the knucklehead PO dented the tank and "bird$hit" welded to try to fill it in) and then lots of sanding with different grit sponges, then steel wool. Just needs a clear coat now.
 
Yeah dude to be honest there's some merit to that :)

How about the wires? You pinching them? Did the assembly work correctly before you disassembled it?
 
For all those that are on the edge of their seats waiting to hear what I did to resolve this problem, here it is. I drilled holes in the new bars to run the wiring internally, as was the case with the old bars. Everything seems to clamp down much better now. Kept the holes as small as possible to avoid compromising the structural integrity of the clip on bars. More pictures soon!
 
Alright, not much work done this last week or so. Got the throttle on and wiring routed better than before. Seem to have (kinda) solved my clamping issues. I have yet to do the same interanl wiring on the left/clutch side, but maybe that will be a good project for this weekend.

Question for everyone - Any quick thoughts on a decent set of tires for this bad dad? It's running a 18"x 3.5" in the rear, and an 18"x 3" in the front.
 

Attachments

  • 1.jpg
    1.jpg
    87.8 KB · Views: 199
  • 2.jpg
    2.jpg
    82.4 KB · Views: 752
  • 3.jpg
    3.jpg
    86.7 KB · Views: 756
Back
Top Bottom