Follow along with the video below to see how to install our site as a web app on your home screen.
Note: This feature currently requires accessing the site using the built-in Safari browser.
We noticed you are blocking ads. DO THE TON only works with community supporters. Most are active members of the site with small businesses. Please consider disabling your ad blocking tool and checking out the businesses that help keep our site up and free.
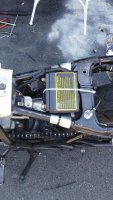
I have run a 17 tooth sprocket on 3 of mine no probe - its not too tight but just make sure your alternator, neutral and starter motor wires are nicely tucked behind the metal bracket down there
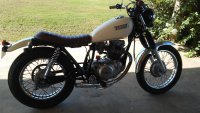
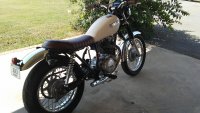
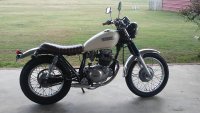
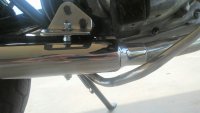
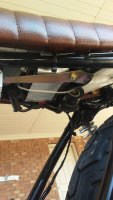
12" Emgo muffler installed. It needs packing. ;D. Very loud. Saddest part is the center stand doesn't work without the stock muffler. Hopefully I can find a way to modify it to work again so I can reinstall it. I found this muffler to be a bit too loud so I installed a washer at the end that has a hole about the same size as the stock muffler had. This quietened it down a bit.
Cool! I'm considering the same muffler for mine. Did you use the stock header pipe and just cut the stock muffler off? If so, did you have any fitment issues other than the centre stand? I'm not planning to use mine anyway....
I would just weld a chunk of steel tube with 1 side cut off, trimmed to fit around the centerstand - so it hits somewhere on the frame as a stop. Maybe drill a hole where it contacts the frame and push in a rubber grommet like they use on OEM seats. A pic of underneath would be good, you may be able to even bolt something on if you don't have access to a welder.
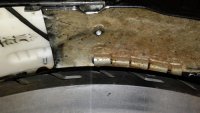
I wish I had taken a pic of what was going on underside before removing it. I went to move the bike and the stand pivoted up to the tire acting as a brake! Ill have to do like you said and wield some sort of bump stop.
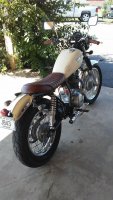
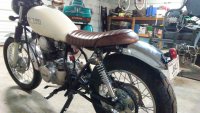
Tonight I trimmed up some of the rear frame cleaning it up a bit. The rear fender is now forward at least 2 inches as well. I had to find a way to attach the seat which was quite a challenge. I ended up pulling back the seat cover and installing a bolt through the pan towards the rear. Then I drilled a hole through the fender for the bolt to go through. One nut and the seat can be removed. I think this looks much better.
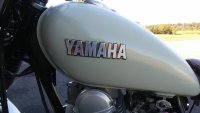
After making another repair to the tank it was in need of a fresh coat. I figured why not add a bit of green since I had some. I sanded some of the emblems to show some nice looking brass under the layer of chrome. Stuck on what to do next.
Thanks. Not really great though. I just sanded it down some and sprayed some $10 paint through my $10 Harbor freight air gun. It is easy though and does a lot better than rattle can ever has for me. It also gives you better options to mix and match paints. Plus a quart of paint is enough to repaint a tank several times.
Thanks. Not really great though. I just sanded it down some and sprayed some $10 paint through my $10 Harbor freight air gun. It is easy though and does a lot better than rattle can ever has for me. It also gives you better options to mix and match paints. Plus a quart of paint is enough to repaint a tank several times.
Im not even sure what 2 PAC paint is. I just grabbed some oil based tractor paint off the shelf at tractor supply store. It hardens up ok but takes a long time to do so. I haven't given it enough time to fully harden before I mount it and go riding. After my first paint job, the tank leaked from a couple previously repaired holes because I sanded too far, and from the petcock not sealing. Since I never waited long enough for the paint to cure, it bubbled the paint. Right now it seems to be sealed good so we will see how it does this time.
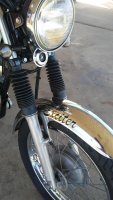
I use an online company for my business and had some Exciter decals made. I originally had these made for the tank but like the emblems better. Here they are on the fender. Ill keep them there a while and see if they grow on me.
The stickers are sweet man. By two pac maybe I meant 2 pack or 2 component. Its stuff they use to paint cars - like epoxy or polyesters, the two parts react together and go off to harden solid. The industry might have shifted to more environmentally friendly alternatives now I am not sure.
Sounds like a better paint. The only experience I have with spray paint is the cheap stuff that comes off the first time it gets washed. This oil base paint I used is really just something quick. I had my eye on a tank with some near perfect dimensions on ebay. I just haven't pulled the trigger. A long shipping time, and too many guesses.
This site uses cookies to help personalise content, tailor your experience and to keep you logged in if you register.
By continuing to use this site, you are consenting to our use of cookies.