DeanJ
Been Around the Block
Sorry this took so long to load.. here is a 2+ year resto in one blast 
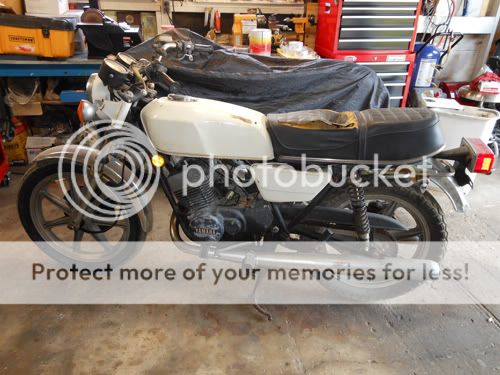
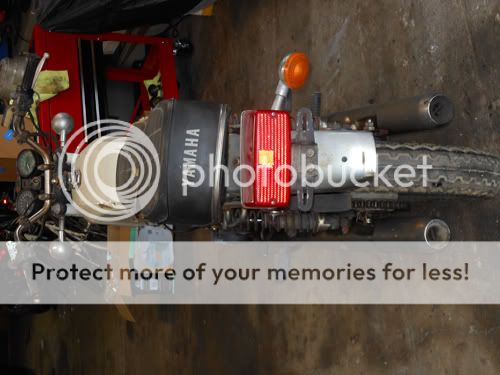
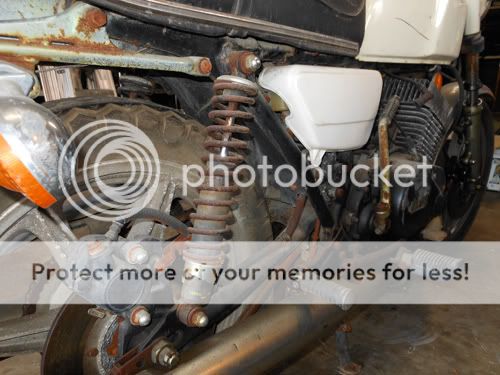
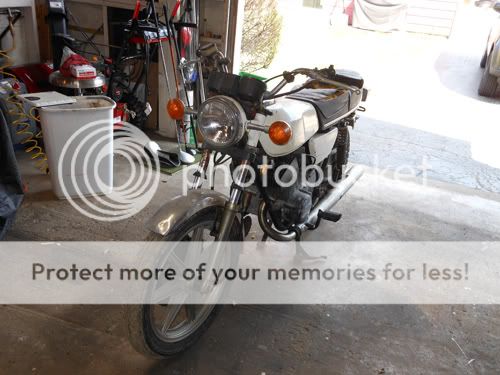
"before" photos of the bike:
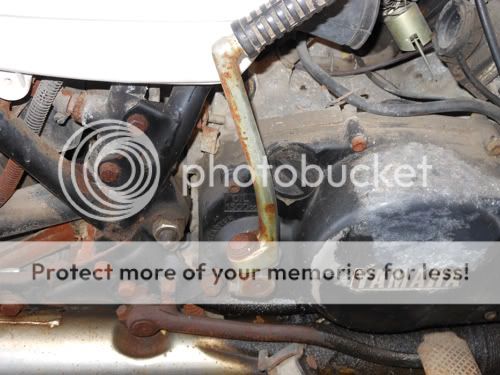
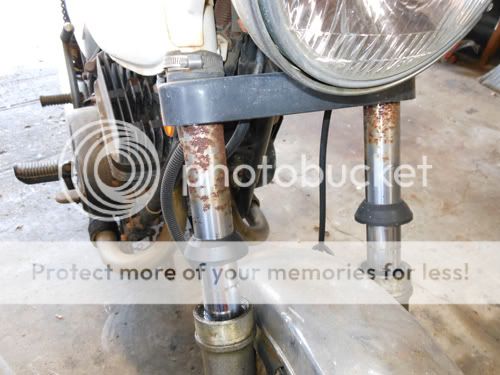
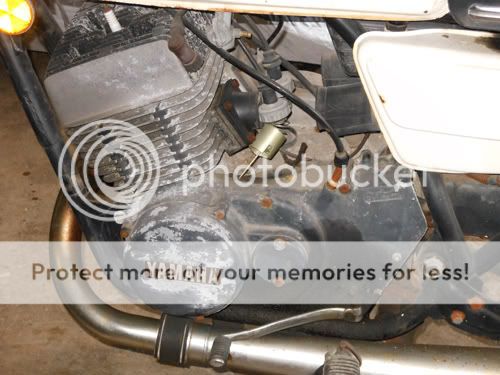
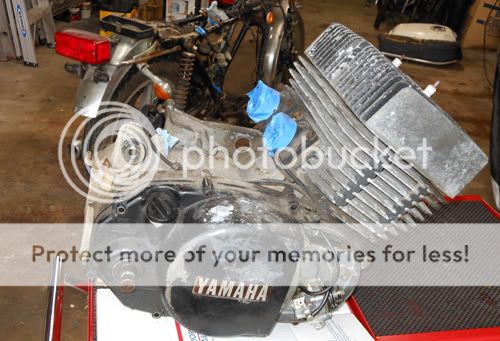
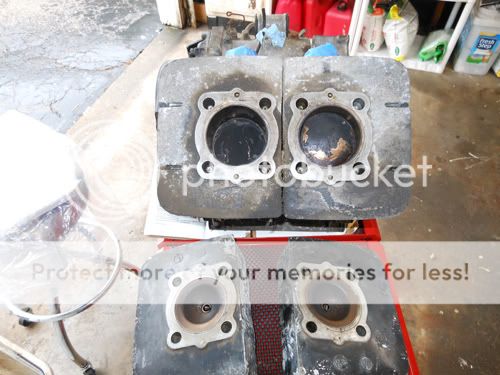
Here is how the engine looked.... ugh.

Prep and blasting of the exterior surfaces ....
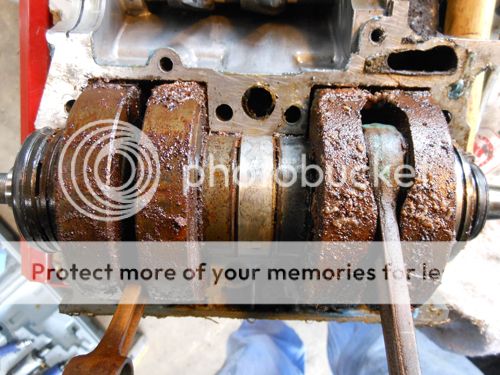
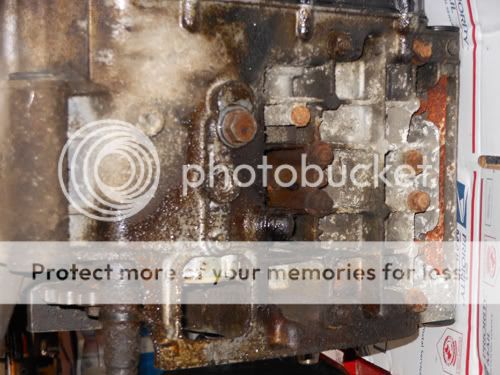
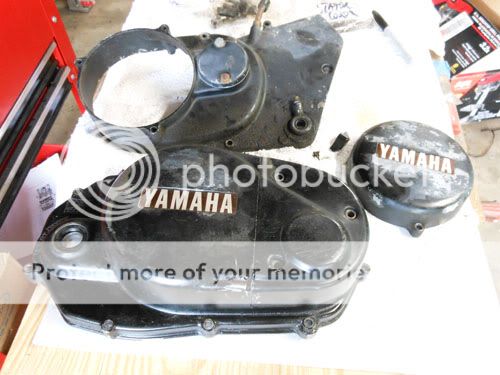
The engine cases were pretty nasty. Here is a before photo of the lower :
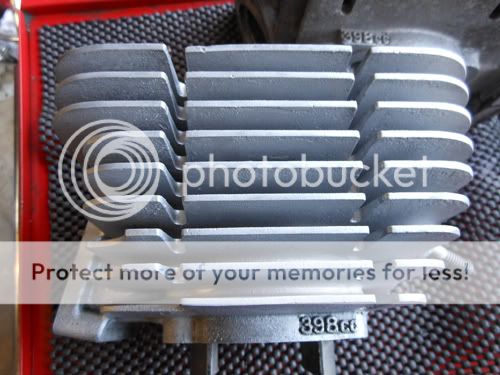
I soda blasted the exterior surfaces only :
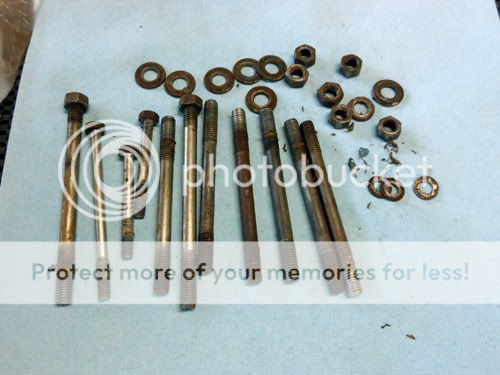
hardware condition "before" :
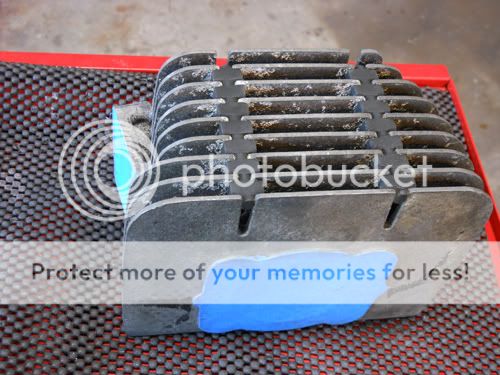
ready to use:
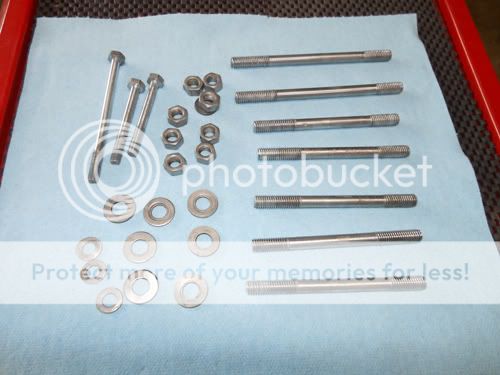
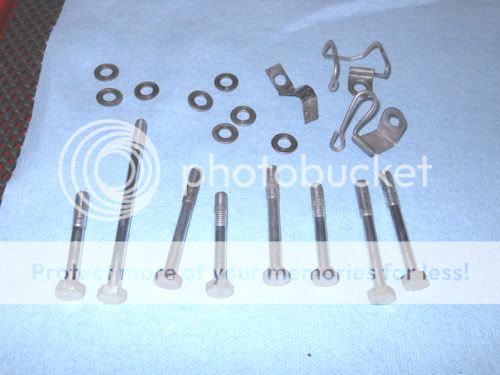
new stuff !
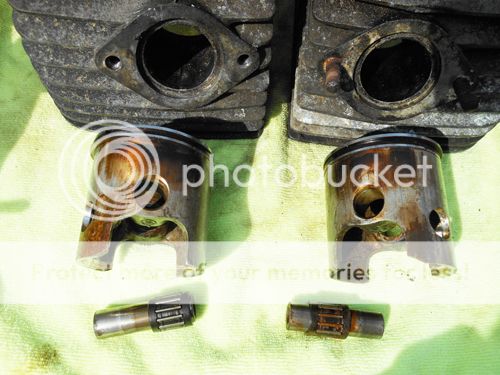
had to go .75 over due to some scoring and pits in the sleeves.
I went with the YPVS spec ProX pistons. These required that I mill and chamfer the intake side of the skirt ( where the h20 cooled has the split intake port )
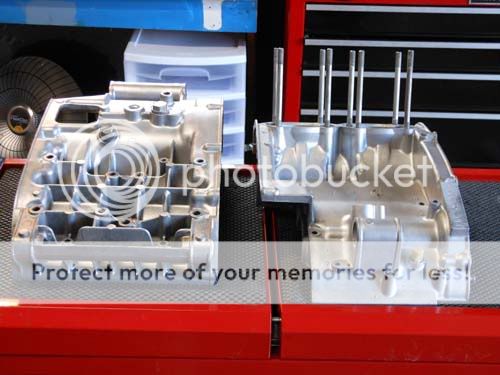
bottom end done, ready for the bike
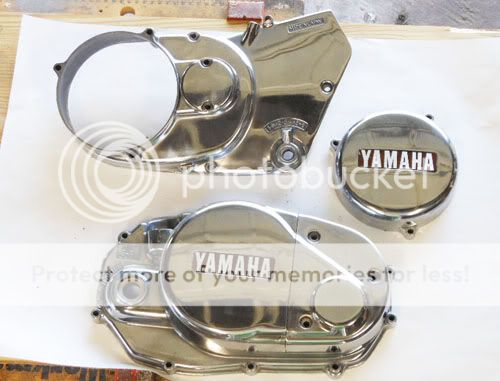
So I blasted the case covers and feathered the scrapes and scratches...
before cleaning and blasting :
after blasting and feathering:
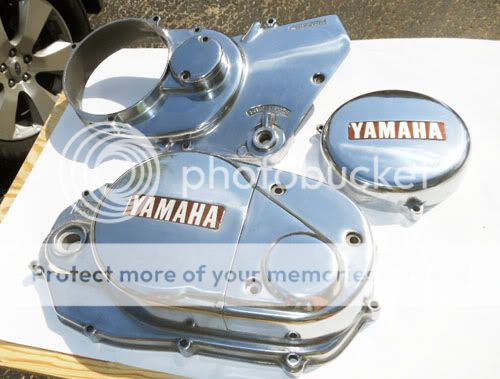
wet sanded and polished the case covers.....
Trust me.. they are shiny:
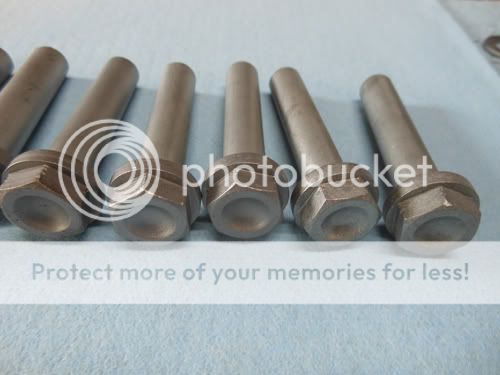
Finishing up with all of the engine hardware

after:
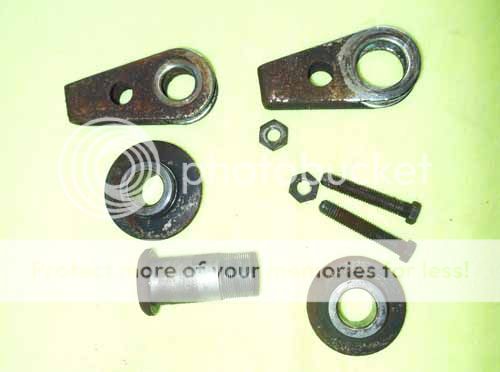
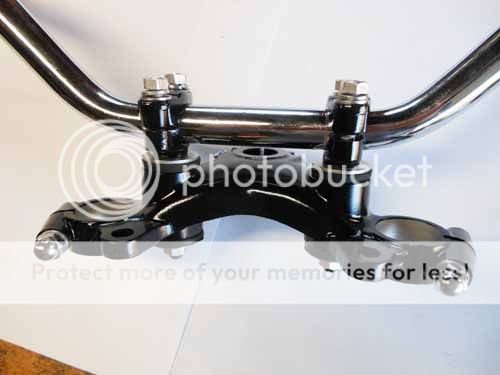
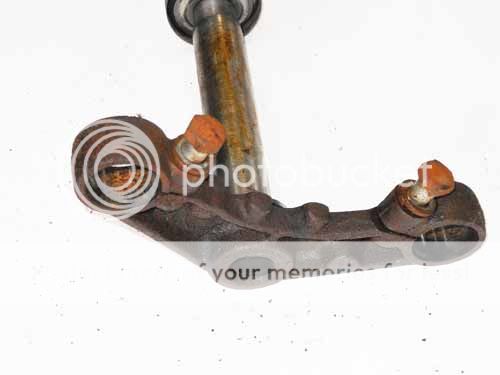
The last of the engine mounts- before:
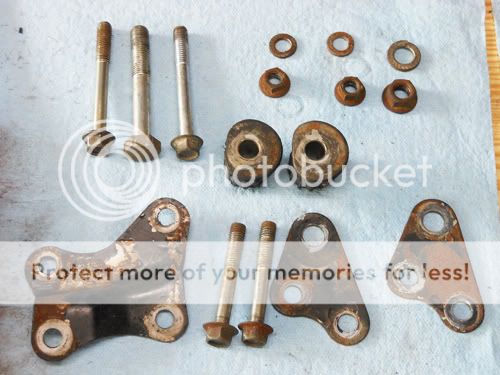
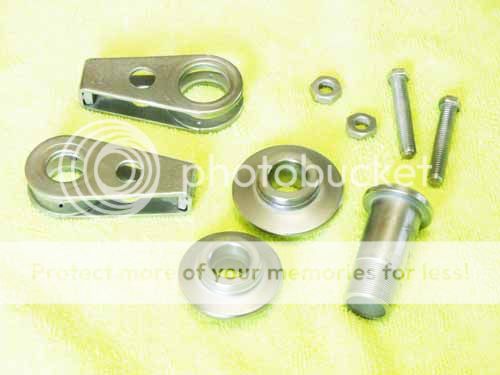
during:
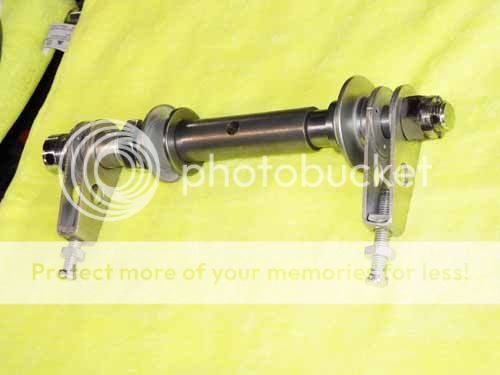
complete:
before....
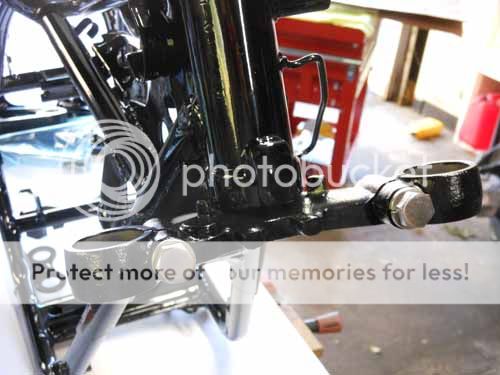
after:
damper mounts.
Air box "before" pic :
After
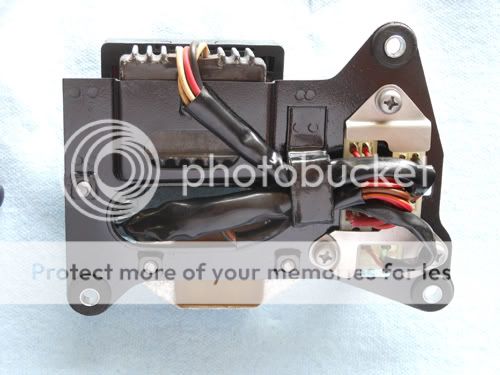
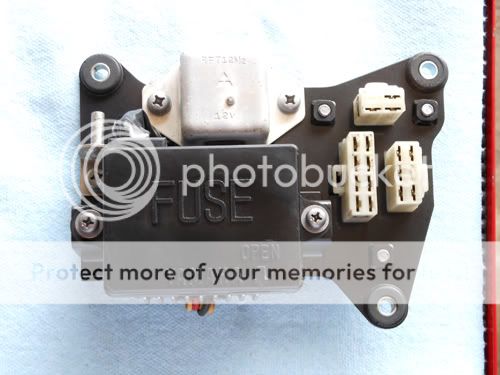
I restored the fuse box/electrics bracket assembly
before pics :
during :
complete :
Same routine for restoring the battery box:

Kicker..... pretty ugly
it's decent..
all done:
Original:
After:
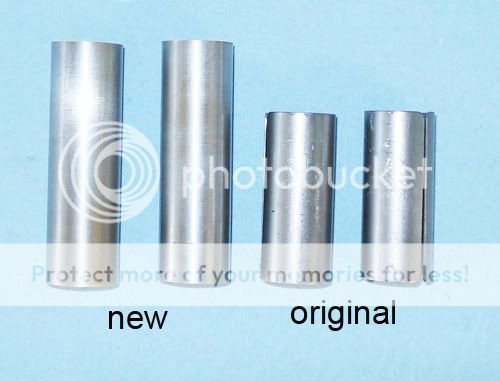
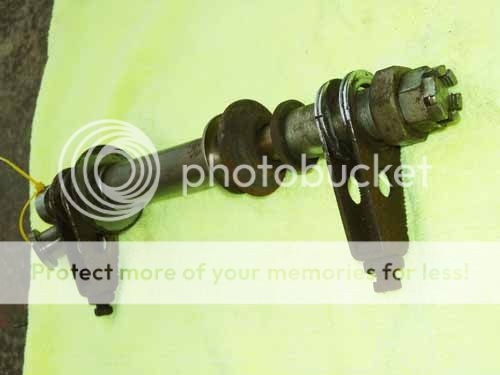
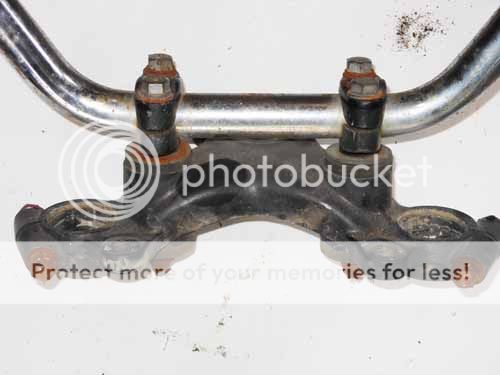
I had to make up a set of spacers for the proper preload
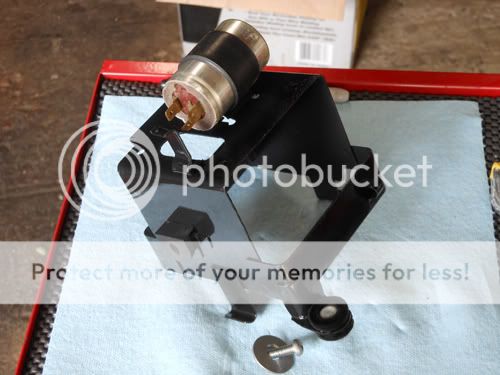
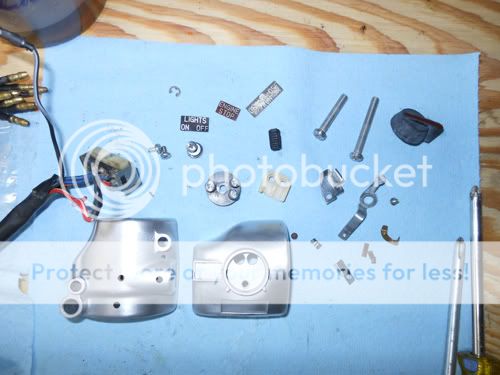
The switch gear ..... before:
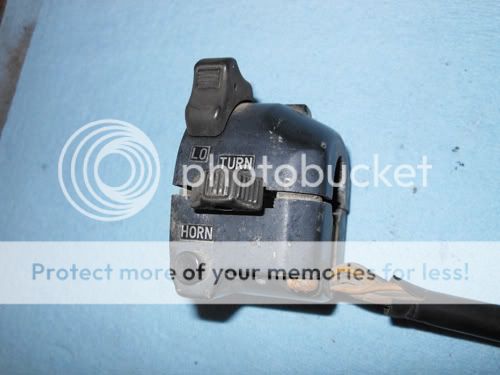
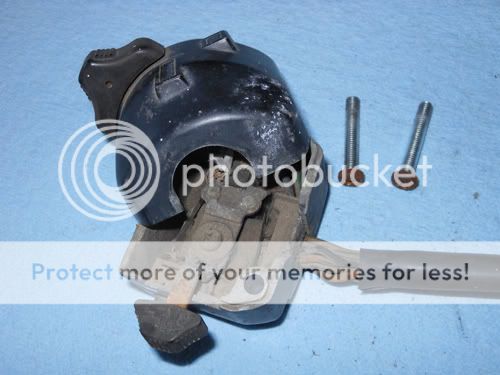
I pulled everything apart for stripping and a good cleaning, then painted the housings ... plus new shrink tubing for the wires.....
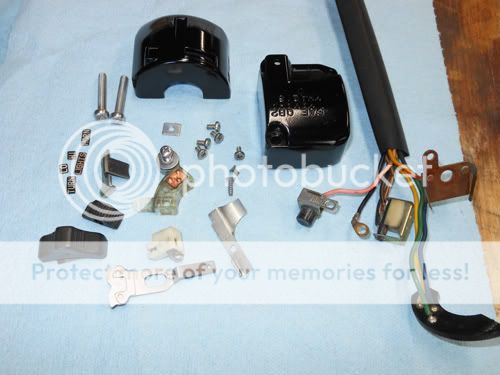
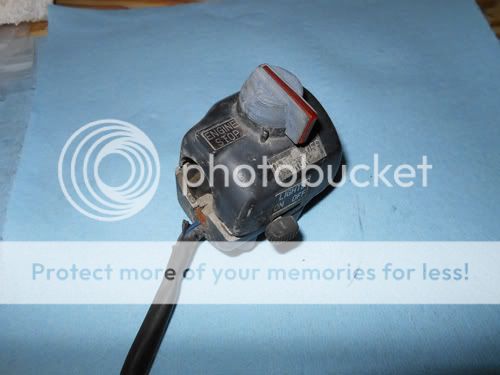
after:
I double checked proper operation and connector continuity with the multi-meter... very happy.
restored the resistor pack and cleaned up the flash cancellation unit-
It was a real treat to start with an unmolested harness vs. the usual mess I find myself with.
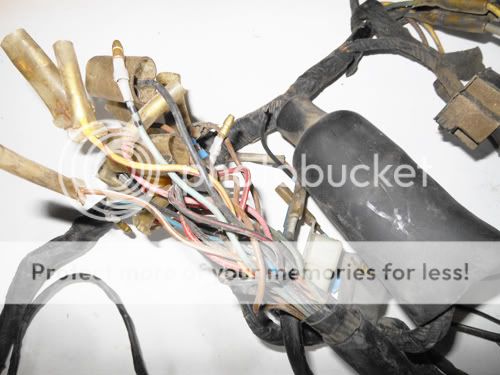
Cleaned, every wire and connector checked for proper continuity and matched against the diagram..... plus some new wire wrap:

The shiny bits were... well, not very shiny..
Here's what I scored from a local kid that is chopping up , what was, a perfectly nice RD:
rear master lever pivot, spring and rod.
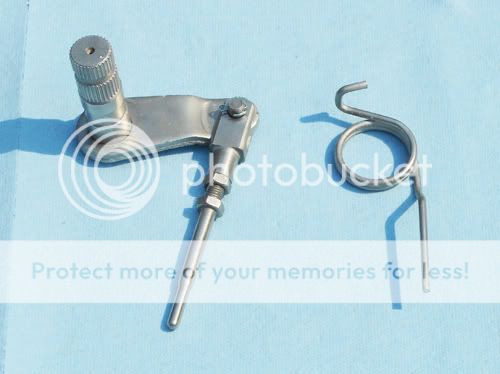
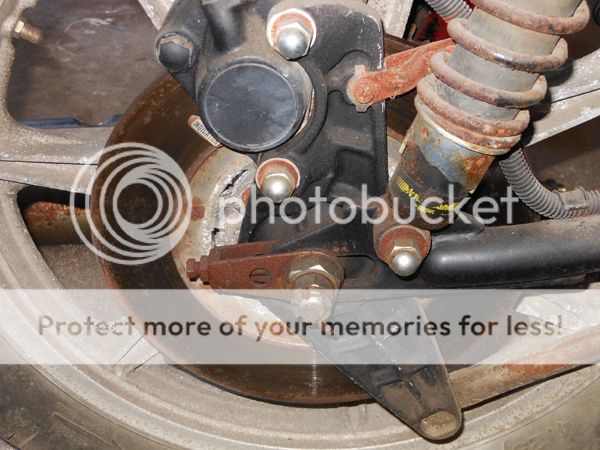
Caliper bracket stay-
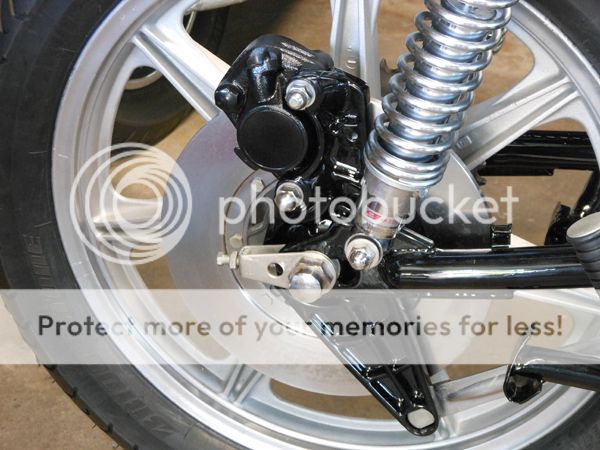
after:
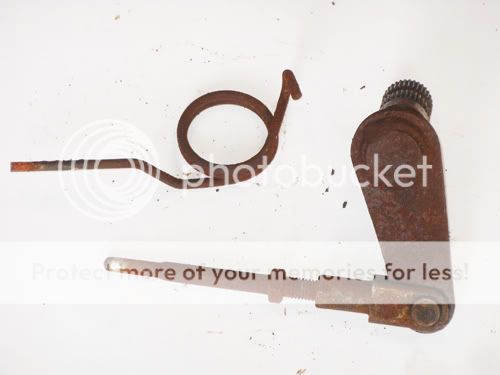
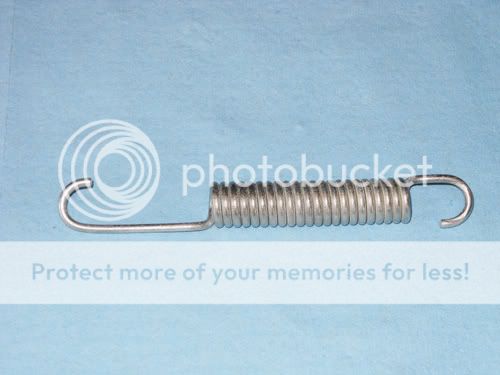
center stand spring-
after
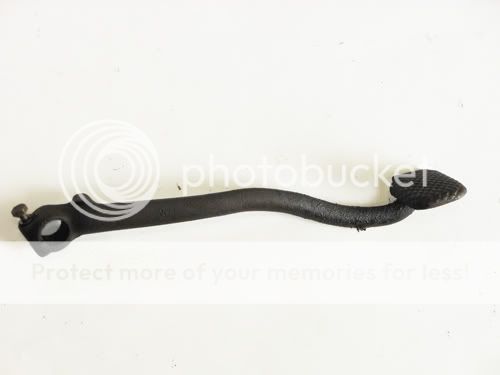
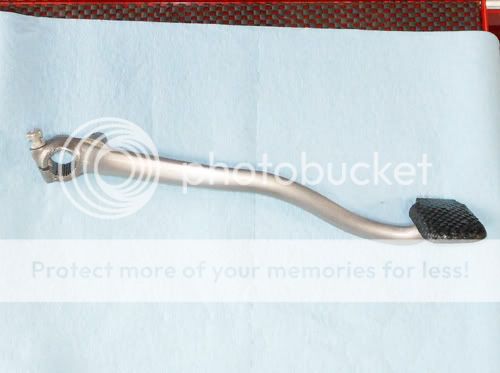
Rear brake lever restored. I used liquid rubber non skid on the foot pad.
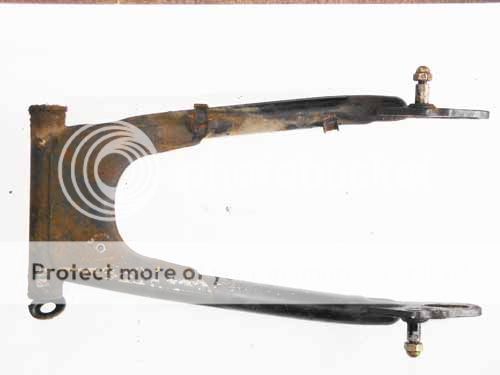
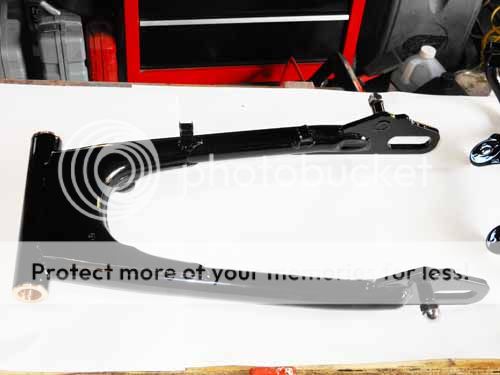
Restored the rear axle bits....
ick:
after:
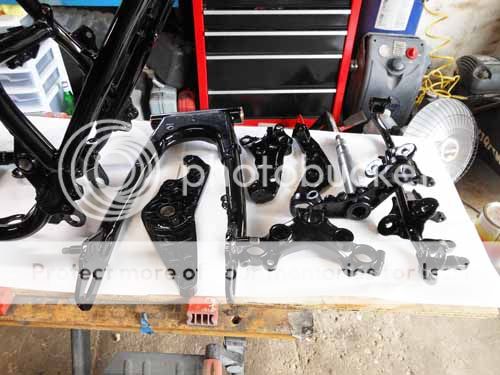
powder coated stuff !
new bronze swing arm bushings.... more before and afters
after
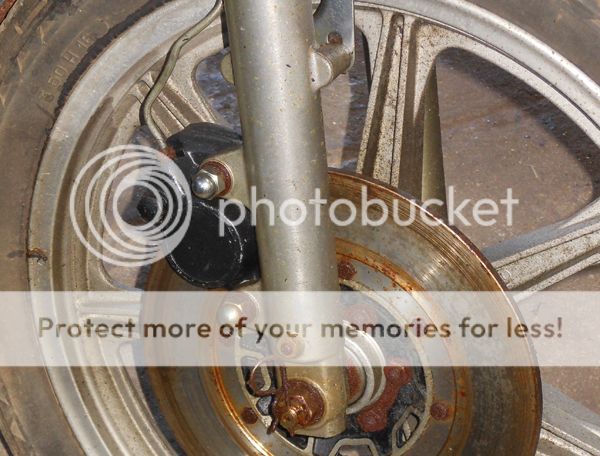
before:
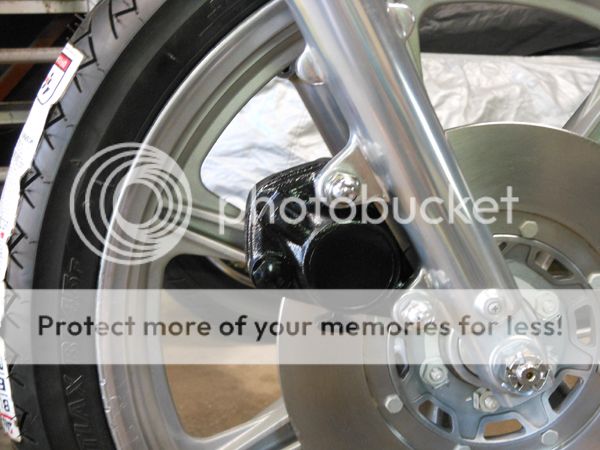
after
before
after:
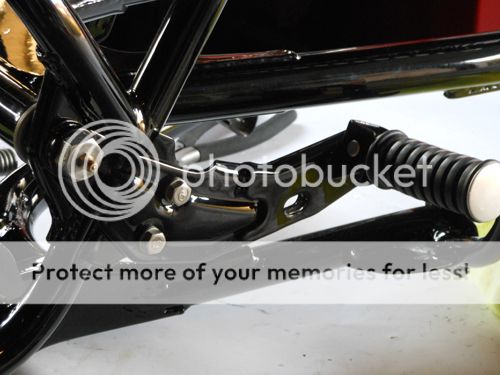
the foot pegs, springs and fastners were pretty nasty
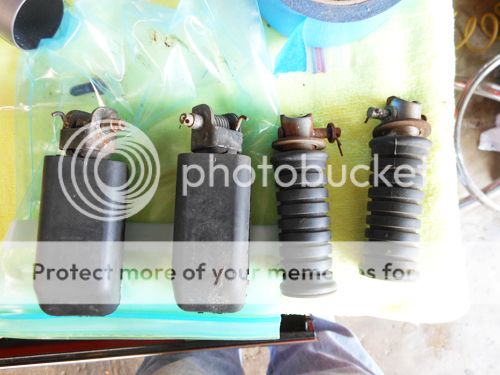
restored:
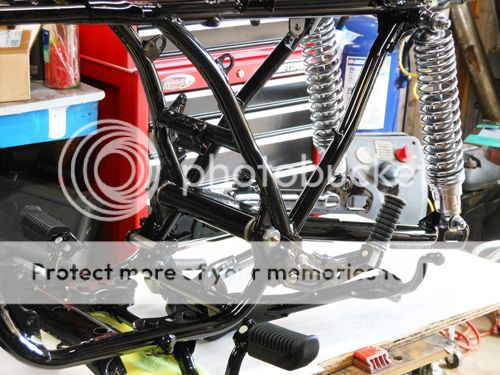
.. and installed the swing arm, center stand, shocks etc...
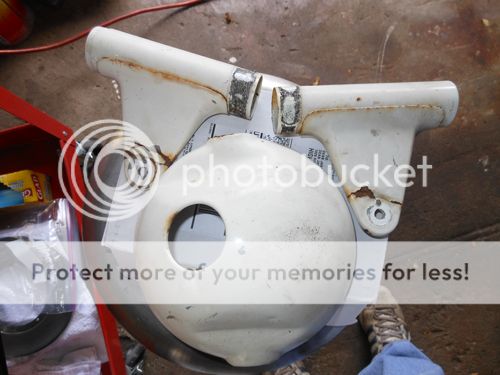
so I completed the metal finishing and paint on the headlight bucket, ears etc... before:
complete...
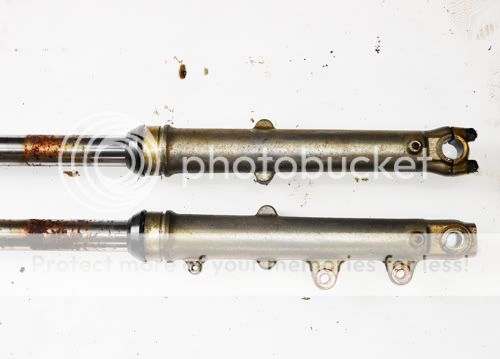
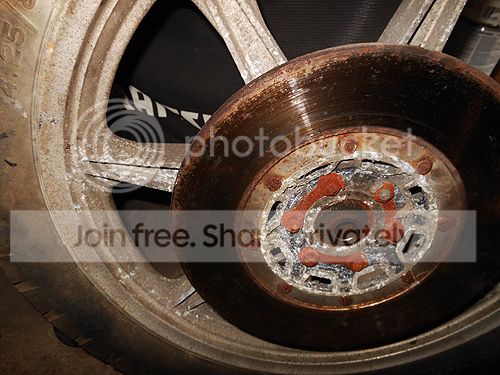
the alloys were very oxidized.. pits were pretty nasty. Here is a close up "before" pic:
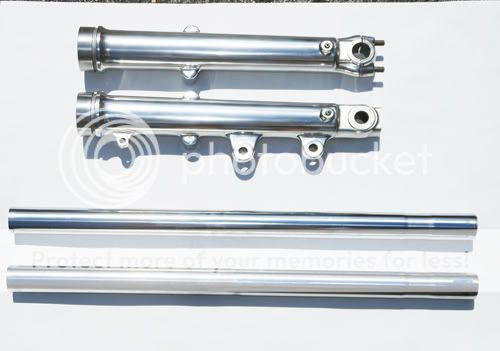
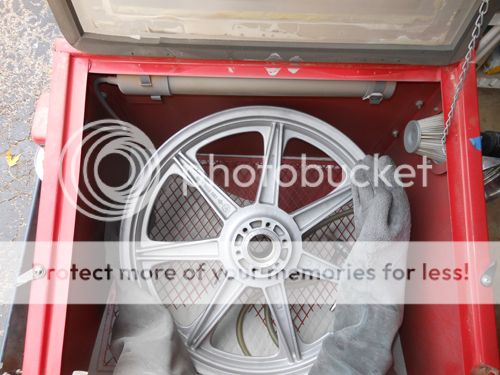
Gave them a blast with bead:
I wet sanded and polished the rims ( wheel on the left is before plolishing , the wheel on the right has the rim polished )
New wheel bearings and seals installed:

Finished up with the rotors and hardware .... new tubes and tires:

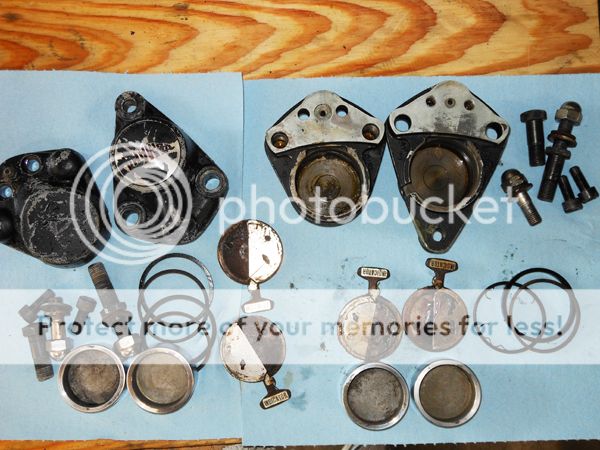
brake calipers did not look too bad from the outside, however they had a layer of rattle can all over them, the pistons were horribly pitted with rust and it sure was fun taking them apart. ( ummm 120 psi did it ! )
Tip- when something is caked with nastiness, use stripper and clean off before media blasting. It helps prevent a bunch of contamination in your media.

Here are the bodies after a blast
I left the thick aluminum plate logos bonded to the calipers and block sanded the surfaces. The thin repro decals need a smooth surface.
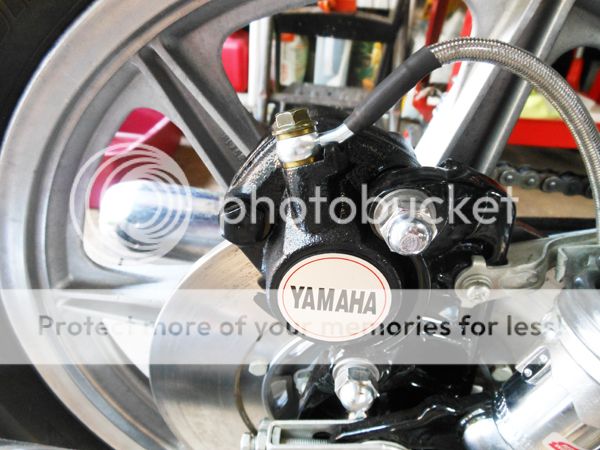
I prepped and painted the bodies with ceramic caliper paint ( ceramic with a small c ), bought some new seals, brake pads, some good pistons, cleaned up the hardware and plated some fasteners

I use high temp 100% silicone grease for assembly ( some call it "red" or orange grease )

And for your viewing pleasure- the before and after pics:
I installed the wiring harness and associated bits:

I tore it down blasted the bracket, painted, cleaned everything up, replaced a lamp, checked the wiring and refinished the plastics:
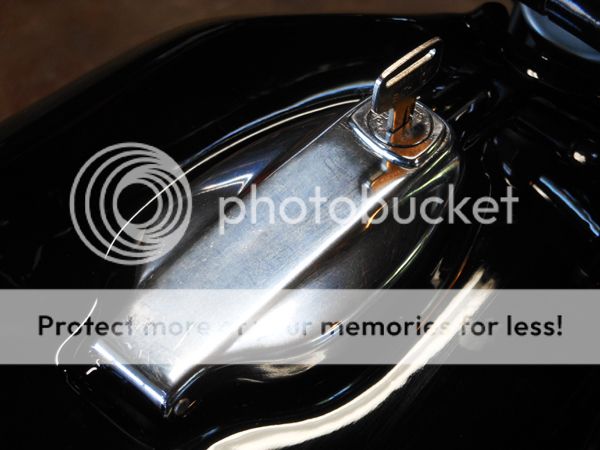
Completed and installed .... yeah, I know that ring on the key switch REALLY looks like poo now, however later you will see this with a fresh decal
The speedometer was in much better shape and I got lucky with a used tach in that the fading/ patina was close. The buckets were dinged up and rusty, so I gave them a blast and completed the metal finishing and paint. The foam ring dampers are from my XS parts pile and I plated all of the fasteners.
Before:

All done plus completed headlight bucket wiring and buttoned it all up:
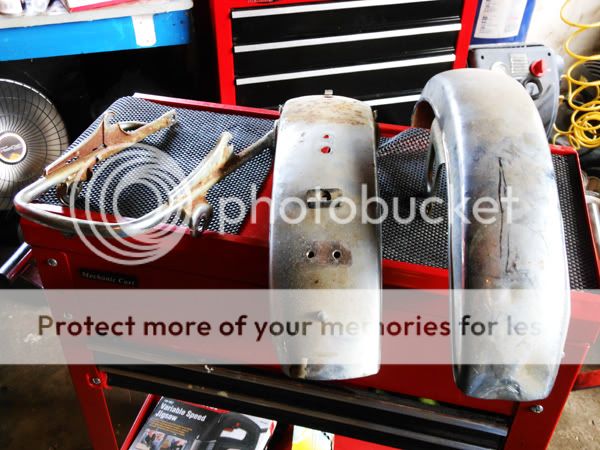
Installed the rear fender, grab rail and lights.... before:

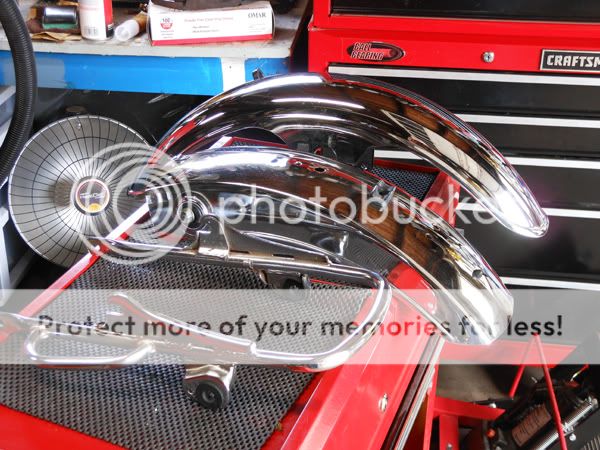
after:

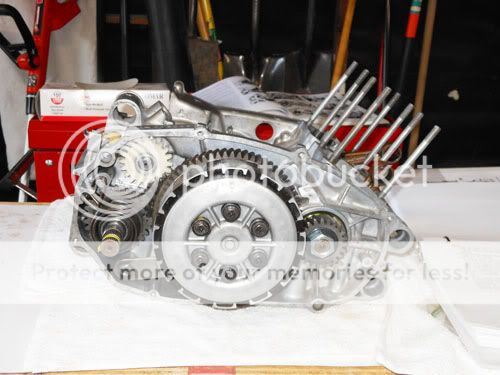
I dropped the engine it ....
Jugs on... I still need to get a set of vibration dampers

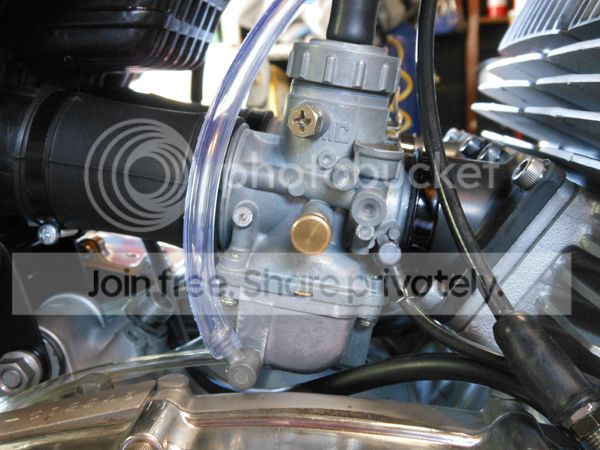
Heads on a torqued, reed cages and boots on just waiting for the carbs. Fresh ignition set installed, points gapped. set timing
The heads are polished to a mirror finish to match the case covers ... I still can't seem to get the hang of photographing chrome or polished alloy... trust me, they are shiny !
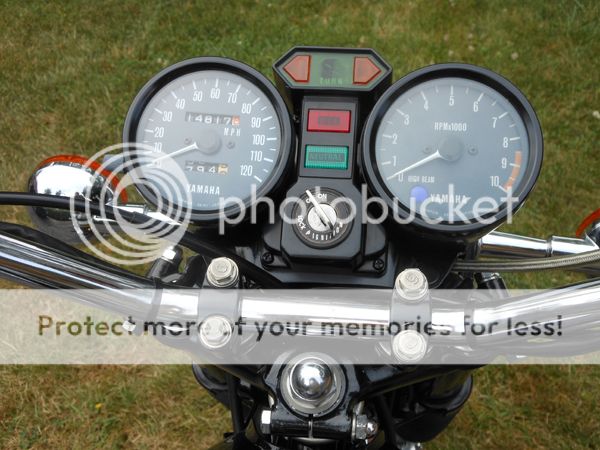
new battery in and "hot tested" everything. Zero issues. New clutch lever, front brake master , new front brake line, throttle cable, speedo cable, new grips and mirrors.

Reminder of what I started with:
I put the autolube pump back together and installed it and the RH case cover, then filled the gearbox with oil. I checked the pump stroke, installed the cable and sync'd

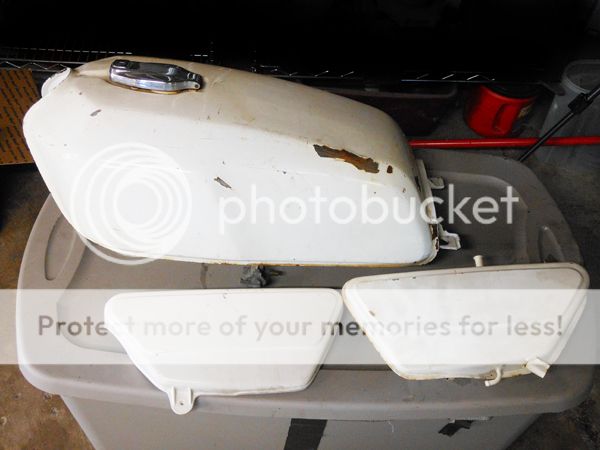
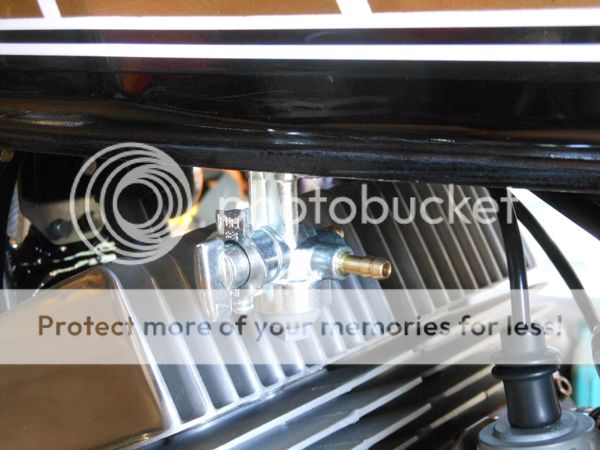
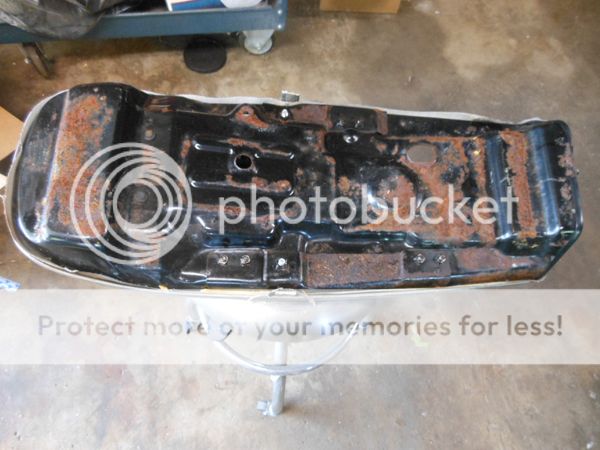
The inside of the tank was a bit rusty with a nice layer of varnish in the bottom....
I added some gas to swish around as a start to get the varnish soluble. A few hours later I realized that the petcock had a hole in it leaking gas. I removed it and made a block off plate so I continue with the tank cleaning and prep:

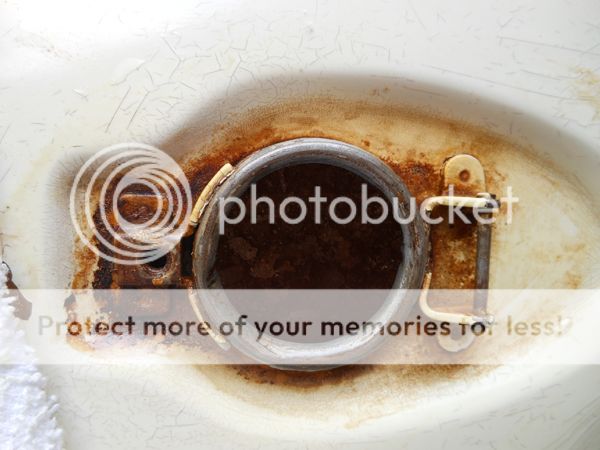
As the cap gasket was perished, I used an expansion plug for the filler so I could begin with the de-rusting:

All of the muck, debris and rust removed inside:
Metal work and prep near completion. Needs final blocking
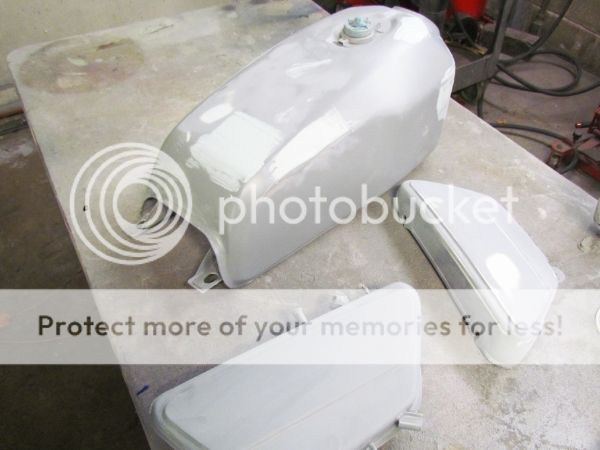
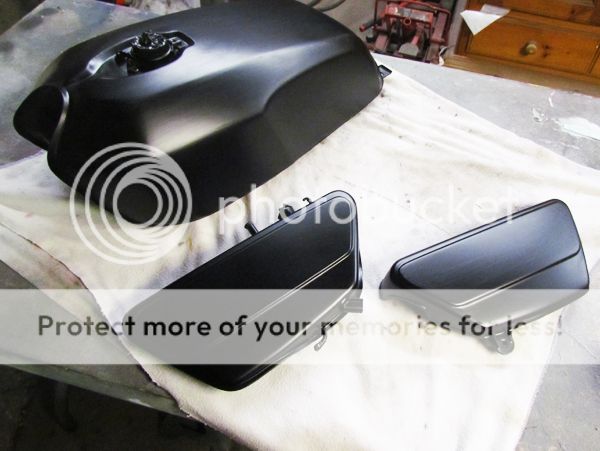
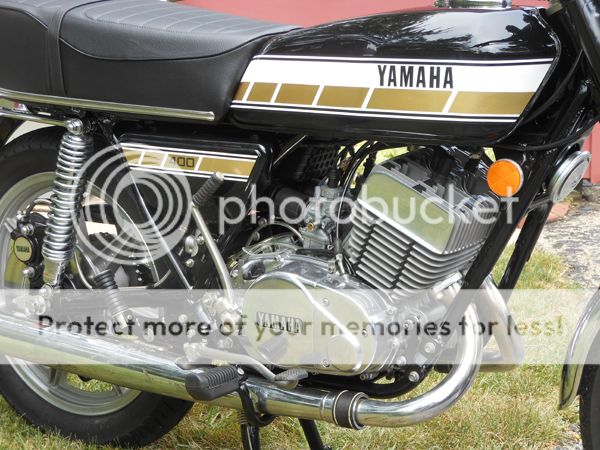
I went with graphics from the satin black Canadian C model, however mine is gloss black.
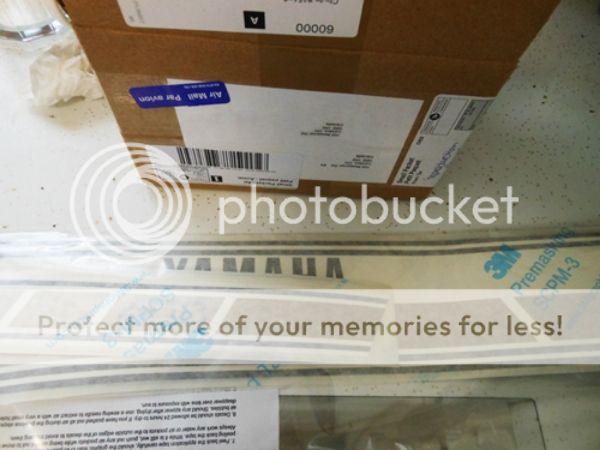
New 3M decal set
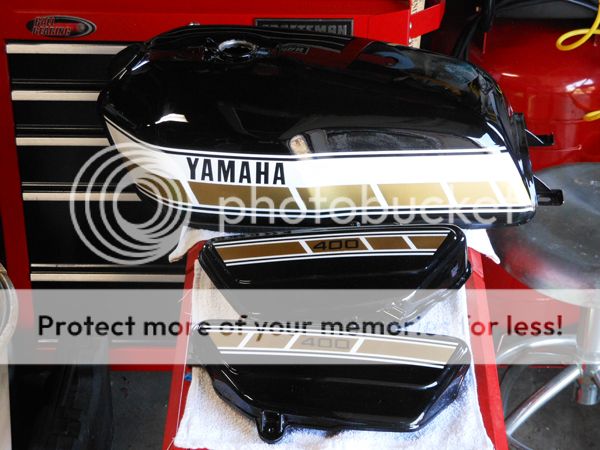
decaled and cleared, color sand and buff

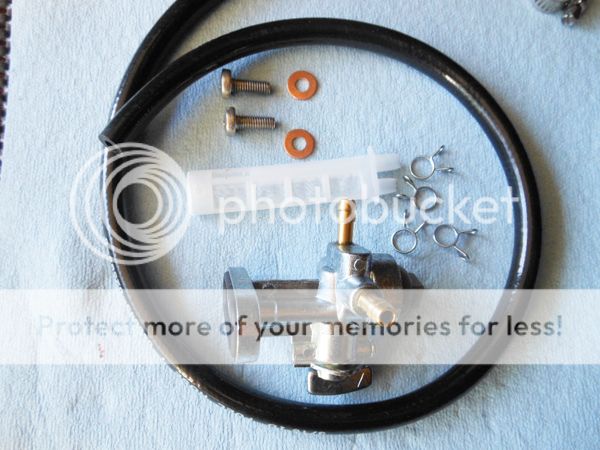
So I have new hardware to go with the new fuel line and petcock:
Before:

After:
Oil tank ready for some mosquito killer :

The head pipes were really nasty on the underside (mostly unseen side) and same with the mufflers.
Original pic from when I drug the bike home:
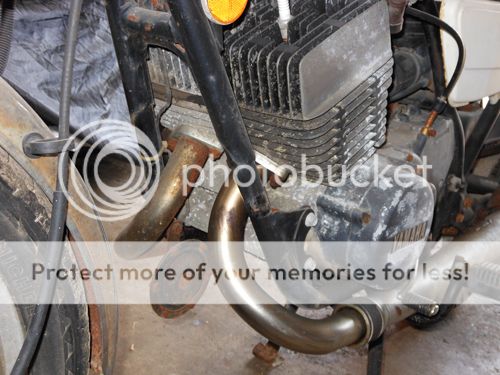

After cleaning and installed.


splurged on some decals and rubber bits:

Cylinder and Head dampers:

Switchgear decals:

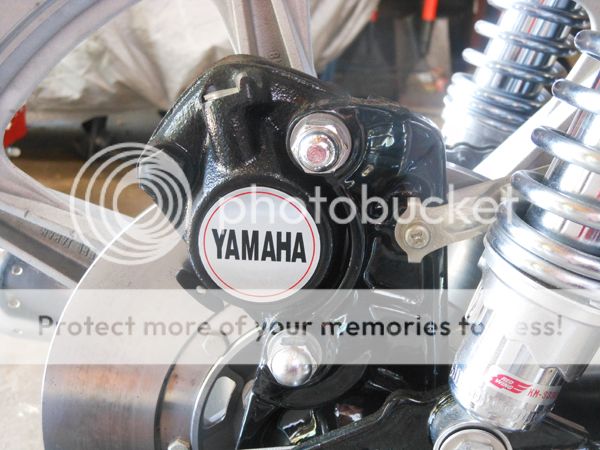
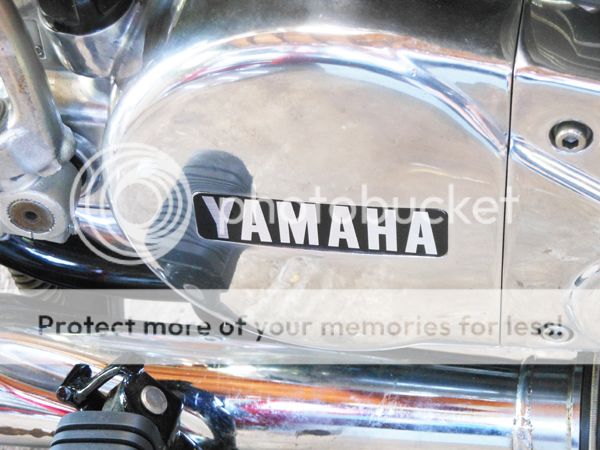
Caliper and engine emblems:
I have completed the warm in cycles, have yet to take it out for a break in series. ( I'm not putting the ratty seat on, even for a 15min break in ride )
http://youtu.be/blZAyPjpFsA
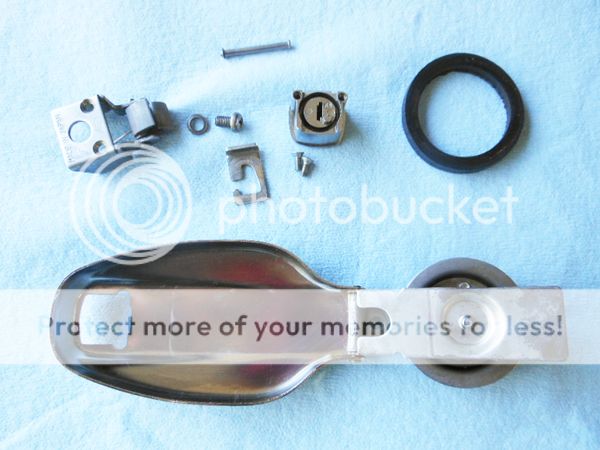
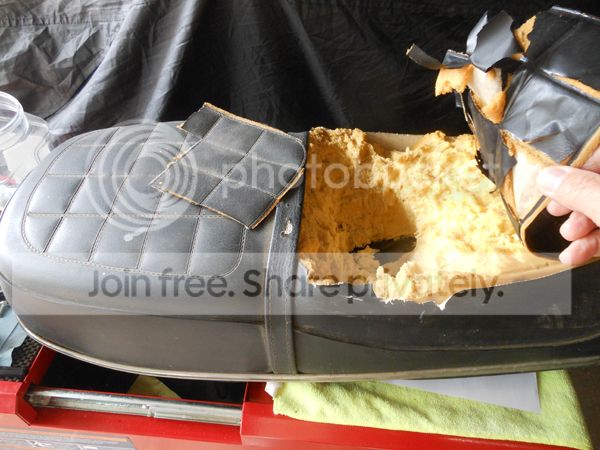
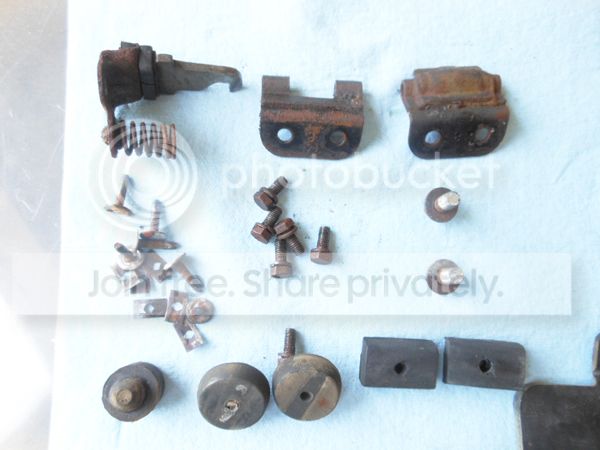
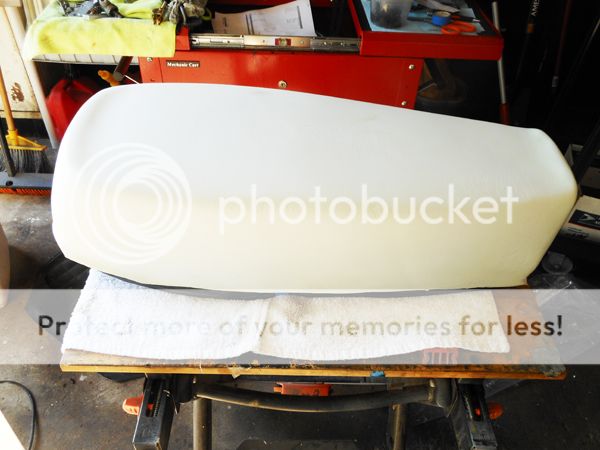
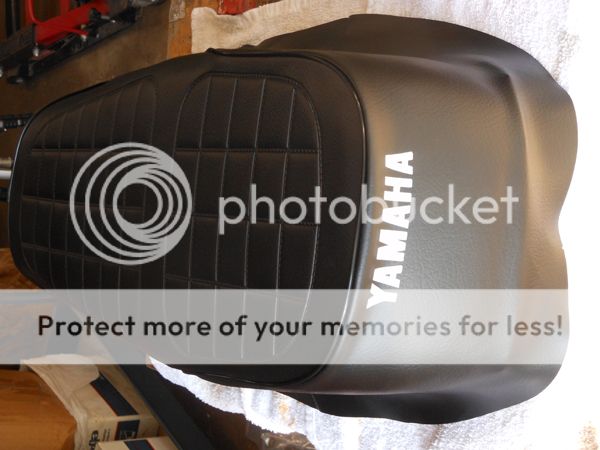
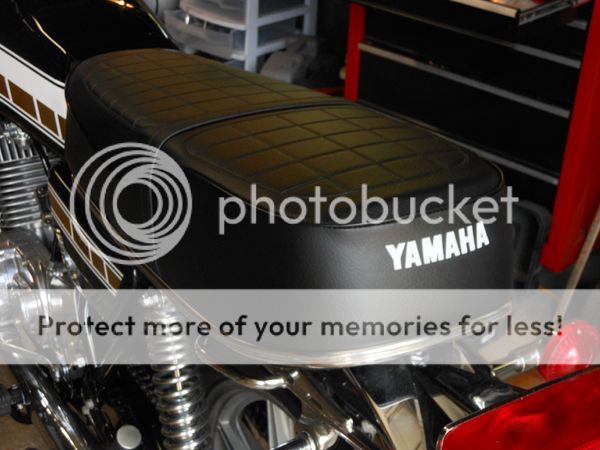
I restored the seat and associated bits:
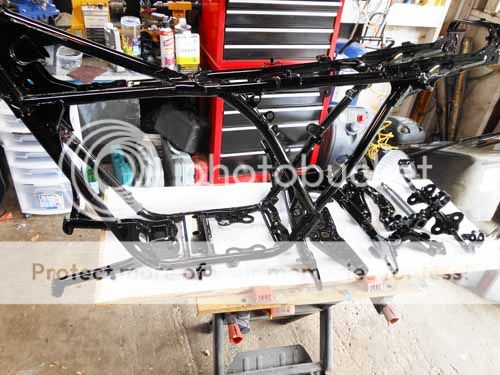
Blasted and fresh chassis black epoxy:
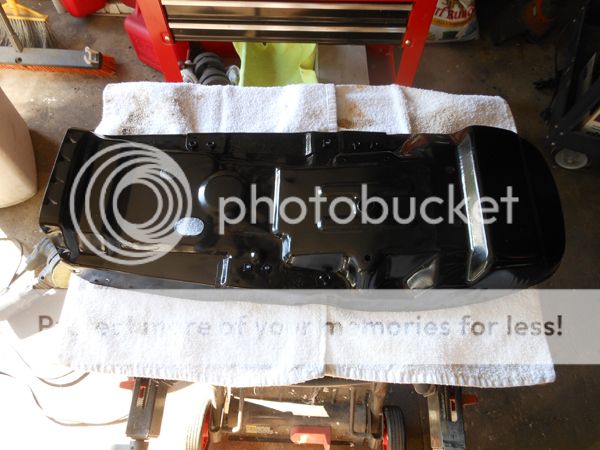

After:


After:

New reproduction Foam from HVC:
New reproduction cover from dis-covers .
( I can't speak more highly of a supplier- made in England, awesome service and the shipping was free to 'merica )

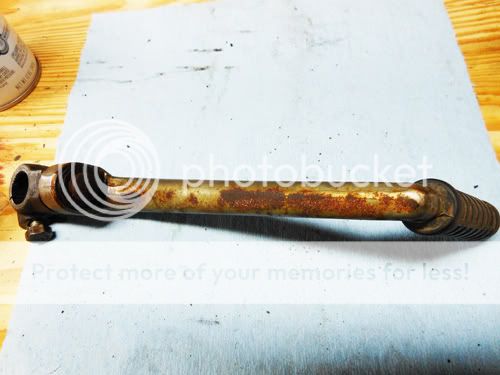
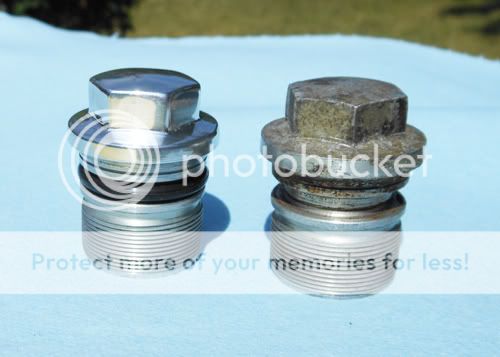
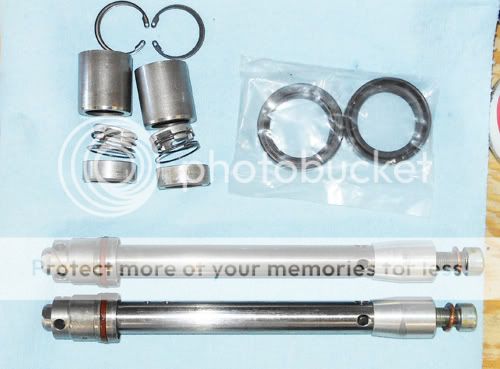
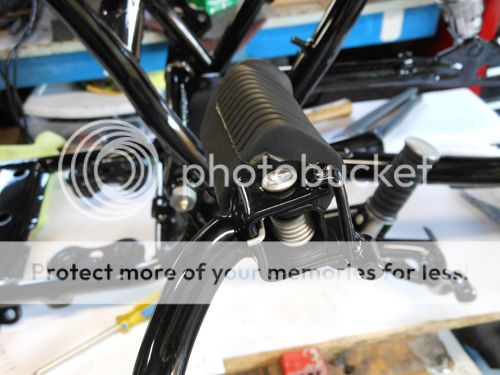
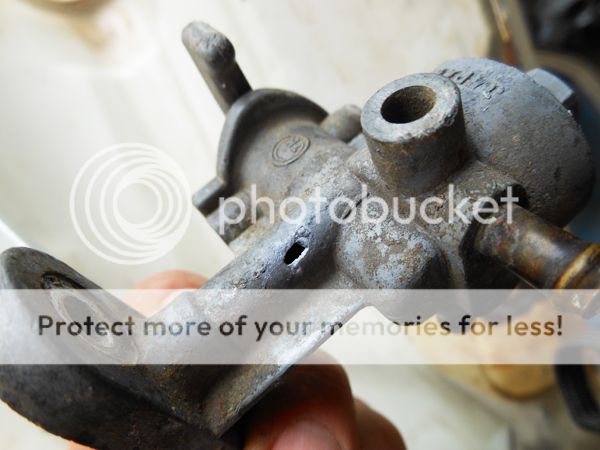
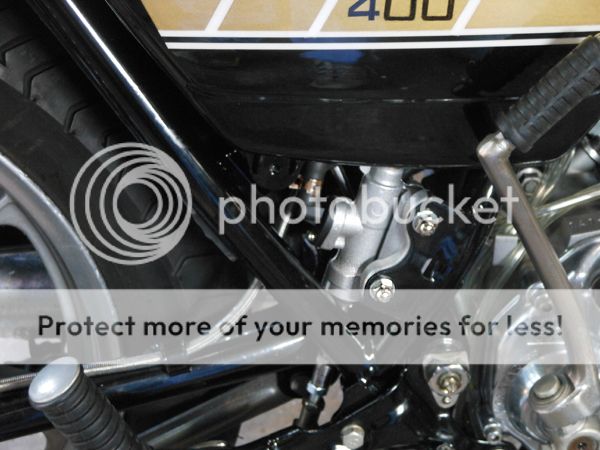
The rear master cylinder bore was horribly pitted and I could not find a good replacement to rebuild. So I picked up a 12mm master and made a compound adapter bracket. I matched the spacing and the angle of the stock set-up. ( It's like Yamaha welded the bracket to the frame out of position / off-set by mistake and then cast a crazy master to fit it ! )

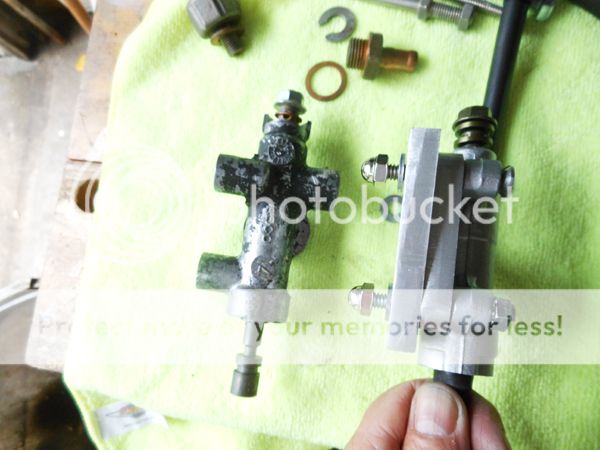
I had to fab up a linkage adapter and used a banjo bolt pressure switch for the brake light:

New brake line, filled and bled:
"after pics" :

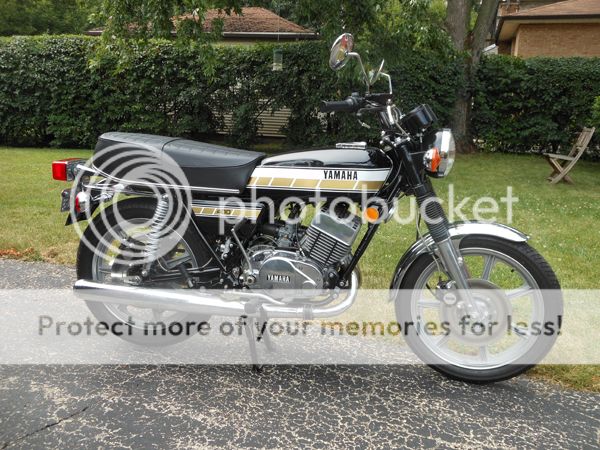

so as of today, it's got 21 miles on all of this freshness !
crappy video camera shot
http://youtu.be/Ui6-TIDvmg
"before" photos of the bike:
Here is how the engine looked.... ugh.


Prep and blasting of the exterior surfaces ....
The engine cases were pretty nasty. Here is a before photo of the lower :
I soda blasted the exterior surfaces only :
hardware condition "before" :
ready to use:
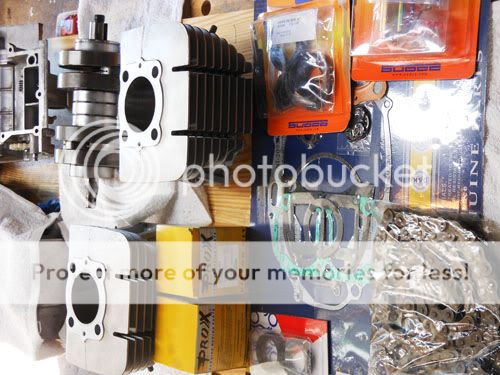
new stuff !
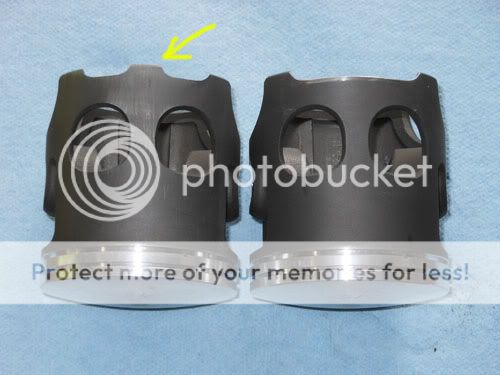
had to go .75 over due to some scoring and pits in the sleeves.
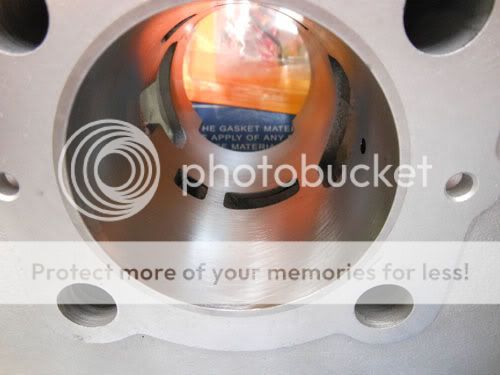
I went with the YPVS spec ProX pistons. These required that I mill and chamfer the intake side of the skirt ( where the h20 cooled has the split intake port )
bottom end done, ready for the bike
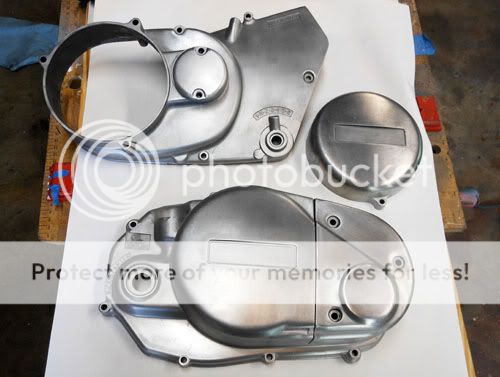
So I blasted the case covers and feathered the scrapes and scratches...
before cleaning and blasting :
after blasting and feathering:
wet sanded and polished the case covers.....
Trust me.. they are shiny:
Finishing up with all of the engine hardware
after:
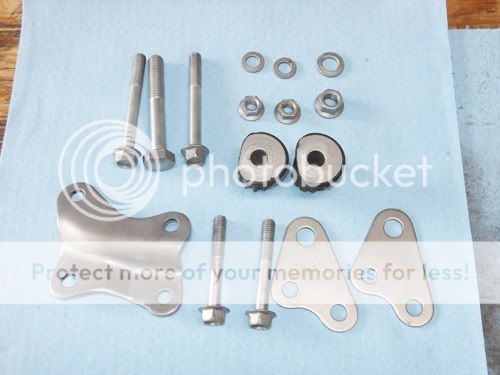
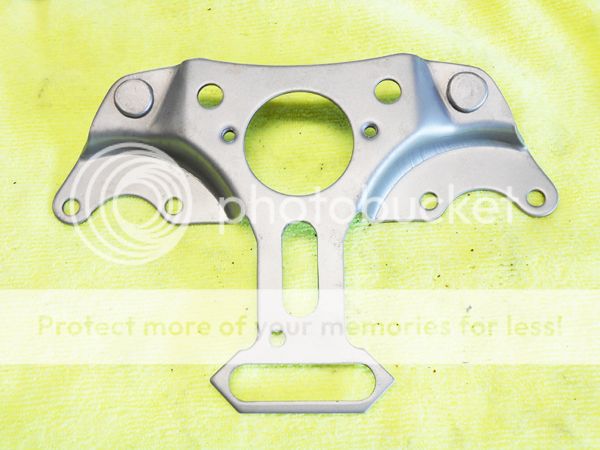
The last of the engine mounts- before:
during:
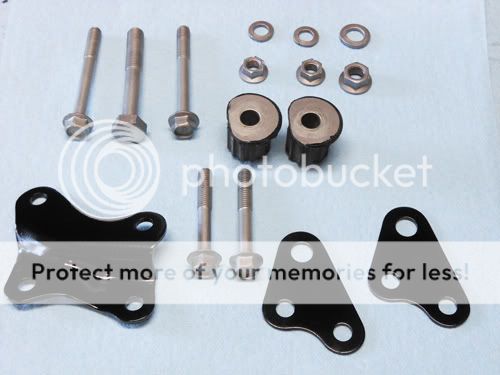
complete:
before....
after:
damper mounts.
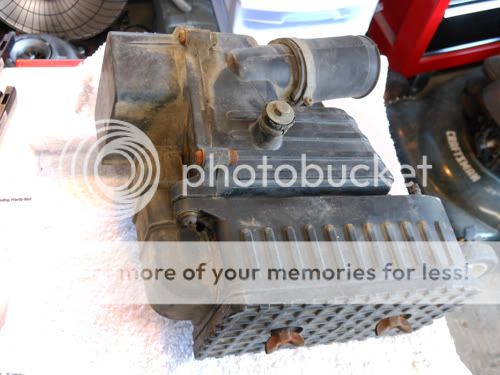
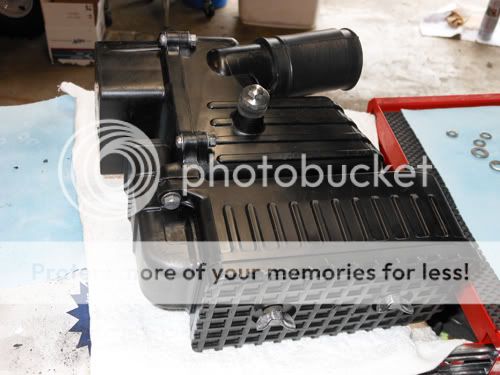
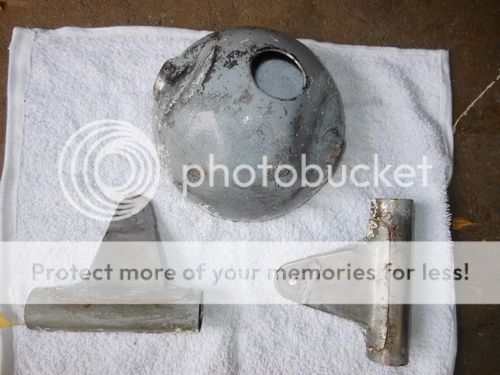
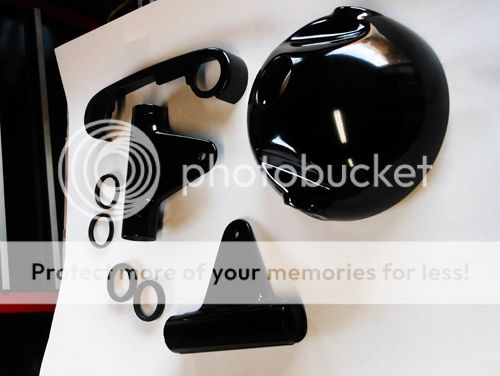
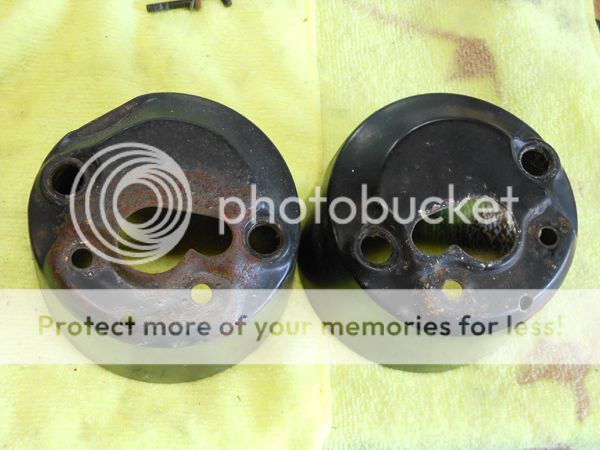
Air box "before" pic :
After
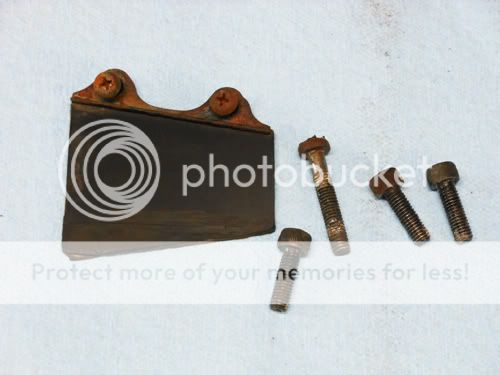
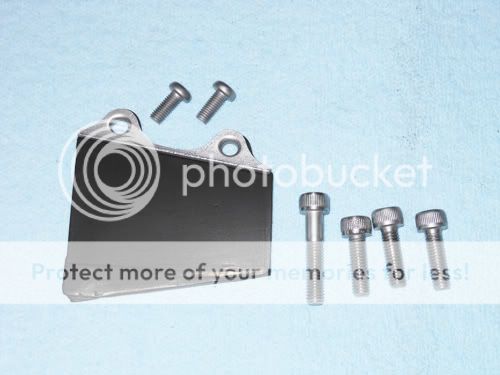
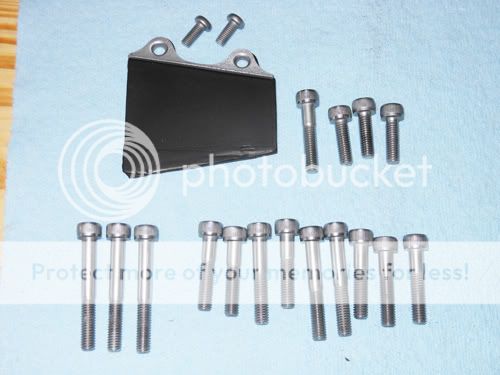
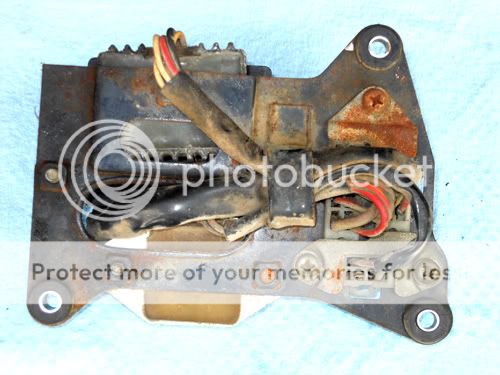
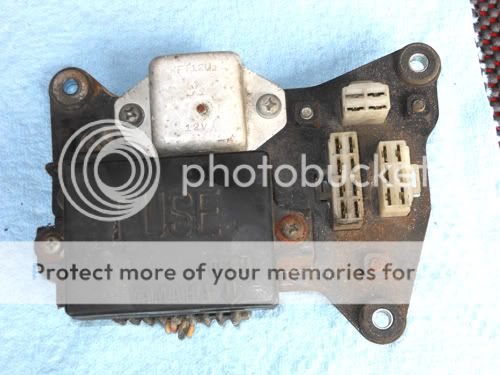
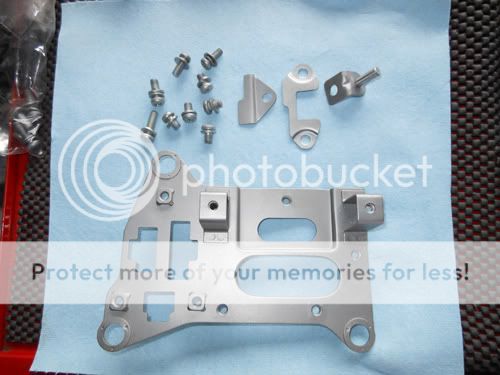
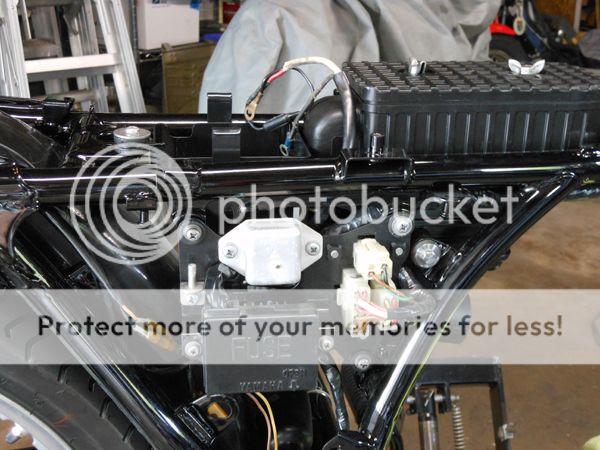
I restored the fuse box/electrics bracket assembly
before pics :
during :
complete :
Same routine for restoring the battery box:
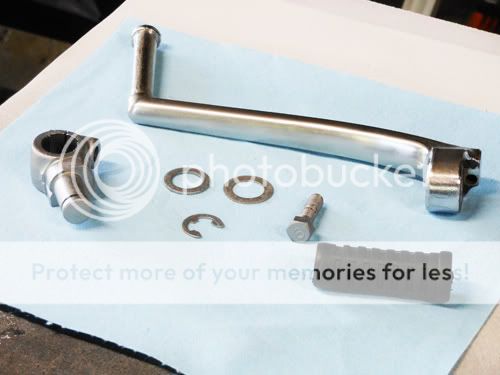
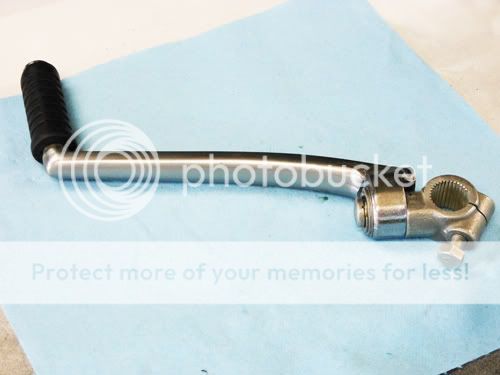
Kicker..... pretty ugly
it's decent..
all done:
Original:
After:
I had to make up a set of spacers for the proper preload
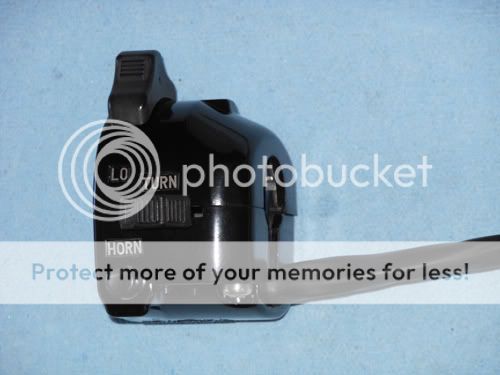
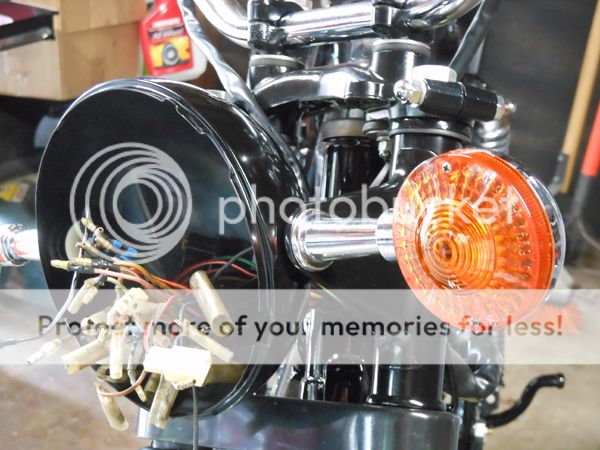
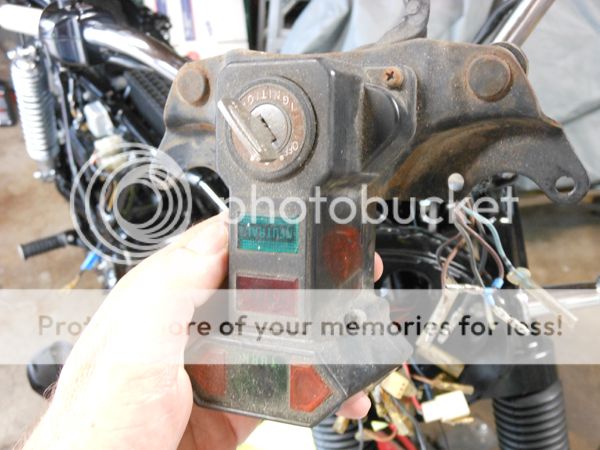
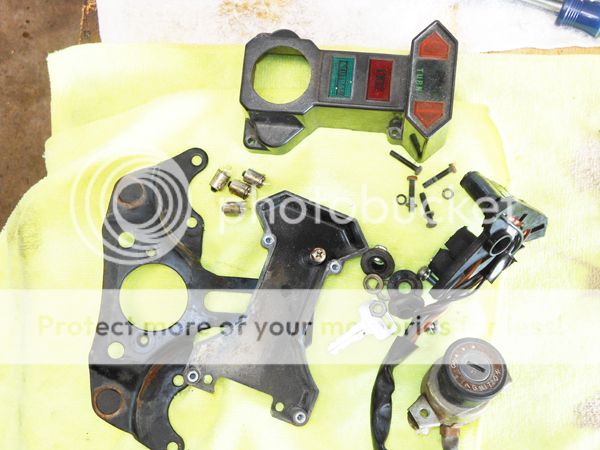
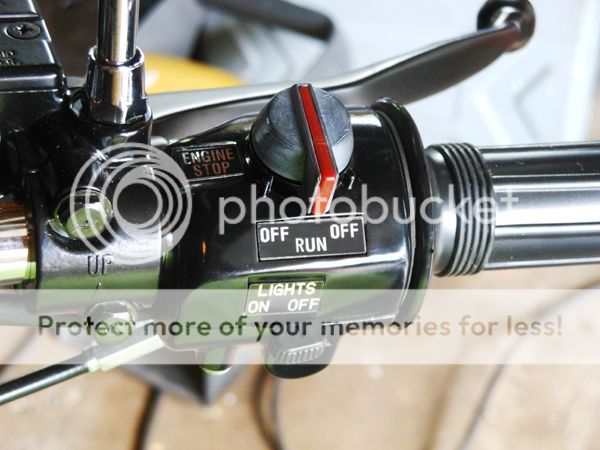
The switch gear ..... before:
I pulled everything apart for stripping and a good cleaning, then painted the housings ... plus new shrink tubing for the wires.....
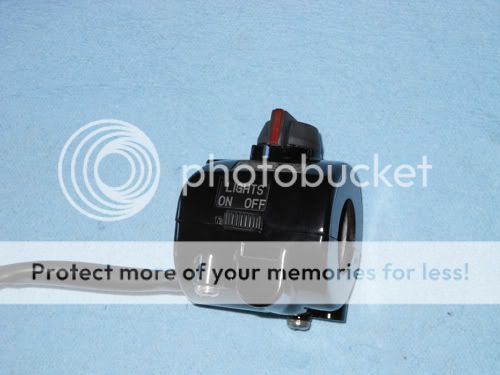
after:
I double checked proper operation and connector continuity with the multi-meter... very happy.
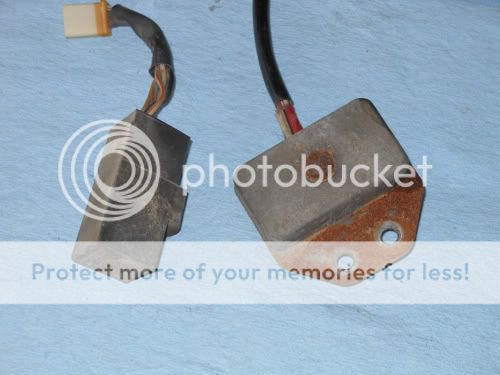
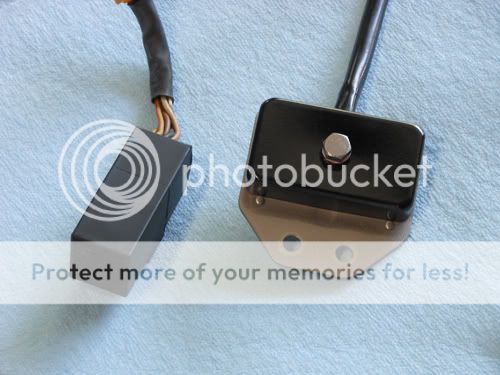
restored the resistor pack and cleaned up the flash cancellation unit-
It was a real treat to start with an unmolested harness vs. the usual mess I find myself with.
Cleaned, every wire and connector checked for proper continuity and matched against the diagram..... plus some new wire wrap:
The shiny bits were... well, not very shiny..
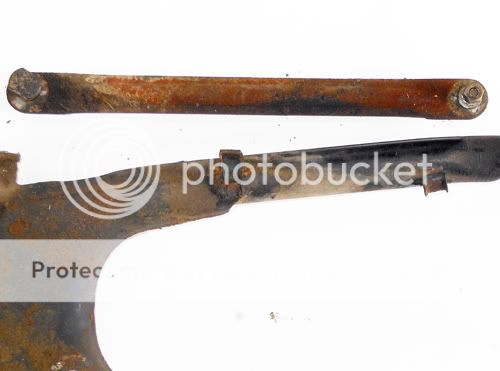
Here's what I scored from a local kid that is chopping up , what was, a perfectly nice RD:
rear master lever pivot, spring and rod.
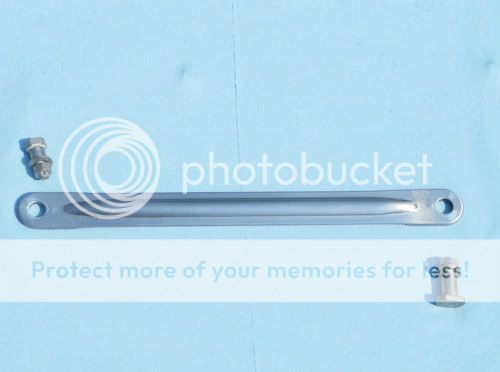
Caliper bracket stay-
after:
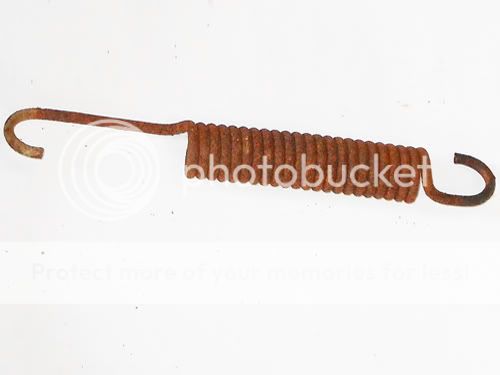
center stand spring-
after
Rear brake lever restored. I used liquid rubber non skid on the foot pad.
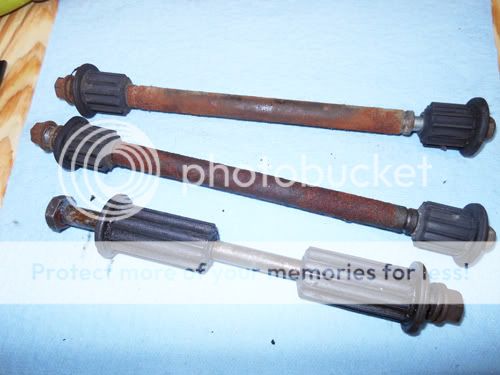
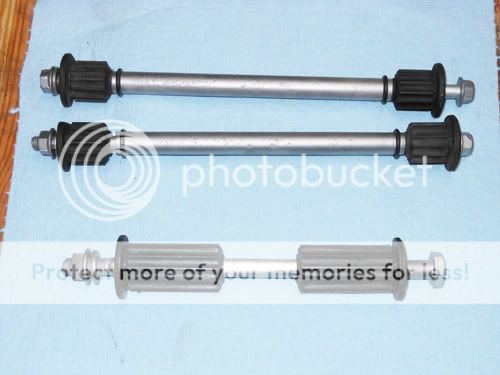
Restored the rear axle bits....
ick:
after:
powder coated stuff !
new bronze swing arm bushings.... more before and afters
after
before:
after
before
after:
the foot pegs, springs and fastners were pretty nasty
restored:
.. and installed the swing arm, center stand, shocks etc...
so I completed the metal finishing and paint on the headlight bucket, ears etc... before:

complete...
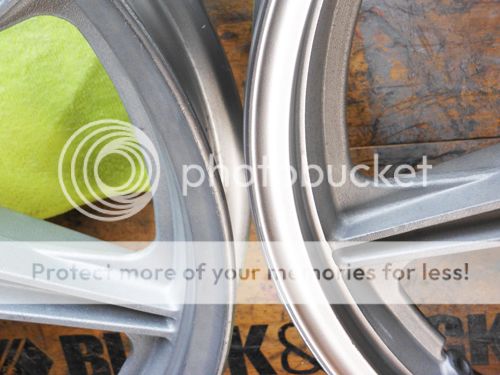
the alloys were very oxidized.. pits were pretty nasty. Here is a close up "before" pic:

Gave them a blast with bead:

I wet sanded and polished the rims ( wheel on the left is before plolishing , the wheel on the right has the rim polished )

New wheel bearings and seals installed:

Finished up with the rotors and hardware .... new tubes and tires:

brake calipers did not look too bad from the outside, however they had a layer of rattle can all over them, the pistons were horribly pitted with rust and it sure was fun taking them apart. ( ummm 120 psi did it ! )

Tip- when something is caked with nastiness, use stripper and clean off before media blasting. It helps prevent a bunch of contamination in your media.

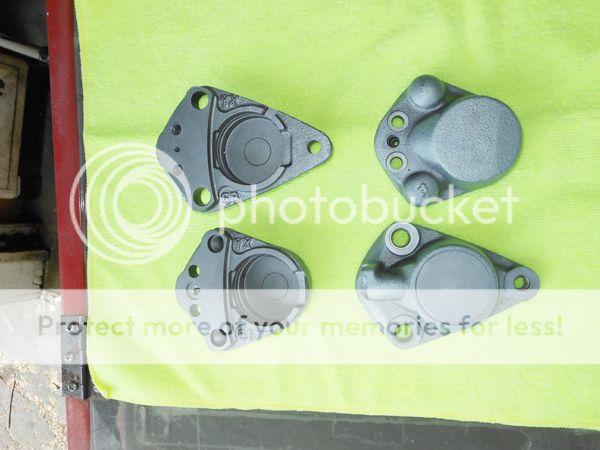
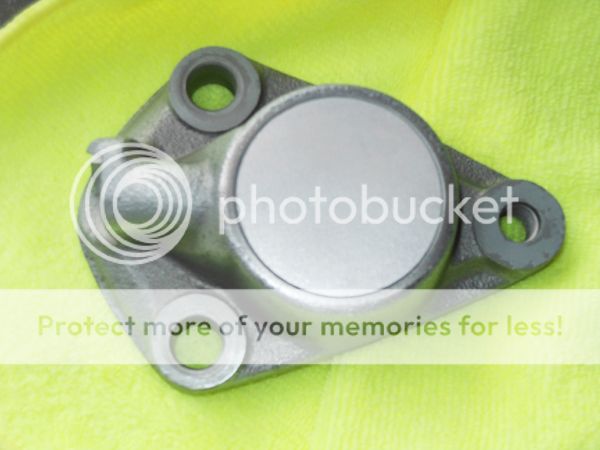
Here are the bodies after a blast

I left the thick aluminum plate logos bonded to the calipers and block sanded the surfaces. The thin repro decals need a smooth surface.

I prepped and painted the bodies with ceramic caliper paint ( ceramic with a small c ), bought some new seals, brake pads, some good pistons, cleaned up the hardware and plated some fasteners

I use high temp 100% silicone grease for assembly ( some call it "red" or orange grease )

And for your viewing pleasure- the before and after pics:


I installed the wiring harness and associated bits:


I tore it down blasted the bracket, painted, cleaned everything up, replaced a lamp, checked the wiring and refinished the plastics:


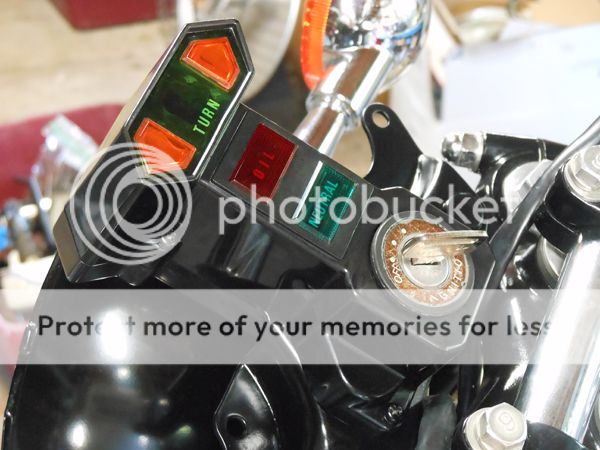
Completed and installed .... yeah, I know that ring on the key switch REALLY looks like poo now, however later you will see this with a fresh decal

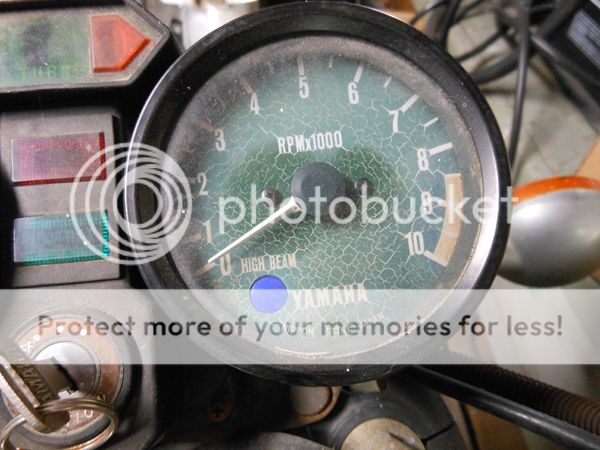
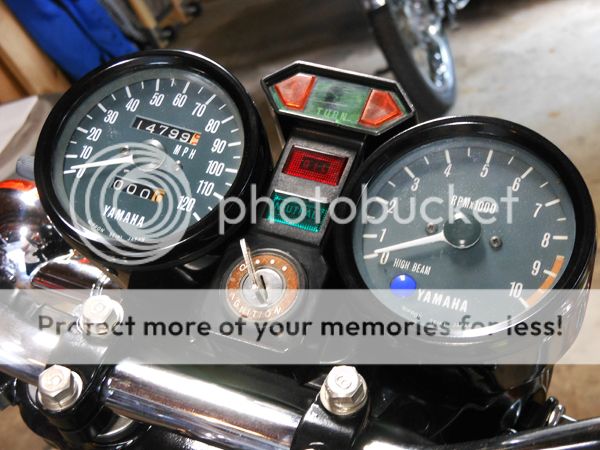
The speedometer was in much better shape and I got lucky with a used tach in that the fading/ patina was close. The buckets were dinged up and rusty, so I gave them a blast and completed the metal finishing and paint. The foam ring dampers are from my XS parts pile and I plated all of the fasteners.
Before:


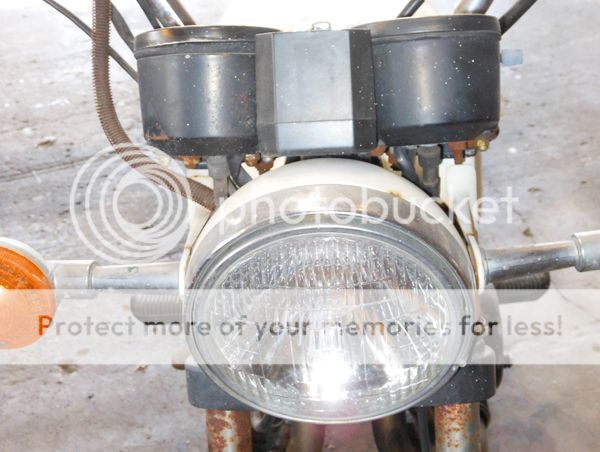
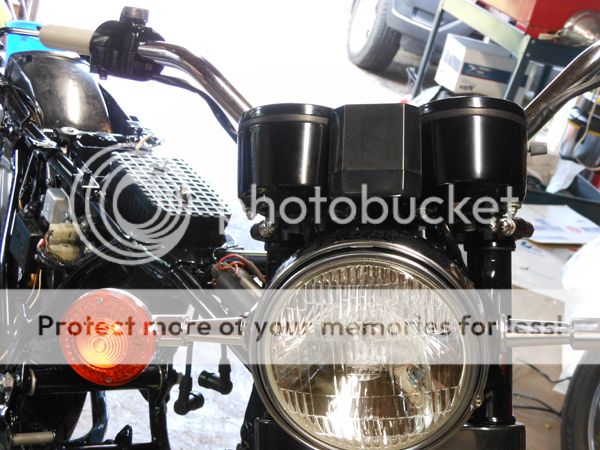
All done plus completed headlight bucket wiring and buttoned it all up:


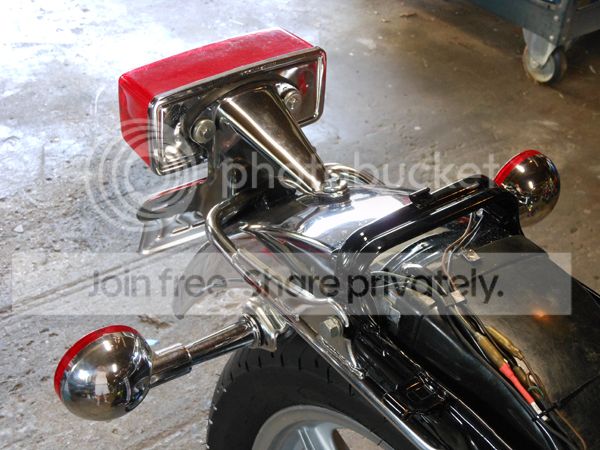
Installed the rear fender, grab rail and lights.... before:

after:


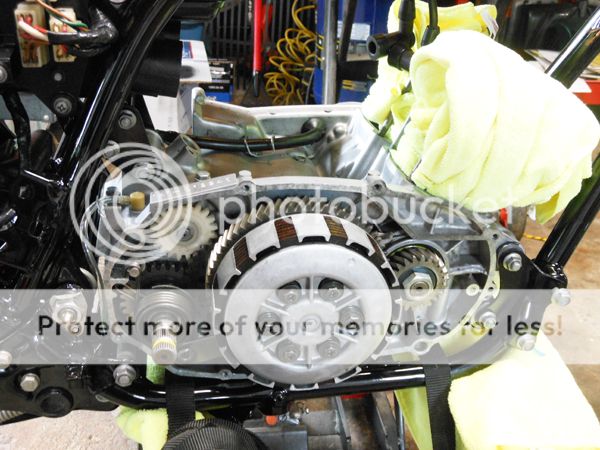
I dropped the engine it ....

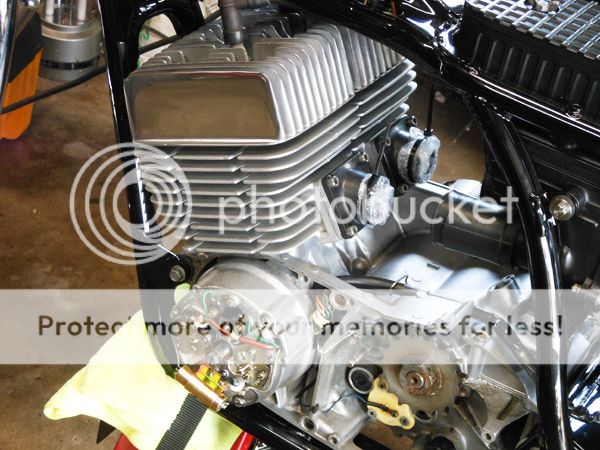
Jugs on... I still need to get a set of vibration dampers

Heads on a torqued, reed cages and boots on just waiting for the carbs. Fresh ignition set installed, points gapped. set timing

The heads are polished to a mirror finish to match the case covers ... I still can't seem to get the hang of photographing chrome or polished alloy... trust me, they are shiny !

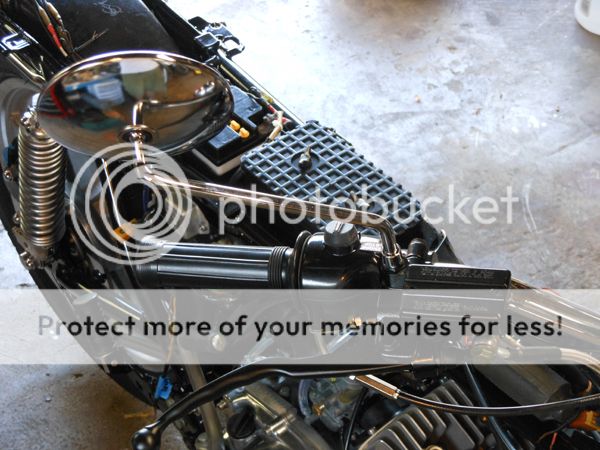
new battery in and "hot tested" everything. Zero issues. New clutch lever, front brake master , new front brake line, throttle cable, speedo cable, new grips and mirrors.


Reminder of what I started with:

I put the autolube pump back together and installed it and the RH case cover, then filled the gearbox with oil. I checked the pump stroke, installed the cable and sync'd


The inside of the tank was a bit rusty with a nice layer of varnish in the bottom....

I added some gas to swish around as a start to get the varnish soluble. A few hours later I realized that the petcock had a hole in it leaking gas. I removed it and made a block off plate so I continue with the tank cleaning and prep:


As the cap gasket was perished, I used an expansion plug for the filler so I could begin with the de-rusting:

All of the muck, debris and rust removed inside:

Metal work and prep near completion. Needs final blocking


I went with graphics from the satin black Canadian C model, however mine is gloss black.
New 3M decal set

decaled and cleared, color sand and buff


So I have new hardware to go with the new fuel line and petcock:


Before:

After:


Oil tank ready for some mosquito killer
: 
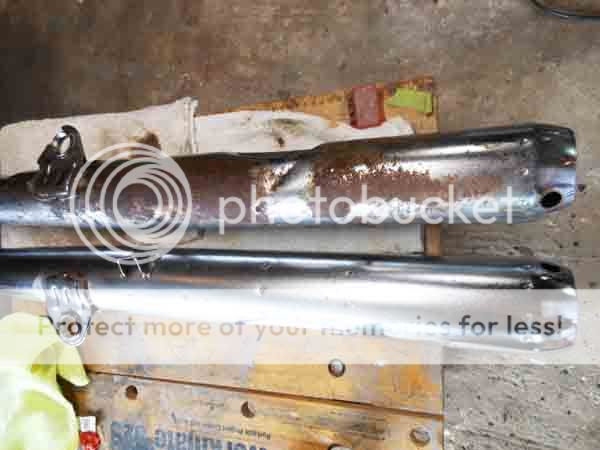
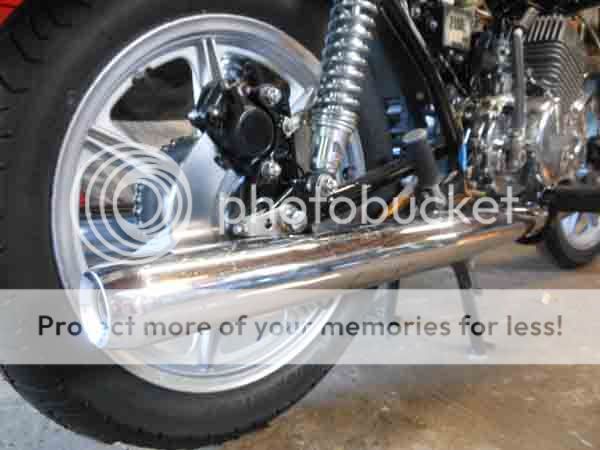
The head pipes were really nasty on the underside (mostly unseen side) and same with the mufflers.
Original pic from when I drug the bike home:


After cleaning and installed.


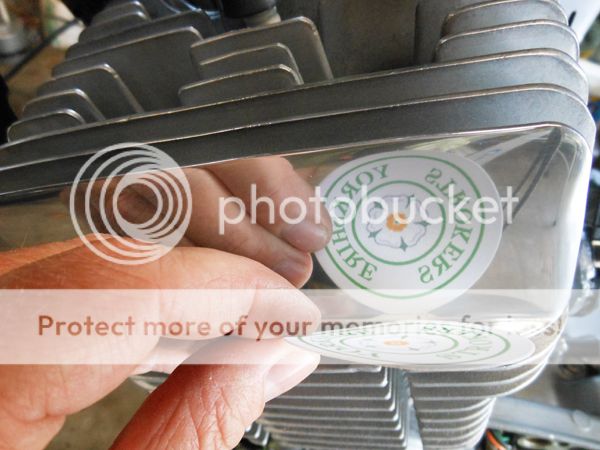
splurged on some decals and rubber bits:

Cylinder and Head dampers:


Switchgear decals:


Caliper and engine emblems:


I have completed the warm in cycles, have yet to take it out for a break in series. ( I'm not putting the ratty seat on, even for a 15min break in ride )
http://youtu.be/blZAyPjpFsA
I restored the seat and associated bits:


Blasted and fresh chassis black epoxy:


After:


After:

New reproduction Foam from HVC:

New reproduction cover from dis-covers .
( I can't speak more highly of a supplier- made in England, awesome service and the shipping was free to 'merica )


The rear master cylinder bore was horribly pitted and I could not find a good replacement to rebuild. So I picked up a 12mm master and made a compound adapter bracket. I matched the spacing and the angle of the stock set-up. ( It's like Yamaha welded the bracket to the frame out of position / off-set by mistake and then cast a crazy master to fit it ! )


I had to fab up a linkage adapter and used a banjo bolt pressure switch for the brake light:


New brake line, filled and bled:

"after pics" :


so as of today, it's got 21 miles on all of this freshness !
crappy video camera shot
http://youtu.be/Ui6-TIDvmg