Follow along with the video below to see how to install our site as a web app on your home screen.
Note: This feature may not be available in some browsers.
We noticed you are blocking ads. DO THE TON only works with community supporters. Most are active members of the site with small businesses. Please consider disabling your ad blocking tool and checking out the businesses that help keep our site up and free.
This is going to be a condensed build thread. I've been lurking on this forum for quite a while and first off I want to personally thank all of you who have helped me with my project either directly or indirectly. I documented the whole process on my phone for my own purposes. I now realize that I should have done it the right way: on this forum and with a good camera. Please excuse the photo quality. Here we go!
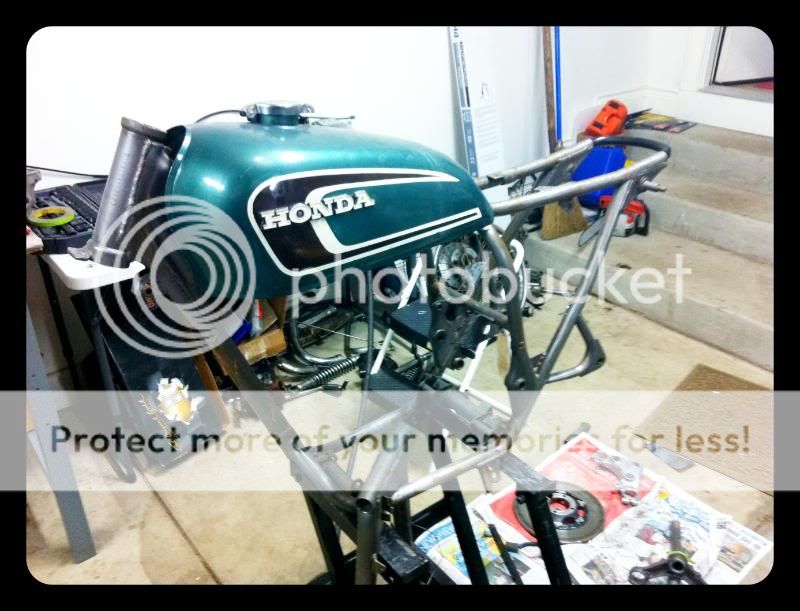
Started with a 1974 CB 360 that you may have seen on this forum before. I bought the bike in Texas about a year ago from someone who stripped it for a cafe project but didn't accomplish much else. The motor was free and tank was clean. It only had about 5000 miles on it. Offered him a bit above $300 and he handed it over. The bike now sits with 7 months of work into it. I am finally in the home-stretch and wanted to share my build.
Here is the bike as it was when I first picked her up:
I was busy with my Firebird project at the time so it sat in the closet in the one car garage below my apartment for 3 months or so.
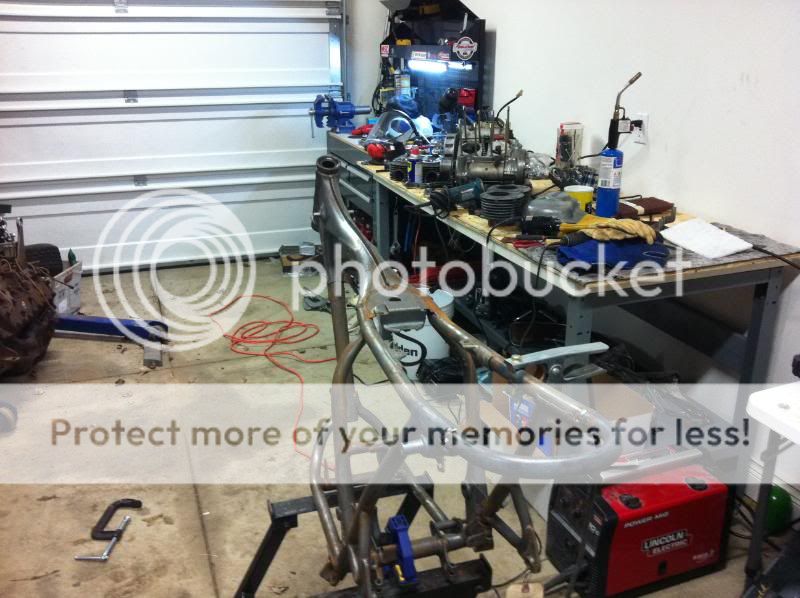
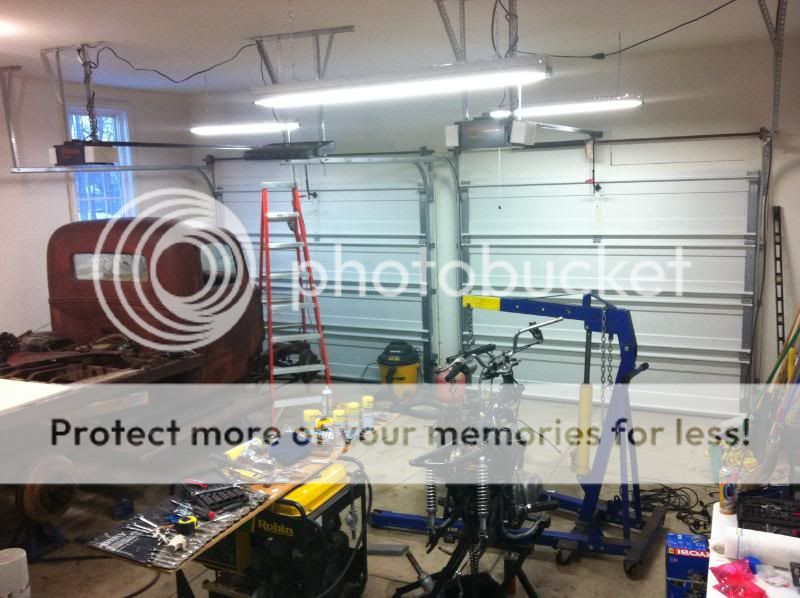
I ended up moving back to Detroit during the middle of winter. My tools were still in TX for a while. You'll see the garage evolve from a bare bones space to a full workshop.
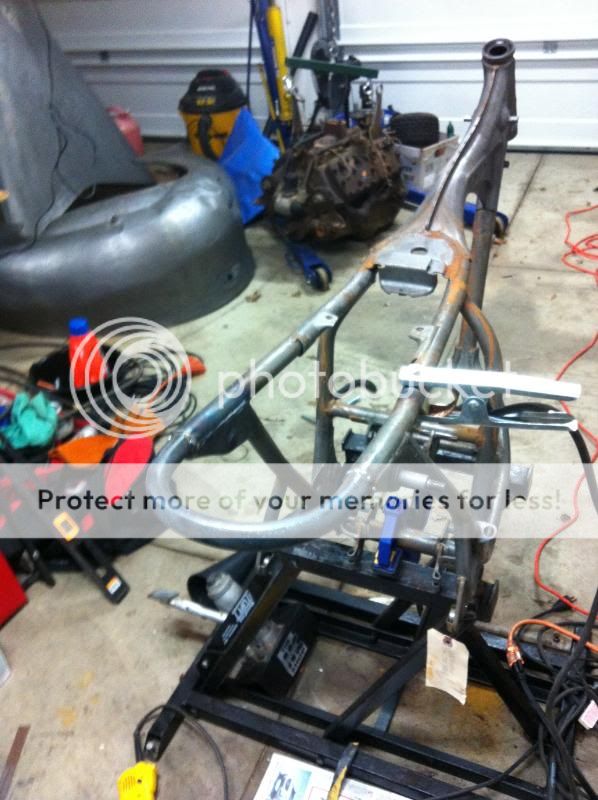
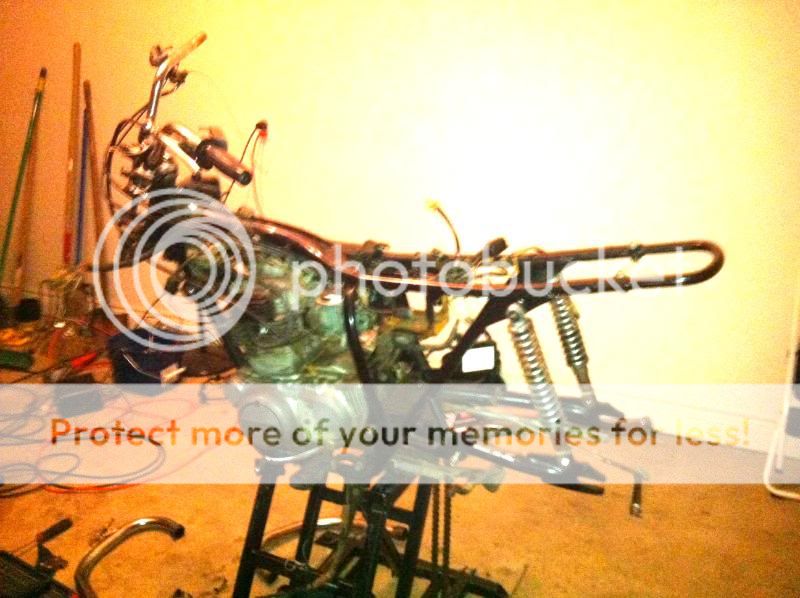
Here is when I first started stripping the bike. See how bad the light was in there?
A few weeks later my father and I installed some T8 lighting and moved in some benches and such.
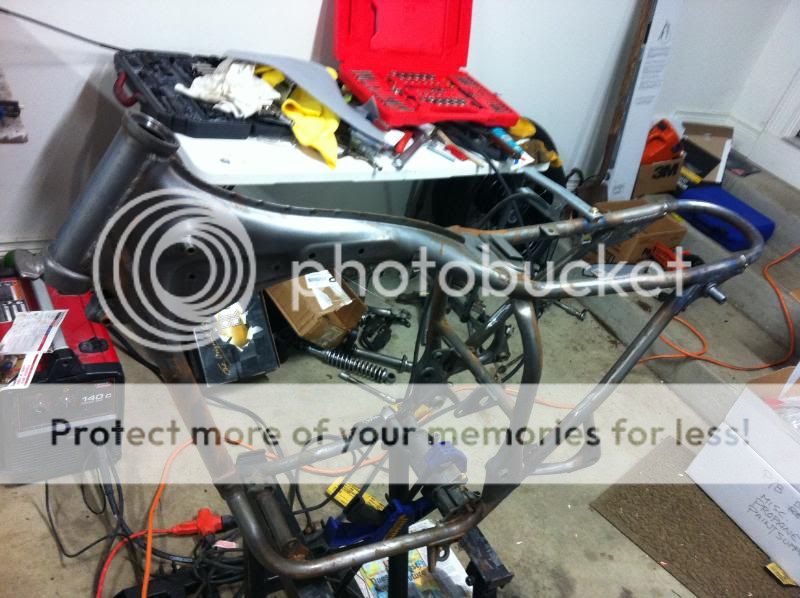
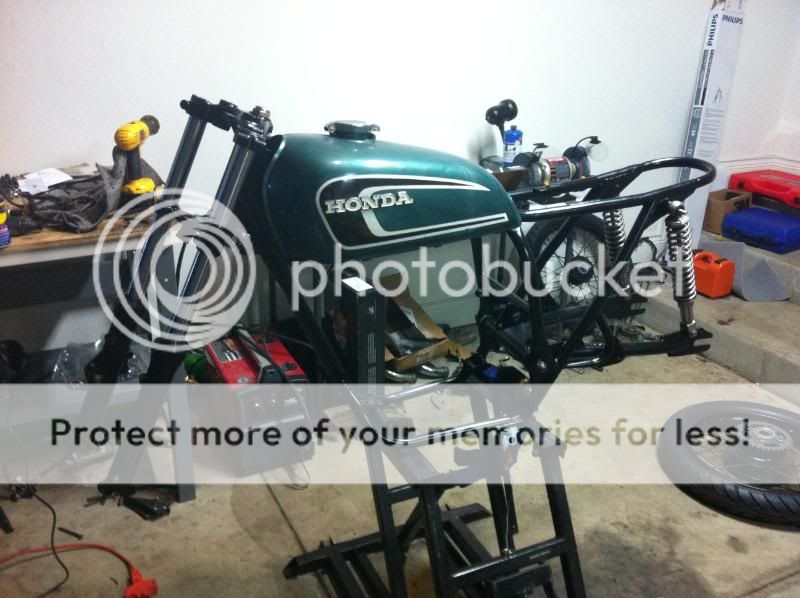
Stripped the bike down to the frame in a few days and immediately had all the "large" hardware acid dipped. Tank will retain the original paint though.
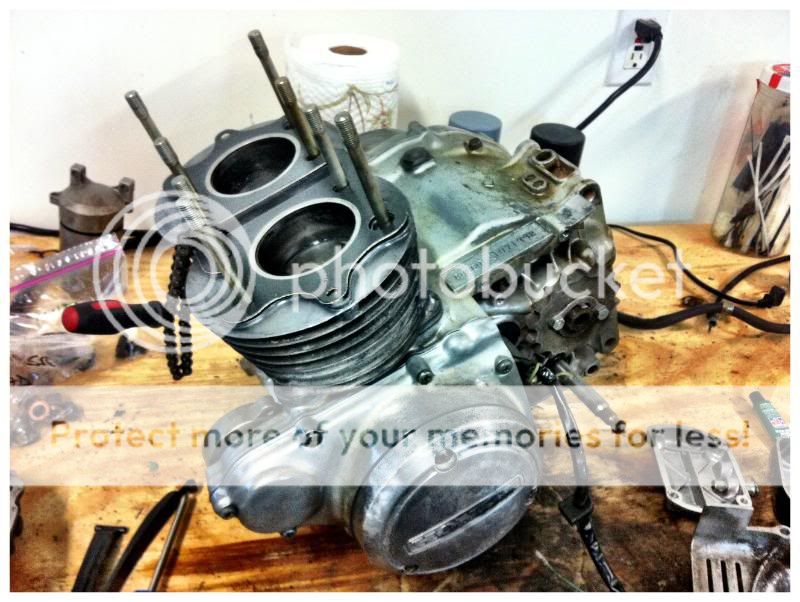
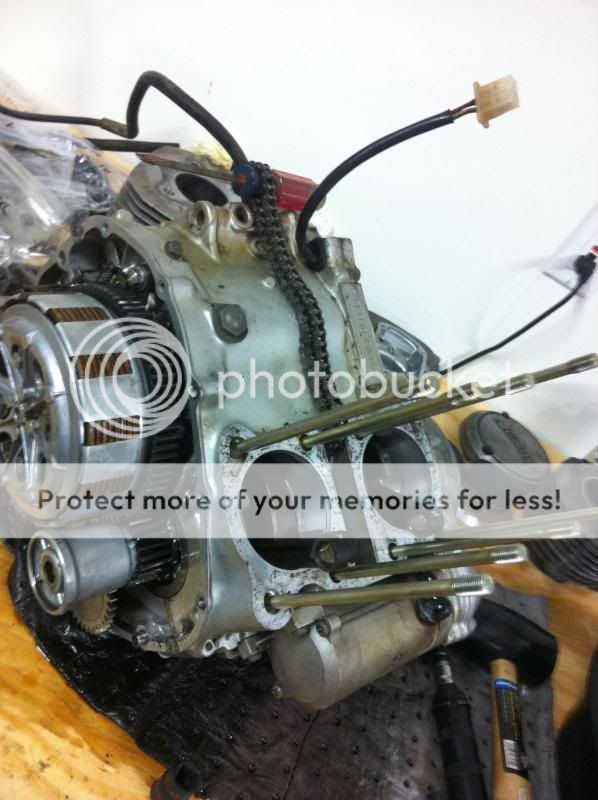
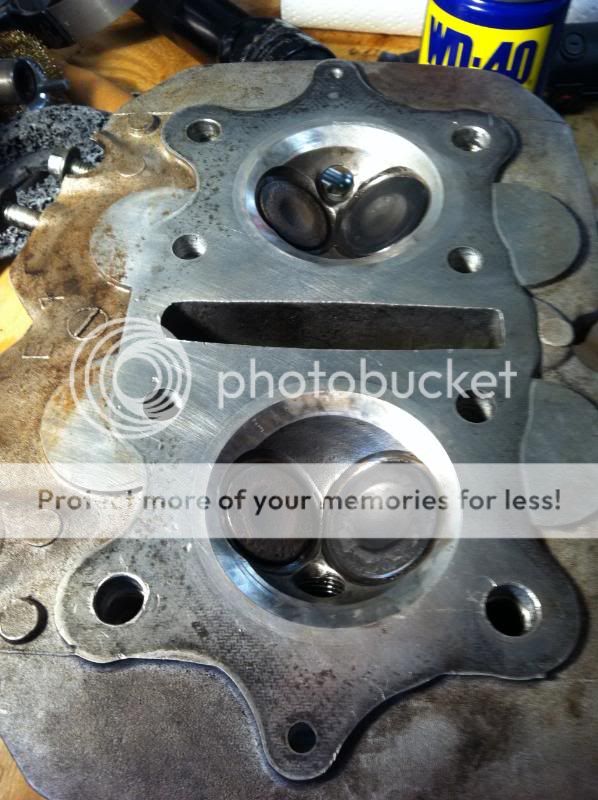
Started stripping the motor to rebuild the top end. Rings, gaskets, valve job, a good cleaning, etc.
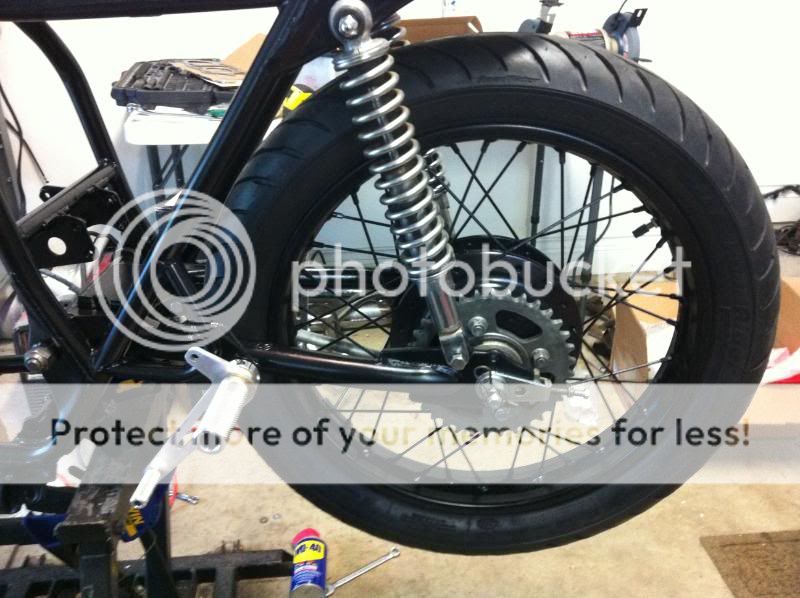
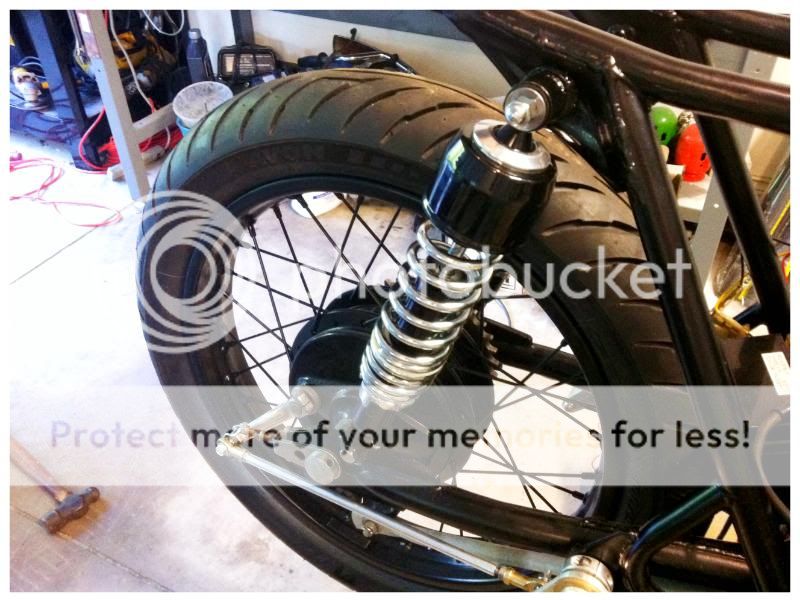
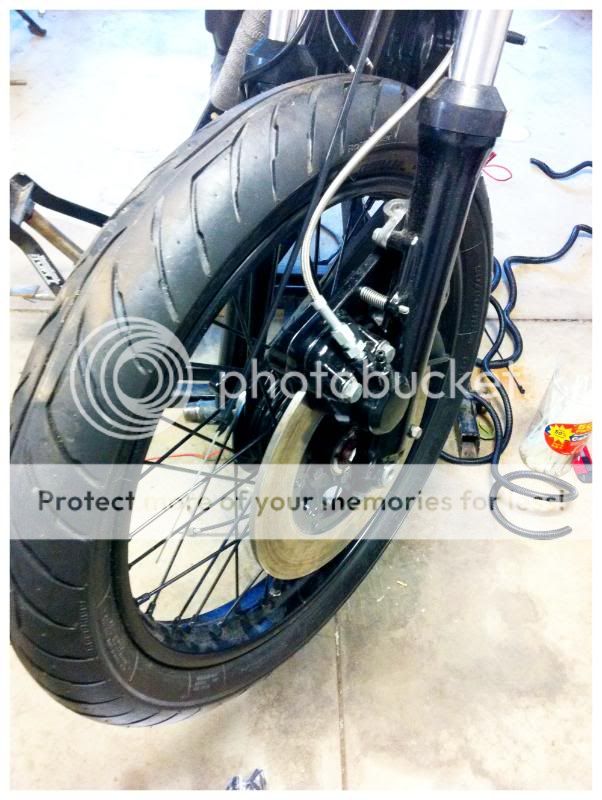
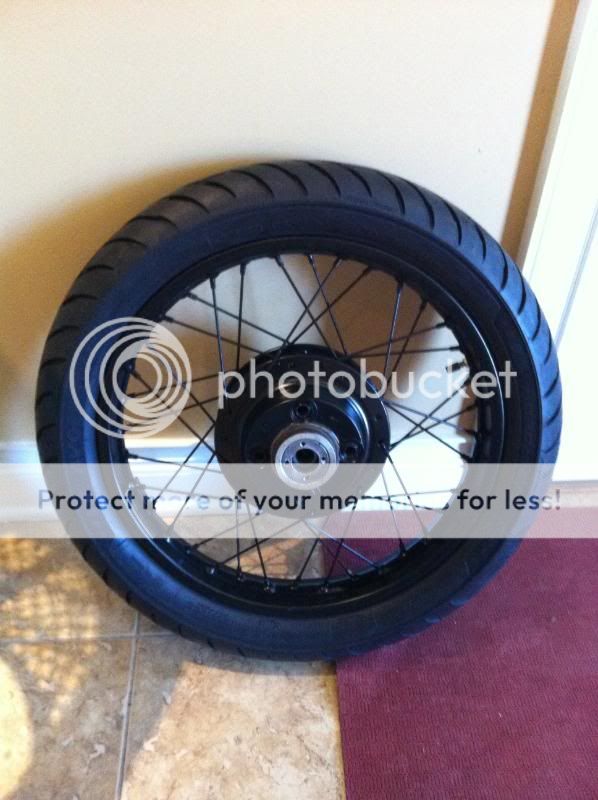
While this was happening I had the wheels powdered and new rubber mounted. Avon AM 26's in 90 and 100. Stock sizes if I am not mistaken. One of the best looking tires I've seen. I also had the bearings replaced with an All Balls kit front and rear/
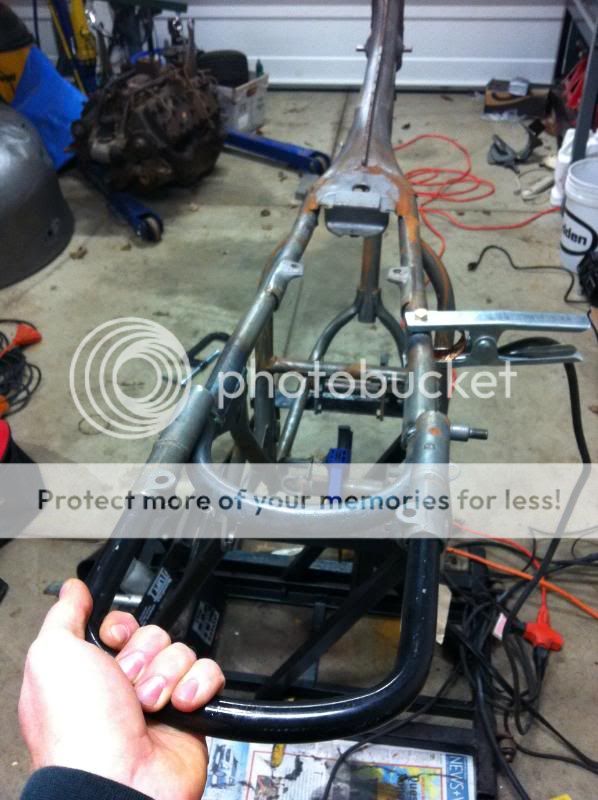
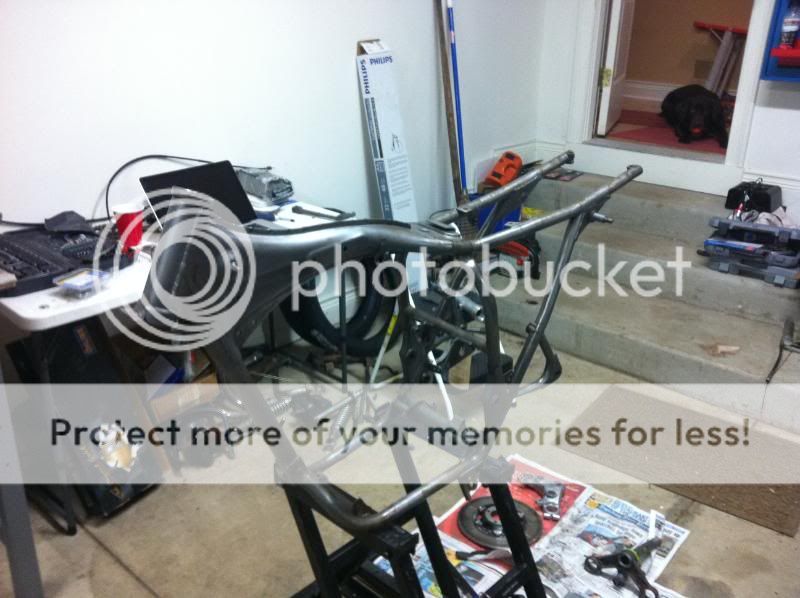
The frame was chopped about 6" and I welded in a new rear hoop to shorten the look of the bike. Keep in mind that the PO chopped most of the unused brackets off (and lost several critical parts ) before I got the bike.
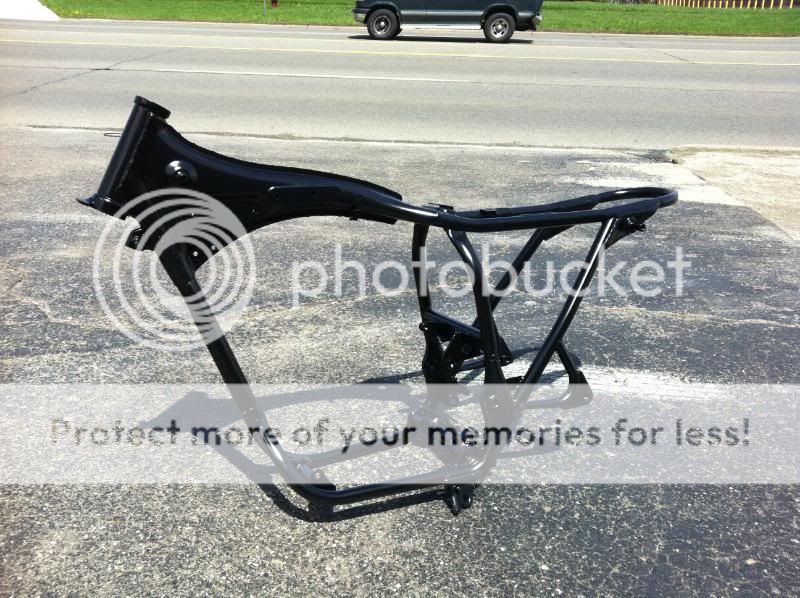
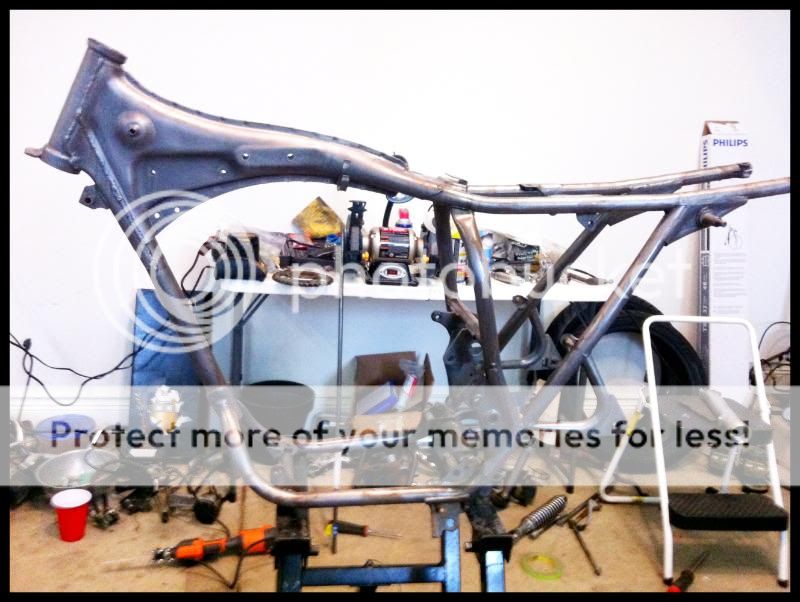
Frame was then buttoned up and powdered black. I also powdered the trees.
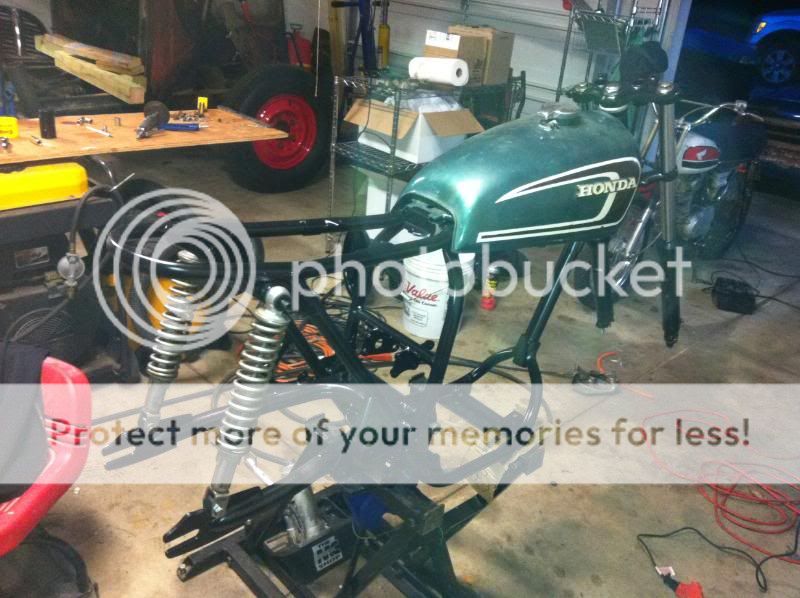
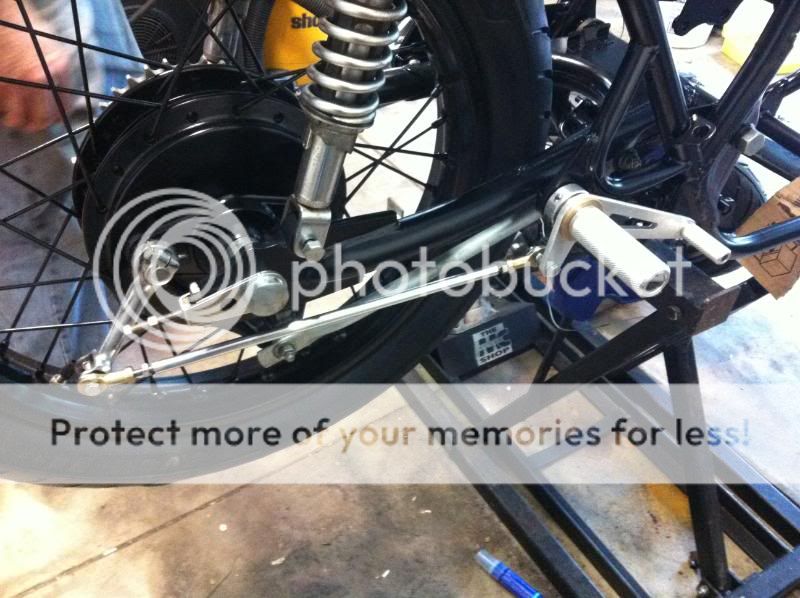
Started reassembly after I got the frame back. I changed the steering bearings to an All Balls racing kit as well as replacing the rubber bushings in the swing arm with bronze ones.
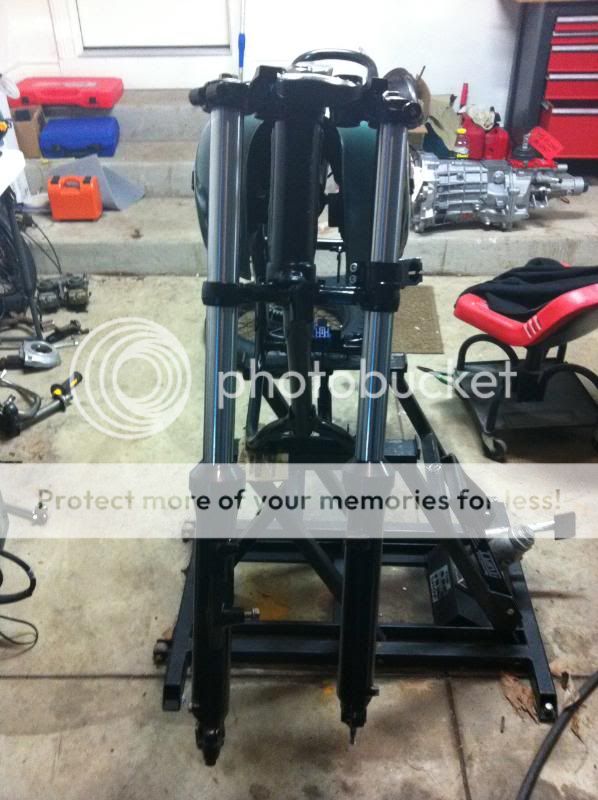
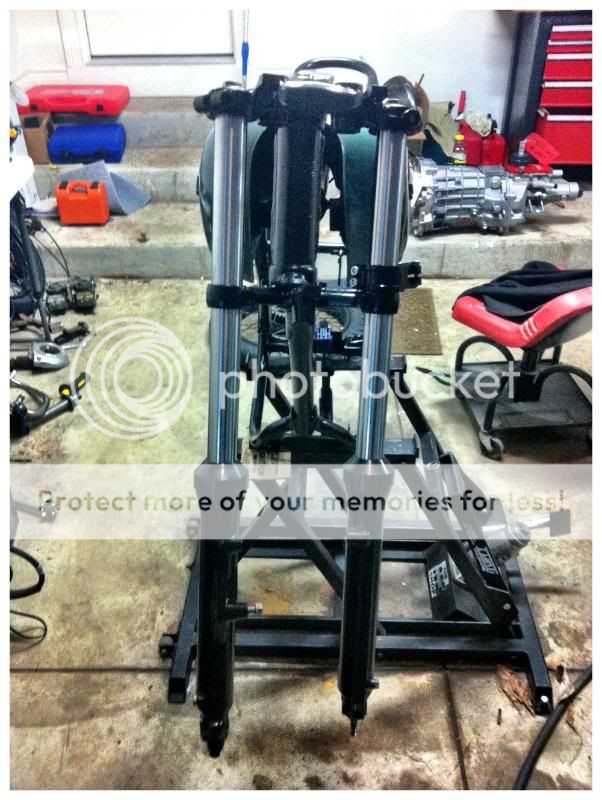
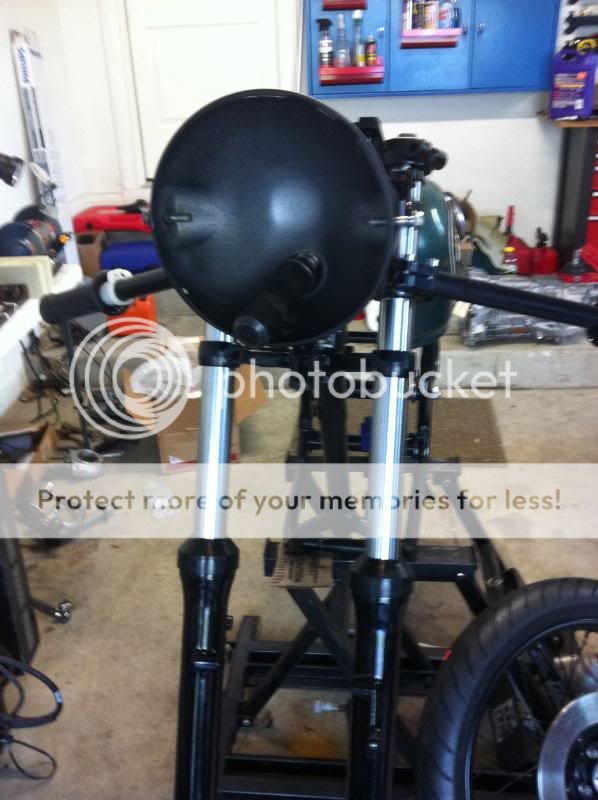
While the frame was out the forks were disassembled, blasted, painted with appliance epoxy, and rebuilt with new seals. Here they are installed.
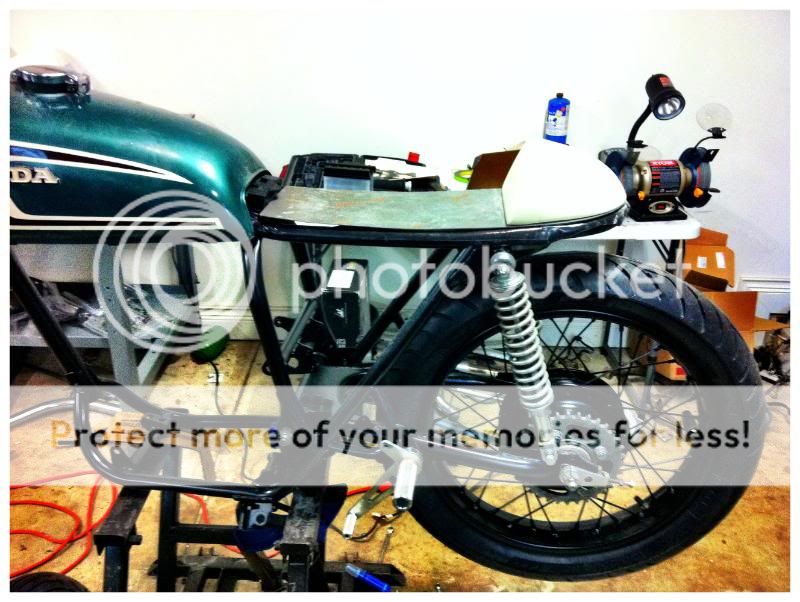
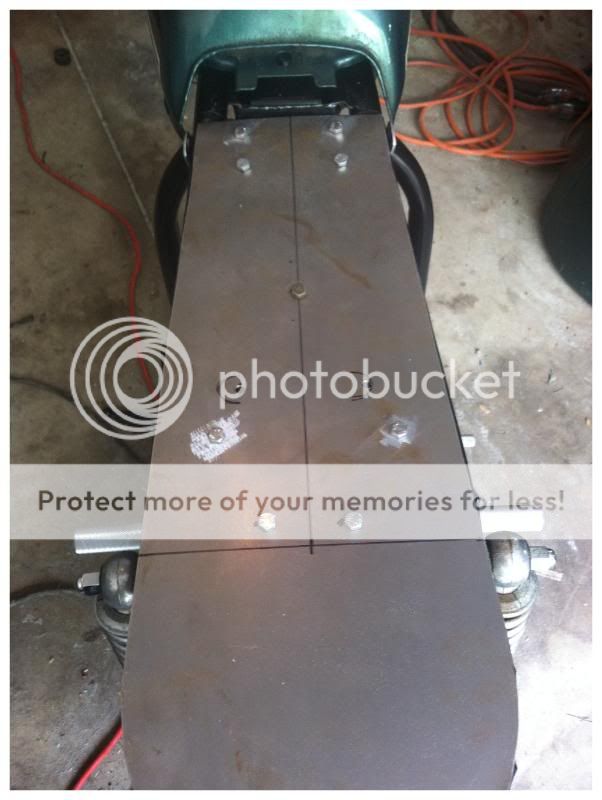
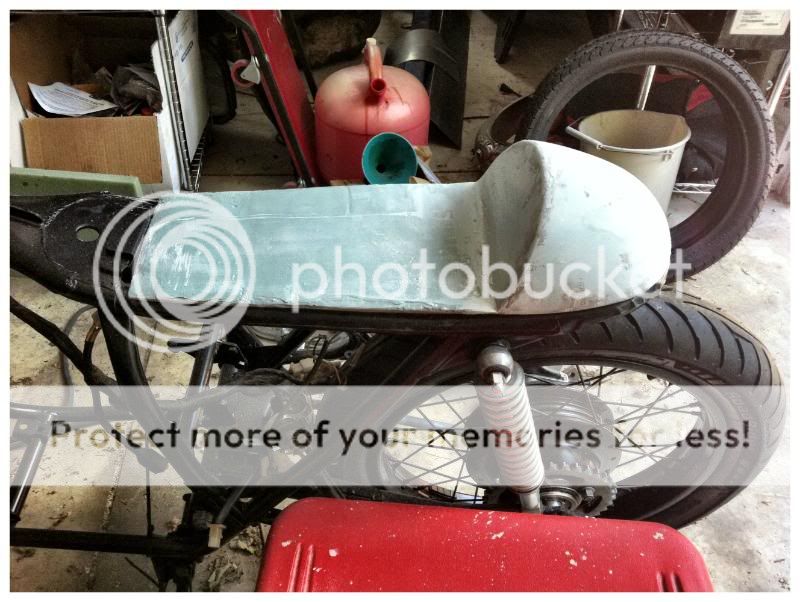
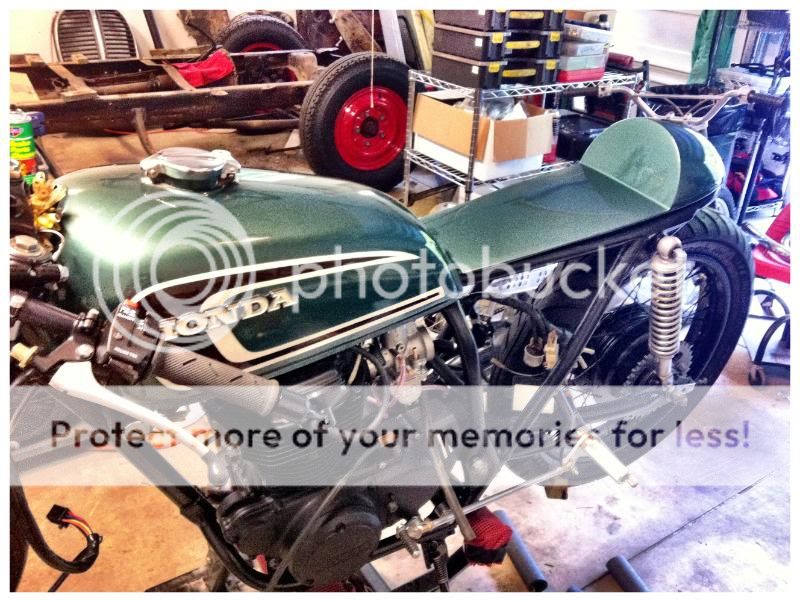
The next project I had to tackle was the seat pan. It was cut out of .050 mild steel on the beverly shear to fit the current hoop pattern.
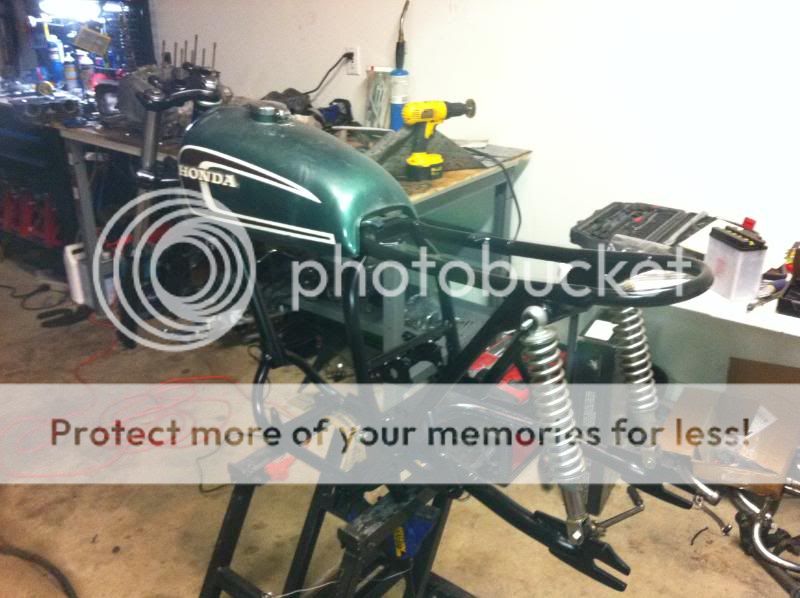
I couldn't wait to try out my new goodies so here are my rearsets mounted up with the new seat pan:
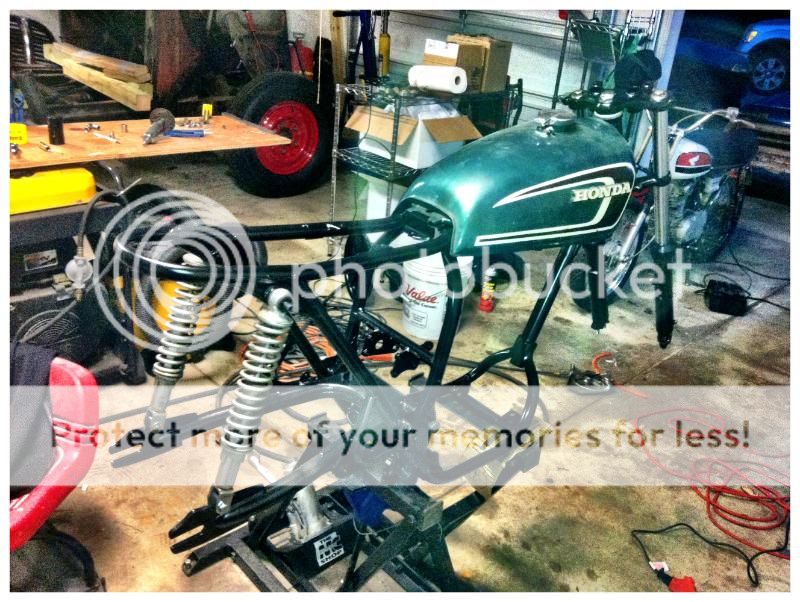
Rear wheel was assembled and mounted in the swing arm while I was figuring out the mounting and linkages for the rear sets.
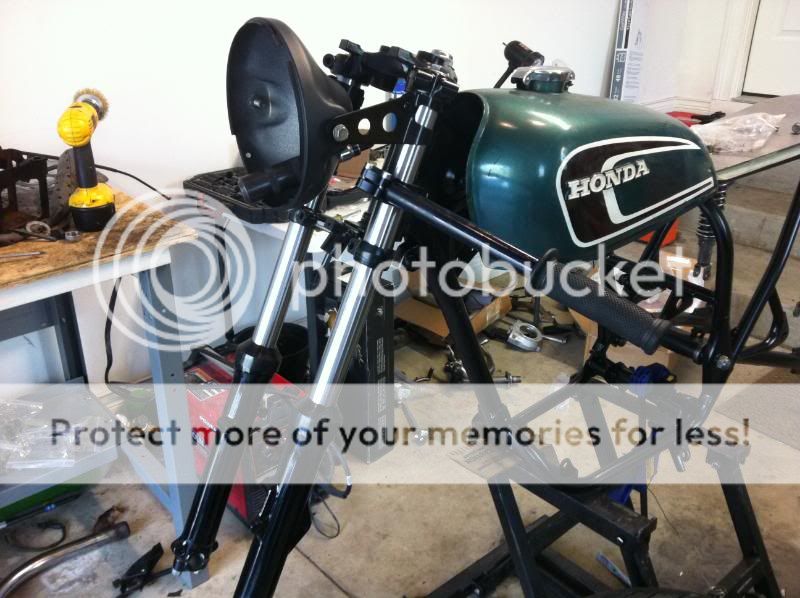
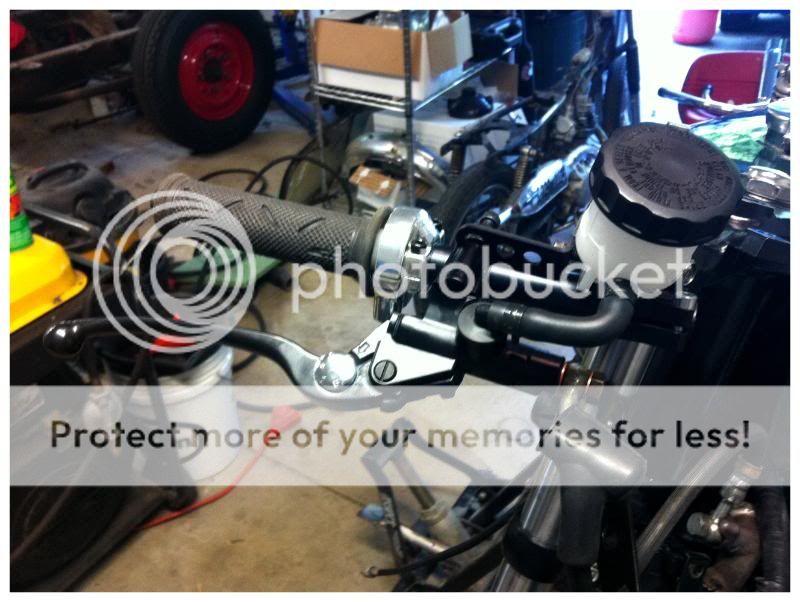
I also gave my headlight bucket and clip-ons a try. Unfortunately the Vortex clip ons were 35mm? and I had to have aluminum shims made to fit the 32mm forks. In this photo the bars are much too low. They will be moved above the headlight brackets soon.
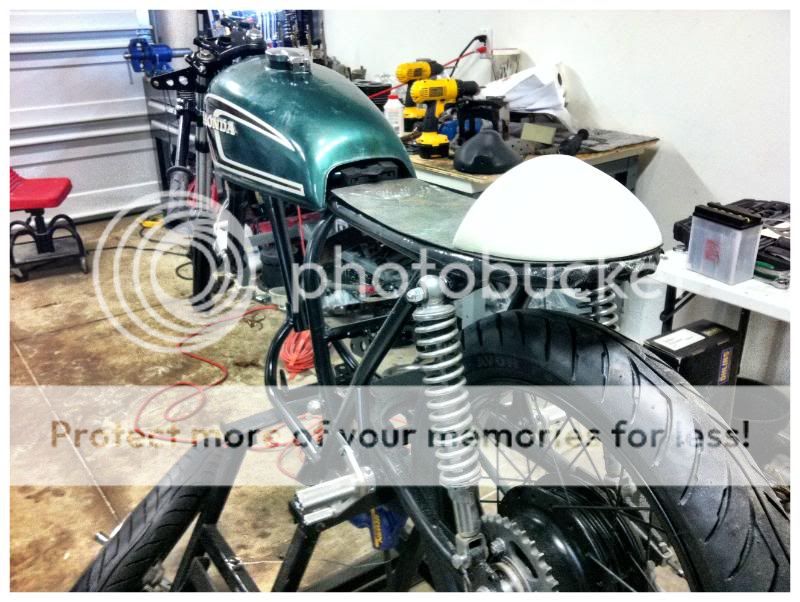
I took some modeling material for machinists called Renwood to make the bump seat. Small pieces were glued together to make a piece large enough for a bump to be shaped from it.
The seat pan was laid out for mounting the electronics. Then studs were welded underneath for the mounting. Studs were also welded in to hold the pan on to the frame. I actually used conduit brackets and Plasti-dipped them to hold it on the frame. They actually came out quite nice.
Here is the bike with the front wheel mounted, as well as the painted brake caliper. I dragged it outside for a few shots with the bump seat to see if I like the likes.
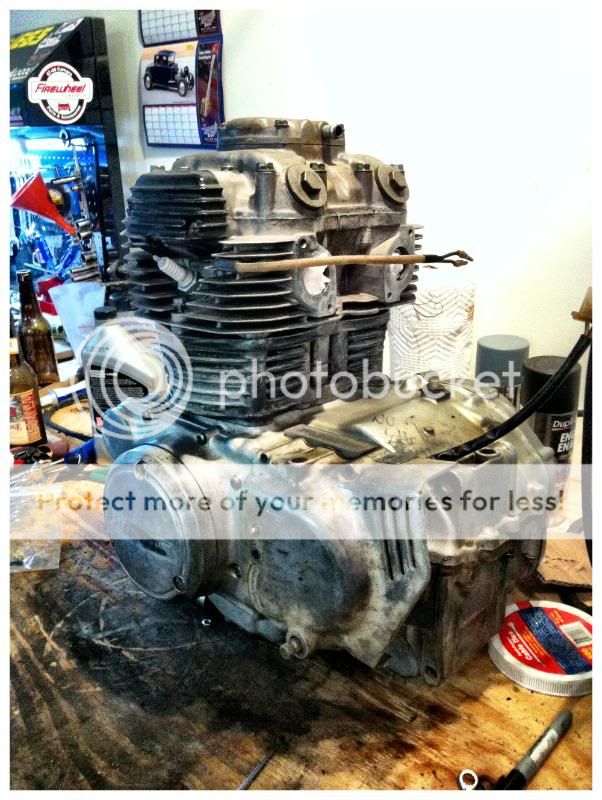
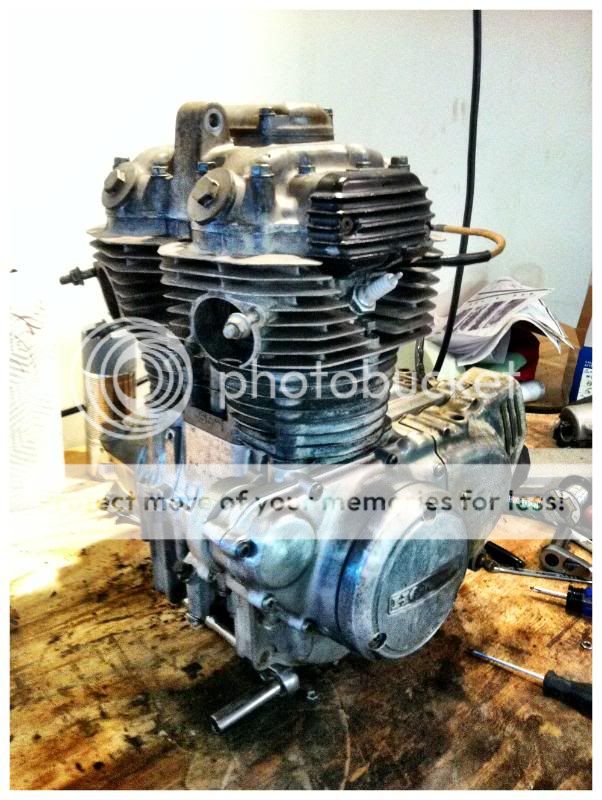
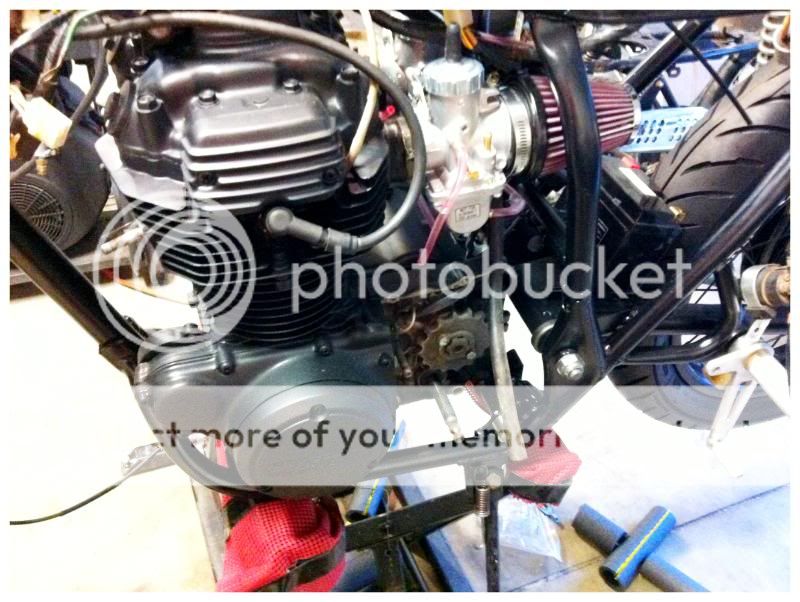
Meanwhile all of the engine parts arrived and the motor slowly took shape. I forgot to document the paining process but I used Duplicolor engine primer and matte black on it.
After the engine was painted and installed in the frame I glassed the seat pan and bump and used body filler to smooth it.
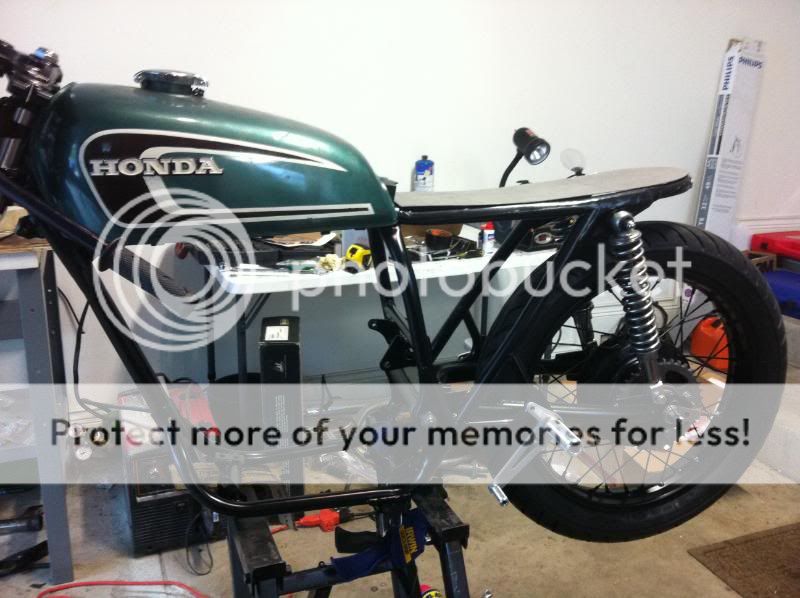
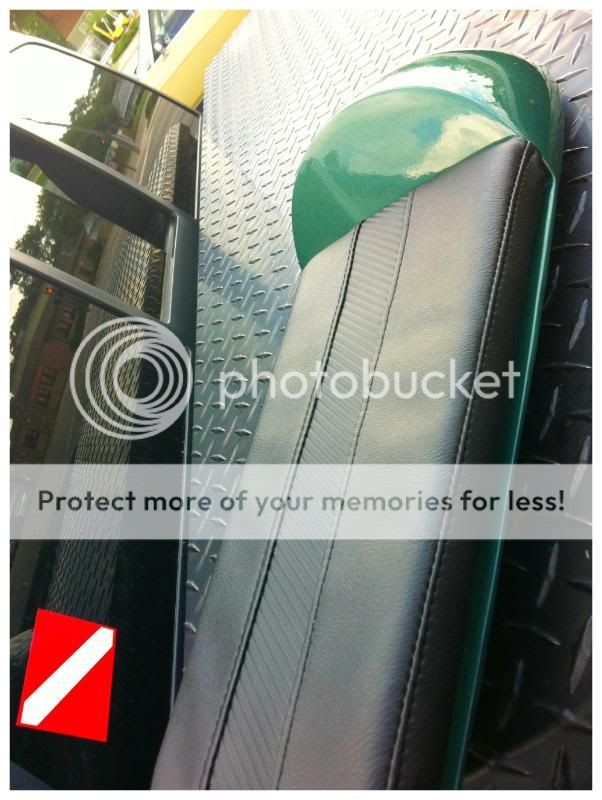
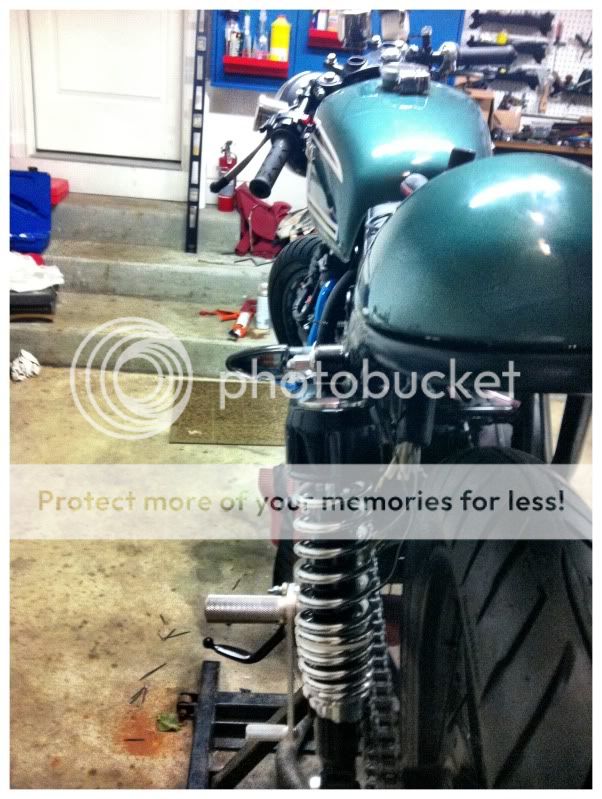
A week later it was back from final prep and painted to match the tank. The tank was rubbed out and touched up as well.
My upholsterer had the seat for a week or so but I am really glad they took their time. The seat pad came out perfectly. It is velcro'd onto the pan.
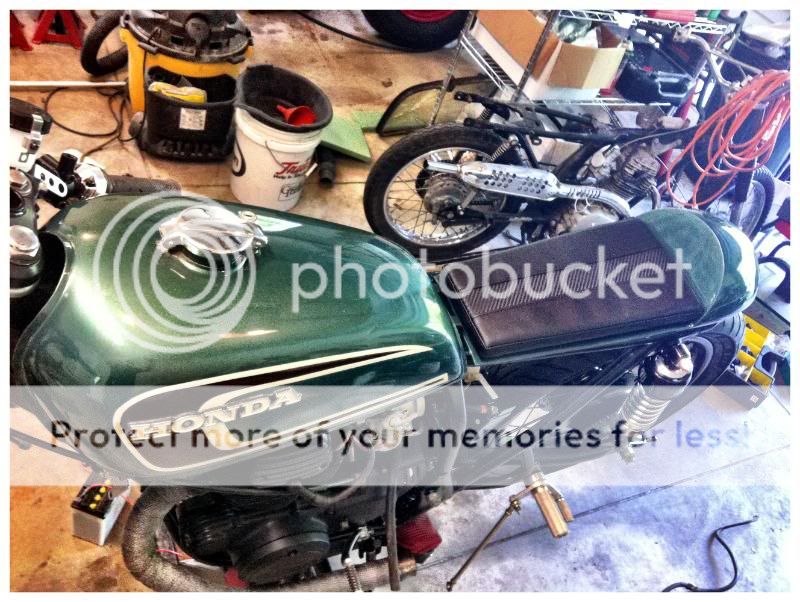
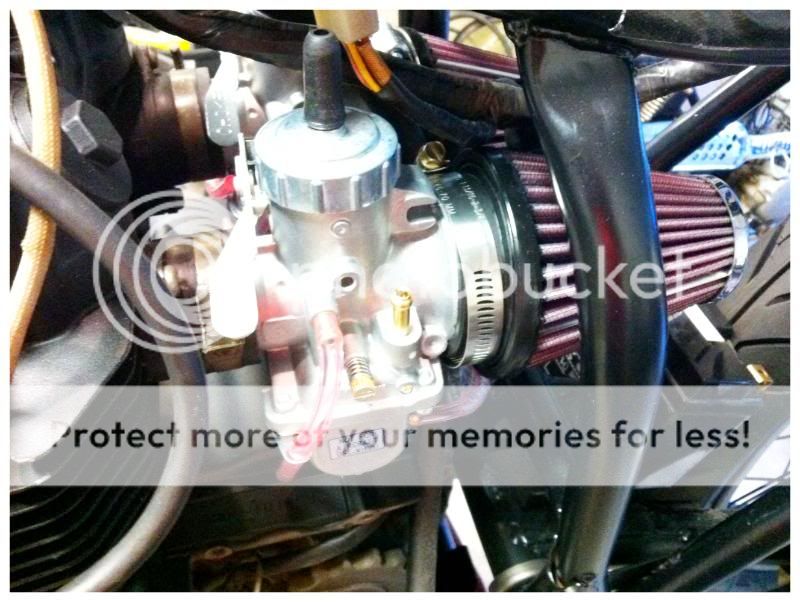
Here is the painted motor mounted. I also mocked up my Mikuni VM 30's and K&N pod filters.
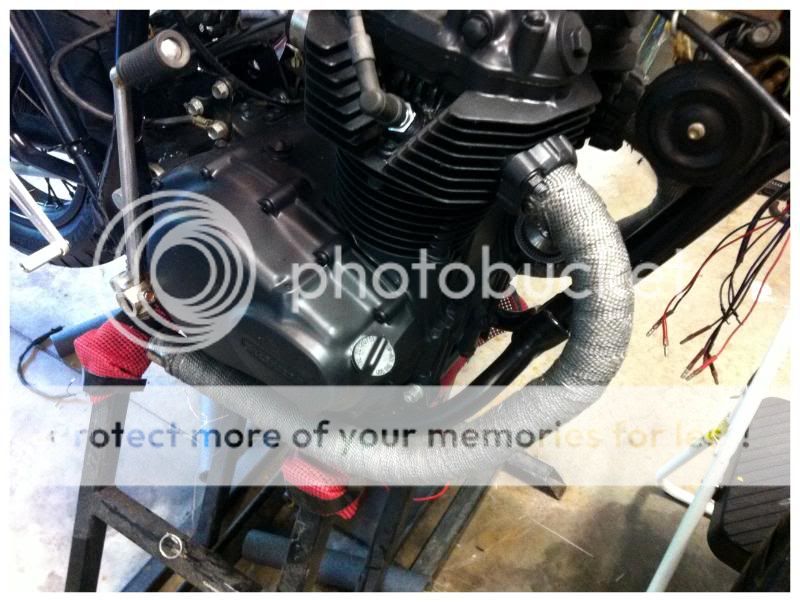
The exhaust has also been wrapped in black header wrap to keep with the theme. I will end up adding shorty mufflers eventually.
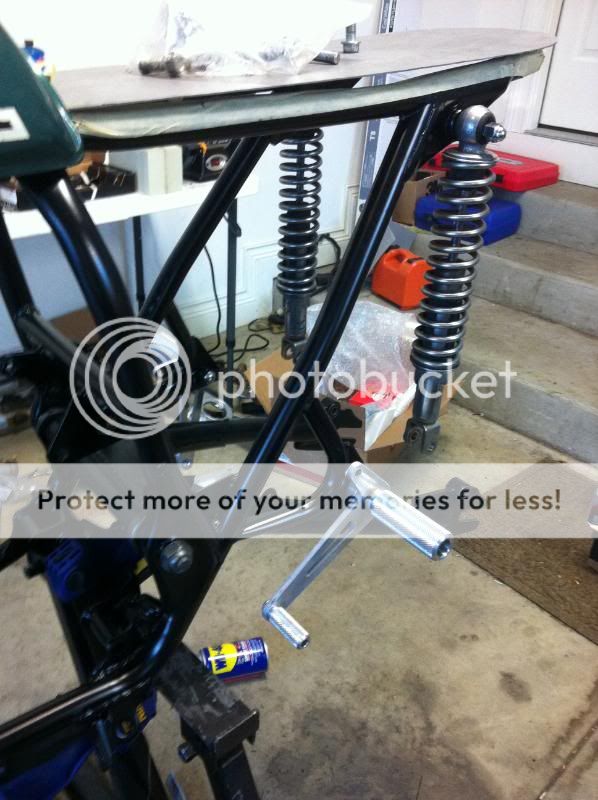
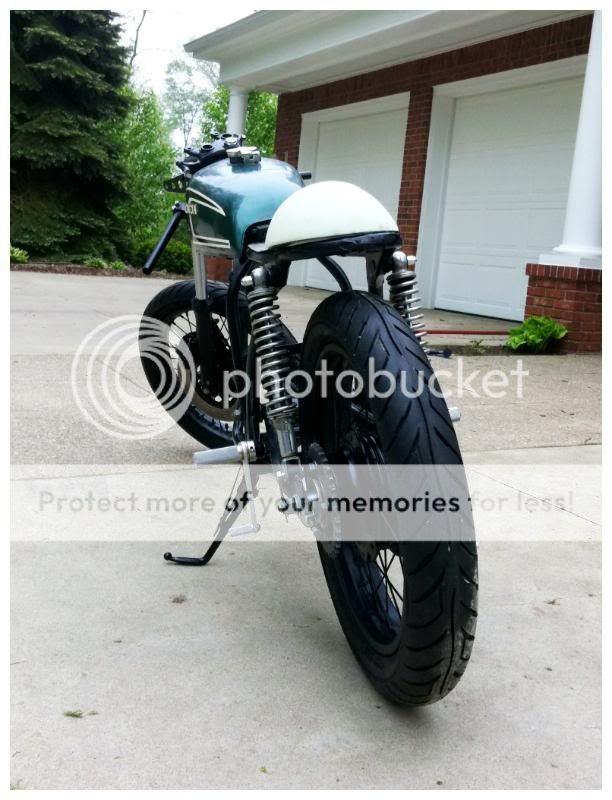
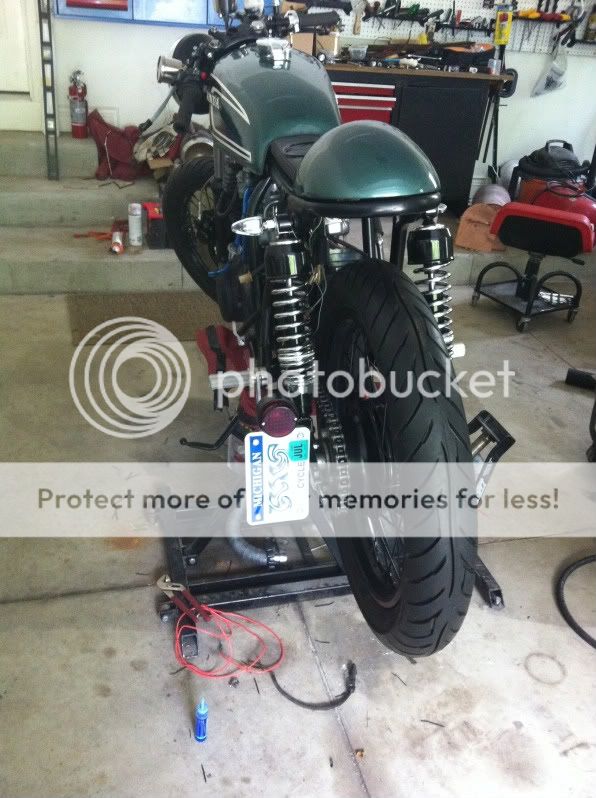
New shocks!
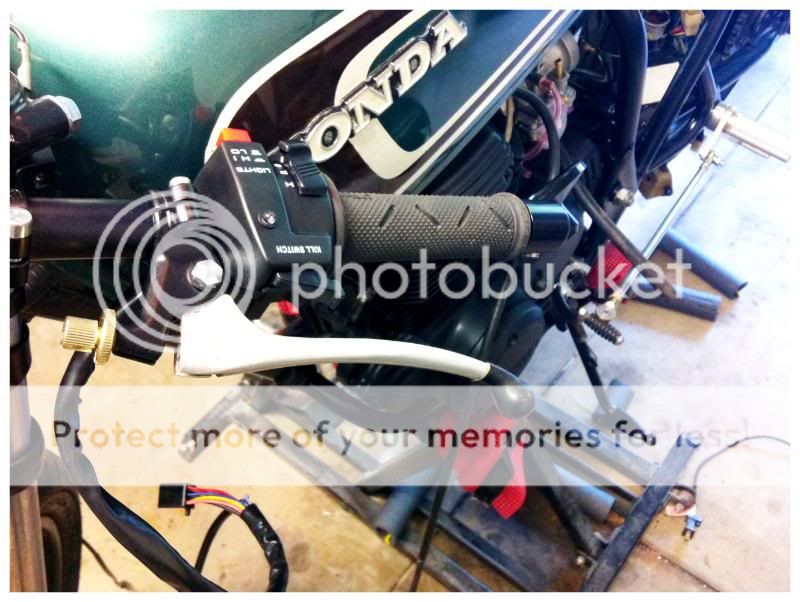
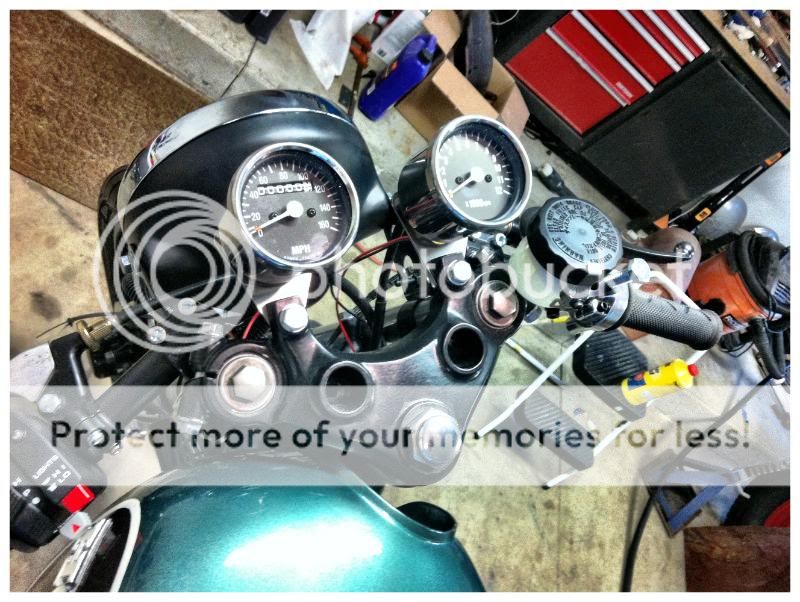
The biggest nightmare on this bike was the wiring. I used a new electronic control system as well and new hand controls to clean up the look of the bike. This moved all of the wiring to one side. By process of elimination and about 2 weeks worth of frustration I managed (with the help of my genius friend D.A. Carter) to merge the old style harness with the new style switch successfully. I now have a small tach, speedo, clutch perch, and brake/mc setup.
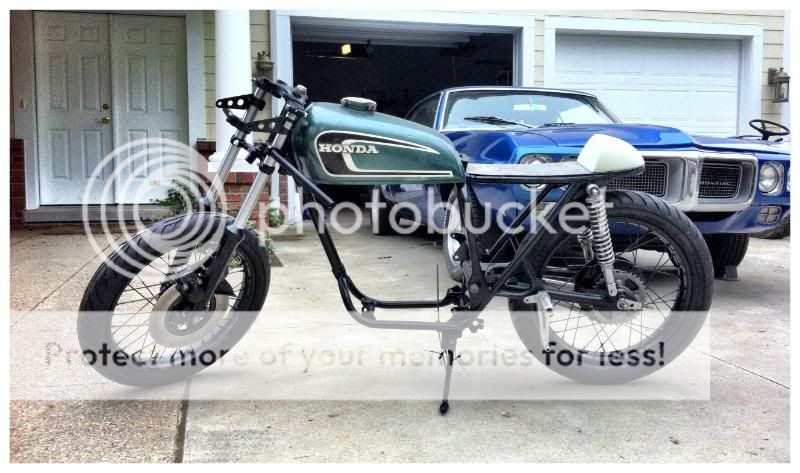
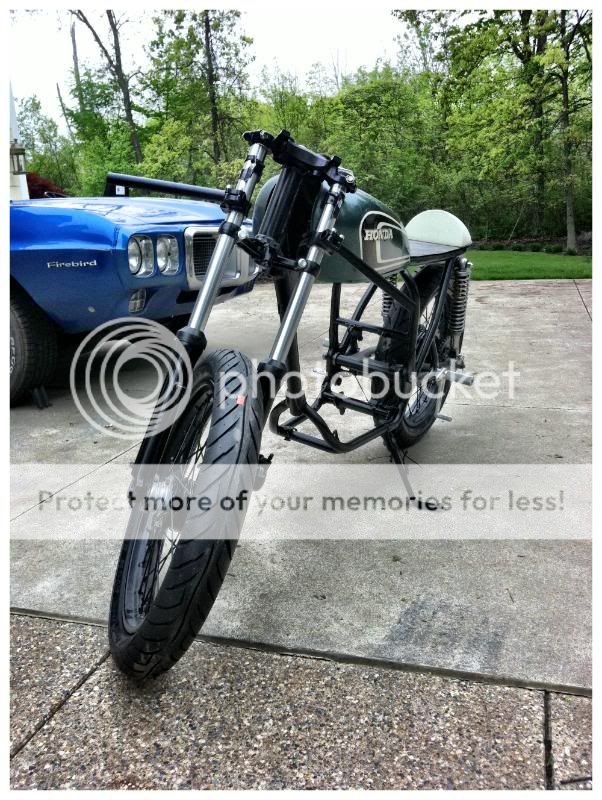
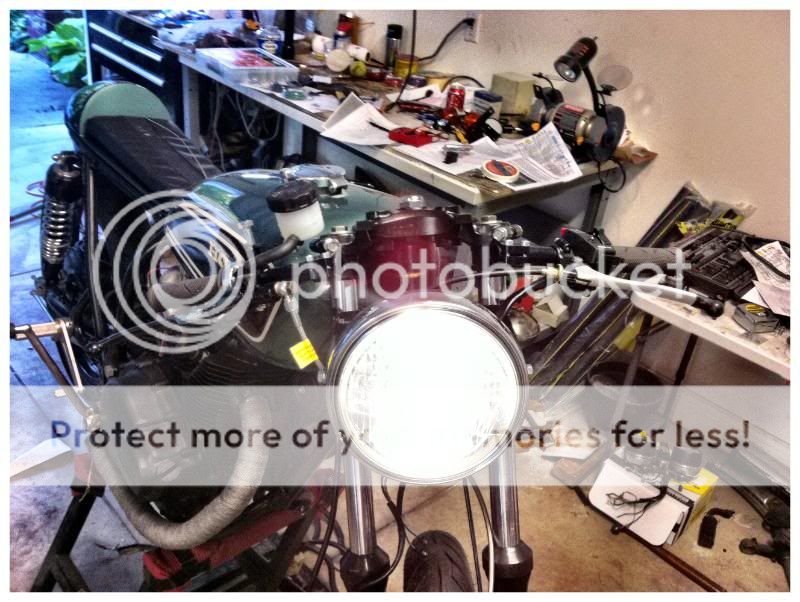
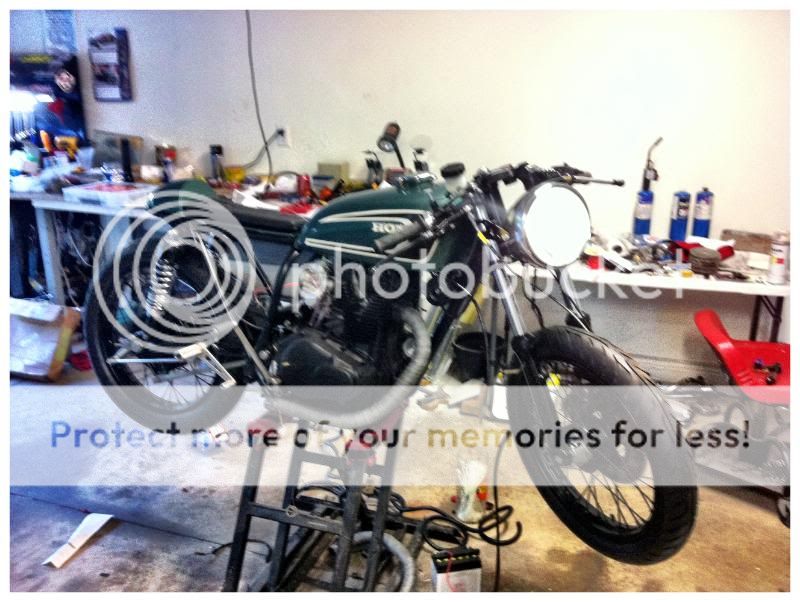
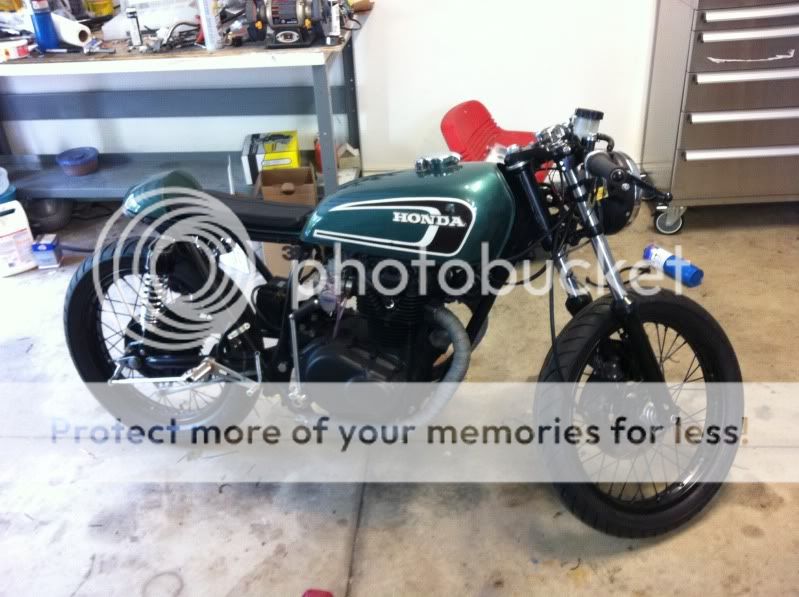
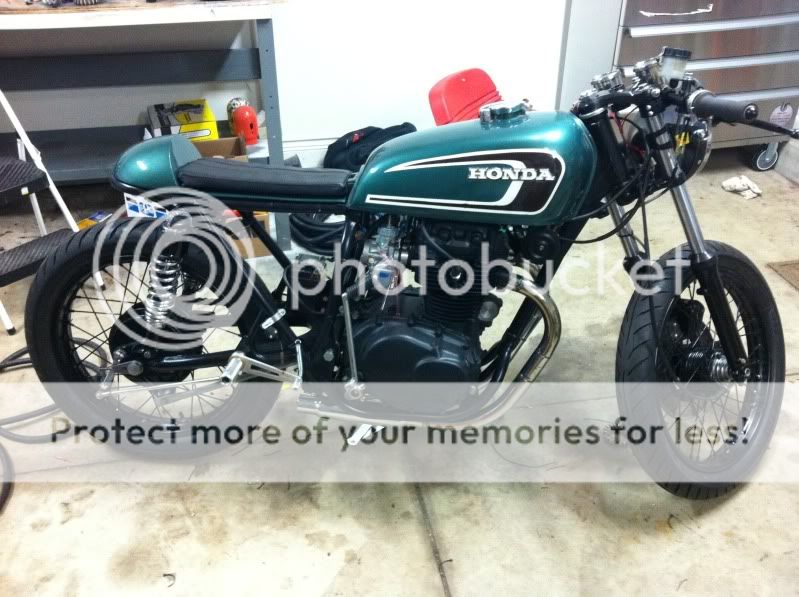
Here is how the bike sits as of now. New headlight works as well!
There is still much to do before it can hit the ground. I am praying that it will fire when I get there. This is the first time I've wrenched on a bike and the manual was my best friend through the engine rebuild. Keep an eye out for more updates. I am hoping to have it ready to roll in the next two weeks.
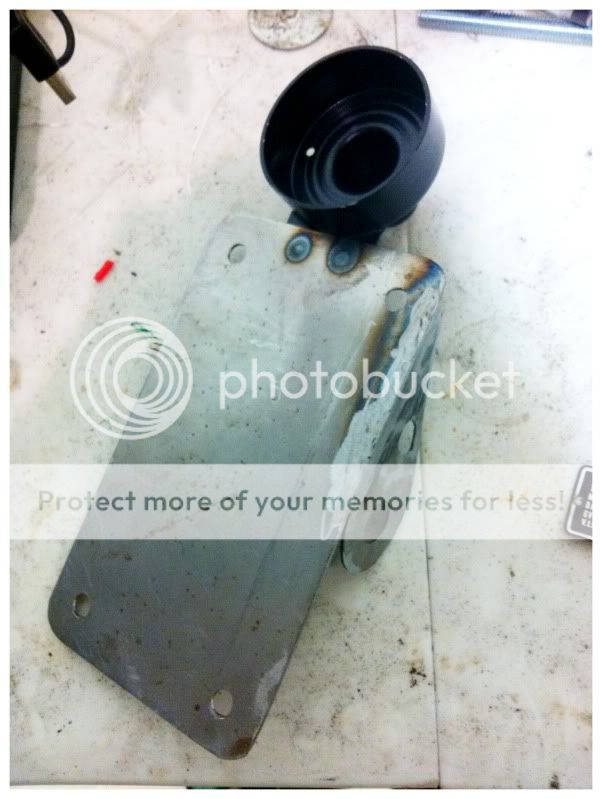
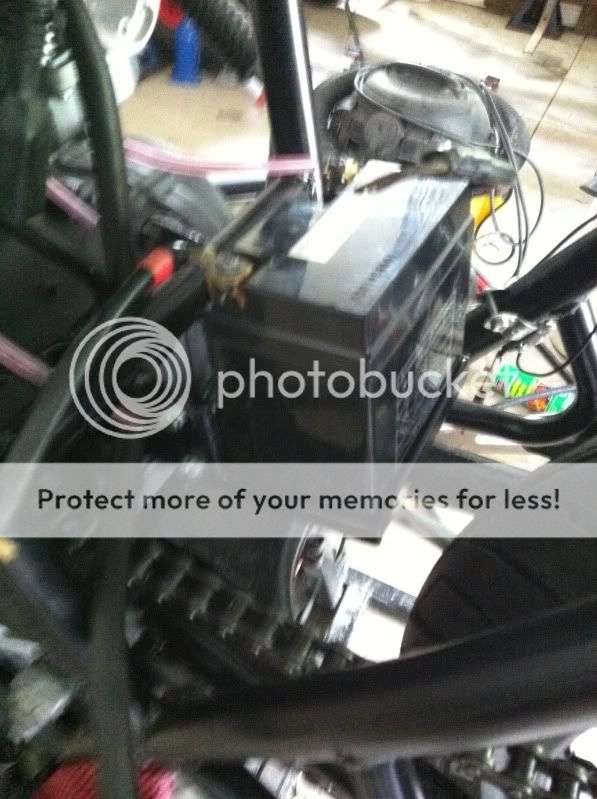
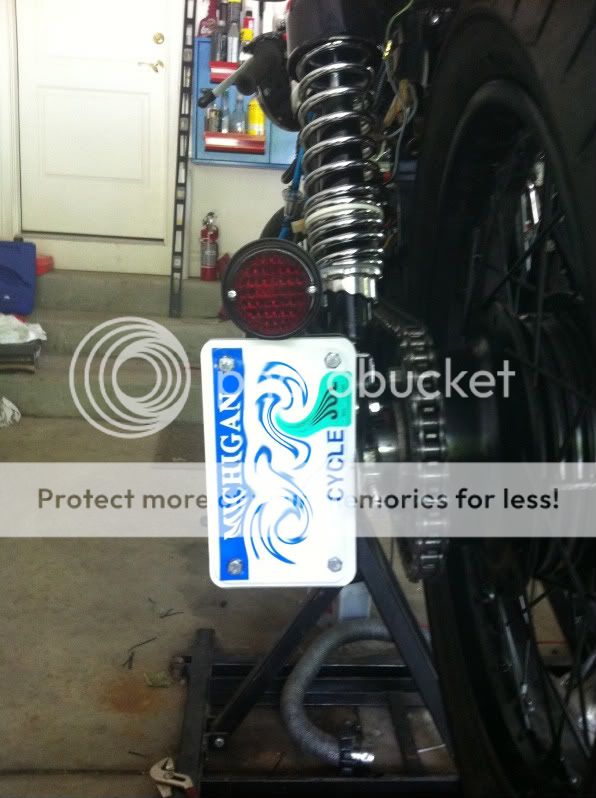
Just now putting the finishing touches into the project. I fabbed a license plate/brake light bracket as well as a battery box (finally).
Forgot to take a photo of the battery box before powdercoat but here it is installed. I actually used the original bracketry from the tool kit and added a tray. I will use a nylon or rubber strap to secure the battery to the tray.
Here is the license plate bracket installed after powdercoat.
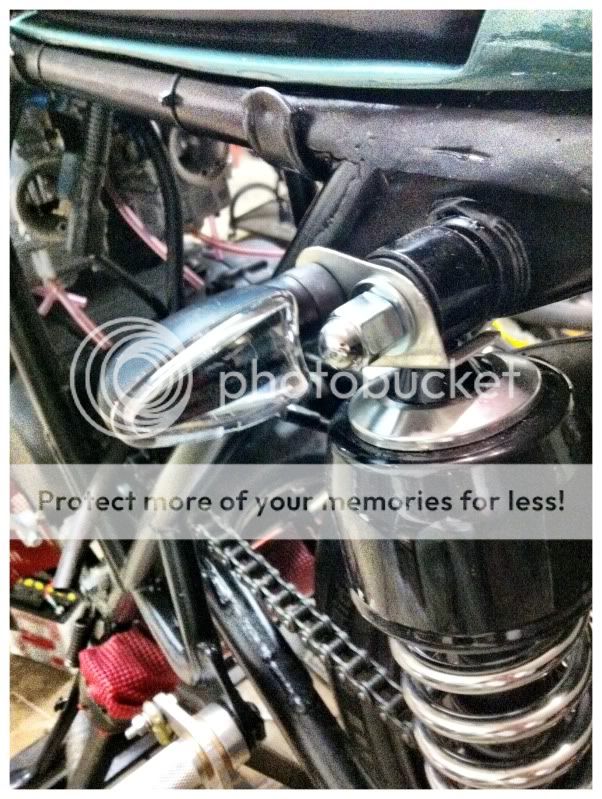
I also made some brackets for the blinkers out of aluminum. The bolt behind the top shock mount and are kept from rotating by folding "arms" around the top of the shock, just below the mounting eye. Only one side is complete at this point.
hey d20mox, this looks fantastic. i have a 360 myself and suffered from low compression on both cylinders. the motors torn down and ready to be re-worked. any advice or reference material you could share would be greatly appreciated. i love the look of this bike and its pretty much the same direction i'm heading. Keep up the good work!
Get yourself a manual. Seriously that was the best piece of advice I've taken from this board thus far. If you have experience with motors then it's not too difficult but the specifics you can obtain from the manual are far beyond the cost. Are you going down to bare metal? What are the plans for your bike?
I won't be doing a front fender unless it becomes a problem. If I do eventually I'll probably just bob the original and mount it to the existing holes.
I did not! This is exactly why this forum is an incredible resource. Do you have any more information on that somewhere? Maybe I could build a brace instead of just a fender to keep the look?
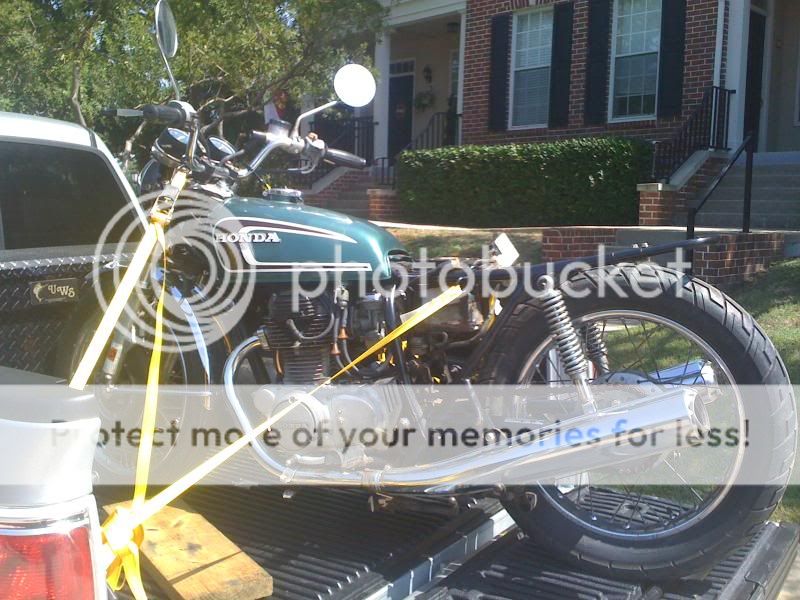
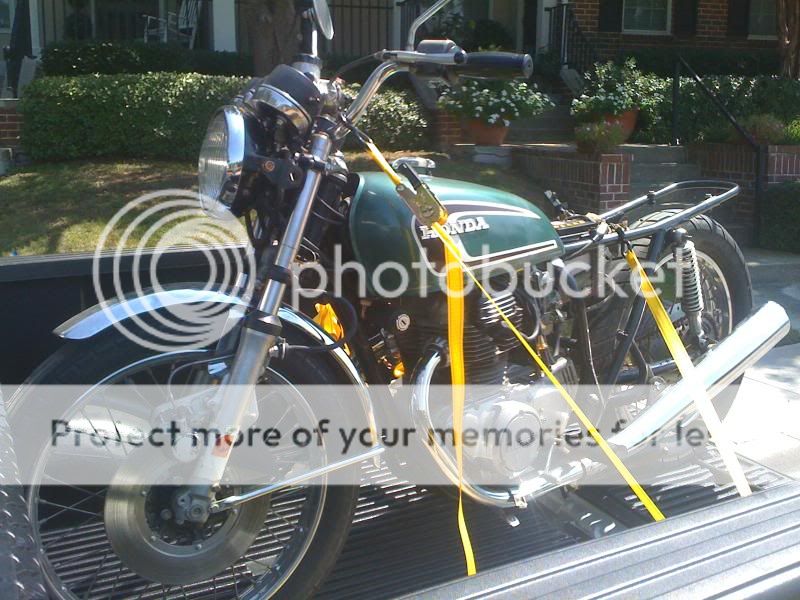
Its been a while since my last update. I was chasing electrical issues for the most part and now I just need to button up a few things before she is safe and rideable.
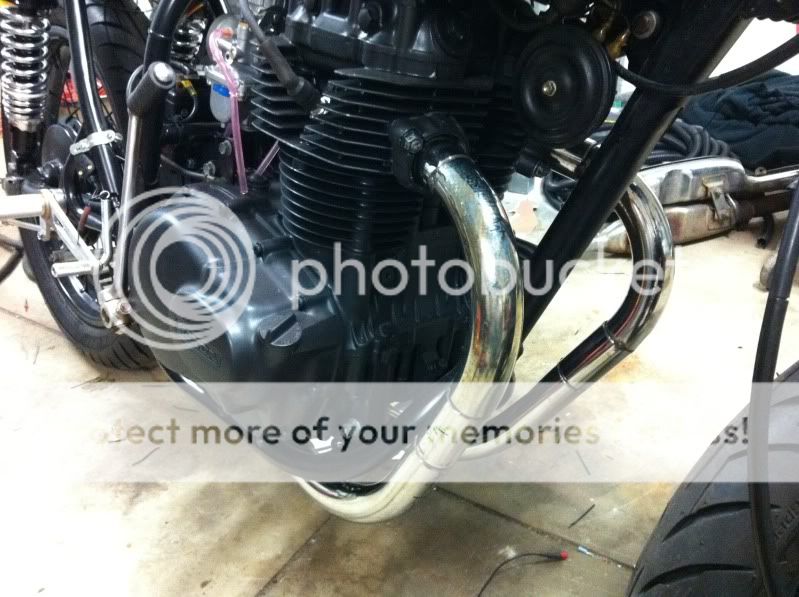
The exhaust was originally going to just be straight pipes. I bought the Loaded Gun Customs rearsets off of DCC and had clearance issues as well as exhaust heat issues where they were located. I also wanted some sort of muffler/baffle for riding (go figure) and they wouldn't slip by the rearsets.
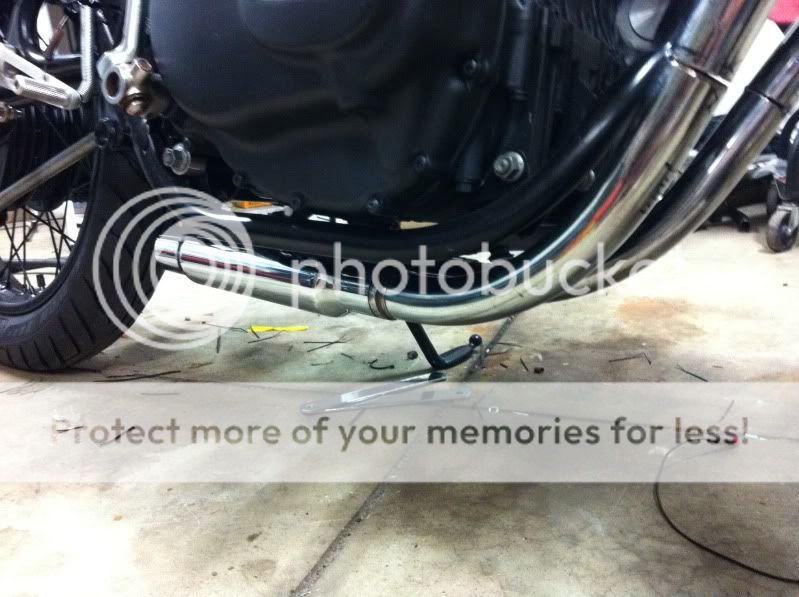
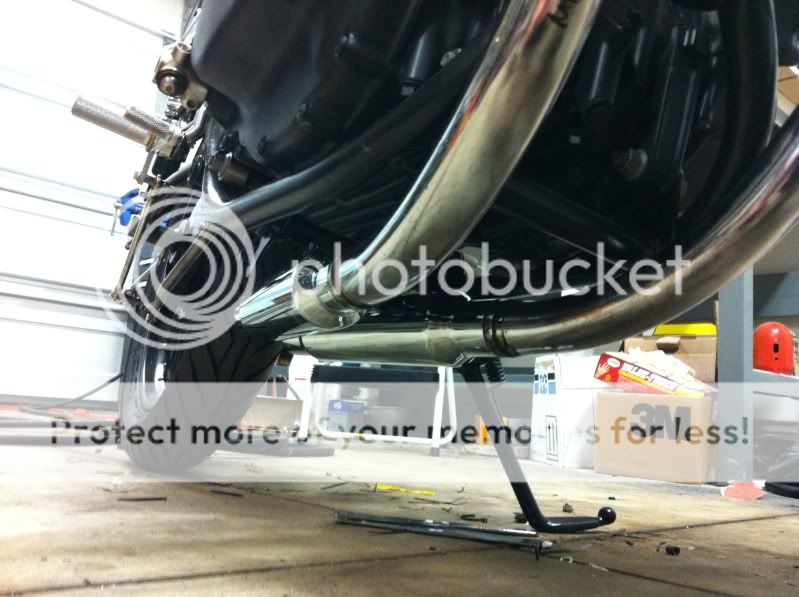
What we came up with was to route the pipes underneath the bike and mount them in back where the center stand once stood. We used only the original piping and just pieced it back together in a different arrangement to get the final layout.
Here is the original (before):
After routing but before final welding.
Keep in mind that in the photos above they have not been painted, wrapped or mounted yet. We ended up turning a rod with a flat in the midde to go where the center stand pivot point would have been. Then a bracket was run from there forward to where the mufflers tied together.
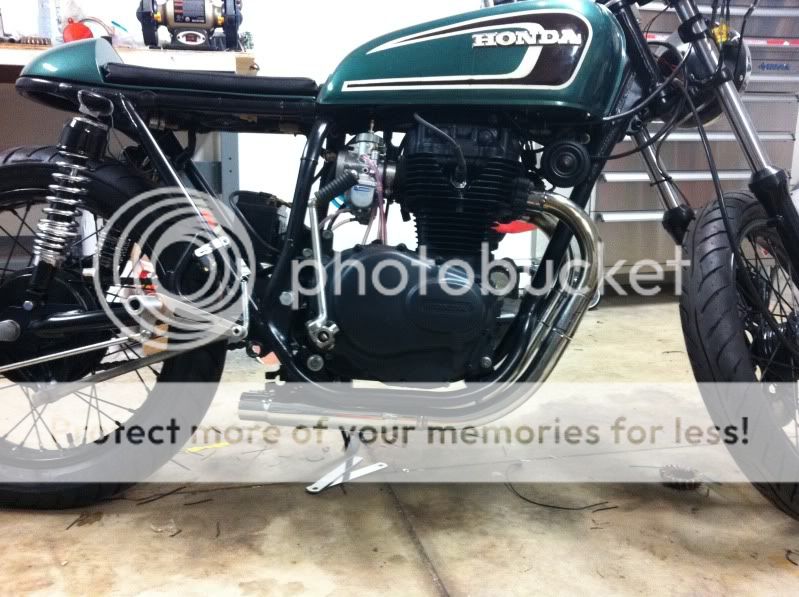
They are finished at the moment but I will need to get some updated photos together to post. The mufflers are now black, pipes are wrapped, and I added some 90 degree bends at the exit to keep any heat/fluids from getting on the tire.
Also, I did cut down the stock fender and got it powdered black. It looks great! I just haven't gotten around to finding the hardware to mount it up. Thanks for the tip.
Awesome job so far!!! Love the color, seat, and shortened frame. Exhaust looks killer too. I love those shorty mufflers, they will hopefully be going on my latest project.
Any forseen danger with your exhaust blowing directly on your back tire? Or did I miss something? You could always just fab a small angle in the headers do your mufflers shoot just outside of the tire.
This site uses cookies to help personalise content, tailor your experience and to keep you logged in if you register.
By continuing to use this site, you are consenting to our use of cookies.
 ) before I got the bike.