Follow along with the video below to see how to install our site as a web app on your home screen.
Note: This feature currently requires accessing the site using the built-in Safari browser.
We noticed you are blocking ads. DO THE TON only works with community supporters. Most are active members of the site with small businesses. Please consider disabling your ad blocking tool and checking out the businesses that help keep our site up and free.
I thought I'd offer up the templates I drew up for my rearsets. They worked out really well.
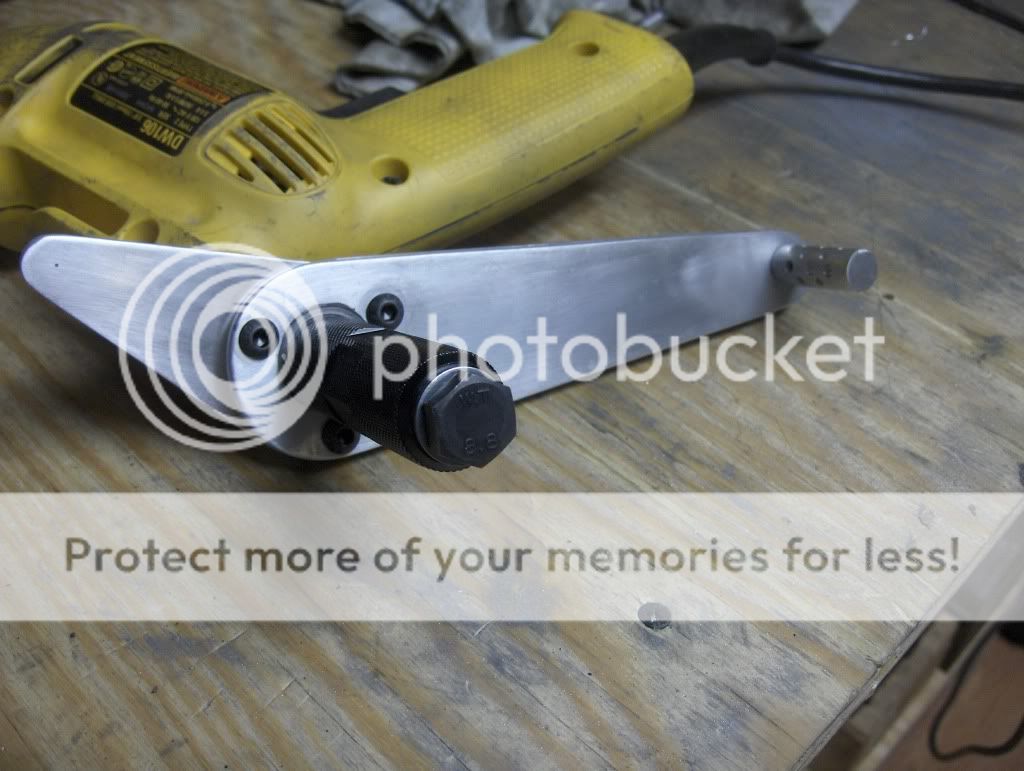
The hole for the bearing was drilled out to 1" to accomodate the 10mm I.D. x 26mm O.D. bearing I used (Part No. 0474371 from Fastenal). I had to file the hole out just a little more to pound the bearing into place.
The templates are to scale. Just be sure to check your settings when you print, in the Adobe Reader print dialog box, it should say "Page Scaling", just make sure it is set to "None". You can check the print is to scale by measuring the bearing hole, which should measure exactly 1" dia. when printed. Also, from the center of the bearing hole to the center of the toe piece hole should be exactly 6".
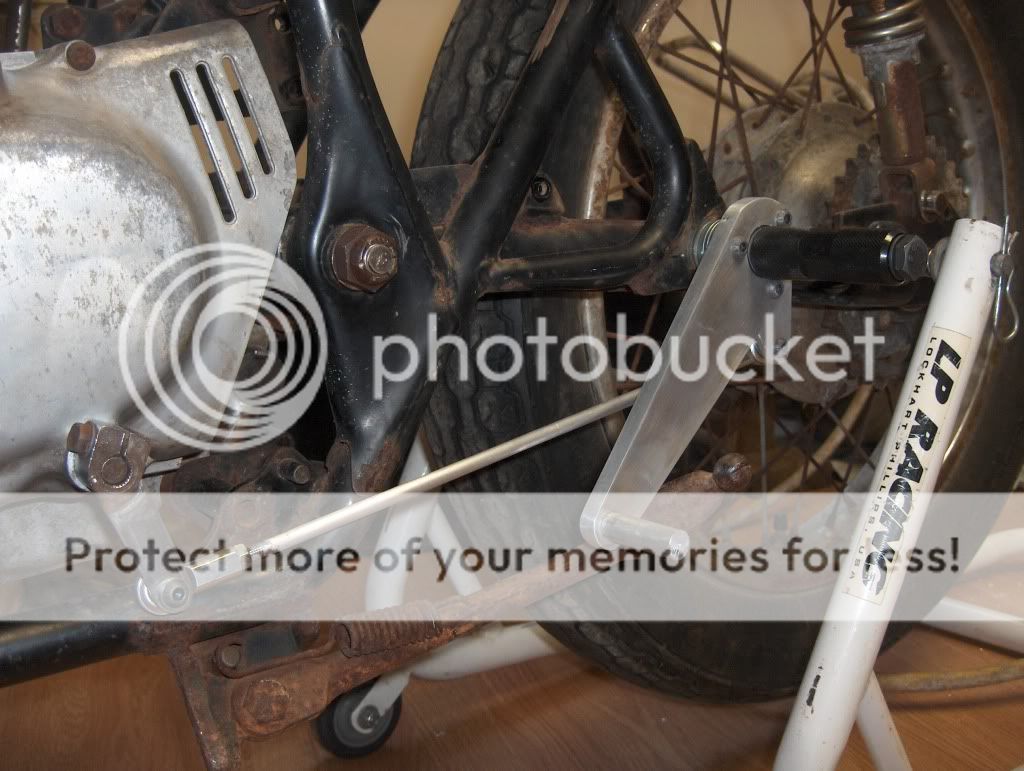
I ran the levers close to parallel to the frame rails coming down from the seat. Just make your rearset shift/brake arms parallel with your arms @ the shift/brake.
I'll try to get some pics of the brake side tonight....
Yeah, I tried to fab my own rearsets. What a nightmare! Without CNC, my levers turned out so crude, that there was no amount of sanding that would make them look nice. There absolutely no way I was putting them on my ride. :-D I had to take them to a machine shop to clean them up. Now they look like machined pieces. Of course, it cost me $60 for them to look that good. I just now found some of the proper rod ends, but they have a bronze tint and don't match the finish of my linkage rods! Argggggh!!! In the end, I would caution those who don't have the equipment to fab up stuff like this to just buy them. I have given up and will just buy my linkages from Fast From the Past. http://www.dotheton.com/forum/index.php?topic=15707.msg233595#msg233595
Yeah, there's no doubt you'll get a better product with better tools. I just happen to have some sheets of aluminum laying around. So, nothin' to loose. I was pretty pleased with the way mine came out. I still will probably add some speed holes or something. The trick is to just know what your tools on hand are capable of. All I used an jig saw, angle grinder, dremmel, drill and a bunch of different hand files.
Same here, except I didn't use any hand files plus my jig saw sucked ass. I ended up using a friend of a friend's band saw. Awesome tool, but kind of scary to cut aluminum plate with. I've only used one in shop class to cut wood. Anyway, your pieces turned out much better than mine. Like I said, mine were way crude. In fact one set of speed holes were so mangled that the machinist made one big hole out of two ragged ones. Ha! He charged me an hour worth of labor or 60 bucks. He said he could've made me a set of levers for the $60 and saved me the headache. Oh well, I think I can still claim to have made my rearsets, eh?
Thank you for sharing your template. I was going to give it a stab this coming weekend with some extra material I have and noticed the template you posted for the rearset_arm.pdf may be a copy of the rearset_lever_outside.pdf template or vice-versa. If you could post the missing template for the small piece it would be greatly appreciated. Nice work!!
GreasyJ, your right, I double posted the arm. Thanks for bringing it to my attention.
You don't need the small piece anyway. You want to use the Inside template and Outside template and match them up together.
That small piece you see in my build thread was a preliminary design that left the actual lever too thin and flimsy. The last photo you see here may look like one thick piece, but is in fact two pieces fastened together. There are some slightly better views here....http://www.dotheton.com/forum/index.php?topic=21538.140
I am using a bit thicker material and am going to try the 2 piece method (lever and lobe) for adjustability sake. Thank you for the response and templates!
This site uses cookies to help personalise content, tailor your experience and to keep you logged in if you register.
By continuing to use this site, you are consenting to our use of cookies.

")


