
We noticed you are blocking ads. DO THE TON only works with community supporters. Most are active members of the site with small businesses. Please consider disabling your ad blocking tool and checking out the businesses that help keep our site up and free.
You are using an out of date browser. It may not display this or other websites correctly.
You should upgrade or use an alternative browser.
You should upgrade or use an alternative browser.
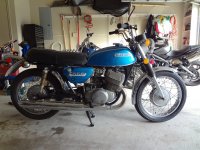
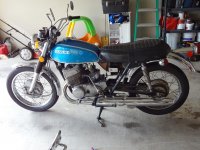
Suzuki T500 Cafe Project
- Thread starter nathan_nathan
- Start date
nathan_nathan
New Member
nathan_nathan
New Member
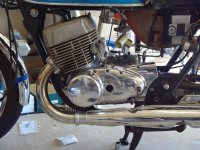
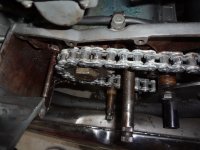
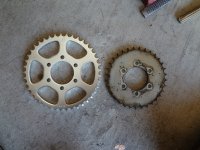
The stock 33 tooth rear sprocket was way too small. I changed it to a 41 tooth sprocket, drove it around on the highway and still think I should have gone bigger. I also replaced the old standard chain with an xring chain (120 links cut to 114). Be careful if you do this though because the wider chain will gouge the seal plate behind the front sprocket if you don't put in a spacer. I found a 0.09" (~2mm) thick washer at the hardware store that matched the diameter of the shaft very well.
Attachments
CarbsAndCylinders
Careful With That Axe Eugene
The polishing looks great.
How do you find 1st gear with the bigger rear sprocket, is 1st a bit too low now?
How do you find 1st gear with the bigger rear sprocket, is 1st a bit too low now?
nathan_nathan
New Member
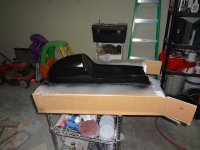
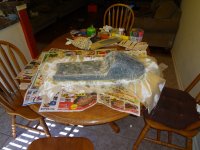
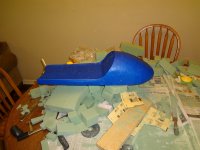
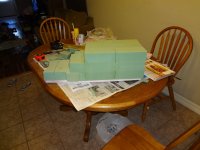
My very first attempt at fiberglass, ever. Once again, the Dime City Cycles tutorial was very helpful. I learned two things while doing this. 1. Never Ever fiberglass in your house. The smell is terrible and will stick around for days. 2. Be very careful with the amount of hardener you mix with the resin. I put my brush in the cup for a few seconds so I could adjust the fiberglass cloth, but when I went to take it back out of the cup it was already hard as a rock. The other thing about fiberglass is it will make you cuss. The entire process I was cussing the brush, the resin, the latex gloves, the table, the newspaper, the internet, the cat, whoever created cafe racers, etc. When it was all over, however, I was pretty impressed.
Attachments
nathan_nathan
New Member
With the stock sprocket, I wouldn't shift to 2nd gear until around 35 mph. Now, I shift to second around 25 mph. I think the gearing is still a little high for first gear in my opinion, but it isn't so bad that I'm going to change the sprocket again.
CarbsAndCylinders
Careful With That Axe Eugene
Thanks, Nathan. I might change the counter-sprocket on mine, one tooth less.
axeugene27
Over 1,000 Posts
Nathan. I also have a t500 i am doing some work to. If you take off any of the chome bits ie : rear fender, tail light assembly. Let me know mine is pretty roached and may be interested in buying them from you. I am still on the fence of a light restore vs. custom Bike looks good man nice polishing work. How does it run with the pods? What jetting did you have to go with?
CarbsAndCylinders
Careful With That Axe Eugene
Axe, I think I might have a taillight, I have to dig through a pile of parts to see if I still have it and what shape it is in.
nathan_nathan
New Member
Axe, I bought the bike from a friend that also has a T500. I agreed to give him back anything that I stripped off if he wanted it, but I will let you know what I've got left. I haven't had any problems with the pods so far, unlike some. I am going to bump up one or two on the main jet because it seems to bog down a bit when you give it medium to full throttle. I moved the clip on the carb needles down to the lowest setting and it helped, but I'm still going bigger on the main jets.
Gary, I didn't space the rear sprocket. It might be a learning experience when I'm stranded on the side of the road someday, but I don't plan on taking this thing too far from home. I'll let you know how it goes.
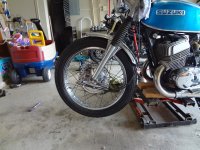
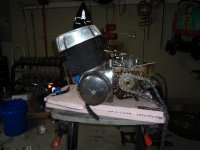
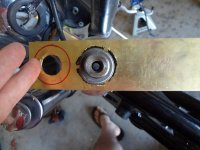
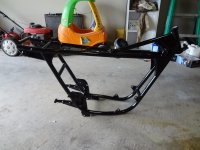
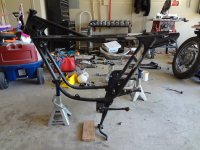
I got the frame powdercoated, which I would recommend to anyone. It makes a huge difference. You can also see my makeshift tool that I used to remove the steering stem nut. It looks ugly, but it worked.
Gary, I didn't space the rear sprocket. It might be a learning experience when I'm stranded on the side of the road someday, but I don't plan on taking this thing too far from home. I'll let you know how it goes.
I got the frame powdercoated, which I would recommend to anyone. It makes a huge difference. You can also see my makeshift tool that I used to remove the steering stem nut. It looks ugly, but it worked.
Attachments
axeugene27
Over 1,000 Posts
lookin really good gotta love that big open frame when putting the motor back in. What's it cost to have a frame powdercoated? Wish my fork legs were that nice. Mine are painted black by PO i'm afraid to strip them and see the condition of the chrome.
nathan_nathan
New Member
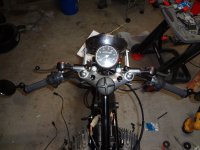
It's been a few months so I figured I should update my progress. I've got my clip-ons installed and had to cut the control cables about ten inches. I made new barrels for the cables with 1/4" brass rod that I drilled and soldered the inner cable to. This wasn't very hard, I just watched a few youtube videos on how to solder cables and it came out well. After I installed the controls I squeezed the clutch and front brake as hard as I could ten times and they didn't break. I also didn't like the look of both the speedo and the tach, so I removed the tach and made a bracket out of steel sheet metal and mounted 3 led lights for the neutral indicator, high beams, and turn signal indicator.
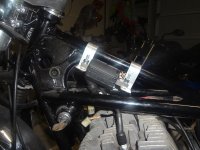
I also discovered that one of my coils was bad. The resistance on the primary should be 5 ohms and the secondary should be 14k ohms. Mine measured 2.2 ohms and 38k ohms. So I bought a set of Dynatek DC10-1 single output coils and a set of their 7mm copper core wires. The coils are bigger than the stock coils and didn't fit on the stock mounting bracket. I made the bracket to install them from aluminum flat bar. After installation, I set the timing as close as possible back to the stock setpoint of 3.4mm from TDC. Something I learned the hard way is that the slide valves for the carburetors can be installed backwards. If this happens you won't be able to idle and will dump a ton of spooge into the expansion chambers. The cut away for the slide valve has to face the back of the bike. After I fixed this, the bike started on the first kick and idled great.
I also discovered that one of my coils was bad. The resistance on the primary should be 5 ohms and the secondary should be 14k ohms. Mine measured 2.2 ohms and 38k ohms. So I bought a set of Dynatek DC10-1 single output coils and a set of their 7mm copper core wires. The coils are bigger than the stock coils and didn't fit on the stock mounting bracket. I made the bracket to install them from aluminum flat bar. After installation, I set the timing as close as possible back to the stock setpoint of 3.4mm from TDC. Something I learned the hard way is that the slide valves for the carburetors can be installed backwards. If this happens you won't be able to idle and will dump a ton of spooge into the expansion chambers. The cut away for the slide valve has to face the back of the bike. After I fixed this, the bike started on the first kick and idled great.
Attachments
nathan_nathan
New Member

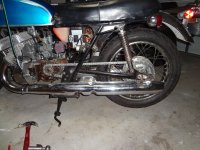
I had one of these old girls that I restored about ten years ago...miss it sometimes. Might I suggest you fit a rear fender or some sort of shield to keep the back wheel from throwing crud all over your air filters. Finished??? These things are never really finished, just a rolling work in progress ") ...and this one is quite tastefully done. Nice Work!
...and this one is quite tastefully done. Nice Work!
...and this one is quite tastefully done. Nice Work!

