Follow along with the video below to see how to install our site as a web app on your home screen.
Note: This feature currently requires accessing the site using the built-in Safari browser.
We noticed you are blocking ads. DO THE TON only works with community supporters. Most are active members of the site with small businesses. Please consider disabling your ad blocking tool and checking out the businesses that help keep our site up and free.
G'day fellas, thought I would redo my cafe build thread after it has been inactive for nearly two years due to racing commitments and family issues which I wont bore you with, suffice to say there was the full gammit of emotions over the last couple of years with Surgery, transplants,death,illness and heartache.
The heartache was mine because none of these things happened to me, but to members of my family and I couldn't fix them.
But things are looking up, hope you blokes will understand all the mushy shit coz a little angel has changed my life,my grand daughter Sophie
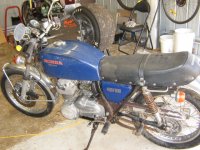
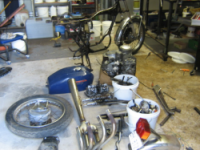
It only had 12000 on the odometer, and after the usual carb and fuel flush and points adjustment she fired right up, so as usual i pulled it into a million bits, the same thing I have been doing to things since I was three years old according to my old girl, lol.
Once apart I quickly detabbed and ground away all the things I didnt want on the frame, went too far as usual more on that later :-\
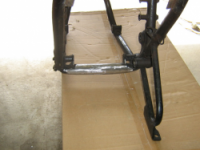
Bent up a loop for the end of the seat rails
Sourced a Benelli mojave tank on ebay back when they were cheap ;D,
welded in some more supports for the seat area and a flat bar to mount the rear of the tank to
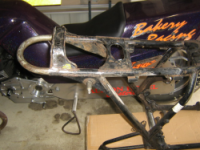
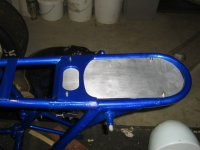
and got the frame powdercoated, then filled in under the seat with some sheet ally of which i have an abundant supply because everyone in Australia likes to shoot signs so my mate on the council gives me the replaced ones.
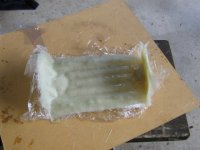
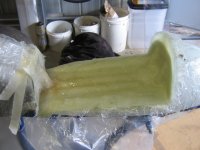
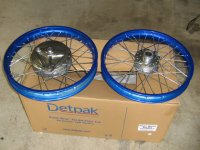
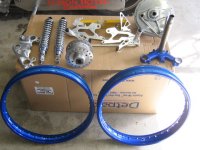
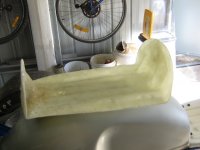
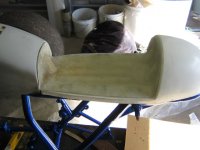
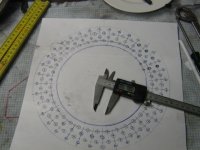
A local bloke did the seat for me and I laid up some glass fibre for a seat base, the wheels are the originals and were powder coated as well, the new spokes turned up and I had my first go at lacing my own wheels even though we have an old master wheel builder just down the road who will lace and true your wheels for 40 bucks a wheel, I told my missus the money I saved could be spent on a magnetic base dial indicator
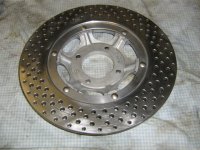
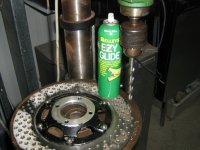
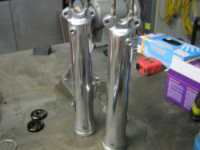
At this point I did a shite load of polishing, and drilled my front disc for less circulating mass and coz it looks da bomb (does anyone say that anymore? ???), onlu used one of each sized drill bit too, that easy glide works a treat
more polishing , and i brazed up the bottom hole in the dampener of the front forks and redrilled at 1/16, read somewhere that it improves the front suspension, might have been on Ohio cafe racers site
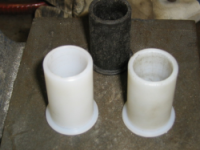
A mate whipped up some you beaut delrin bushes for the swingarm
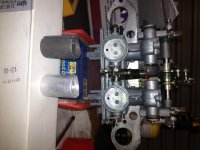
Started on the carbs and gave them a dip in an ultrasonic cleaner then soda blasted them, you can see the difference in the slides before and after the ultrasonic treatment, bought one of those sigma6 carby rebuild kits off of fleabay, you can decide for yourself if it is worth the 70 bucks : it amounts to a set of size 80 mains and three drill bits with some plastic and steel shims for under the needle if needed which I dont because my needles have the adjustable clips, thats it apart from a lot of copy and pasted material on rebuilding carbs, oh well lesson learned.
Busted this little plastic doodad pulling the carbs apart :-[ shouldn't have been so heavy handed so I turned up a couple of new ones out of some alloy
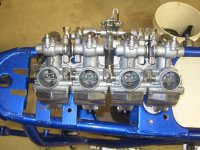
Anyway the bottom pic is the carbs with new orings, gaskets, jets and adjustments with a little polishing
I saw your post on SOHC4 about the jetting kit but didn't get the point until I read this one. Good to know as I was looking at those kits for my 466 kitted bike. Might pass!
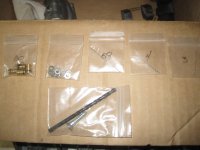
What are all the drill bits for? Can you explain a bit more? I thought there would have been at least 2 jets in the kit.
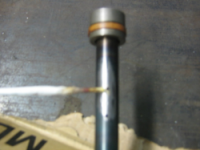
Yeah I thought the same mate, turns out that you get one set of jets and the drill bits are for drilling out your original mains depending on how your bike responds to the changes they suggest, so for 70 bucks I got a set of jets three drill bits and it was suggested I lower the clip on my needle down one, no gaskets or o rings nada :-\
ps the bigger bit and screw are to drill out the plastic stopper covering the idle mixture screw, but in Australia we actually have an adjustable idle screw
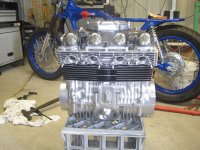
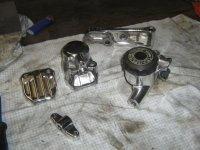
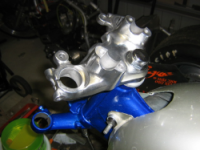
Used a metallic charcoal VHT paint for my rocker cover , pic doesn't do it justice , then put a ceramic clear over the top and it also copped the three stage curing process
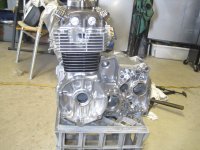
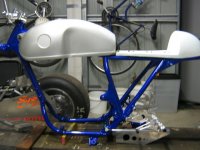
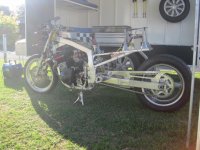
This is all these parts put together for a quick mock up, time for some more painting and polishing
Got to give this guy a plug the hydroblasting was done by Woodys hydroblasting in Melbourne the work is first class and I could not find a single grain of blasting media anywhere in that motor when he finished with it, his missus is his sidekick and she runs a tap through every threaded hole before it is deemed readt to pick up
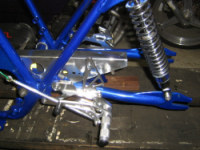
The pic above shows my clearance issues with the rear tyre so the Hagons have to go pissed about that but oh well , up for sale is a pair of brand new hagons only been fitted to bike never used any offers?
Some more of those old street signs folded into a chain guard, but looking at it now I'm not happy with it and will think about reshaping it and changing the holes to a more modern cutout
This site uses cookies to help personalise content, tailor your experience and to keep you logged in if you register.
By continuing to use this site, you are consenting to our use of cookies.


") it amounts to a set of size 80 mains and three drill bits with some plastic and steel shims for under the needle if needed which I dont because my needles have the adjustable clips, thats it apart from a lot of copy and pasted material on rebuilding carbs, oh well lesson learned.
it amounts to a set of size 80 mains and three drill bits with some plastic and steel shims for under the needle if needed which I dont because my needles have the adjustable clips, thats it apart from a lot of copy and pasted material on rebuilding carbs, oh well lesson learned.