Follow along with the video below to see how to install our site as a web app on your home screen.
Note: This feature currently requires accessing the site using the built-in Safari browser.
We noticed you are blocking ads. DO THE TON only works with community supporters. Most are active members of the site with small businesses. Please consider disabling your ad blocking tool and checking out the businesses that help keep our site up and free.
I use moly / graphite grease on fork seal 'insides 'You can also get Teflon based greases very easily today . I wouldn't attempt running without seals, stiction is minimal until you use air pressure in forks instead of springs. Forks will have to be compressed a bit to develop any air pressure which then causes seals to 'grip ' I remember test riding a Goldwing with S&W air suspension. Almost crashed watching the front and rear pressure gauges moving around between 35 ~ 110 psi as suspension was moving. Worked well though as road didn't fel at all undulating. You could look at mid~late 90's mountain bike forks for air shock idea's, there was a LOT of engineering, information and speculation going on back then plus, they had to be light as possible. If you really wanted to go nuts, a set of modern downhill forks would most likely work but they are very very expensive for good ones, all alloy / titanium construction
Fork decision was made a while ago so no air forks and no swaps - this fork is already getting a whole lot of trick treatment. I was just curious how the Minton mod would work in this case - as it obviously worked very well in the case of the XS650 using larger seals.
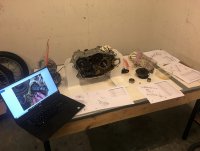
Jumping around here a bit again but I try to tackle jobs that I can complete in the time I know I will have in the workshop - to be as effective with my little time as possible.
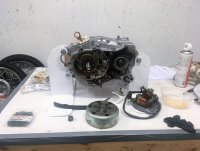
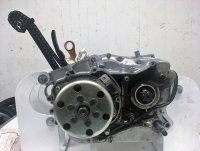
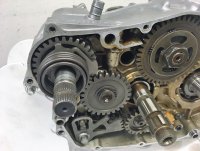
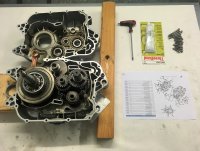
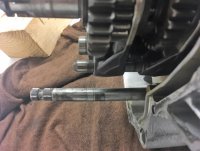
So I really wanted to get the engine halves back together with the rebuilt crank. I cleaned everything up (a lot of crud), cleaned all the mating surfaces, used the suggested Three Bond, which seems to be awesome, then screwed the halves together with the Ti bolts I ordered.
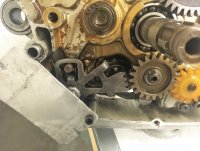
The engine also had a bent gear lever shaft which I swapped out for a spare one I had. I needed to screw a bracket into the crankcase half to keep it in place while I put the halves back together - frustrating having it all in place then falling out when turning the assembly over (which happened twice haha).
Stoked to have the engine rebuild underway and even the kickstarter installed. Woohoo!
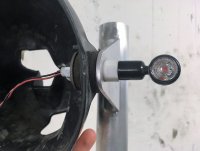
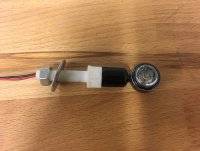
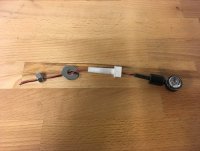
While the engine is underway I had a neat idea to make an adapter for the chosen blinkers - so I don't need to fabricate another bracket or drill more holes into the headlight ears. It will also make for tidy electrics - no visible blinker wires because they go right into the headlight!
After making this first prototype I decided to ditch the hex drive entirely and just have a small spacer type thing instead, so there will be a much cleaner transition from blinker to adapter to headlight ear.
I guess I'm missing the point of the turn signal adapters. Are they not threaded, hollow mounts? Then they should be able to be used with either a washer on the inside and outside of the headlight bucket (but you need to "play" with the alignment), or a short (just enough material for the ear/headlight bucket) aluminum tube with an ID appropriate for the turn signal stalk and an OD that fits within the ear/headlight bucket hole.
Yep you lost me there too, just a spacer to get the OD of the stalk on the turn signal up to the size of the hole in the headlight would work fine? Unless it's too short?
Sort of like Sonic suggested, I like to do this on my bikes when I have a bigger hole to fill. This is for an allen screw, but the concept is basically the same. In this example, I'm making a mounting screw for a BMW R100/7 headlight. The hole is much bigger than the head of the screw because BMW uses this location for the keyswitch on one side and then just a bigger flanged washer deal on the other. I machine the piece to be flanged so that it locks into the headlight ear hole, then allows the allen screw head to be countersunk for a cleaner look. I could see a similar deal on your bike, but with the blinker stem inset instead of an allen screw. Unless your signals are weak plastic, there's no reason why they can't double as your headlight mounting screw. Is that why you're doing the double screw thing?
Sorry I was not clearer but you're all off track ;D
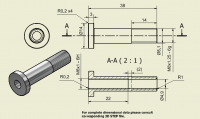
The blinkers have a super tiny and weak M6 thread. Weak because the threaded section is thin because it has the wires running through it. The threaded section is also too short to extend all the way inside the headlight So the spacer is both to increase diameter through the headlight (yes, could have used a spacer tube instead), but also to increase length, but most importantly, to relieve any fixing/mounting stress from that particular thread. I didn't trust it to hold the whole headlight assembly together. So now this bolt is internally threaded M6 and externally M8, with neither of the threads overlapping internally - so the is plenty of meat in the adapter where load by the fastening nut is applied - see attached.
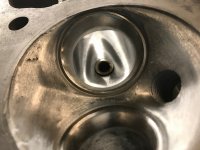
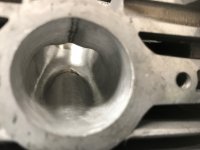
It's hard to tell from the pictures but I hope that it's the exhaust port that's polished to prevent (slow down at least) carbon build up and the intake is rough to prevent fuel puddling, and not the other way round.
It's hard to tell from the pictures but I hope that it's the exhaust port that's polished to prevent (slow down at least) carbon build up and the intake is rough to prevent fuel puddling, and not the other way round.
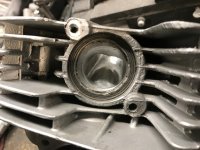
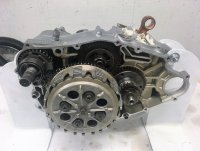
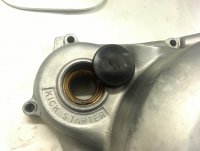
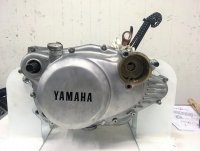
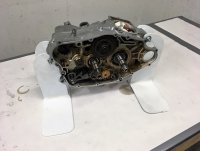
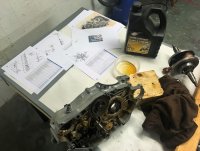
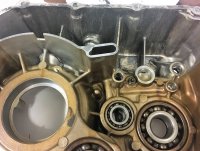
The slow rebuild continues. You can see that the clutch side of the crankcases is much emptier now without the electric start drive and its centrifugal engagement assembly (much lighter too ). Also got the cover plug out and installed the kick start seal. Just waiting for the final head work ;D
You should lop off the majority of the starter boss. Might only save a few grams, but it works with your build. I reckon it wouldn't be much of a project to do.
Has anyone done a gram for gram comparison between the electric starter bits and the kick start bits? The kickstarter mechanism on my XS650 engine, which includes the arm itself, the shaft and all gears, is heavy as hell. Not saying the kick start deal is heavier, but if we're talking about just a few grams, while keeping the ability to just push a button to start, many would choose the electric option. Seems like everyone's first inclination, when it gets in their head to lighten the bike, is remove the electric starter.
The kickstarter spline shaft (for lack of a better name) could be partially center drilled. Just go deep enough that you don't penetrate through the back side. A fabricated tubular aluminum kickstarter lever would be nice too. Lot's of weight to be shed there.
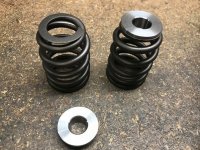
Kick-start lever is probably a 'standard ' Yamaha spline so one of the motocross bikes may have a direct bolt on ally kick-start lever? As for electric start, as pointed out, even on XS 650 you save at least 10 lbs by removing it and all the reduction gears then use a much smaller battery. BTW, are the valve springs one off or are they a standard fitment on something?
This site uses cookies to help personalise content, tailor your experience and to keep you logged in if you register.
By continuing to use this site, you are consenting to our use of cookies.


 So the spacer is both to increase diameter through the headlight (yes, could have used a spacer tube instead), but also to increase length, but most importantly, to relieve any fixing/mounting stress from that particular thread. I didn't trust it to hold the whole headlight assembly together. So now this bolt is internally threaded M6 and externally M8, with neither of the threads overlapping internally - so the is plenty of meat in the adapter where load by the fastening nut is applied - see attached.