
spurlock
New Member
I know this has been discussed some here before but wanted to share my experience with a recent conversion. All my life I've had spoked wheels and tubed tires, and done roadside repairs with patch kits, spare tubes and tire irons. So now that I have a Honda GB500 with no center stand and DID alloy rims the prospect of flats is a whole different challenge. I've had Akront alloys on bikes in years past that were no problem but these DID's need a bead breaker to get the tires off the rims. And with no centerstand, just getting the wheel off would be tough in a roadside repair situation. I like to be equipped to fix flats on the road so I looked into converting to tubeless. The advantage for me is beng able to just plug, pump, and get back home without even having to remove the wheel from the bike. Plus a 12V pump and plug kit are much easier to carry than patches, spare tube, pump, tire irons, and portable bead breaker, to say nothing of having to remove a wheel with no centerstand.
There are lots of online discussions about converting spoked wheels to tubeless. Methods include:
- sealing each individual spoke nipple with silicone seal (it works but is a god-awful mess and adjusting spoke tension is bound to break the seals.
- getting a tube from a smaller diameter wheel, cutting around the circumference, and laying it into the rim's drop center like a big rim strip, then laying a bead of sealant under each edge.
- sealing the entire drop center area with special tapes.
All these methods seem to work if done carefully. There are 14 pages of discussion on these methods in a forum here:
http://supermotojunkie.com/showthread.php?5090-Tubeless-for-under-10-00
I chose the tape method. First I looked at the Outex Tubeless Conversion Kit found on ebay or here:
http://www.ronin-cycles.com/product/27
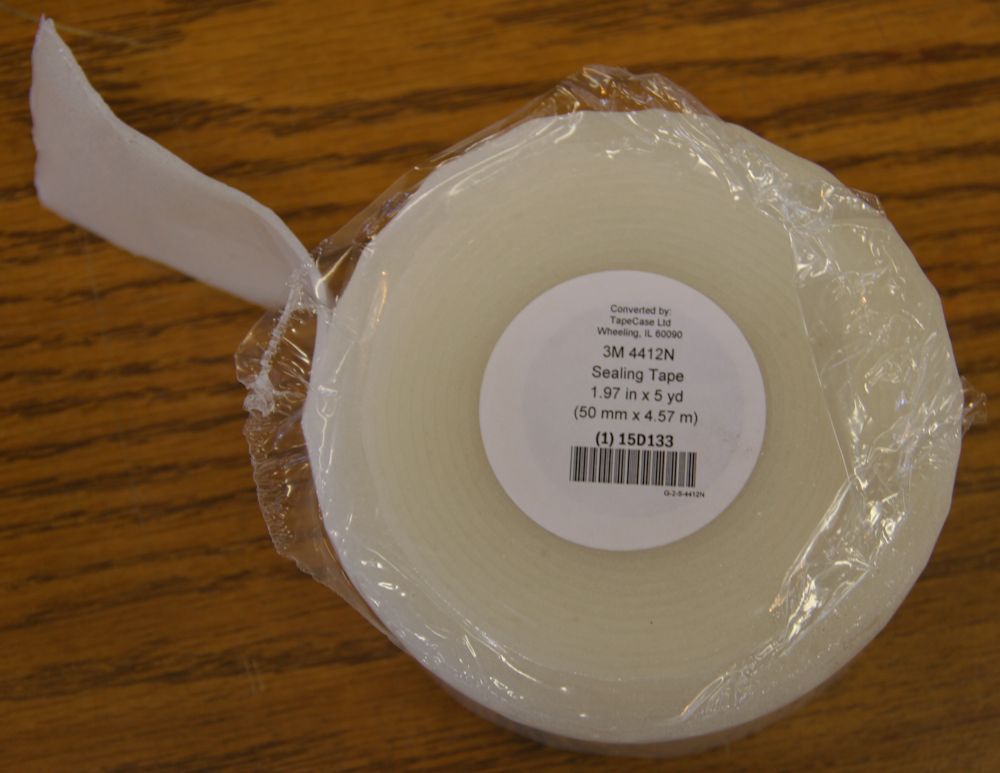
I decided to go with another recommended tape, the 3M Extreme Sealing Tape #4412N, info here:
http://solutions.3m.com/wps/portal/3M/en_WW/VHB_Tapes/Home/Products/three/two/
This stuff is 2mm thick, extremely sticky and conforming, and withstands temperatures from -40 deg F to 200 deg F. I bought a 5 yd. x 2" wide roll for $31.54 here:
http://www.zoro.com/g/Extreme%20Sealing%20Tape/00090401/
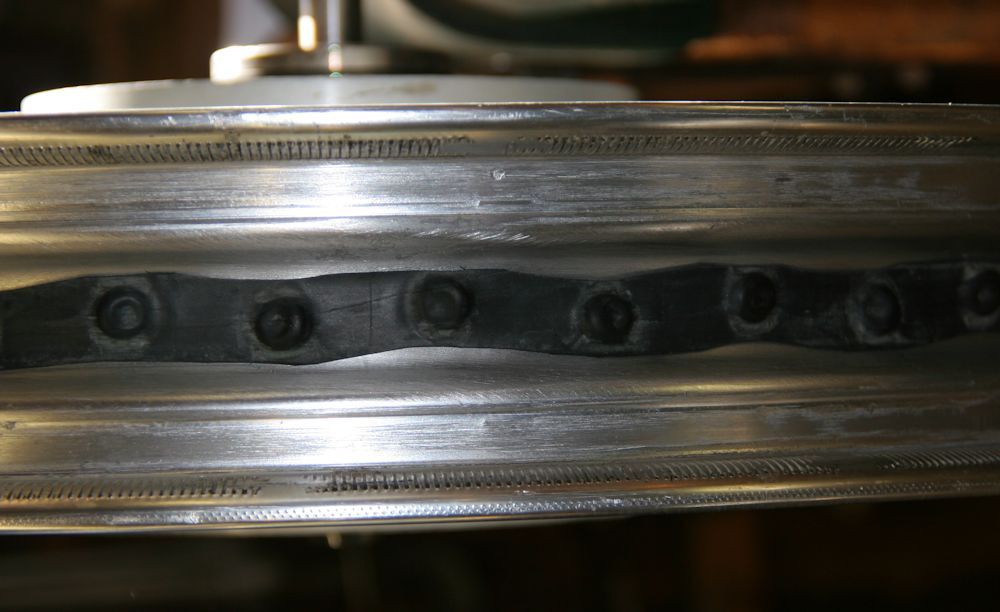
The Outex kit comes with mylar sticky dots to cover each spoke nipple to allow for future adjustment without damaging the sealing tape. Using the 3M tape on my rear wheel, I decided to try just trimming the existing rubber rim strip narrower to maximize tape contact area on the rim. After sanding the rim free of any corrosion and thoroughly cleaning with acetone followed by isopropyl alcohol, the rim and strip looked like this:
3M recommends final cleaning with 50/50 isopropyl and water, so after one final wipe down I applied the tape. Per the Outex video demo I overlapped the tape near the valve stem hole, using a piece of the release paper between layers, then cut through both layers so the ends formed a perfect butt joint. I then added a short piece covering the joint and providing a double thickness for the valve stem. Here it is before trimming to width:
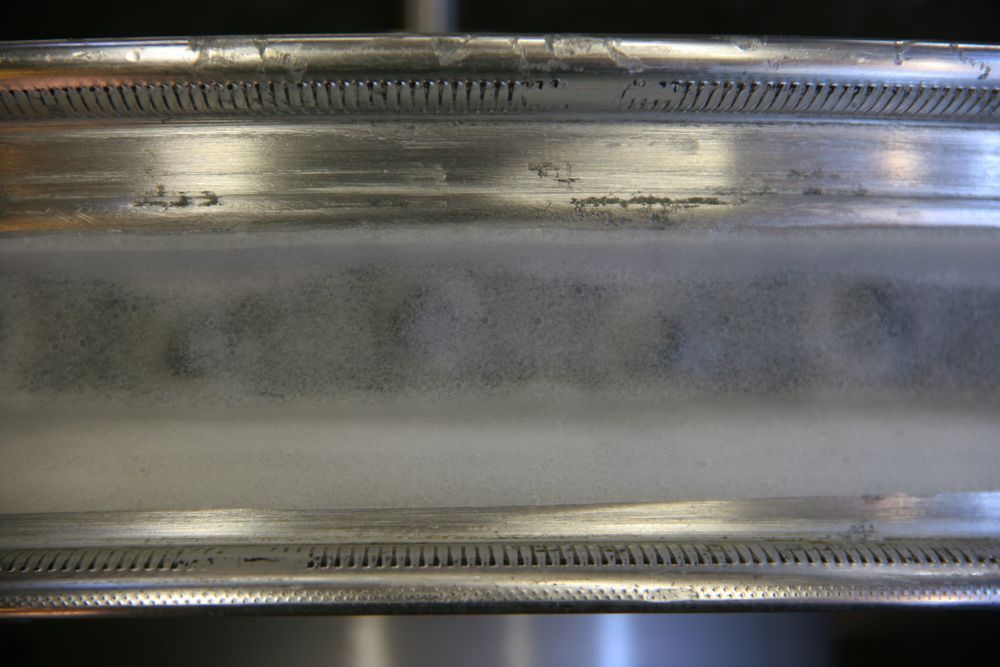
I pressed the drop center areas thoroughly with a rubber roller, then used a razor knife to trim the edges just below the bead lip. Getting the excess tape off the rim is definitely a bit of work if it has been pressed at all.
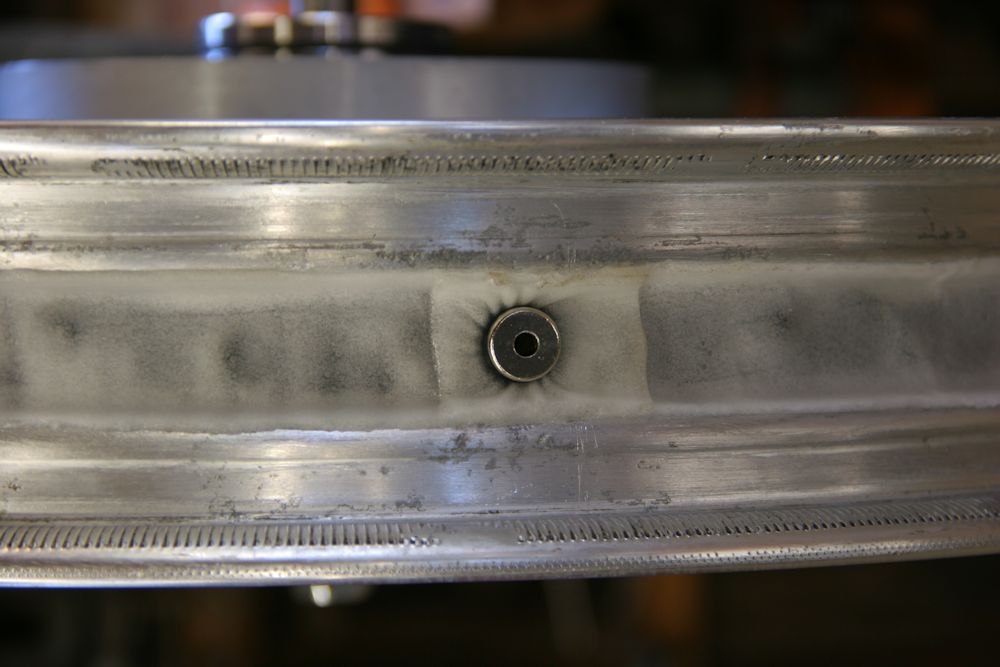
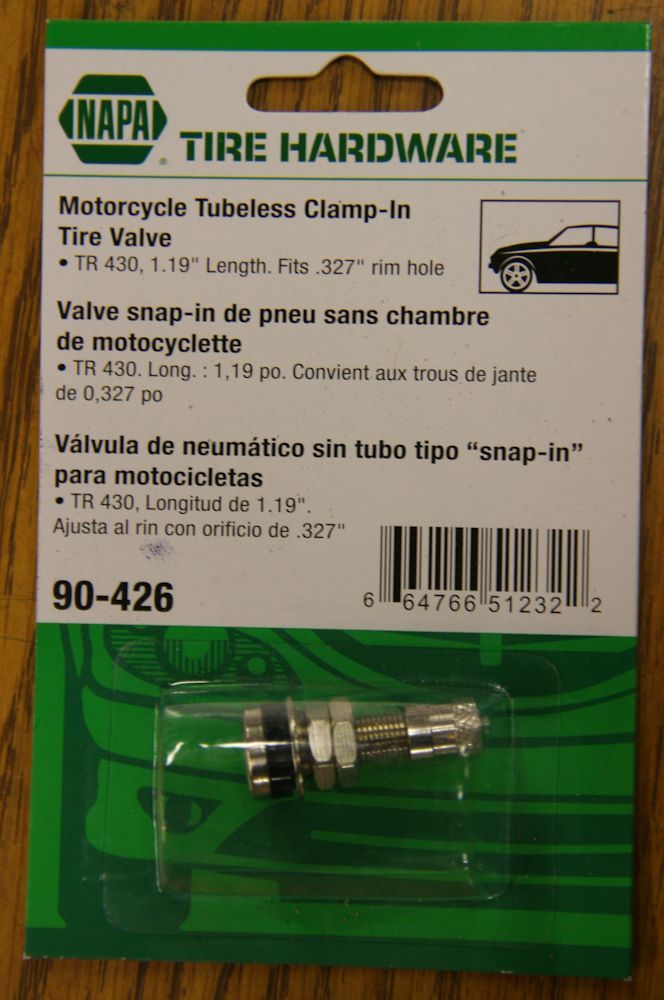
The valve stem is from NAPA Auto Parts:
The front rim is a bit narrower so to get the most tape-to-rim contact I decided to cover each spoke nipple with 15mm dots punched from 10 mil plastic tape, rather than use the cut down rim strip. To make sure the nipples could still turn easily I stuck a 10mm dot punched from 4 mil plastic bag material in the center of each tape dot before sticking them over the nipples.
The tires mounted fine, I took special care to use rubber lube over the tape and tire beads to avoid pulling the edges of the tape loose. After inflating I wished I could see inside the tire at how the tape was conforming to the nipples and rim curves. As it turned out I got my wish as the rear tire had a nail hole in it! The previous owner had had a puncture and replaced the tube. So I pulled the tire off and took a good look. The tape looked great, tightly plastered around each nipple and seated perfectly to the curves of the drop center. It has only been a few days and about 200 miles, but so far air pressure is holding steady. I will report back if anything changes. No news will be good news.
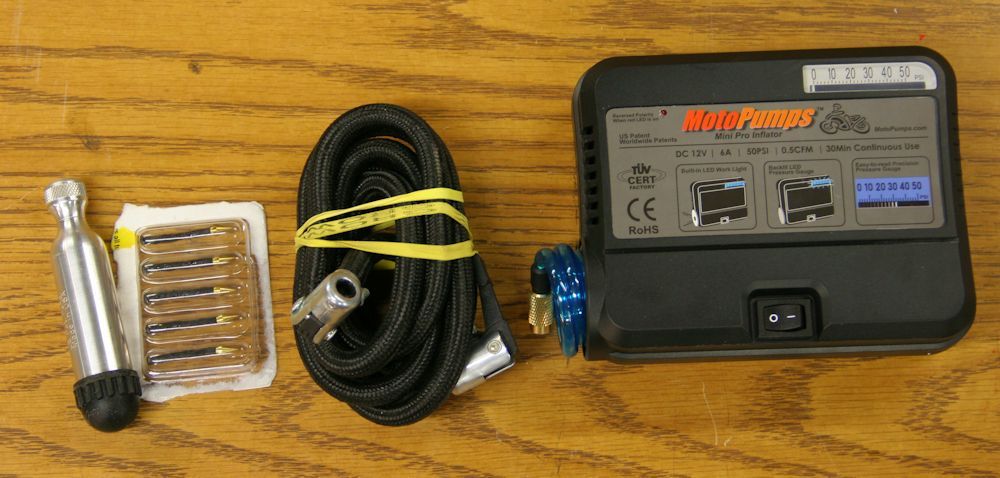
Along with going tubeless I carry a 12v pump and Dynaplug tubeless tire plug kit (both from http://www.motopumps.com), and a "DonorHose" for setting the bead back on the rim if necessary after a flat (from https://www.bestrestproducts.com/p-45-donor-hose.aspx).
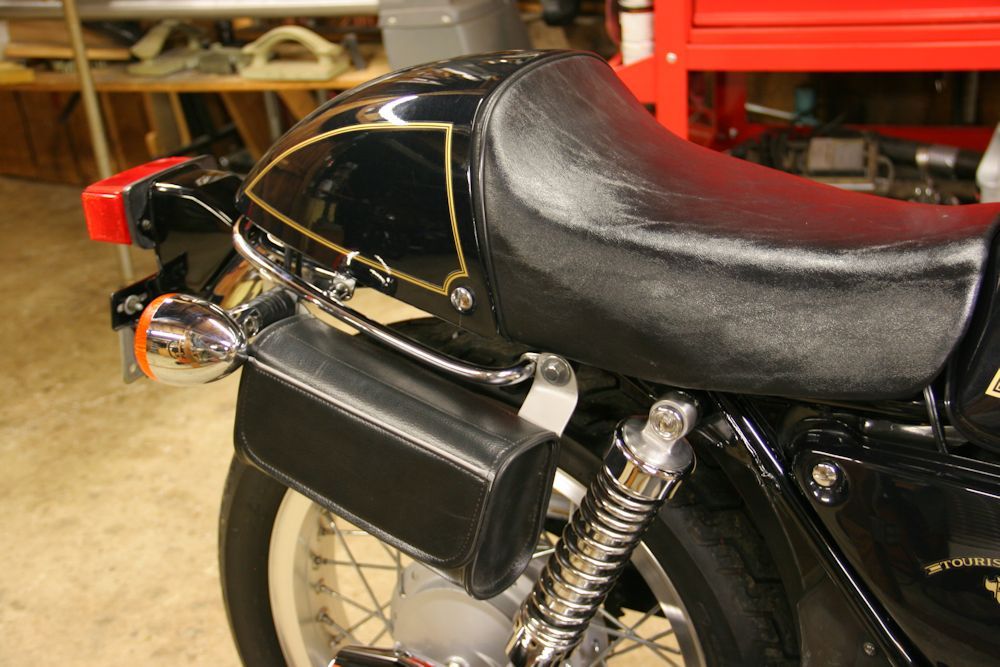
The whole kit fits easily into a small tool bag I mounted to the side of the bike:
So now I'm feeling much better equipped for a roadside flat, but hoping I never need to use the kit!
-Bill
There are lots of online discussions about converting spoked wheels to tubeless. Methods include:
- sealing each individual spoke nipple with silicone seal (it works but is a god-awful mess and adjusting spoke tension is bound to break the seals.
- getting a tube from a smaller diameter wheel, cutting around the circumference, and laying it into the rim's drop center like a big rim strip, then laying a bead of sealant under each edge.
- sealing the entire drop center area with special tapes.
All these methods seem to work if done carefully. There are 14 pages of discussion on these methods in a forum here:
http://supermotojunkie.com/showthread.php?5090-Tubeless-for-under-10-00
I chose the tape method. First I looked at the Outex Tubeless Conversion Kit found on ebay or here:
http://www.ronin-cycles.com/product/27
I decided to go with another recommended tape, the 3M Extreme Sealing Tape #4412N, info here:
http://solutions.3m.com/wps/portal/3M/en_WW/VHB_Tapes/Home/Products/three/two/
This stuff is 2mm thick, extremely sticky and conforming, and withstands temperatures from -40 deg F to 200 deg F. I bought a 5 yd. x 2" wide roll for $31.54 here:
http://www.zoro.com/g/Extreme%20Sealing%20Tape/00090401/
The Outex kit comes with mylar sticky dots to cover each spoke nipple to allow for future adjustment without damaging the sealing tape. Using the 3M tape on my rear wheel, I decided to try just trimming the existing rubber rim strip narrower to maximize tape contact area on the rim. After sanding the rim free of any corrosion and thoroughly cleaning with acetone followed by isopropyl alcohol, the rim and strip looked like this:
3M recommends final cleaning with 50/50 isopropyl and water, so after one final wipe down I applied the tape. Per the Outex video demo I overlapped the tape near the valve stem hole, using a piece of the release paper between layers, then cut through both layers so the ends formed a perfect butt joint. I then added a short piece covering the joint and providing a double thickness for the valve stem. Here it is before trimming to width:
I pressed the drop center areas thoroughly with a rubber roller, then used a razor knife to trim the edges just below the bead lip. Getting the excess tape off the rim is definitely a bit of work if it has been pressed at all.
The valve stem is from NAPA Auto Parts:
The front rim is a bit narrower so to get the most tape-to-rim contact I decided to cover each spoke nipple with 15mm dots punched from 10 mil plastic tape, rather than use the cut down rim strip. To make sure the nipples could still turn easily I stuck a 10mm dot punched from 4 mil plastic bag material in the center of each tape dot before sticking them over the nipples.
The tires mounted fine, I took special care to use rubber lube over the tape and tire beads to avoid pulling the edges of the tape loose. After inflating I wished I could see inside the tire at how the tape was conforming to the nipples and rim curves. As it turned out I got my wish as the rear tire had a nail hole in it! The previous owner had had a puncture and replaced the tube. So I pulled the tire off and took a good look. The tape looked great, tightly plastered around each nipple and seated perfectly to the curves of the drop center. It has only been a few days and about 200 miles, but so far air pressure is holding steady. I will report back if anything changes. No news will be good news.
Along with going tubeless I carry a 12v pump and Dynaplug tubeless tire plug kit (both from http://www.motopumps.com), and a "DonorHose" for setting the bead back on the rim if necessary after a flat (from https://www.bestrestproducts.com/p-45-donor-hose.aspx).
The whole kit fits easily into a small tool bag I mounted to the side of the bike:
So now I'm feeling much better equipped for a roadside flat, but hoping I never need to use the kit!
-Bill
")


