
We noticed you are blocking ads. DO THE TON only works with community supporters. Most are active members of the site with small businesses. Please consider disabling your ad blocking tool and checking out the businesses that help keep our site up and free.
You are using an out of date browser. It may not display this or other websites correctly.
You should upgrade or use an alternative browser.
You should upgrade or use an alternative browser.
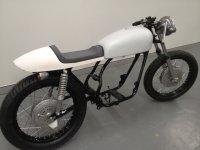
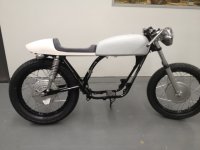
YAMAHA RD250 Cafe Oz
- Thread starter Clueless
- Start date
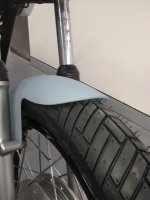
Cheers guys ") Got some supplies and made myself a front fender, I want the bike to look cool but be practical too so I'm going to use the same method to make a smallish rear fender.
Got some supplies and made myself a front fender, I want the bike to look cool but be practical too so I'm going to use the same method to make a smallish rear fender.
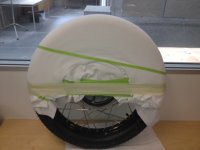
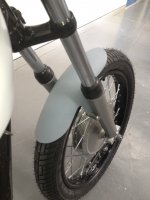
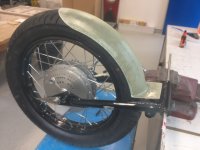
Here is my attempt at a close fitting fender:
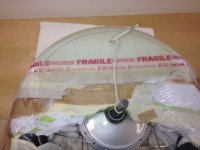
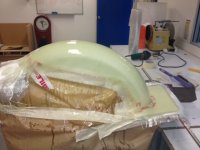
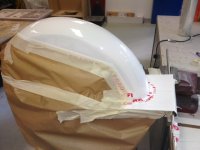
First I stretched some cheap cotton stretch sheets over the wheel, I paid $3.75 a meter for the material and got 3m, it only stretches in one direction, I found stretching it tought over the circumference was best. I'm going for an 8mm offset so I built up layers to achieve it strapping each layer in place with masking tape.
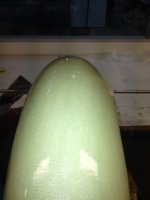
I then covered the stretch sheets with one layer of kitchen cling film/glad wrap to give a smooth shiny surface. Epoxy resin will not attack the cling film and simply peels away from it after curing. This part was probably the biggest PITA, gently using a heat gun shrinks the cling film tort.
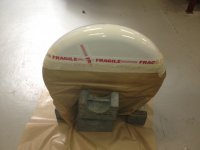
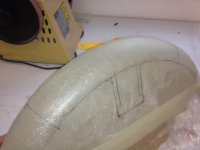
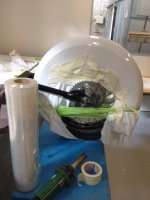
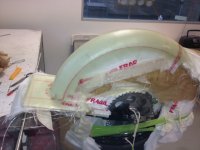
I built up layers of woven fiber glass cloth to give a thickness of around 2.5mm it moves in all directions so it is very easy to use in this application. The last layer was surface tissue/Veil to try and give a smooth surface for painting.
The process is quite easy and actual laminating quick, I started by painting resin onto the cling film then draping the woven cloth over and wetting it out with the epoxy using a brush then a wire roller to get rid of any air bubbles. Waiting for the epoxy to go off was the most painfull part.
Got some supplies and made myself a front fender, I want the bike to look cool but be practical too so I'm going to use the same method to make a smallish rear fender.Here is my attempt at a close fitting fender:
First I stretched some cheap cotton stretch sheets over the wheel, I paid $3.75 a meter for the material and got 3m, it only stretches in one direction, I found stretching it tought over the circumference was best. I'm going for an 8mm offset so I built up layers to achieve it strapping each layer in place with masking tape.
I then covered the stretch sheets with one layer of kitchen cling film/glad wrap to give a smooth shiny surface. Epoxy resin will not attack the cling film and simply peels away from it after curing. This part was probably the biggest PITA, gently using a heat gun shrinks the cling film tort.
I built up layers of woven fiber glass cloth to give a thickness of around 2.5mm it moves in all directions so it is very easy to use in this application. The last layer was surface tissue/Veil to try and give a smooth surface for painting.
The process is quite easy and actual laminating quick, I started by painting resin onto the cling film then draping the woven cloth over and wetting it out with the epoxy using a brush then a wire roller to get rid of any air bubbles. Waiting for the epoxy to go off was the most painfull part.
Attachments
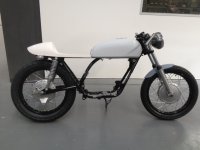
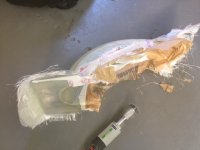
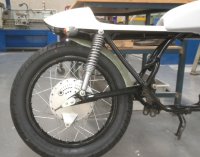
I then shaped and drilled it to fit, the surface needs some work and a coat of filler primer but Im happy with the result, hopefully it will sort of disappear once painted matte black.
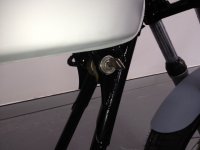
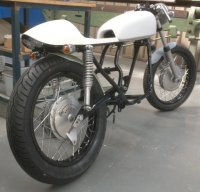
I also got a key cut for the ignition, so I decided to see what it looks like relocated.
I also got a key cut for the ignition, so I decided to see what it looks like relocated.
Attachments
barnabasantioch
Active Member
Great looking build! I've been struggling with the route I wanted to go with my wheels... Polished vs. blacked out. I like what you did with the contrasting hoops/wires. Think I'm going to be jacking that idea...
JustinLonghorn
No Purple Hearts, No Blue Ribbons
Looks absolutely bad ass to me, sir.
valvesprung
Over 1,000 Posts
Amazing. Nothing better than a part made from scratch to fit perfectly...bravo good sir
FlyinRyan350
Been Around the Block
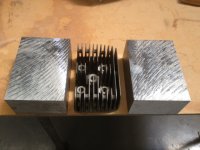
I can't wait to see those heads, those are gunna be trick. Are you worried about that rear fender flexing enough and rubbing the tire or is the piece pretty solid?


