Yet another CL350 rebuild...HELP!!!

It'd definitely be worth it if you plan to get into more projects. Not sure about the quality of the HF one though. There's a cool thread over on the Garage Journal forum called Harbor Freight Pass/Fail that gives honest reviews of most all of their products. I always check it out first before pulling the trigger on a HF product.
 
the HF comp tester is garbage. When it comes to specialty tools that I plan on using on every bike here-out... I have learned to go with the decent ones.
 
Crap. Alright, I guess I'll be going to Sear's... eventually.

Working for shit wages are no fun. Hopefully that 15 dollar minimum wage comes to Colorado, soon. -fingers crossed-
 
Also keep an eye on flee-bay for used tools in good shape - I got a blind-bearing puller for $20 - would have cost $100+ new
 
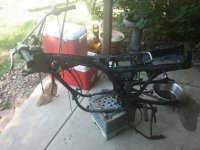
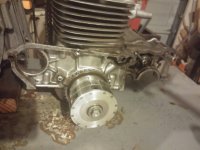
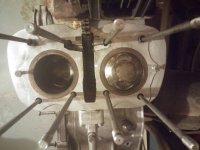
Okay, since I can't do much else until I get the compression tested, I decided I was going to do stuff that was free. One of those things was painting the hand controls. And now I think I done fucked up guys.

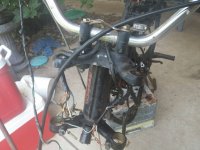
1: I'm relatively sure I burned the little circuit board for the electric start button. Using the push start button doesn't do anything at all. And 2: Upon trying to tape up the connection so it doesn't short out on anything, NONE of the electrical works. Turn signals, headlights, brake lights, I can't even get the bike to kick-start. I have no idea whats going on. I know I have juice in the battery, cause I tested it with a volt meter, and prior to taping up the loose wire, the starter was shorting out and continuously going until I turned off the key.

I know it was me who messed it up, but I felt like kicking the damn thing. But if I did that, I would have to hug it and cuddle it and whisper sweet nothings into the carburetor air intakes to make it feel better.

Does anyone have any insight or experience with this problem? I mean, I realize its pretty specific, but you never know until you ask....
 

Attachments

  • 115605.gif
    115605.gif
    4.5 KB · Views: 393
Do you have a copy of the wiring diagram and a multimeter/ test light?

Do you have a general knowledge of how electrical works (not trying to be a dick, I assume you do because of all the work you've been doing, but sometimes electrical is a mystery to people)

The best thing to do is to test for continuity across the bike. I would start with your coils. They are the part that makes the bike run. Either move from the battery out or the coils in - should help you trace down your problem. IF you think its all in the hand controls, then just try to get continuity across the hand controls (should be a few power in and then the switches will get power to the right places as made clear by the wiring diagram - the direction of the bullet connectors tells you which way is which, and lets you bypass some of the switches if you know what you are doing.)

I personally got lazy and just built a new wiring harness because A: mine had all sorts of gremlins and redundant systems that don't matter on old bikes in the state of Alabama, and B: I was tired of being blind at night, so I wanted to beef things up for an HID system.

It cost me about $30 in parts off of McMaster Carr (IIRC)
 
And starters are cool and everything, but . . . its a 350 - just kick it. Either its going to kick pretty easy or your battery is going to die trying to start it. From the sound of things, you'll want to pull that starter anyway (based on your goals for this build).

I've seen people plug the hole for the starter with a basic pipe cap from home depot. I myself am friends with a machinist who likes when people owe him favors. it wasn't a hard part to lathe.
 
Check the fuse mounted right off to the side of the battery box. If it is original it is a glass fuse encased in a little white plastic shell that pops open. If it's blown you would have the symptoms you're experiencing (i.e. no power). Typically a short would cause the fuse to blow - i.e., one of your powered wires grounded out. Could be in your switches since that's what you were working on last.
 
You know, I was just in the shower and thought of that as well. I guess I'll have to look into that as well as a pipe cap to close off the electric starter hole. Do you have to shorten any chains when you do that?
 
So, I was just looking at the bike today and I noticed the motor had a different serial number than the frame. Turns out I have a SL350 K0 motor on a CL350 K2 frame.
 
I believe the SL motors were kickstart only. There was no provision for a starter. The right side cover was different as well, oil fill cap was at the front of the cover.
 
Well, I realize it's been a long time since I last posted about progress on this project.

I pulled the motor out of the frame and took it apart in search of the reason I couldn't get any compression. It was a quick find. There was a whole corner of the gasket missing immediately under the valve housing. Easy enough? No, not for this guy. I had to continue digging into the Damn thing. I did something I probably shouldn't have done. I split the cases.

Luckily, I didn't find anything notable other than a ton of sludge in the bottom of the oil pan. :)

Next I decided to tear into the forks. I'm very glad I did, the inside of the left fork was beginning to get a bit rusty. BUT THE FORK OIL WAS GREEN! What the fuck is that? The other fork, it was almost entirely empty. What oil was in there, it was a nice subtle rust orange. Oooh aaaahh. At least one good thing happened, I cleaned and re-greased the ball bearings for the triples. C: I'll post pictures tomorrow or something.
 
As she sits now. Just waiting on funds to but a gasket set and hondabond and the motor will go back together.poor thing was dirtier than it deserved.
 

Attachments

  • uploadfromtaptalk1407600646816.jpg
    uploadfromtaptalk1407600646816.jpg
    94.4 KB · Views: 247
  • uploadfromtaptalk1407600665780.jpg
    uploadfromtaptalk1407600665780.jpg
    82.8 KB · Views: 250
  • uploadfromtaptalk1407600674558.jpg
    uploadfromtaptalk1407600674558.jpg
    93.1 KB · Views: 254
  • uploadfromtaptalk1407600686697.jpg
    uploadfromtaptalk1407600686697.jpg
    71.5 KB · Views: 281
  • uploadfromtaptalk1407600704957.jpg
    uploadfromtaptalk1407600704957.jpg
    62.3 KB · Views: 252
  • uploadfromtaptalk1407600714147.jpg
    uploadfromtaptalk1407600714147.jpg
    61.3 KB · Views: 233
  • uploadfromtaptalk1407600725557.jpg
    uploadfromtaptalk1407600725557.jpg
    53.3 KB · Views: 239
you have it that far apart you will need to change out the cylinder base gasket,put new cam chain in , inspect measure the cylinder bores ,overbore if needed, replace all cam chain guides and wheels as well
check the crankshaft make sure it is in spec as well
 
Back
Top Bottom