

You are using an out of date browser. It may not display this or other websites correctly.
You should upgrade or use an alternative browser.
You should upgrade or use an alternative browser.
Hondacati GSX-R CL350
- Thread starter Luke Manion
- Start date
Luke Manion
Active Member
A few nights this week were dedicated to the restoration of my blasting cabinet,
and one night turning parts.
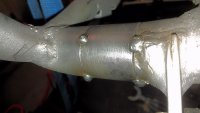
I finally got some time, late this afternoon to tack in one of my frame slugs to widen the CB frame.
This is the easy side (round), the other needs to be 'squashed' to match the original frame tube shape.
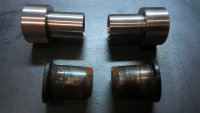
I turned these slugs out of solid 1.5" rounds, then shouldered them 3/16" on each end to extend inside the openings.
I plan on cross-cutting on the right side insert, and finishing it off with a grinder to match the profile.
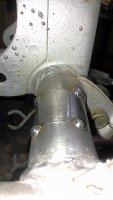
I have to remove the backing plates for the passenger footpeg mounts/swingarm pivot for clearance,
then inset my new interior bushings, and after careful checking...I'll weld these up solid.
and one night turning parts.
I finally got some time, late this afternoon to tack in one of my frame slugs to widen the CB frame.
This is the easy side (round), the other needs to be 'squashed' to match the original frame tube shape.
I turned these slugs out of solid 1.5" rounds, then shouldered them 3/16" on each end to extend inside the openings.
I plan on cross-cutting on the right side insert, and finishing it off with a grinder to match the profile.
I have to remove the backing plates for the passenger footpeg mounts/swingarm pivot for clearance,
then inset my new interior bushings, and after careful checking...I'll weld these up solid.
Attachments

Luke Manion
Active Member
DesertKZ said:Admire your build.
Gonna look so cool!
Thanks desert!
Luke Manion
Active Member
I have the right side frame slug tacked into place now, but
I still have to grind down the profile to match the squashed cross-tube on the right side.
I have to center everything and double check all of my figures before a final weld.
If anything, it seems that I am a bit wide on the right side...it could be the shape of the swingarm,
or perhaps the original CL frame is offset slightly differently from left to right.
I believe I may take out about an 1/8" from the right crosstube, trimming to an even 1 inch of stretch,
whereas the left sits at 1.200". My 'reveal' between seat support and swingarm needs some adjustment.
At least it all fits. My new inner bushing sleeves should be ready tomorrow, then I can fine tune the entire back half,
and fabricate the outer plates.
I still have to grind down the profile to match the squashed cross-tube on the right side.
I have to center everything and double check all of my figures before a final weld.
If anything, it seems that I am a bit wide on the right side...it could be the shape of the swingarm,
or perhaps the original CL frame is offset slightly differently from left to right.
I believe I may take out about an 1/8" from the right crosstube, trimming to an even 1 inch of stretch,
whereas the left sits at 1.200". My 'reveal' between seat support and swingarm needs some adjustment.
At least it all fits. My new inner bushing sleeves should be ready tomorrow, then I can fine tune the entire back half,
and fabricate the outer plates.
Attachments


Luke Manion
Active Member
johnu said:Looking good
Thanks Johnu...
Luke Manion
Active Member
neevo said:There's some serious work going on here, it's fun watching it unfold.
I don't know about serious work...LOL Thanks for staying tuned in!

neevo
Over 1,000 Posts
BSA Nut said:I don't know about serious work...LOL Thanks for staying tuned in!
Frame stretching and slug inserts for SSSA, if that's not serious work I'd like to see you do something serious

Luke Manion
Active Member
Some progress tonight, after a long hot week of work.
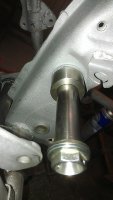
New pivot bushing pressed into the frame, clearances check, and swingarm put together in its final resting place.
Everything worked out well. A nice, tight pivot bolt installation...and patterns made for the outer plates.
I drilled the pivot nut for safety wire, and checked fitment again with the shock and linkage.
***I am going to cut open the right-side frame and remove a .250" sliver to even out the inner frame clearance. My slugs were exactly the same,
and they should have been different. Everything moved equal amounts, but visually I need to shrink the right side. Centering will not be effected otherwise.
Some eye candy for the watchers:
New pivot bushing pressed into the frame, clearances check, and swingarm put together in its final resting place.
Everything worked out well. A nice, tight pivot bolt installation...and patterns made for the outer plates.
I drilled the pivot nut for safety wire, and checked fitment again with the shock and linkage.
***I am going to cut open the right-side frame and remove a .250" sliver to even out the inner frame clearance. My slugs were exactly the same,
and they should have been different. Everything moved equal amounts, but visually I need to shrink the right side. Centering will not be effected otherwise.
Some eye candy for the watchers:
Luke Manion
Active Member
Luke Manion
Active Member

Luke Manion
Active Member

Luke Manion
Active Member
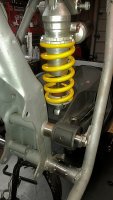
From here...I will cut off the stock backing plates for the motor mounts,
fab replacements plates, and final weld the frame slugs.
Then I can bolt the sandwich together and tack the outer plates.
A reinforcement tube will be shoved down the stock frame member and welded to the pivot housing,
then capped at the top. Top shock mounts, and frame gusseting will finalize the back-half mods.
fab replacements plates, and final weld the frame slugs.
Then I can bolt the sandwich together and tack the outer plates.
A reinforcement tube will be shoved down the stock frame member and welded to the pivot housing,
then capped at the top. Top shock mounts, and frame gusseting will finalize the back-half mods.
Attachments
Luke Manion
Active Member

Luke Manion
Active Member
Luke Manion
Active Member
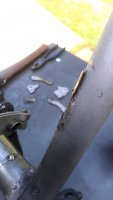
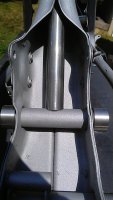
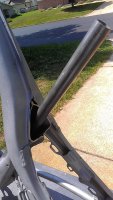
Center down tube reinforcement...
I cut out the goofy ears, leveled the factory welds, built a tube (1.00" OD), and built a triangular top plate.
Welded and roughed in.
I cut out the goofy ears, leveled the factory welds, built a tube (1.00" OD), and built a triangular top plate.
Welded and roughed in.
Attachments



Luke Manion
Active Member
Thanks XB!xb33bsa said:most excellent