Follow along with the video below to see how to install our site as a web app on your home screen.
Note: This feature currently requires accessing the site using the built-in Safari browser.
We noticed you are blocking ads. DO THE TON only works with community supporters. Most are active members of the site with small businesses. Please consider disabling your ad blocking tool and checking out the businesses that help keep our site up and free.
If you know the dimensions of the dowel, you can try finding it on boats.net - (i know wtf.. a boat site?) but i was able to order all the dowels i needed for assembling my 350 from that site and it was cheap n shipped quickly.
So i started on the wiring harness.....I have a NOS Harness. But there are SO MANY WIRES in this thing. Im going to be running this thing bare bones, so i think im going to ditch it an build my own harness....hmmmm
thoughts on that? (I have done it before its not hard, just wondering opinions on keeping the stock harness..)
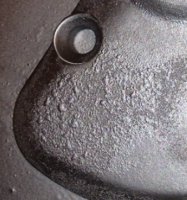
The clutch cover cover thing.......not so much......should have baked it first to let all that shit come out BEFORE coating it. Damn, thats going to be fun to blast off. Thats my first BAD powdered part. Ive had a few that have a bubble or three but this one looks like dog shit.
TELL ME thats not the ugliest thing you have every seen?
Okay i decided a few things, first I'm so close to stock im going to go ahead and use the factory wiring harness.
I set it up tonight and HAVE SPARK! that was easy (famous last words anyone?)
Anyway, major question:
How the hell do I route this wiring harness? It is so long in the front and theres no way its going in the headlight bucket. So WTF do i do with it?
Can someone with a stock bike give me a rundown of how this thing goes in here?
Here's what I thought looking at the stock harness however I couldn't find a definitive answer either.
Big mess goes in headlight. Rubber cup with other collection of connectors is around head stem (for handlebar switches). Coils wiring naturally around coils. Then the rest around the airbox and rear of the bike.
Yeah that's what I figured, problem is I do not want the bundle around the head, I don't like it. I may try and stash it under the tank somewhere. We shall see
Hey Sonicjk - yes, it's from the Cb400f supplement to the Honda Shop Manual. It's funny how things goo missing over time. I've had a few of these bikes, yet none of them have had the (I'm guessing) rubber strap that wraps over the harness to the front of the coils on the left hand side. The mounting points are there, but the strap goes AWOL.
Didnt like how the PO had the gauges mounted, they were too high and not tucked enough for me, so i fabbed up a new bracket to hold them right in close to the bars
and hit it with some powder
and it should be out of the oven in 20
I LOVE powdercoat, have I mentioned that? You can fab a part have it powdered and installed in under an hour. sure as hell beats the pants off of waiting on paint to dry!
Okay sort of, I got the exhaust on and had to hear it so a little starter fluid in the intakes and she rumbled to life with a tap of the starter button!
This kerker sounds awesome
This site uses cookies to help personalise content, tailor your experience and to keep you logged in if you register.
By continuing to use this site, you are consenting to our use of cookies.