
We noticed you are blocking ads. DO THE TON only works with community supporters. Most are active members of the site with small businesses. Please consider disabling your ad blocking tool and checking out the businesses that help keep our site up and free.
You are using an out of date browser. It may not display this or other websites correctly.
You should upgrade or use an alternative browser.
You should upgrade or use an alternative browser.
1982 Virago 920 engine up build
- Thread starter Knifemaker87
- Start date
two-smoker
I reject your reality, and substitute my own!
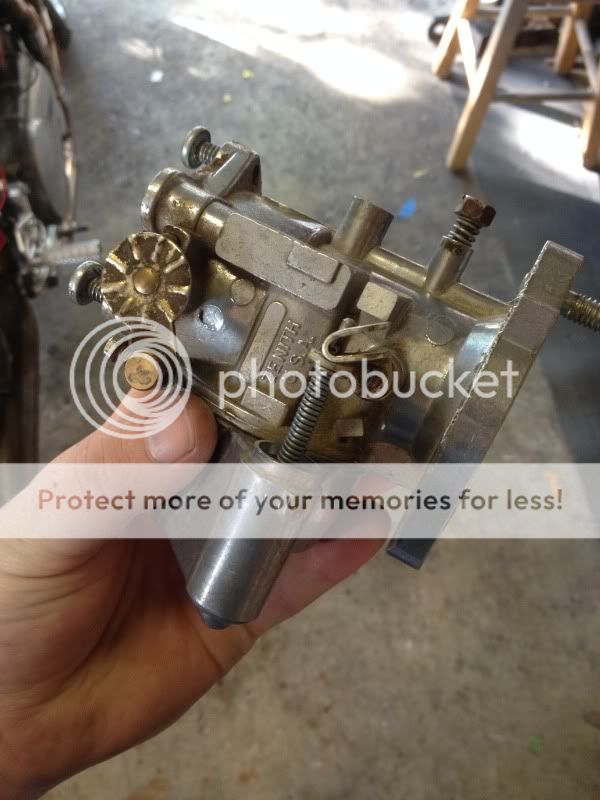
Looks like a stock Harley carb. Mikuni HSR42, yes? In fact, you'll see the old bar and shield cast into the carb body above...
okay, well as some of you may know, i work for NASA and due to a lapse in funding i have been out of work since the 1st of october. =( however the bright side of that is that i have had plenty of time to work on the bike. I havent posted anything as i have been so busy, so this should be an interesting post (or two... i have a bunch of pictures.)
to get right down to it, a co-worker gave me old sportster carb; a Zenith. Anybody have any experience with this carb? i am going to try and hook it up so i can see the difference between this pure mechanical carb and my more modern CV Kehin carb.
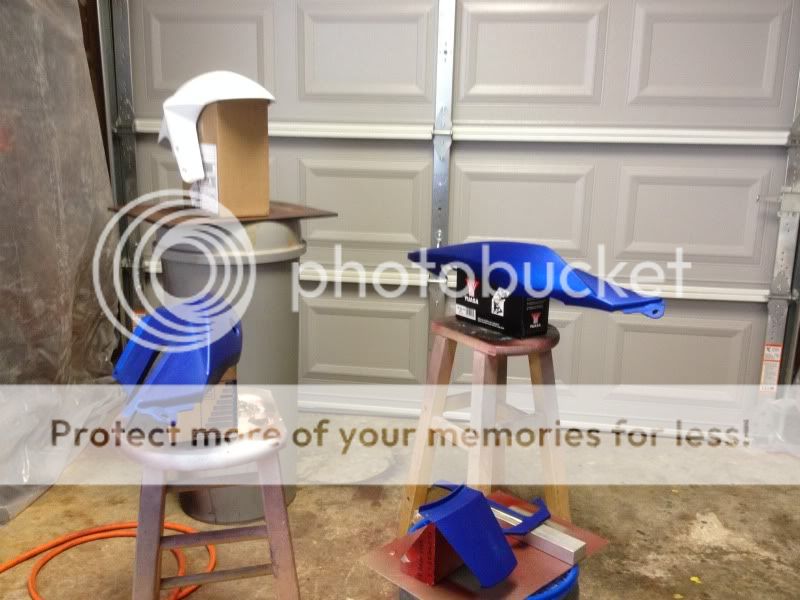
I also painted a local guy's SV650.
before:
After: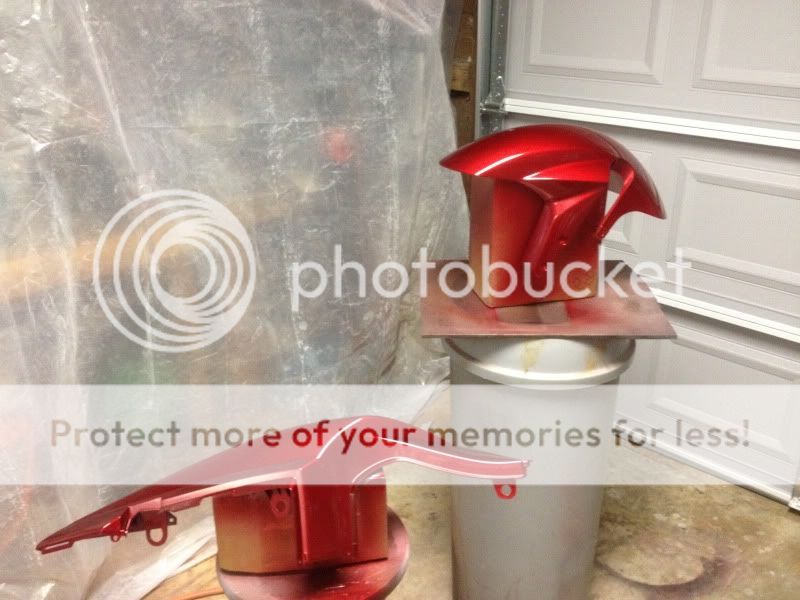
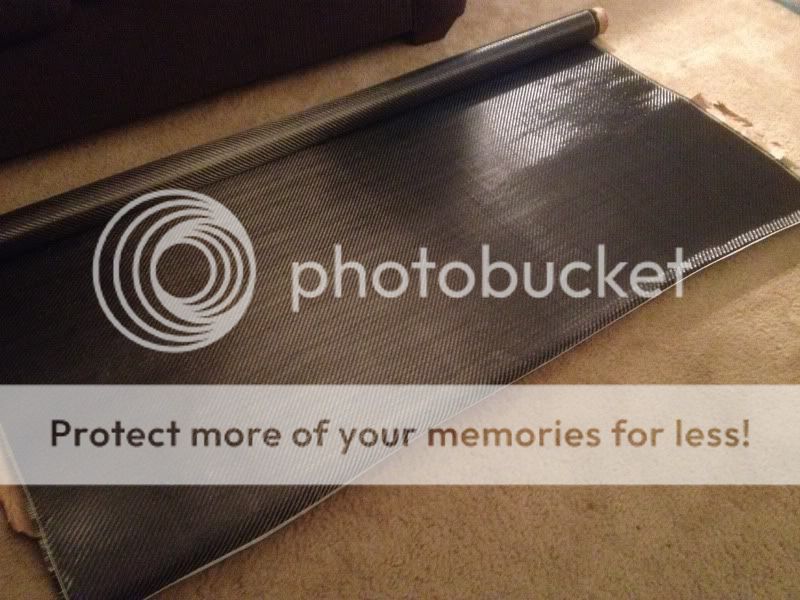
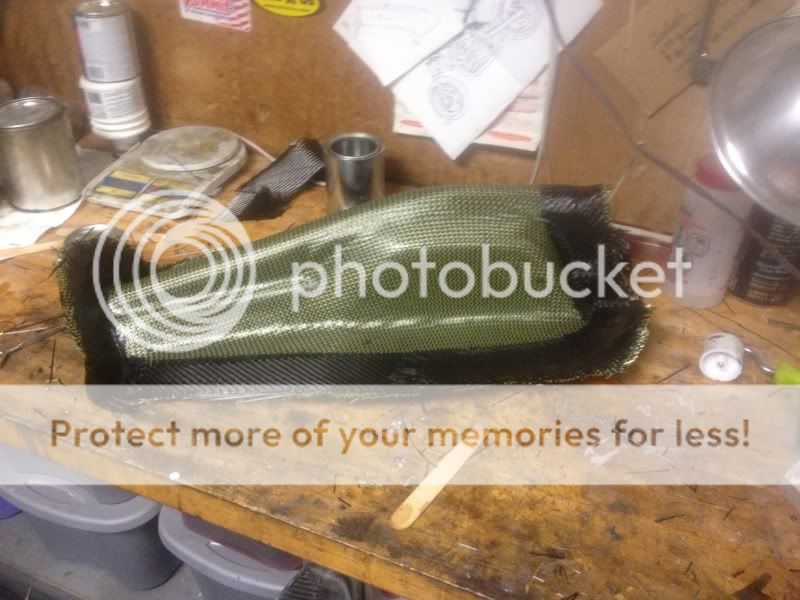
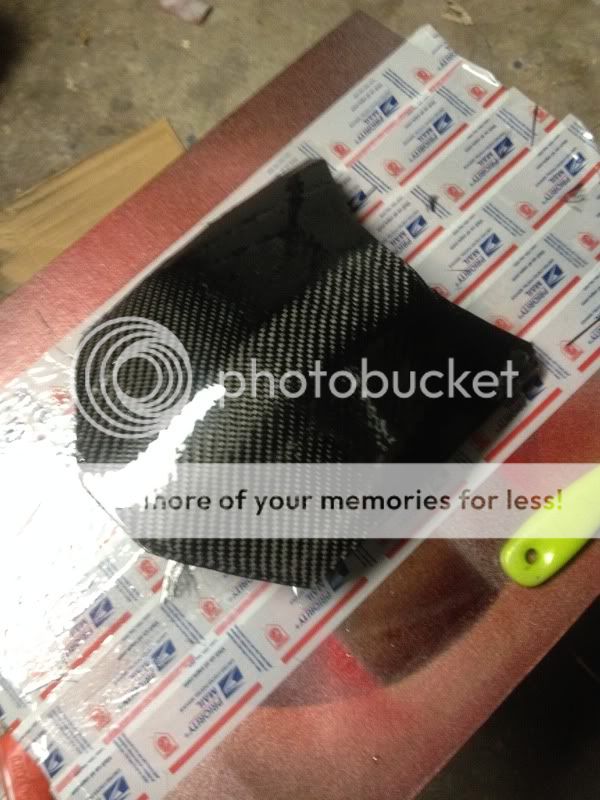
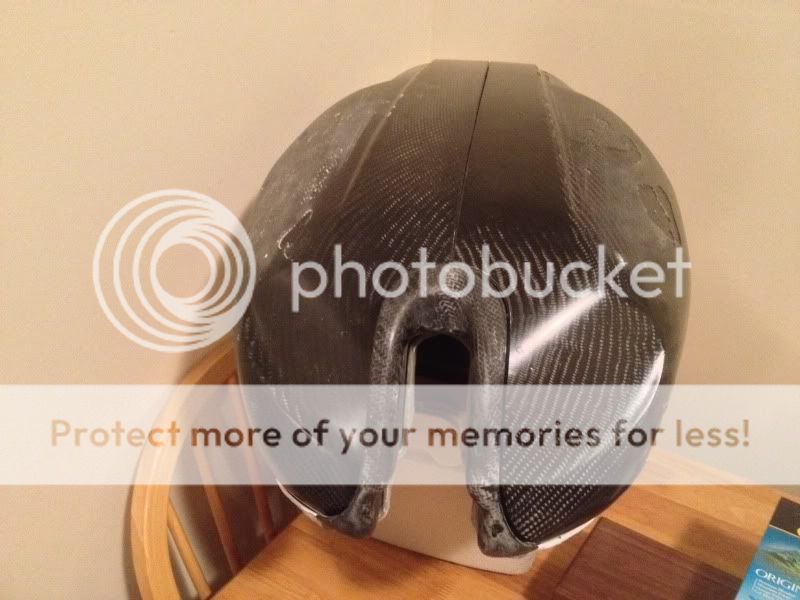
and now, on to some carbon fibery goodness. I have two yards of 2k twill Areo grade carbon fiber to make my parts. I also have kelvar cloth and kevlar/carbon twill.
I prepped my molds, and released them with several layers of car wax, with a couple layers of bowling ally wax on top. The molds were finished with off the shelf sealer-primer that was sanded smooth and buffed shiny. I layed up the first layer of carbon fiber paying close attention to follow all the curves and let them cure.
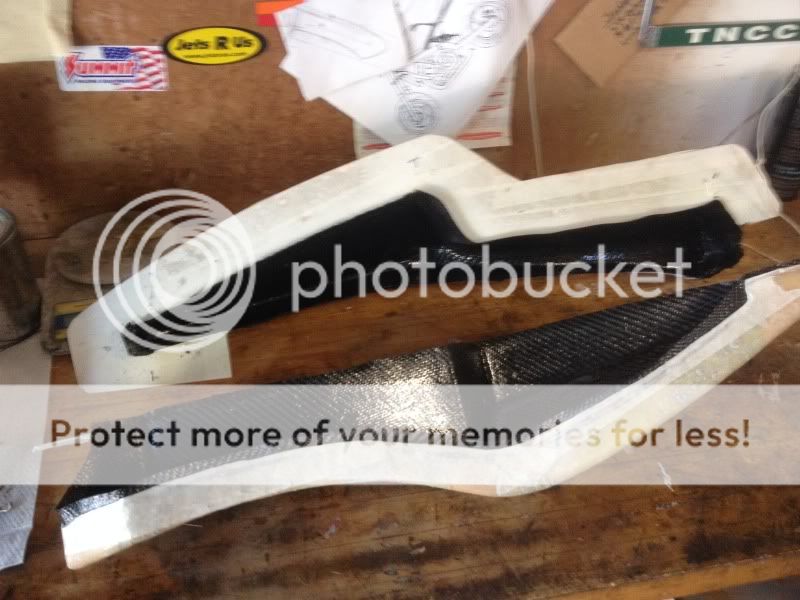
then i put two more layers of carbon, a layer of kelvar/carbon and topped with another layer of carbon. once cured, i popped the parts out.
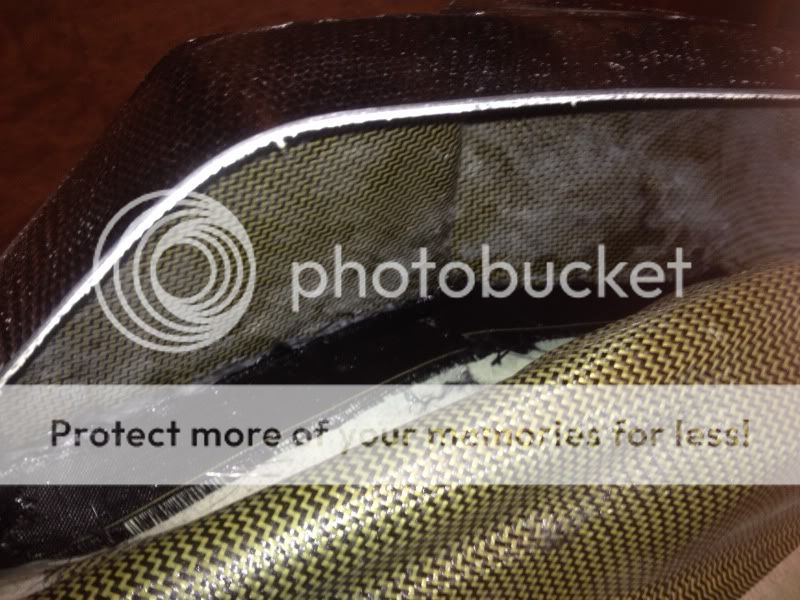
Sadly, the off the shelf primer was just too porus and some of the paint stuck to the parts, but nothing some soda blasting couldnt solve. then i trimmed and sanded the parts flush with the flange on the mold, bolted the molds together and taped the parts together, took them out of the mold and ran a line of tape over the seam to seal it.
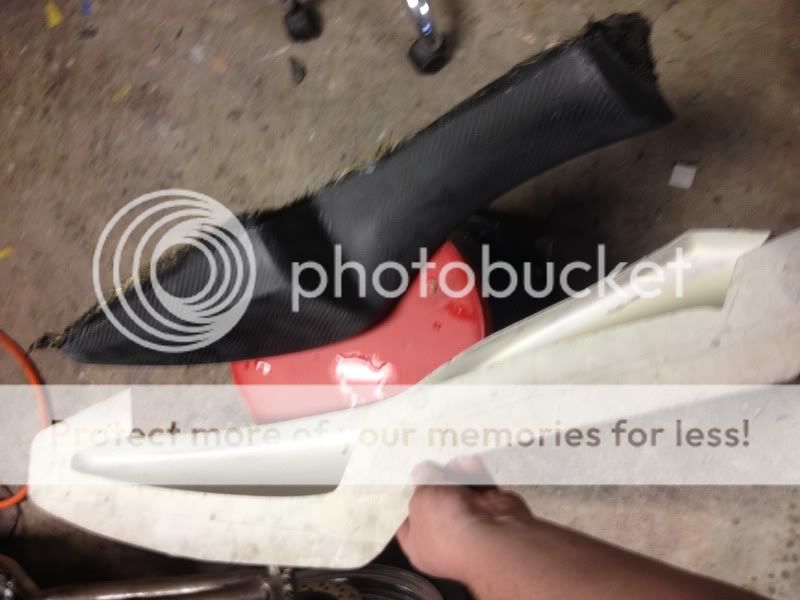
With the seam sealed i put the parts back in the mold halves, bolted them together and laid up layers of carbon over the seam, and put 5 more layers of carbon and kelvar on the seat area. this section has to be be really stiff as it will need to support my weight.
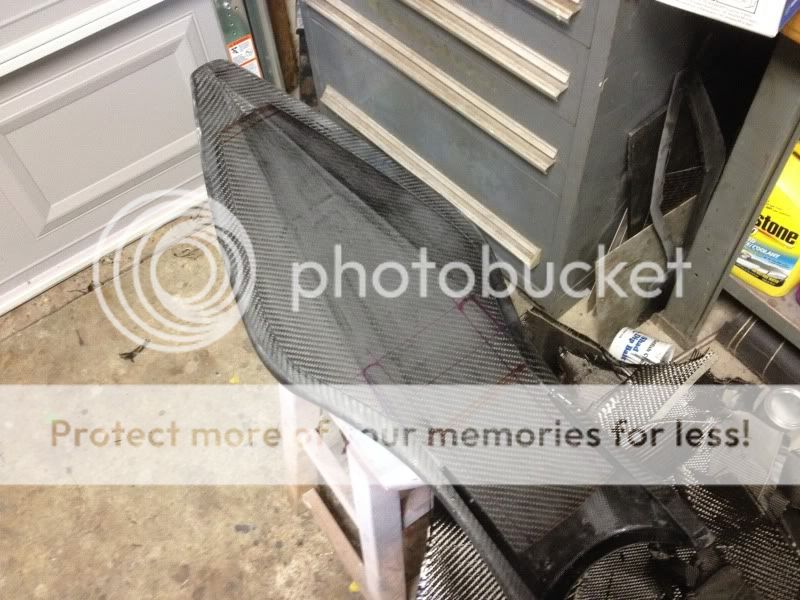
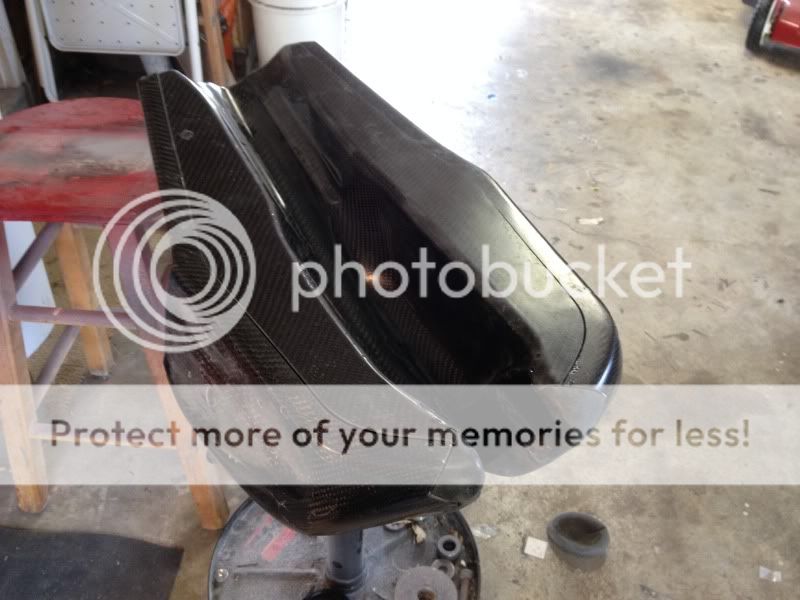
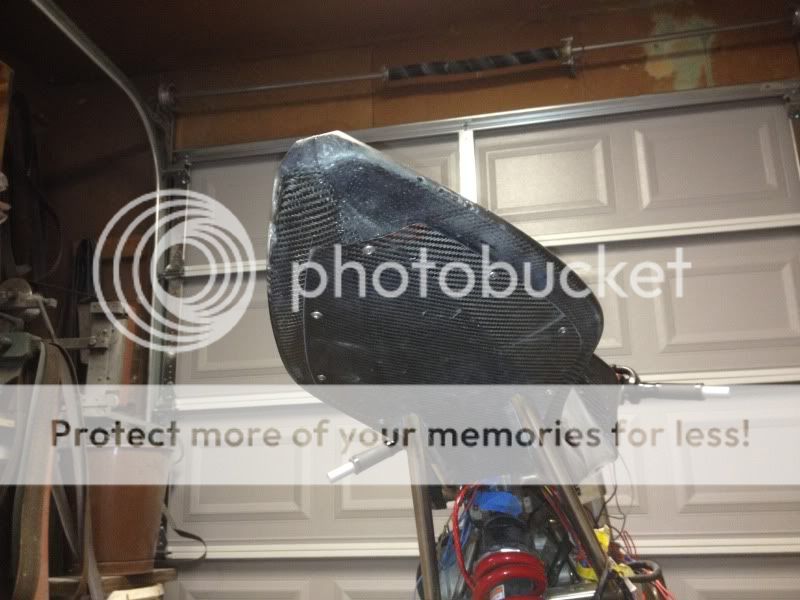
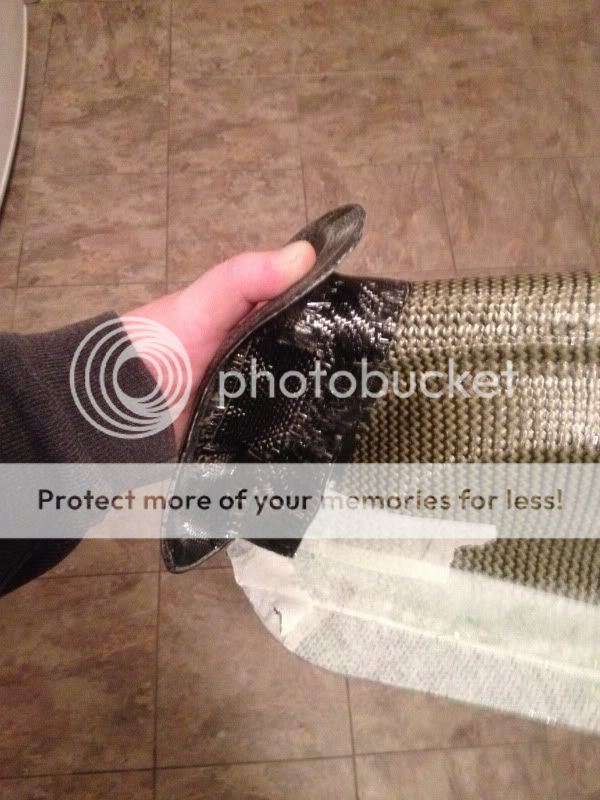
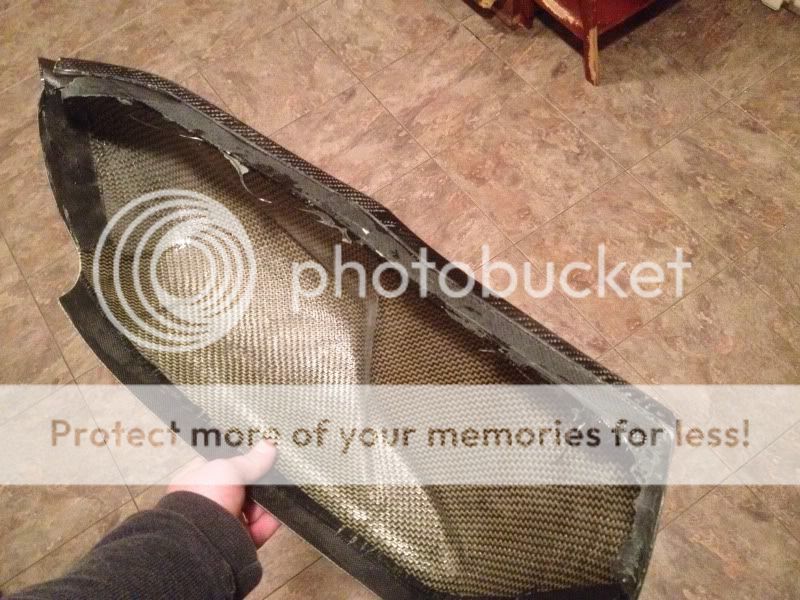
then i let the resin cure up overnight. before popping the part out and peeling off the tape. and here you go! seat and tail
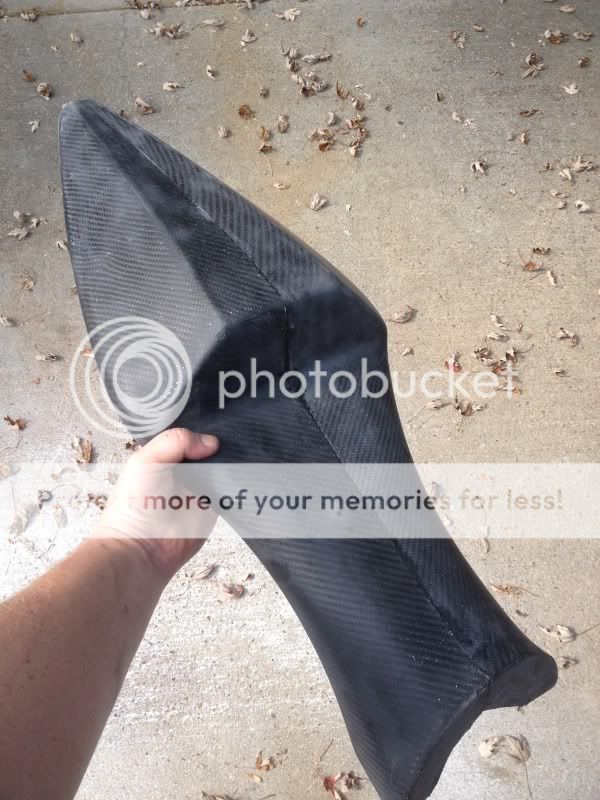
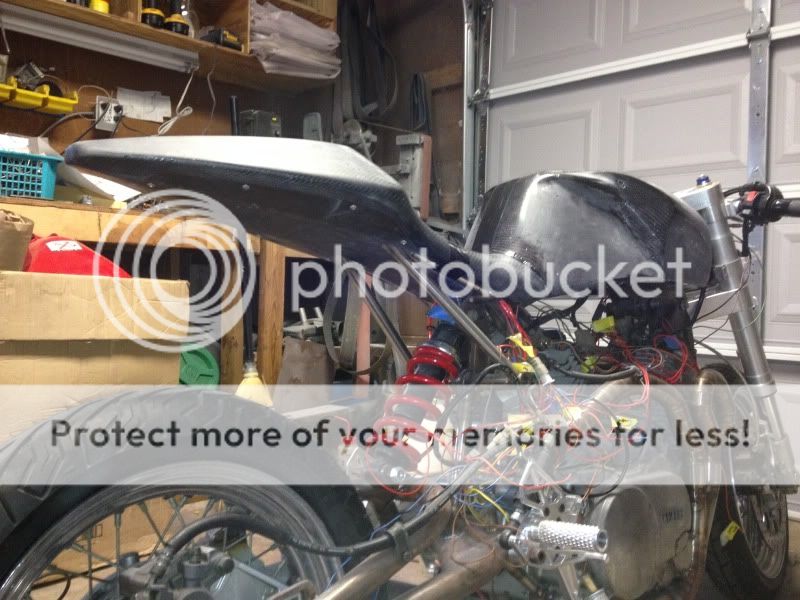
I trimmed it to fit over the subframe and had to get a picture.
now, due to photo limits i have to end this post, but dont be sad... there is more.
to get right down to it, a co-worker gave me old sportster carb; a Zenith. Anybody have any experience with this carb? i am going to try and hook it up so i can see the difference between this pure mechanical carb and my more modern CV Kehin carb.

I also painted a local guy's SV650.
before:

After:

and now, on to some carbon fibery goodness. I have two yards of 2k twill Areo grade carbon fiber to make my parts. I also have kelvar cloth and kevlar/carbon twill.

I prepped my molds, and released them with several layers of car wax, with a couple layers of bowling ally wax on top. The molds were finished with off the shelf sealer-primer that was sanded smooth and buffed shiny. I layed up the first layer of carbon fiber paying close attention to follow all the curves and let them cure.

then i put two more layers of carbon, a layer of kelvar/carbon and topped with another layer of carbon. once cured, i popped the parts out.

Sadly, the off the shelf primer was just too porus and some of the paint stuck to the parts, but nothing some soda blasting couldnt solve. then i trimmed and sanded the parts flush with the flange on the mold, bolted the molds together and taped the parts together, took them out of the mold and ran a line of tape over the seam to seal it.

With the seam sealed i put the parts back in the mold halves, bolted them together and laid up layers of carbon over the seam, and put 5 more layers of carbon and kelvar on the seat area. this section has to be be really stiff as it will need to support my weight.

then i let the resin cure up overnight. before popping the part out and peeling off the tape. and here you go! seat and tail

I trimmed it to fit over the subframe and had to get a picture.

now, due to photo limits i have to end this post, but dont be sad... there is more.
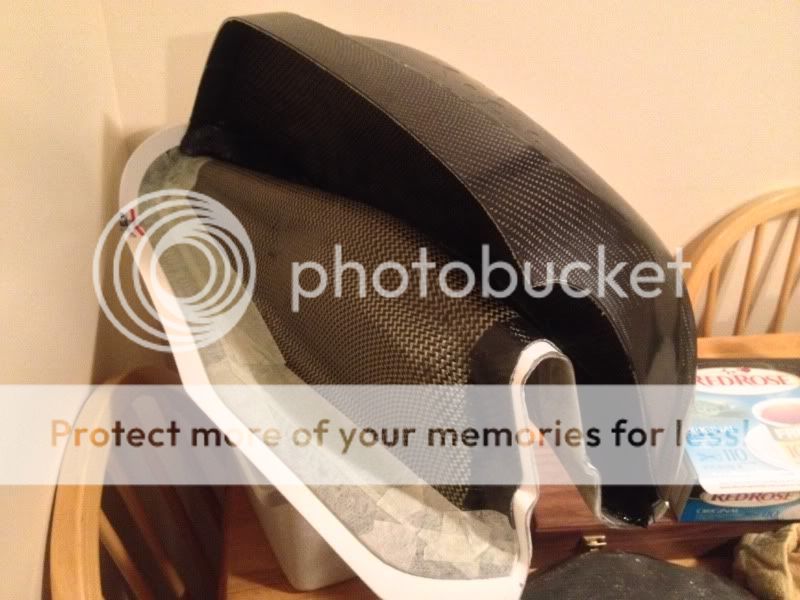
with the tail roughly finished and fitted, i made the undertail panel and fit it to the tail.
then i used the same mold i used for the undertail i made a flange to mount the undertail.
this way it fits the cuves and contours of the tail and it got laid into the tail (it is oversized and needs to be trimmed before being drilled. I havent decided if i am going to use plastic removable rivets or stainless bolts to put everything together. thoughts?

and so now the undertail fits into the tail, and the flange allows it to fit down and keeps drit and water out. you can also see how i have marked the undertail to fit inside the subframe and indegrate into the battery-box but i cant do that till i mount the tail, and i cant mount the tail till i have access to machining tools again.
with the tail more or less finished, it was time to move on to the tank. the bottom mold needed some work, so i started on that. all bondo covered.
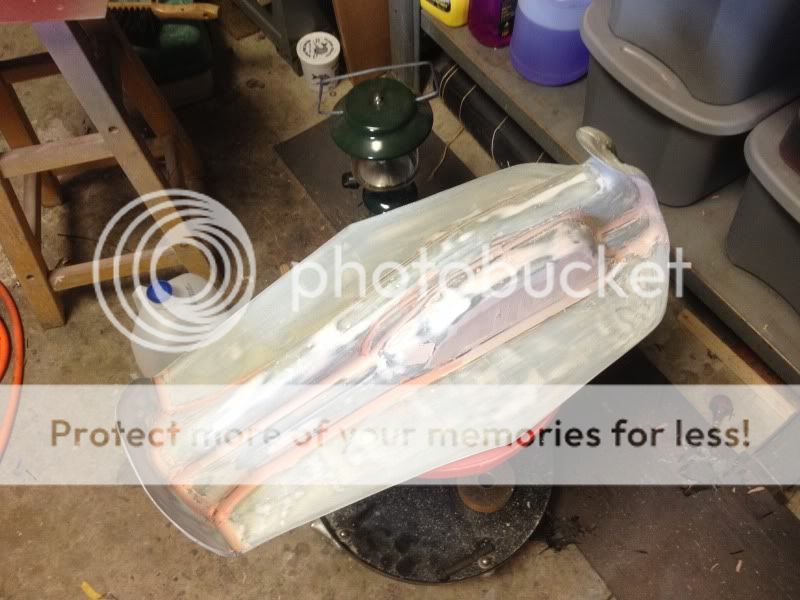
sanded down and smooth:
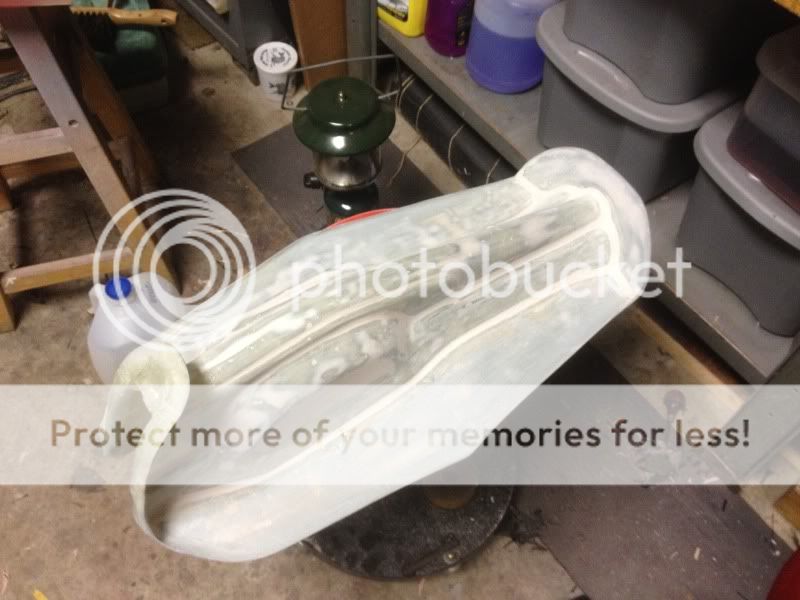
Because i didnt want a repeat of the paint pulling like i had on the tail, i painted the molds with a two part epoxy primer sealer. sanded it smooth and then buffed it very shiny.

i dont have any pictures in-process for the tank halves as they fought me the whole way, but they are 3 layers of carbon fiber, 1 layer of pure kevlar and 2 layers kelvar/carbon with another layer of pure kelvar on the extremities just in case. the carbon didnt want to go into all the tight corners, but i will fix them up.
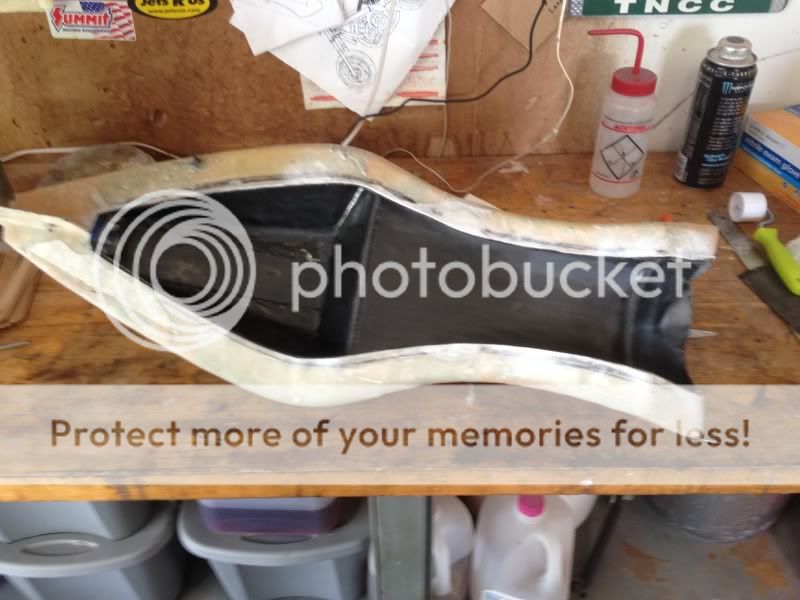
I also laid up the "throat" section of the tank, trimmed it and marked the mold so the lower half would match up. the throat will be attatched to the two top halves, and then i will be able to put the overlapping flanges all on the top side so i can glue together the top half and the bottom half and have a single seamless interface between the two halves.
here are the parts as they sit now in an "exploded" view. i am getting ready to go out to trim and fit them, but as it is early, i posted all this to wait for a better hour to run loud equipment.
i'll have more soon. thanks so much for looking
~Chris

then i used the same mold i used for the undertail i made a flange to mount the undertail.

this way it fits the cuves and contours of the tail and it got laid into the tail (it is oversized and needs to be trimmed before being drilled. I havent decided if i am going to use plastic removable rivets or stainless bolts to put everything together. thoughts?

and so now the undertail fits into the tail, and the flange allows it to fit down and keeps drit and water out. you can also see how i have marked the undertail to fit inside the subframe and indegrate into the battery-box but i cant do that till i mount the tail, and i cant mount the tail till i have access to machining tools again.

with the tail more or less finished, it was time to move on to the tank. the bottom mold needed some work, so i started on that. all bondo covered.

sanded down and smooth:

Because i didnt want a repeat of the paint pulling like i had on the tail, i painted the molds with a two part epoxy primer sealer. sanded it smooth and then buffed it very shiny.

i dont have any pictures in-process for the tank halves as they fought me the whole way, but they are 3 layers of carbon fiber, 1 layer of pure kevlar and 2 layers kelvar/carbon with another layer of pure kelvar on the extremities just in case. the carbon didnt want to go into all the tight corners, but i will fix them up.

I also laid up the "throat" section of the tank, trimmed it and marked the mold so the lower half would match up. the throat will be attatched to the two top halves, and then i will be able to put the overlapping flanges all on the top side so i can glue together the top half and the bottom half and have a single seamless interface between the two halves.

here are the parts as they sit now in an "exploded" view. i am getting ready to go out to trim and fit them, but as it is early, i posted all this to wait for a better hour to run loud equipment.
i'll have more soon. thanks so much for looking
~Chris
HerrDeacon
Over 1,000 Posts
I followed your Honda build over on svrider and loved it, extremely impressive. I really like how neat your composite work is, something that I have a real hard time with, mine is always messy and so involves extra time/work to get nice. You are definitely setting a good example of something for me to strive to. Look forward to more updates.
Rodent said:Astounding. If you're the same Knifemaker87 from Bladeforums, double kudos.
Thanks! yep, same guy, honestly thats one of the reasons that i try and keep my username the same over all the forums i am on.
HerrDeacon said:I followed your Honda build over on svrider and loved it, extremely impressive. I really like how neat your composite work is, something that I have a real hard time with, mine is always messy and so involves extra time/work to get nice. You are definitely setting a good example of something for me to strive to. Look forward to more updates.
to be perfectly honest mine is going to need a good bit of clean up as well. if i could have vacuum bagged the parts it would have been better but o dont have a vacuum pump so i was stuck doing a free lay up. but you do what you can with what you got.
Okay,
so... i got some more work done on the tank.
i pulled the bottom part off the mold, and cleaned it up. then threw it on the frame along with the throat.

then i set one side on, (this is very rough placement. i just got it to sit upright in the approximate position.

and then the other side

then, in order to fit the side and the throat (the bottom and throat are already lined up) i lined the throat up i the side/top molds and scribed a line around it, trimmed the tank to the lines, and then with the parts in the mold used the mold to scribe a line onto the parts.

so now, the parts fit together like so:

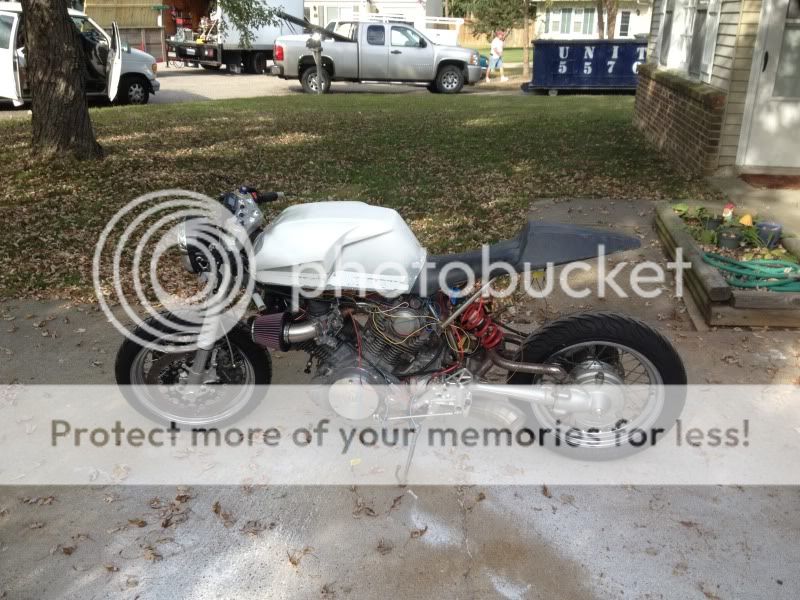
Then i took a break to work on a couple other people's bikes. Honestly i needed a break from the carbon fiber, i was so itchy from the carbon fiber dust that i needed a respite. So, i did some work for Ben (bengone1) to get his bike ready to sell (let me know if you are interested). It didnt run and had been "tipped over" on the track.
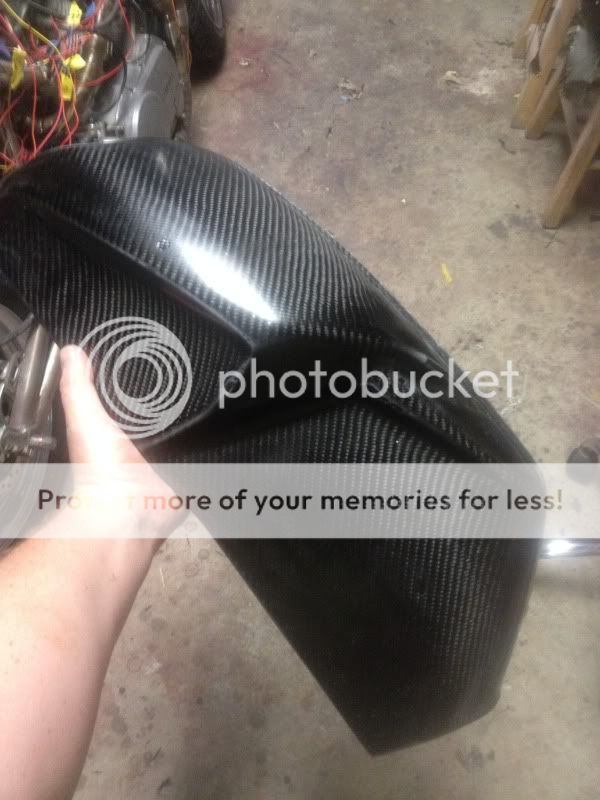
here is as i got it

got a new rear fairing on, new tank, pulled the fuel filter and cleaned it thouroly before putting it in the new tank, cleaned the airbox (a lot of oil build-up from the crankcase) cleaned the plugs and checked the coils, and i also installed new clocks. all the parts were provided by Ben. heres how it looked at the end of the day, oh yeah.. and now it runs strong)

and now.. i am back at work, so the bike stuff will go back to being on the back burner and i can get some work done at work.
thanks for looking!
~Chris
focusinprogress
City Limit Moto:Parts-Service-Apparel (716)8038606
Loving the Carbon Fiber work.....are you going to clear and polish it so it's still carbon fiber finish when you're done or paint over it?
I may also have interest in the ex650r depending on your location and the price....
I may also have interest in the ex650r depending on your location and the price....
focusinprogress said:Loving the Carbon Fiber work.....are you going to clear and polish it so it's still carbon fiber finish when you're done or paint over it?
I may also have interest in the ex650r depending on your location and the price....
The plan is to paint over most of it, but leave some carbon fiber showing. it would be a shame to have a real cabon fiber tank and no-one know it.
I am in tidewater VA 23608 I am not sure how much he wants for it. but i can ask if you want. also, it needs a new rear tire, but the owner said he will mount and balance whatever tire you want at no charge.
GTVSaviour
New Member
I've just 'extended' my lunch break reading this entire thread..... this thing is amazing, stupendous, outstanding, jaw-dropping..... etc... etc.... an accumulation of the superlatives throughout the thread still doesn't cover it :-X
I've been offered a 920 running on only one cylinder that I need to go look at this weekend. If not this one, the search continues........
A shout to Rich Ard for a posting elsewhere with some outstanding Virago builds I have all bookmarked")
Best of luck with the finishing - truelly inspiring work and greatly appreciated informative posts.
John
and as you can see - this has inspired my first 'real' post...... after lurking and soaking up knowledge here for a while now. Just HAD to
I've been offered a 920 running on only one cylinder that I need to go look at this weekend. If not this one, the search continues........
A shout to Rich Ard for a posting elsewhere with some outstanding Virago builds I have all bookmarked
Best of luck with the finishing - truelly inspiring work and greatly appreciated informative posts.
John
and as you can see - this has inspired my first 'real' post...... after lurking and soaking up knowledge here for a while now. Just HAD to
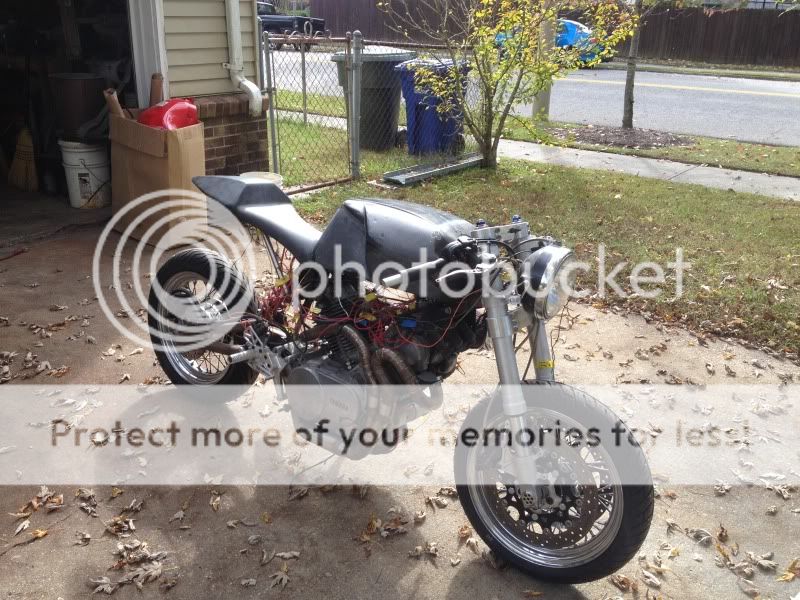
Sorry for the lack in updates.. hopefully this will tide you over
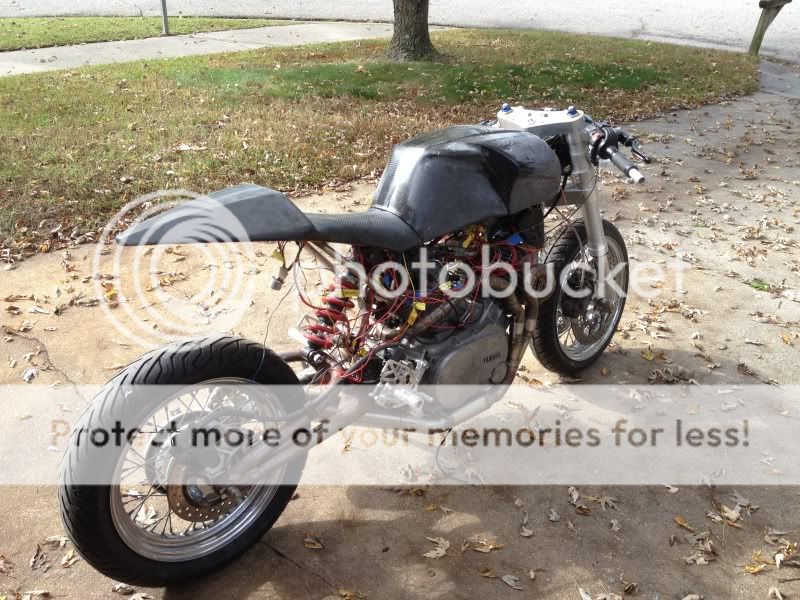
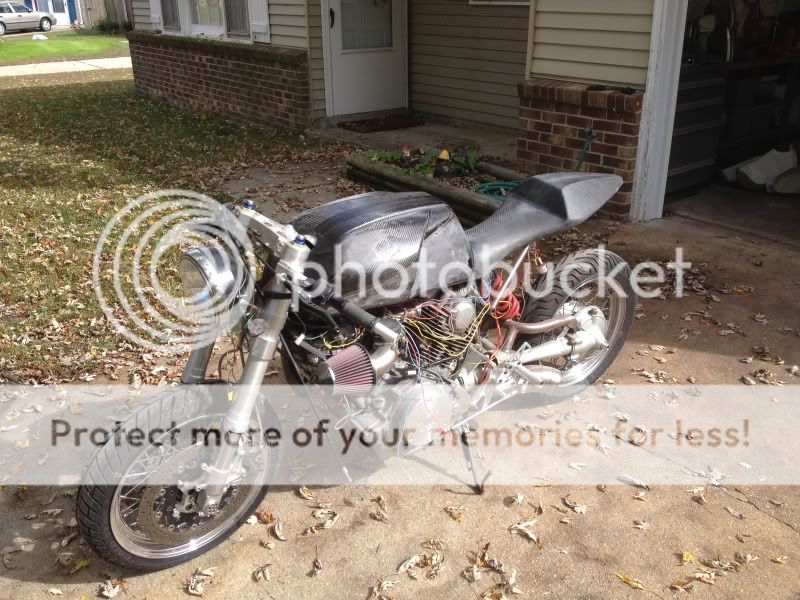
as the bike sat as of Nov 1
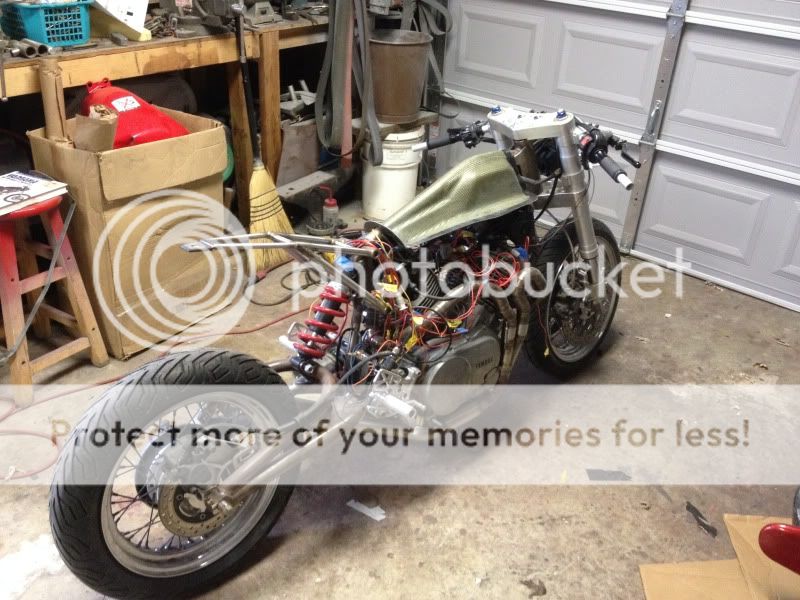
A basic assessment of the bike now: (all the custom work i designed and fabricated)
1982 Virago 920 Engine and final drive (shafty)
Gsxr 750 front end, rotors and calipers
Custom triples, rotor adapters, and axle
Custom main frame, subframe, lower frame and swingarm
Harley hub and rim in front
Harley rim and custom hub, CBR rotor and caliper
Custom exhaust with danmoto GP tip
Custom 2-1 intake manifold and harley CV carb
Koso Gauge
Custom wiring (in progress)
Custom carbon fiber tail unit (in process)
Custom carbon fiber tank (in process)
ninja 650r rear shock
cost so far: $2870
I am working on finishing the body-work before finalizing the wiring, ensuring the bike runs and everything is functional before i tear it all down for painting and engine rebuild. my goal is to have the bike cost less than 4k when it is all said and done, and have it running and on the road before the end of the build-off.
Now that all of the formal stuff is done, lets get to work!
thanks for everything
~Chris
Alrighty then!
I was unhappy with how the fabric on the tank matched at the centerline, so i laid up one more layer of fabric and pressed the parts back into the mold, pressing the resin and new layer tight to the mold. When they had cured, everything lined up beautifully, and other than a few bubbles that can be fixed easily it was a great success.
and now.. according to my wife, it is dinner time, so i will post this to not loose my place and then come back and finish the post.
okay, i'm back.. and dinner was delicious.
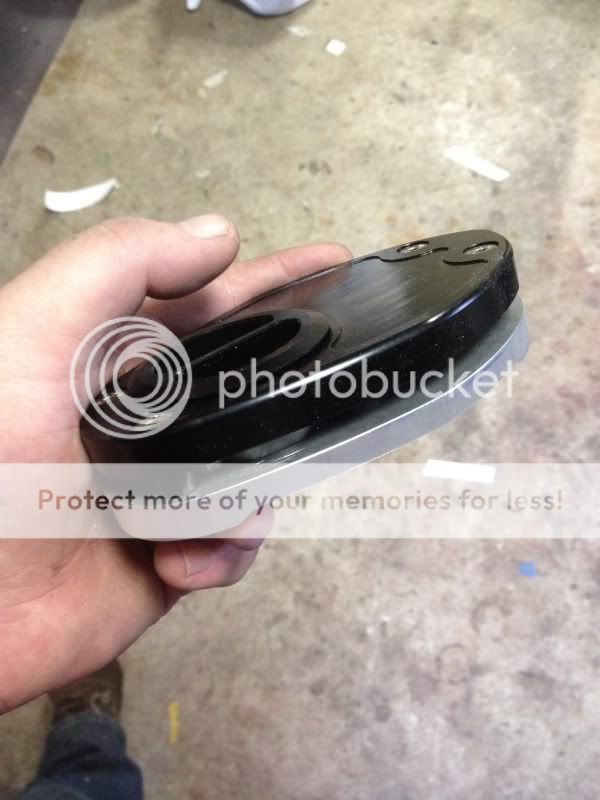
I made the support for the tank cap (aftermarket for a Ducati 749/999) so i will mount the aluminum base in the carbon fiber after the two havles are permanently joined so that the gas cap will mount flush and seal will allowing for venting
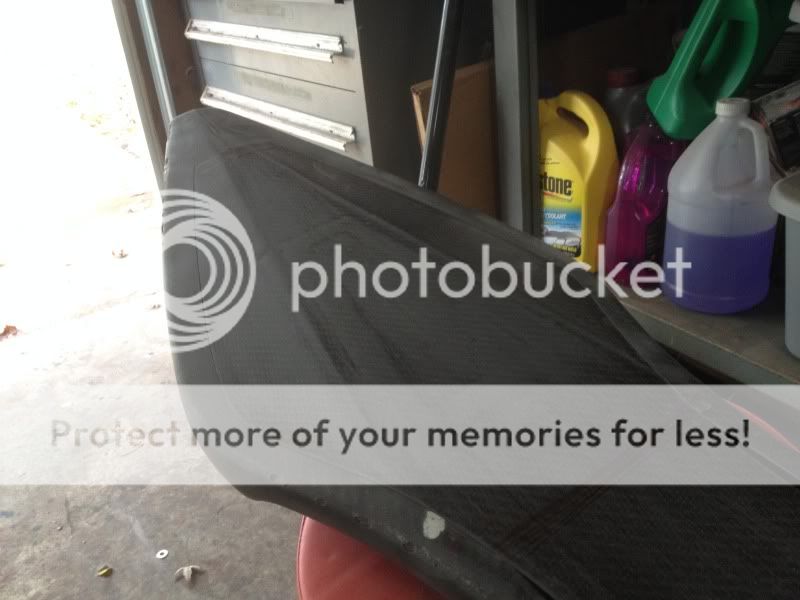
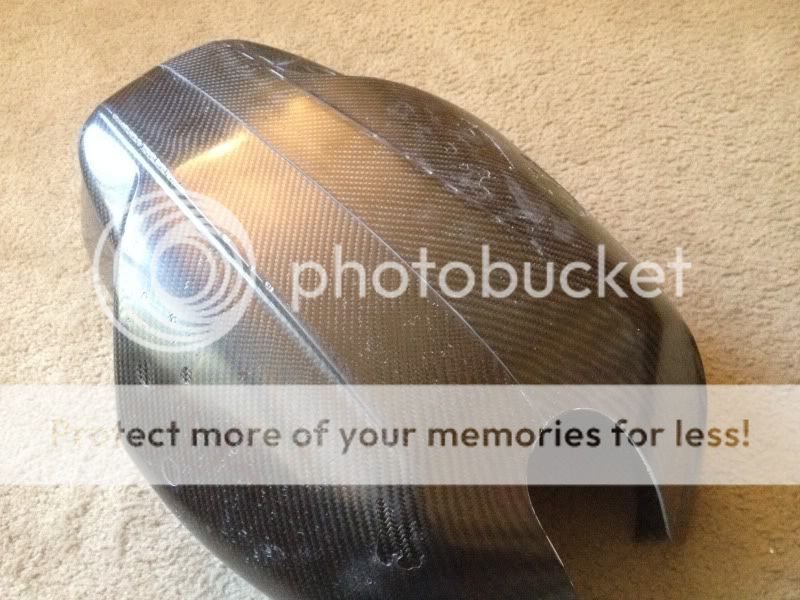
Then, i put the two halves into the mold, bolted them together and with them lined up duck-taped them together. I could then do the final fitting on the bottom and the throat. here is the result:
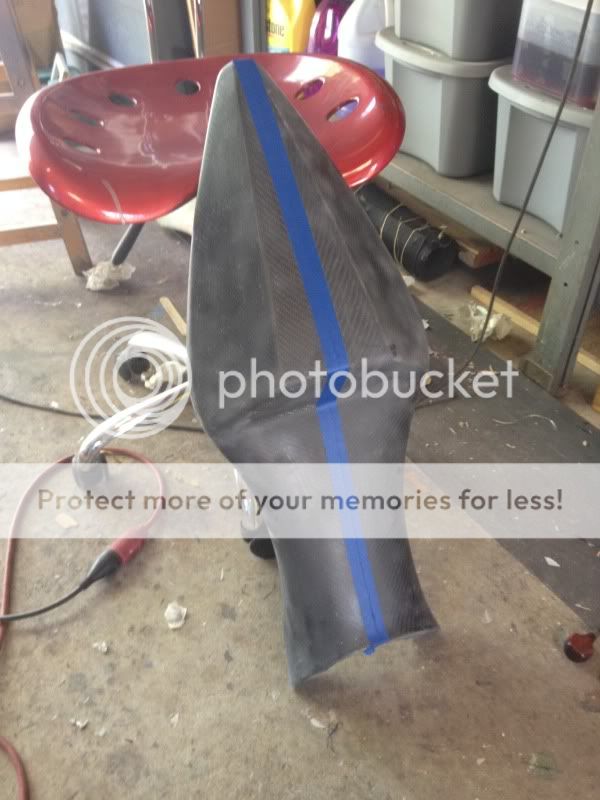
and to prove it is carbon fiber... here's a shot in the sun
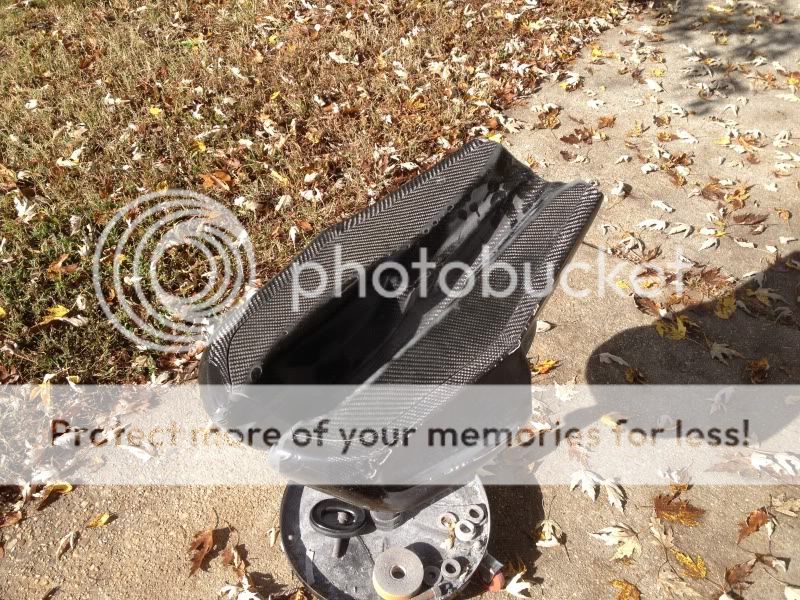
so that was friday's work. My dog was out "helping" me and was quite tired after all the effort, and decided to take a well earned lounge

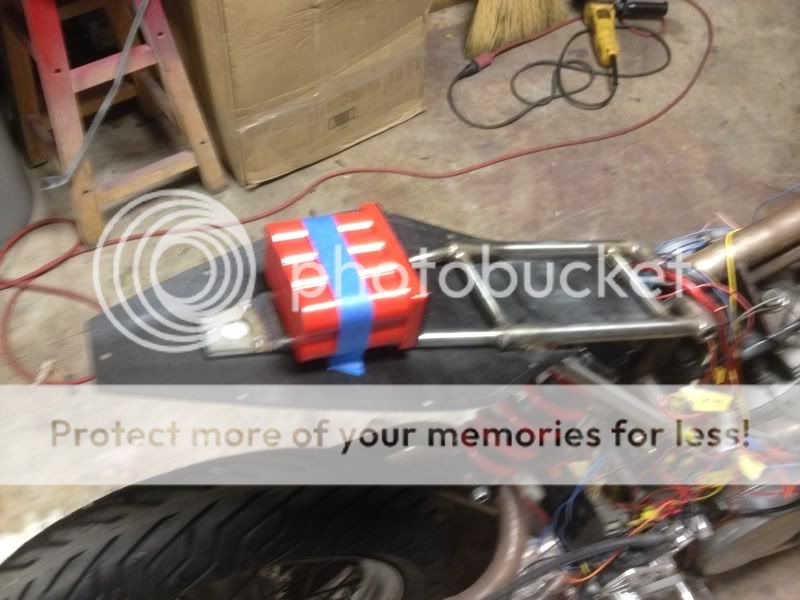
on saturday i got a good pit of work done. i made a battery box for my ballistic battery.
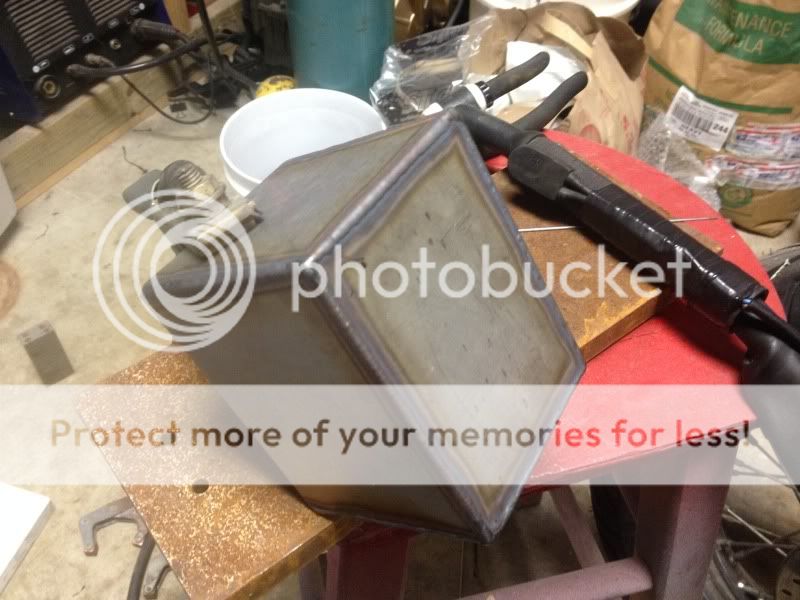
it fits very nicely and will keep it secure.
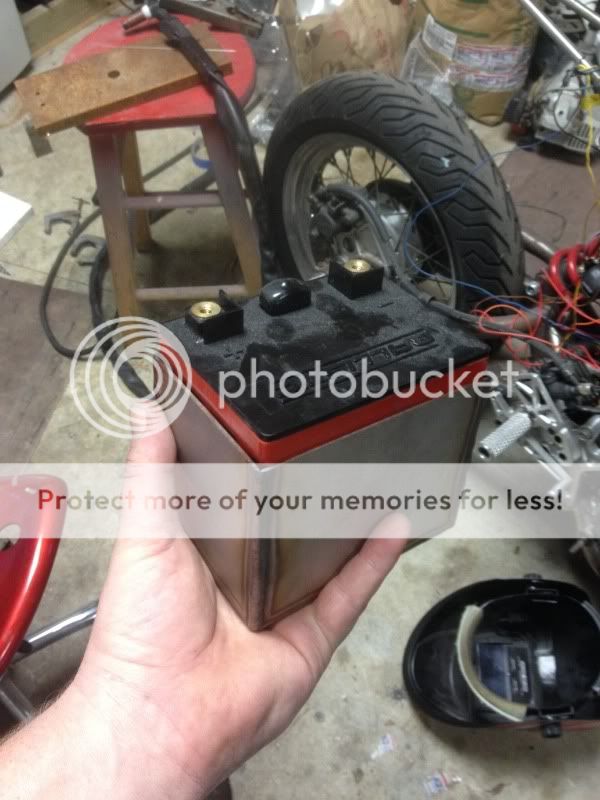
however... after the work i did later, i decided to scrap the idea. i was going to mount it under the tail section right behind the shock. however this totally screwed up the lines, and i am going to sell the 12 cell and get an 8 cell as it will fit inside the tail. so if anyone wants an unused 12 cell ballistic battery, let me know.
Then i got working on the hard points for joining the undertail and the tail, and trimmed the undertail to fit the subframe.
all aligned and fit up:
i also finished the hard mount that will support the undertail and the upper tail will rest on it, and it will allow all of the electronics to be supported.
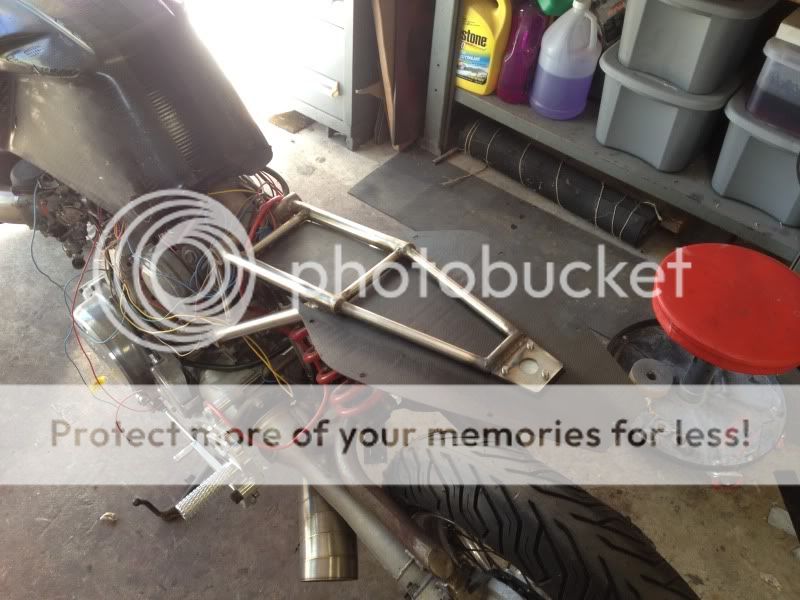
all put together...
more to come soon!
thanks
~Chris
I was unhappy with how the fabric on the tank matched at the centerline, so i laid up one more layer of fabric and pressed the parts back into the mold, pressing the resin and new layer tight to the mold. When they had cured, everything lined up beautifully, and other than a few bubbles that can be fixed easily it was a great success.

and now.. according to my wife, it is dinner time, so i will post this to not loose my place and then come back and finish the post.
okay, i'm back.. and dinner was delicious.
I made the support for the tank cap (aftermarket for a Ducati 749/999) so i will mount the aluminum base in the carbon fiber after the two havles are permanently joined so that the gas cap will mount flush and seal will allowing for venting

Then, i put the two halves into the mold, bolted them together and with them lined up duck-taped them together. I could then do the final fitting on the bottom and the throat. here is the result:

and to prove it is carbon fiber... here's a shot in the sun

so that was friday's work. My dog was out "helping" me and was quite tired after all the effort, and decided to take a well earned lounge

on saturday i got a good pit of work done. i made a battery box for my ballistic battery.

it fits very nicely and will keep it secure.

however... after the work i did later, i decided to scrap the idea. i was going to mount it under the tail section right behind the shock. however this totally screwed up the lines, and i am going to sell the 12 cell and get an 8 cell as it will fit inside the tail. so if anyone wants an unused 12 cell ballistic battery, let me know.
Then i got working on the hard points for joining the undertail and the tail, and trimmed the undertail to fit the subframe.

all aligned and fit up:

i also finished the hard mount that will support the undertail and the upper tail will rest on it, and it will allow all of the electronics to be supported.

all put together...


more to come soon!
thanks
~Chris
Well so much for keeping this build up to date.
the one problem with composite work is it is messy and hard to get pictures of, however i will try and show you what i have been doing.
I got my new 8-cell Ballistic battery. it fit up inside the tail perfectly. i will make some slightly more permanent mounts for it... but you get the idea. now i dont have to try and mount it underneath the tail.
I got the flange made for the throat, i havent trimmed it yet, and will wait to do so till i finish the side flanges so i know the match here you can see it fit on flush
and it pulls off like so:
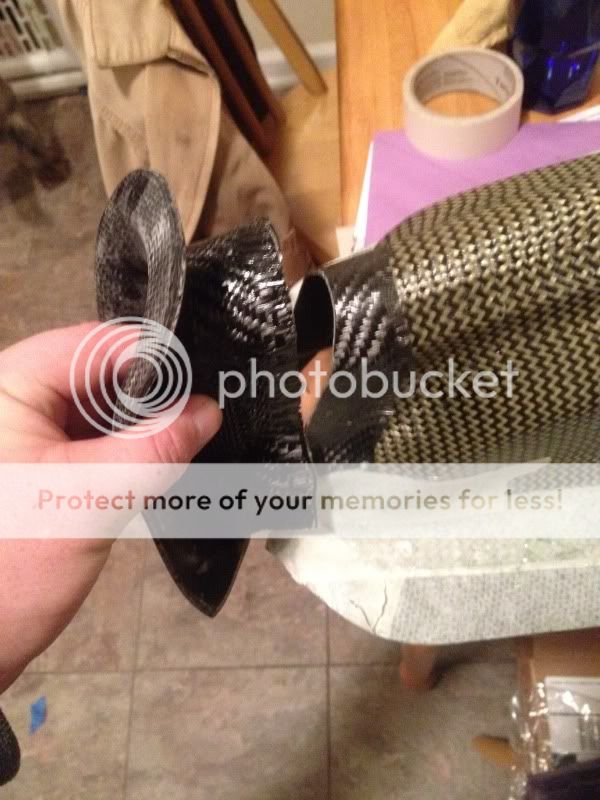
with some of the extra resin from the throat flange, i made the fly-screen twill.
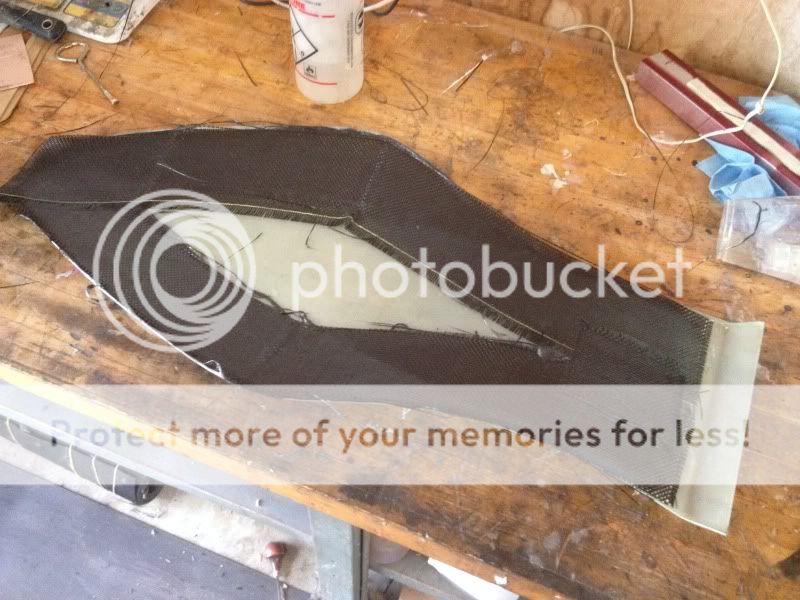
here you can see one of the side flanges laid up... sorry for the darkness. i masked and released the bottom so the flange didnt stick to it, but roughed up the side part with some 80 grip paper anbd cleaned it really well.
here you can see the flange all set up after i removed it from the bottom. I used the bottom mold to line everything up and laid up the flange strip on a flat plate (five layers of carbon) then laid it in so as to get the proper amount of resin in the fiber without the mess inside the tank.
here it is sitting together by itself.
Now i just need to do the other side, before joining the two side. then i will connect the two side to the throat, before i make the gas cap recess, and put in the petcock mount and the equalizing mounts.
also there was some confusion on the exhaust routing, as the previous pictures all but hid it. here is one that shows the exhaust exiting behind the left rearset.
more soon!
thanks
~Chris
the one problem with composite work is it is messy and hard to get pictures of, however i will try and show you what i have been doing.
I got my new 8-cell Ballistic battery. it fit up inside the tail perfectly. i will make some slightly more permanent mounts for it... but you get the idea. now i dont have to try and mount it underneath the tail.

I got the flange made for the throat, i havent trimmed it yet, and will wait to do so till i finish the side flanges so i know the match here you can see it fit on flush

and it pulls off like so:

with some of the extra resin from the throat flange, i made the fly-screen twill.

here you can see one of the side flanges laid up... sorry for the darkness. i masked and released the bottom so the flange didnt stick to it, but roughed up the side part with some 80 grip paper anbd cleaned it really well.

here you can see the flange all set up after i removed it from the bottom. I used the bottom mold to line everything up and laid up the flange strip on a flat plate (five layers of carbon) then laid it in so as to get the proper amount of resin in the fiber without the mess inside the tank.

here it is sitting together by itself.


Now i just need to do the other side, before joining the two side. then i will connect the two side to the throat, before i make the gas cap recess, and put in the petcock mount and the equalizing mounts.
also there was some confusion on the exhaust routing, as the previous pictures all but hid it. here is one that shows the exhaust exiting behind the left rearset.

more soon!
thanks
~Chris
HerrDeacon
Over 1,000 Posts
That is so awesome.
HerrDeacon
Over 1,000 Posts
Your wiring sucks though ;D ;D ;D
HerrDeacon said:Your wiring sucks though ;D ;D ;D
Everybody seems to just tuck their wires up out of sight. thats crazy! i want all my wires odd lengths, exposed and confused. it adds to the look of the bike.
lol once i get the seat mounted and can finalize the mount locations i will get everything situated and the wires trimmed to the proper length and tucked in.
i am glad you like it
~chris


