360 swiftly

Re: 360 swiftly

Swagger said:
Cool, I like the direction you're going with this one!
Do yourself a favor though.....take the spring off one of your back shocks...stick that puppy on and let the rear end sag.
I worry that you tire will contact the flat pan under your new seat. If I remember correctly there was a looped brace somewhere near the back that allowed the tire to swing up between the frame rails on max compression.
I hope I'm wrong, but check out Spiderman's gorgeous 450 build for the same issue...

Swagger,

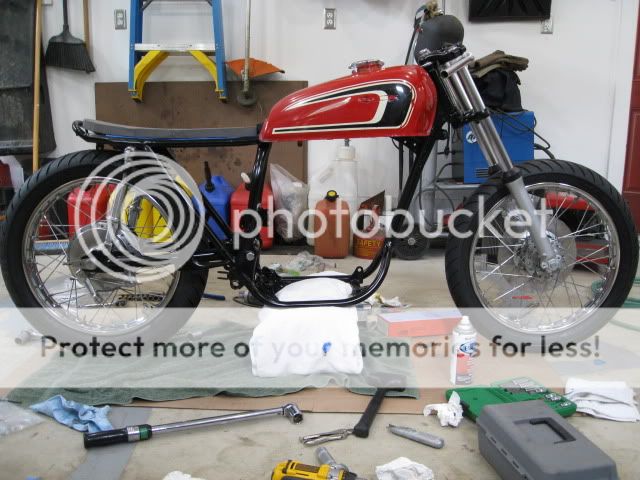
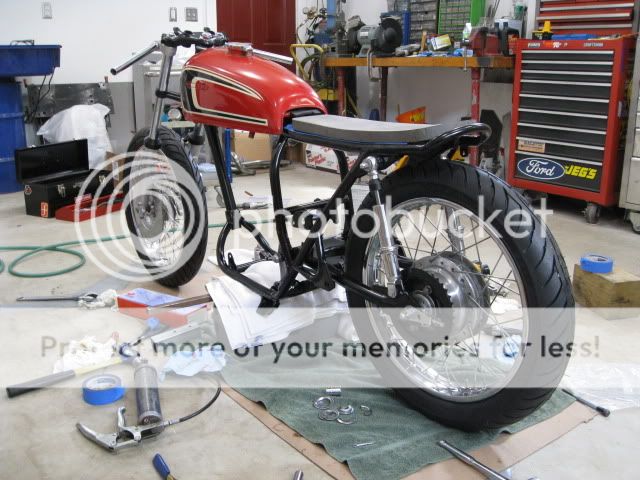
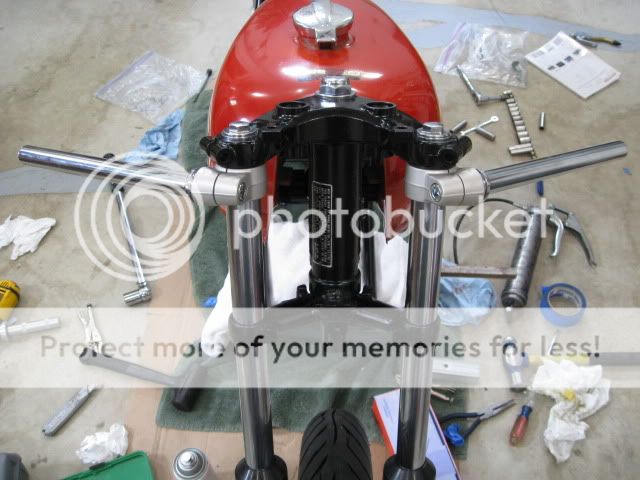
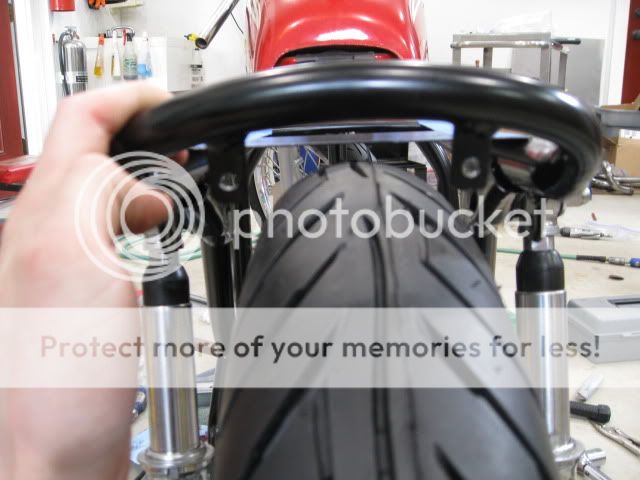
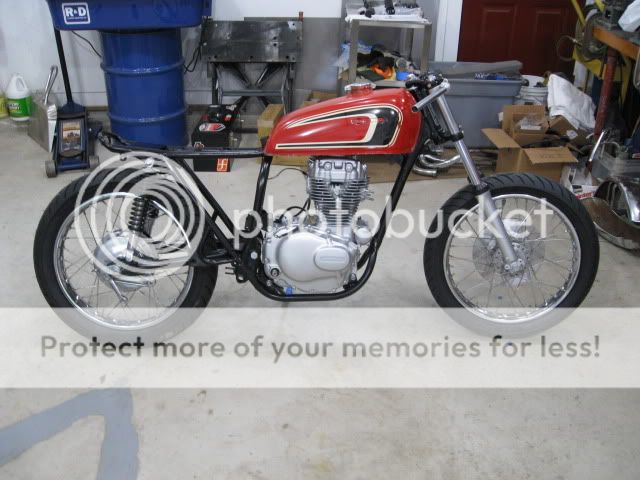
The loop on the back of the frame was right about where I welded my plate. When the bike was together while I was mocking this up it looked like I had plenty of room. 2up may not work but my g/f and I are probably about 250lbs total so I will have to see on that one. I definitely have more room than spider-mans bike, but I am a little worried about my tail light as it will hang lower than the frame rails. I hope that it is far enough out from the back of the bike that it will not hit. Thanks for the heads up.
 
Re: 360 swiftly

UPDATE!!! ;D

I have been to busy to post any of the progress. So here is what I have been up to for the past couple of weeks.

Got the wheels all ready with some new tires, bearings (allballs), sanded spokes, and did some cleaning up.
IMG_0546.jpg


Added some more parts to the done pile.
IMG_0553.jpg


Frame is done and drying.
IMG_054823.jpg

IMG_054923.jpg


This week I hope to paint the engine. Then I can start putting everything back together.
 
Re: 360 swiftly **progress finally**

Great job on the finished parts! Putting it back together is the
best part.
 
Re: 360 swiftly **progress finally**

+1

But you say you sanded the spokes - any kind of clear coat or anything?
 
Re: 360 swiftly **progress finally**

Big R I didn't coat them with anything. If they get nasty I will just give them a quick sand again. I wet sanded them with 600 just to clean up some of the grime that didn't come off with washing.

cafePete said:
Great job on the finished parts! Putting it back together is the
best part.

Yes it is. It makes me think I will actually have this thing on the road sometime soon.
 
Tonight spent the night in the garage with my motor and some rolling rocks.

IMG_0547a.jpg


IMG_0552a.jpg


IMG_0556a.jpg


Next things to do are find a pipe the right size to press on my steering stem bearing, make a spring compressor to put the rears back together, and rebuild the fork legs. Maybe I will make my goal of rolling chassis by the end of the month. ;D
 
Thanks for all the compliments.


mtrace,

The tires are Avon Roadrider's

90/90 front
100/90 rear

I wanted to run a fatter/ taller front but ultimately chose to keep it close to stock so I can keep the speedo.
 
For the seat stitching I enlisted the help of some family members.


I did some work this weekend and finally have something that looks like a bike again. I love the Tarozzi clip-ons.

IMG_054843.jpg

IMG_055143.jpg

IMG_055243.jpg


This one is for Swagger tire will not hit but the taillight I want to use is not going to work. I may have to cut the brackets off :'(
IMG_055443.jpg
 
WOW! Beautiful work! I love it. Bike looks insanely clean...cant wait to see the finished product!
 
Hey! Good on ya for setting up the shot and getting verification that you have clearance.
Good deal man. I like how this is coming out!
 
Motor sealed up and in, rear end mostly done! Pictures don't show it but the chain and CL brake pedal are installed. The CL rear break looks so much better than the stock CB especially sense I am running CL pipes.

IMG_0002.jpg
 
So I had an interesting smelling Sunday. Boiled my carbs in some lemon juice. Left them looking a little dull, but at least they are clean. I may paint them when I am done with tuning or buy mikuni's depending on how it runs.

I also finished all the foot controls and adjusted the rear breaks.

fce5512e.jpg

b5a83903.jpg

32b6bd56.jpg
 
Had a pretty productive weekend in-between the partying. Got the controls mounted, hooked up all the wiring, and got everything working. Had some trouble with the starting circuit but eventually figured it out. You can see the jumper I had to make to hook up the solenoid. I still have a green wire with a red stripe that I have no idea what it is supposed to got to, everything works fine without it hooked up. The circuit goes to ground when the bike is in neutral or the clutch is pulled in. The extra wire is at the same point in the harness where the regulator hooks up. Anyone know what this is for???

Also finished the battery box. Figured out the location of the electronics, fabricated some tabs for the starter solenoid, and got everything primed.

95b1965a.jpg


a34e78b1.jpg


778722c9.jpg


Next weekend should be ready to start her up for the first time since it all came apart. ;D
 
Back
Top Bottom