Follow along with the video below to see how to install our site as a web app on your home screen.
Note: This feature currently requires accessing the site using the built-in Safari browser.
We noticed you are blocking ads. DO THE TON only works with community supporters. Most are active members of the site with small businesses. Please consider disabling your ad blocking tool and checking out the businesses that help keep our site up and free.
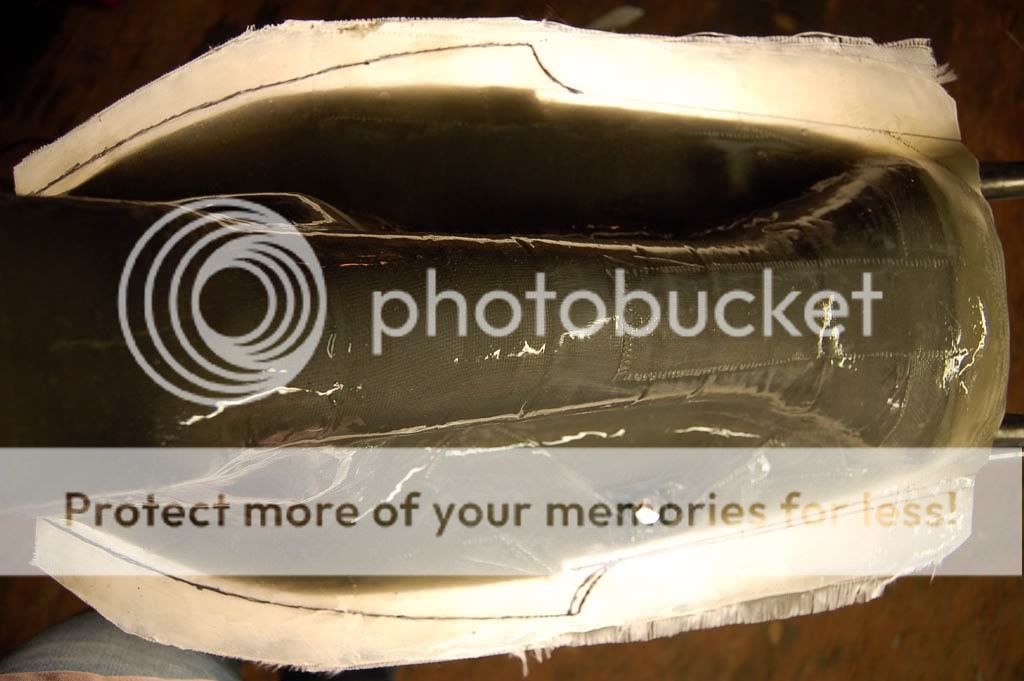
One trick when you've laid up enough layers is to paint a coat of resin over the whole mould. The resin will layer up and smooth out the ridges that chop and mat have. Lots of boat builders use this technique. Works really well. There will be some small air pockets that will need to be touched up but you won't have to glaze the whole works to get it smooth.
Jay- good call, I've used that technique successfully with what I've glassed so far. I just have to be careful and not go overboard with it! Based on the bottom part already, I think this tank will actually be heavier than stock. :
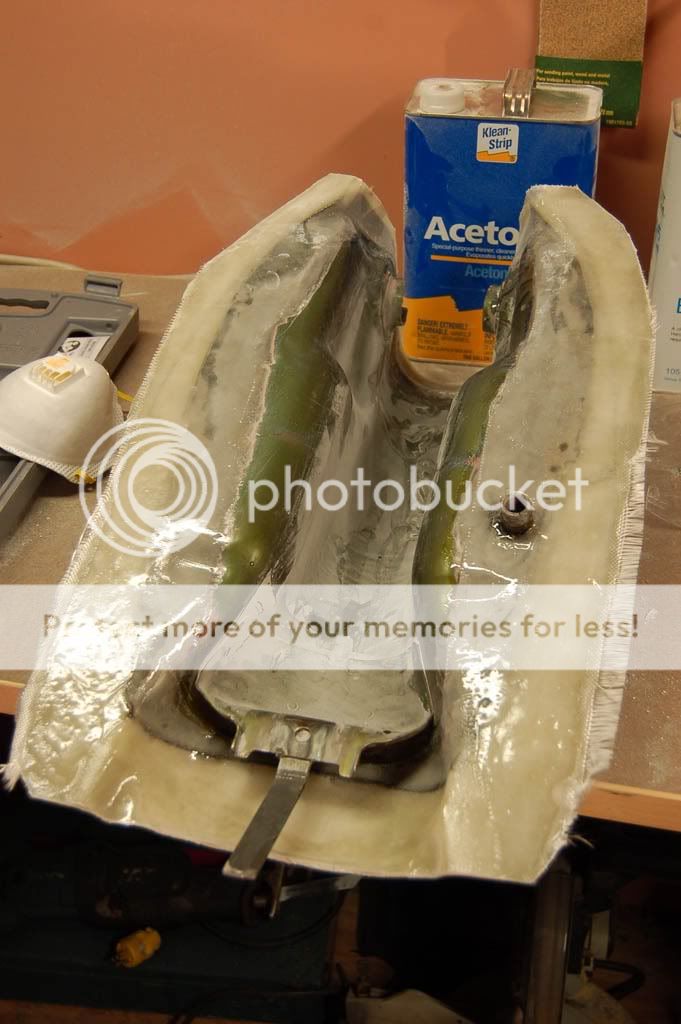
Couple more pics to update. I'm going to try and catalog the fiberglass work as best I can for anyone wanting to do it themselves...
One layer on the underside to bond around the metal completely.
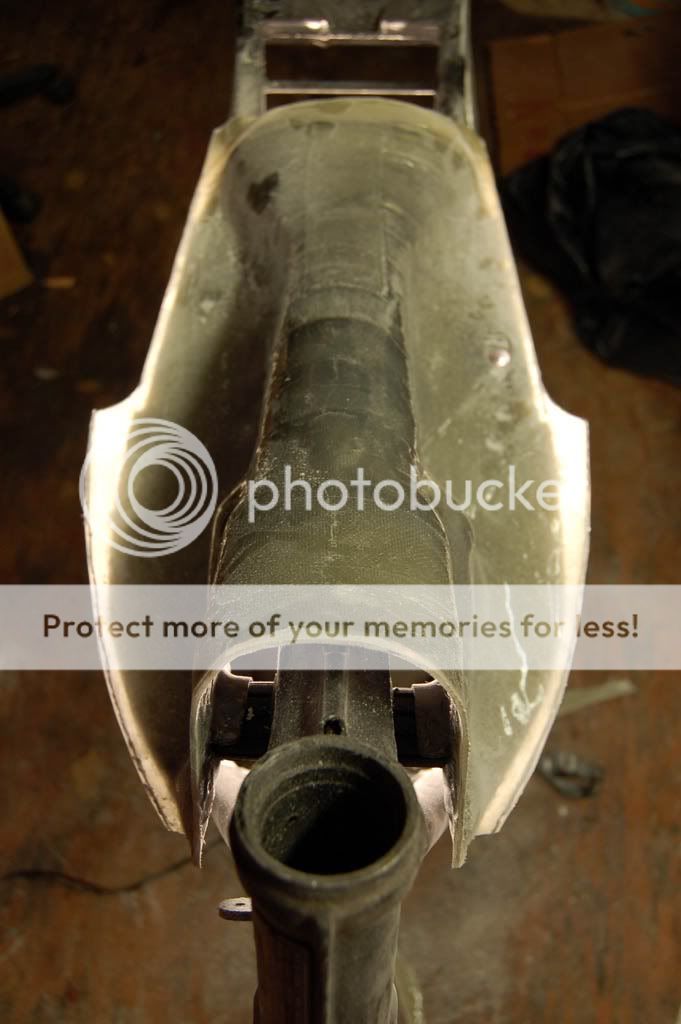
Rough outline of the tank
Rough cut
From the back
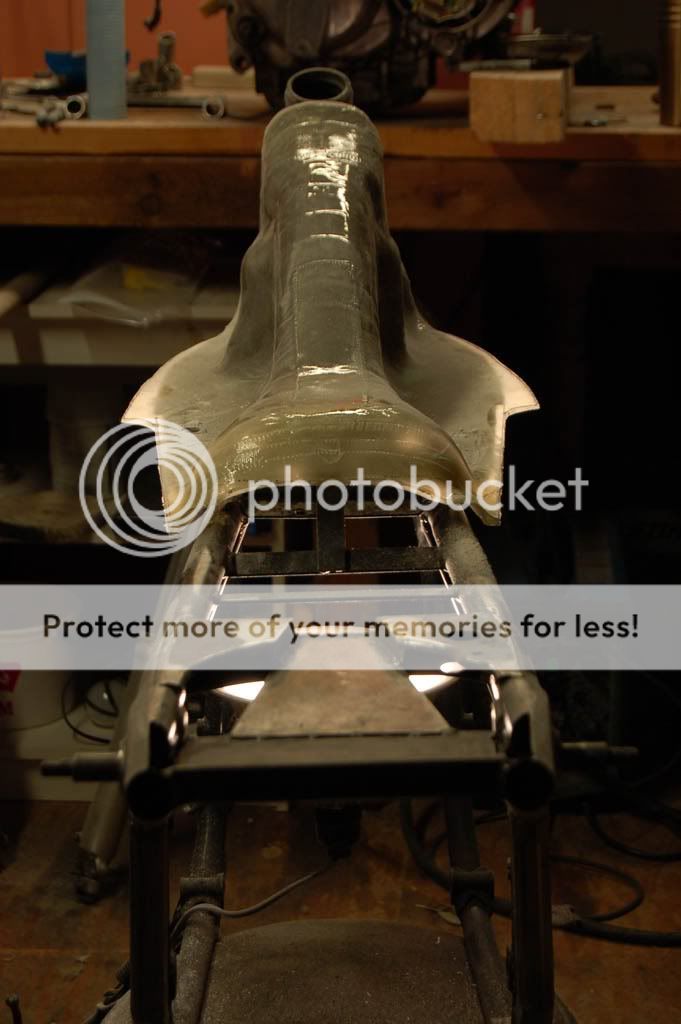
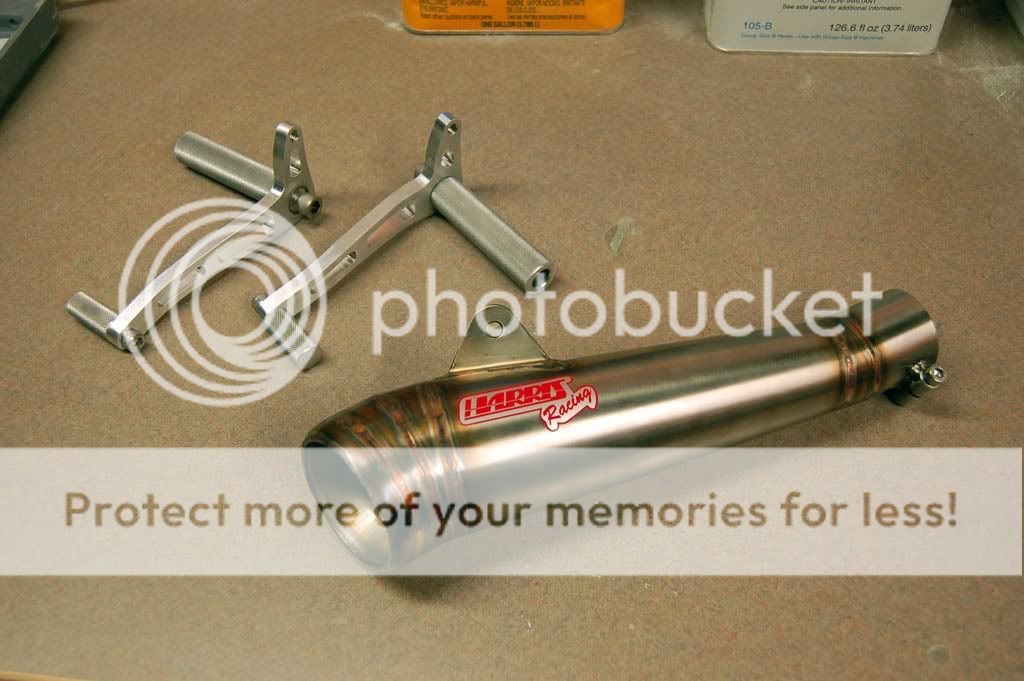
Now that the base is about done, I can start building the foam for the tank shape. I also received some kick-ass rear sets from Durgam_K, and a muffler. The muffler was kind of an accidental buy. I *believe* I saw it on a Bonneville, not sure, but I was lusting pretty bad. Normally they're way out of my price range for a simple muffler, so when I found one on ebay with a "best offer" button, I offered half price for shits and giggles. Didn't expect the seller to accept it at all, but he did...crazy.
The OD of the inlet is the same as the OD of my Kerker header. I'll have to cut off part of the header and put a smaller section on. It'll also allow me to make the narrower piece of pipe into a baffle, as this muffler is nothing but open.
I was under the impression that you were only using the bottom of the tank as a mold to begin with. I am not sure that glassing the steel in is such a good idea. The steel and the fiberglass will have different expansion rates and that may cause problems at the point where the two materials meet. I am not sure of this, which is just my theory; you may be fine with it. The work looks great though!
Hay Ringo I don't want to be a drag but you know that gas and Polyester Resins don't like each other and Epoxy Resins has problems to especially that dam E86 ..
there's this stuff called STEELFLEX witch I've been told you can line it with it can take race fuel Aviation fuel and up to 50% ethanol if you want more info I'll look for my datasheet sheet ..
As for the hernia I had one of mine turned trader on me years ago I had it patched and was back to my self in days..
three months later I hit the water at 60 Mph and got right back on the boat and keep racing..
Hey Brandon, I hear your concern. During the curing process of each layer I used heat to speed up the "slow" resin. The cured glass and steel was exposed to much more radical temperature changes than it would see in real life. I haven't seen anything negative yet, but that doesn't mean I wont keep an eye out.
I don't have the patience to transfer the mounts and bung over from the old tank, let alone get them straight. ;D
Deuce, yeah man, I'm an epoxy convert now. I was planning on using Caswell epoxy liner for inside the finished tank. http://www.caswellplating.com/aids/epoxygas.htm
I've heard good things and their website certainly boasts about the product. If it's not too much trouble though, I would like to know more about that Steelflex stuff!
That's an interesting approach, man. I thought you were going to glass over the tunnel as a mold. Never thought of using it at the tank itself again. Can't wait to see the finished product.
Yeah, it may be cutting a corner for sure! But as I said, copying the front and rear tank mounts and incorporating the petcock bung would take more time than I have. Think of it as a fully built/enclosed tank attached to the original tank bottom.
Your tank is looking amazing. I've been wanting to make a fiberglass tank for a while. I found a one off tank that I really like the lines of, but it was on a build from another site (not sure if the mods care, but I won't post a link to it just in case :-X ).
I'm just afraid I would spend a ton of money and have the tank coating delaminate on me. After seeing this, I might just have to get a spare tank and rip it apart.
Is your tank going to be holding ethanol at all, or are you going to run something like racing fuel or av gas?
Either way, it looks nice so far. Can't wait to see it completed. Keep up the good work!
Thanks Eric,
man, I'd love to run 100LL. But it's not too practical! Yes it will hold ethanol, but the tank will get lined with either Caswell liner (which is ethanol proof) or the stuff Deuce posted above, depending on how much they want for it...
I wouldn't be afraid to post an outside link. If sombody here benefits from it, it's only doing good...
and that Caswell epoxy liner sound's like the stuff ..
hay when West System sold you your Epoxy did they tell you how epoxy
will stick to Polyesters/Vinylester but Polyesters/Vinylester won't stick to epoxy
and even though it don't smell it can be just as bad for you the fumes turned me in to
a bad tempered monster for about a week ..
I knew about epoxy bonding to polyester but didn't know it doesn't work the other way around. No worries though, no polyester resin will be used anywhere on the bike!
I believe you about the fumes. The epoxy doesn't make my shop stink at all, WAY better than polyester, but I have a pretty gnarly headache today.
Thanks guys. Well, I finally ran the wood stove in my shop long enough to warm it up above freezing. Glued all the foam together for the tank mold, and started shaving it tonight. I have to say, before I started shaping the tank, I was getting pretty discouraged about my ability to pull it off. Seeing the clusterfuck of florist foam haphazardly glued together over the tank base was just plain depressing. I didn't even take any pics of it. But once it started to take shape, I got back into the groove. I'm relatively positive this thing's going to turn out fine.
A word of warning to those using florist foam and a dremel: make sure every hole in your face is properly protected. I started off just using safety glasses and a mask, and right away caught a tiny spec of foam to the eye. That stuff burns like hellfire; way worse than sawdust. So I finally put the junk-Chinese Halcyon copies to use:
I showed my brother this pic, and he said I even smelled like foam dust. I asked him what that smells like; he paused for a second and said...beer.
This site uses cookies to help personalise content, tailor your experience and to keep you logged in if you register.
By continuing to use this site, you are consenting to our use of cookies.

")