Follow along with the video below to see how to install our site as a web app on your home screen.
Note: This feature currently requires accessing the site using the built-in Safari browser.
We noticed you are blocking ads. DO THE TON only works with community supporters. Most are active members of the site with small businesses. Please consider disabling your ad blocking tool and checking out the businesses that help keep our site up and free.
Hello again. An hour here and an hour there amidst a very busy few weeks of work. Weather is heating up here on the Gold Coast and its pleasantly cool to be in the cave tinkering.
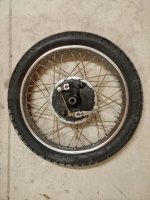
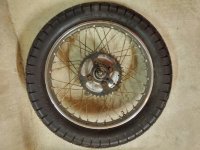
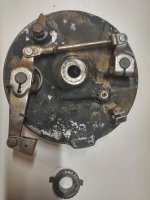
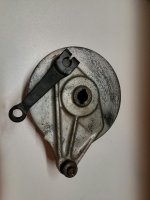
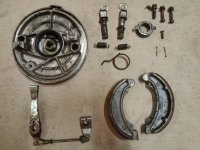
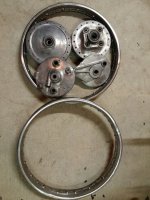
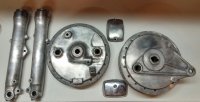
After dissembling the front end I de laced the both wheels and have been stripping, sanding and cleaning both hubs. Im waiting on the replacement fork spring to arrive prior to rebuilding the forks.
Very nice - are you just going to run them as bare aluminum or do you plan on painting them again? Vapor blasting is a great way to have the final cleaning done and it leaves a very nice finish.
Very nice - are you just going to run them as bare aluminum or do you plan on painting them again? Vapor blasting is a great way to have the final cleaning done and it leaves a very nice finish.
Very nice - are you just going to run them as bare aluminum or do you plan on painting them again? Vapor blasting is a great way to have the final cleaning done and it leaves a very nice finish.
Tim, Ive been soda blasting the drums to get into the tight slots but I am going to powedercoat glass black once I am finished cleaning. However, I do want to vapour blast the engine leaving the lower case vapour finished and the head gloss black. Did you link me a vapour blaster in QLD?
Silly question! Do I need to pull apart the lower case for vapour blasting or can it simply be taped and plugged up?
Texasstar said:
we spend hours sanding to polishing...very rewarding. Good start!
Thanks Brodie, I thinks trips to Brisbane will be worth it once I have my rolling chassis and commence on the engine.
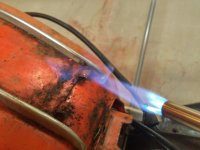
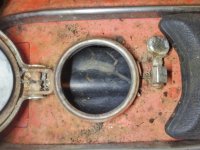
I picked up a second tank yesterday that is clean on the inside. Disassembly needed some heat to loosen the grill screws. Going at it with a steel brush, some stripper and sandpaper today!
I am moving towards painting the tank 'baby blue' matt finish, but the wife likes yellow! so seeing I have two tanks, I will get the blue one complete then once the bike is finished I might concentrate on lining the other tank and painting yellow, that way can interchange. I am a good procrastinator though, keeping the wife happy!
In Currumbin mate. Have been looking at your builds, they look great. Your GS750 is coming along great. But how is ts185, you have got your work cut out for you on that one. Cant wait to see how it turns out!
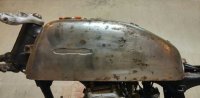
Commenced stripping the tank today. Used paint stripper to lift and loosen paint. Then the orbital sander and next the 400grit wet and dry.
The tank had some pitting in areas with holes max diameter of 3mm. I suppose I can bog these up with some epoxy putty which can handle fuel. There also is a leak under the tank where moisture sat, this may require a new piece of 1x2 inches. But I am happy with the result thus far. I am going to have to read up on tank restoration for the next step and not leave it to long without putting a primer for protection.
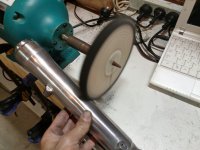
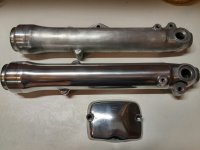
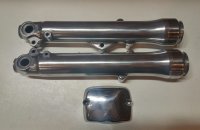
Also managed some time to start polishing the lower fork stays whilst waiting for the internal fork spring.
Bought from the hardware store 6" sisal buff & loose leaf buff and attacked the lower fork tubes with grey and white compound. Like previous pictures I have seen on other builds I am very satisfied on my efforts. Once I have my rolling chassis I cant wait to attack the motor with the same techniques.
However I didnt use laquer thinner between polish's but might repeat If need be.
The second picture shows the difference between sanded and cut polished. The final is buffed
Well now you've gone and done it. Those fork lowers look so good you're going to have to do the rest of the bike up just as nice because everything else will look crappy by comparison.
Well now you've gone and done it. Those fork lowers look so good you're going to have to do the rest of the bike up just as nice because everything else will look crappy by comparison.
This site uses cookies to help personalise content, tailor your experience and to keep you logged in if you register.
By continuing to use this site, you are consenting to our use of cookies.

") I do agree though it is very rewarding when you increase the sandpaper grade
I do agree though it is very rewarding when you increase the sandpaper grade