
We noticed you are blocking ads. DO THE TON only works with community supporters. Most are active members of the site with small businesses. Please consider disabling your ad blocking tool and checking out the businesses that help keep our site up and free.
You are using an out of date browser. It may not display this or other websites correctly.
You should upgrade or use an alternative browser.
You should upgrade or use an alternative browser.
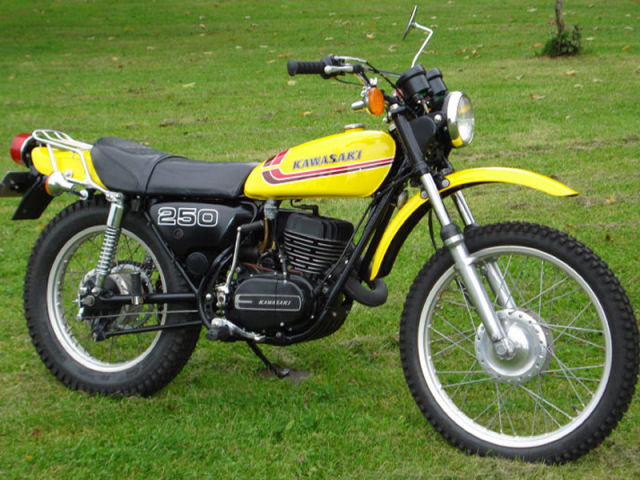
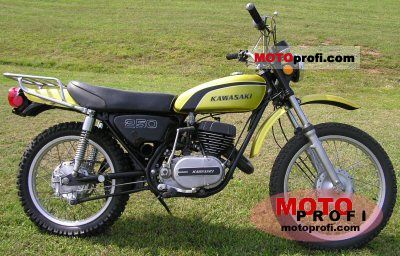
Kawasaki 250 F11B - dads old bike
- Thread starter jaderd
- Start date
jaderd
Been Around the Block
Cheers mate, today was a good day also.
Fitted new front sprocket and new chain, tensioned it up as per manual with around 20mm play while on side stand, looks a little tight to me but its what is stated so should be good....guessing will loosen up a little straight away anyway.
Rubbed back and painted the exhaust that came from US and cleared coated the front and rear guard and oil res. cover.
As for next project im not too sure just yet, uncle has a TS185 that needs a bit of a resto but is in mildura and i told him maybe we can just play with it when im up there next.
Really aching to just spend time riding and playing with my bike complete although would love another one....but space wise its sell my twincam corolla or wait until next house in a few years with more space.
cleaned up ready to paint the air box, might paint it in the silver like the guards just for something a little different and cos it would save me buying more paint or use the heat proof and have to oven it.....yes im a tight ass lol.
have cleaned and checked back half of wiring, will do rest tomorrow and fit it all up maybe.
may start on pulling apart carby...will see i better spend some time with the missus i think")
Fitted new front sprocket and new chain, tensioned it up as per manual with around 20mm play while on side stand, looks a little tight to me but its what is stated so should be good....guessing will loosen up a little straight away anyway.
Rubbed back and painted the exhaust that came from US and cleared coated the front and rear guard and oil res. cover.
As for next project im not too sure just yet, uncle has a TS185 that needs a bit of a resto but is in mildura and i told him maybe we can just play with it when im up there next.
Really aching to just spend time riding and playing with my bike complete although would love another one....but space wise its sell my twincam corolla or wait until next house in a few years with more space.
cleaned up ready to paint the air box, might paint it in the silver like the guards just for something a little different and cos it would save me buying more paint or use the heat proof and have to oven it.....yes im a tight ass lol.
have cleaned and checked back half of wiring, will do rest tomorrow and fit it all up maybe.
may start on pulling apart carby...will see i better spend some time with the missus i think
Bamos3
New Member
The jets in your model, F11-B , should be:
Needle jet 0-6
Pilot Jet #30A
Main Jet #115
The earlier bike had:
Needle Jet 0-8
Pilot Jet #40
Main Jet #112.5
Don't know why they changed them, nothing else in the engine or exhaust was altered.
The Keyster kits are not made up of genuine Mikuni parts, they are copys and as such can vary from genuine bits. Best bet is to use the original jets, just replace o rings etc. Keyster kit dosen't supply the o rings, best bet is to go direct to Mikuni supplier online and order the genuine bits from them A bit more hastle, but always the safest.
The only O ring in the carb is part #92055-044 (kawasaki) or 42-1001 (Mikuni).

jaderd
Been Around the Block
Did some more today,
sanded and sprayed the airbox - silver and cleared so that is ready for fitting.
refitted the chain guards and also the rear metal guard and also the rear tail light /number plate part. cleaned the light and light sanded / polished the lens to bring it back to new looking.
Also decided to use the old reflector holder mount to hold the rear indicators as i didnt want to use the stock mount spot.
Also have decided to go with the second lot of indicators i bought of ebay as they are a little smaller and more era specific looking.
really enjoying the build now...its all the nice clean less messy parts i get to play with.....still frustrating though wire wheeling all the nuts bolts washers etc and polishing them (mainly to protect a little from rust) before i can use them to remount stuff .....tedious but worth it in the end.
cheers
some pics below....seat and rear fender just sitting there.
jaderd
Been Around the Block
ok today was a 10am - 5:00pm garage day.
all to do with wiring, airbox, oil reservoir etc.
so it all went well, in relation to wiring any where where there was some old black tape that appeared to be concealing a join or splice i undid and inspected, at the steering stem area where heaps wires come together i found two that were broken so fixed them.
was able to remove a little wiring that was the lights for tacho n speedo dials.
i replaced the 6V17w relay with the 6V8w one i bought, indicators work fine, nice brightness i think and seem to flicker at the same rate as a car which im guessing is all good.
Rear brake light works, tail light works.
What doesnt work.
Horn doesnt....im just gunna buy another for $10.
Neutral light on dash doesnt work ? does motor need to be running ?
Headlight doesnt work - guessing engine needs to be running ?
high beam indic light doesnt work ? once again due to motor not running ?
Front brake light sensor doesnt work...not exactly sure how it works, looking into the part that slips onto the part that clips into brake it has 2 contacts in their that look bent and butchered so may need need replacement ? as the actual piece that clips into brake looks fine, has 2 contacts on it and the spring loaded little rod bit.....might not even be needed for legalities ?
i spoke to VJMC guy who inspects and he is happy to inspect bike with indicators working etc bike doesnt have to be running. so hopeflly registered soon.
All of the electrics should work off the battery. Engine running or not.
Check your earths. Black with yellow and make sure they are grounded to metal and not paint.
Nice build by the way neighbour....I'm over in Sunbury and have had too much to do with old Kwaka 2 strokes.
Catch up with you soon.
Adrian.
Check your earths. Black with yellow and make sure they are grounded to metal and not paint.
Nice build by the way neighbour....I'm over in Sunbury and have had too much to do with old Kwaka 2 strokes.
Catch up with you soon.
Adrian.
jaderd
Been Around the Block
Ok, no prob, even though all other stuff works could it still be an earth ? Currently it is earthed onto the powdercoat though I guess the bolt goes into the thread, should I wire brush away the PC ?, so even 6v two strokes the headlight should work with no engine on, i be found info that 74 model dt250 that headlight only works with engine running as direct from lighting coil, fairly certain mine is like that as it has a set lighting coil ?
Cheers
Cheers
jaderd
Been Around the Block
Ok, in bed on the iPhone happy a Larry.
I have everything working except headlight components as engine not running yet.
Long story short the problem with the neutral light and front brake was my error, on first inspection the other day I found a broken brown wire so I joined it, thing is that brown wire was two separate brown wires that had pulled away from a brown wire splitting into 4.
So in the mean time I had stripped majority of old tape off loom, undid every taped join / solder to inspect and retap, attempted to remove neutral globe with the globe breaking in fingers, so I replaced the bulb and holder with spare light that used to be for tacho, then went to test old tacho bulb In indicator light socket as I know that works.... And indicator bulb broke too, so replaced that with old speedo bulb and holder lol. So atleast they are both nice new ones and not rusted together now.
Quite glad I have done all this now as I know all joins/ soldering is good.
Horn dead couldn't get it to make any sound even directly onto a torch battery ad adjusting screw and nut so I'll buy another.
Very happy I went out for that last 1 hr tonight and nutted out what was really a simple initial error of mine.
Will now organize the VJMC inspection for ASAP
Went out this morning before work and did the fingers crossed test again of everything and it all worked which is brilliant.
Tonight i will re wrap a few places with tape then the rest of the main part of the loom running under tank and up to steering stem i am just going to place it within some wiring conduit i bought, i feel that way the wiring has the ability to move and not be caught up, i noticed once i unwrapped the old tape everything was a little more free and the original tapeing had put pressure on a couple of wires....the ones that had broken. This way i can just put a few zip ties around the conduit and enable the wires to move within if necessary. http://89.206.185.119/images/ebay/jjc/lma_cable-protection.jpg
Also last night i covered my old scratched tool box lid with a sideburn sticker, not sure if many follow the sideburn blog or buy the magazines, i do and find them brilliant, good stories and great bikes. So instead of using the pristine NOS tool box lid i paid a pretty penny for a few years ago i made the old one look better...7 layers of clear later and it looks good enough to me...the sticker "sunk" into where the old scratch marks were but looks good from far lol.
link to sideburn blog http://www.sideburnmag.blogspot.com/
there mags are great value A5 size high quality books and only around $10-12 aussie dollars inl. postage form UK
Question: Now as for fuel hose is it ok to use standard PVC hosing ? i had some for a water pump for garden etc, i have used it for the oil line was perfect diameter etc and figure the oil is less corrosive than fuel. As when i went to supercheap auto and looked at "fuel" hose all it was stated on packet etc was "universal PVC hosing" which is what i got at bunnings cheap as ? or for fuel should i buy specific hose.
Cheers
a few pics below....
If you're talking about the clear PVC hose you can get from just about any hardware store you can use it, but it will go hard quite quickly and possibly dis-colour as well. You may then have problems with it leaking at the ends if it goes hard.
Most auto places or mower shops will have "proper" fuel hose.
Most auto places or mower shops will have "proper" fuel hose.
jaderd
Been Around the Block
Cheers doc, yeah was always going to buy a little filter.
Finished off the wiring re fitted headlight and oversize grill etc. Had to undo whole from end of wiring first so I could feed the loom through the little hole below tank mount that wiring fits through, then below that little hole is the bendable tab for the oil filter / throttle cable.
I tested horn by earthing it then after Afew hits with screw driver then adjusting tone it was all good. Still wouldn't work from the switch so I pulled apart and fitted earth wire, then it worked even though earth wore I added wasnt connected to anything ! so im guessing it may have just needed a fiddle with or needed the wire I added to increase contact point ? Either way I just taped up the loose end of new earth wire ad tucked it away incase needed later on.
Put some ofthe conduit over it all and it looks neat.
Cleaned and polished tank, love how it came out old all weathered yet nice and shiny.... It will be the old looking part of the bike.
Next is clutch cable, though not exactly sure of it's routing, will look at pics on comp tomorrow.
Some pics below
jaderd
Been Around the Block
Ive been on the hunt for a NOS rear luggage rack for the bike since beginning the resto...there was one on ebay US for around $100 incl postage but i gave it up as was pretty steep...havent seen one since
bumped my wanted thread on OZVMX yesterday and it was my lucky day, brilliant bloke from SA area had recently been to his father in laws property, they happened to use F11's in the day for mustering and he scored me 2 racks....just costs me the postage and an IOU for future incase part in melb he needs etc.
Brilliant deal i think...so for around $40 i will have the racks on the way to me, one traditional large rack which needs a bracket re welded and re chroming and another slimline type which i only found existed 1-2 days before i bumped my thread and could only eve dream of coming up for grabs !!!, it just needs a few tabs angle grinded off, they were added for side panniers etc....
i will use the slimline one, rub back to bare metal and spray 30% gloss black with rattle can supplied by my powder coater for "extra" parts i might want same as frame....should contrast rear tail nicely and allow me to carry stuff / can go bush for day or two.
Will repair both though as fairly quick and easy to install / interchange.
Very happy right now !!
Cheers
Slimline one
Larger one
jaderd
Been Around the Block
ok getting closer now.
Friday night and saturday night at about 9:30pm i headed to the garage till around 1am lol...time flew wasnt even tired.
Finished wiring and fitted the trail tech dash with its 9V battery + switched tucked away under tank though accessible to turn off n on etc.
then i pulled apart the carby sat night and today i cleaned it all and refitted it all together.
It was gross, heaps of muck and gunk as you can imagine.
Carby cleaner worked great, better than i expected actually and stripped all the black paint that was already deteriorated anyway.
after cleaning it all i blew everything and everywhere with air gun and fitted everything back together.
Carby was simpler than i thought, i just used the exploded view in workshop book, i didnt go to the detailed area that explains how everything works, that would have confused me.
The needle (i think lol) showed basically zero signs of wear just like how it should be which is good.
All the stats on jets etc were identical to manual which is great, although the jet needle was on slot 2, where manual says 3. From what i know dad never adjusted etc so maybe incorrect position from factory ? i changed it to 3 so inline with book.
i left the float height alone, didnt bend tang as guessing fine from standard as ran correct before.

Question: I adjusted the air screw correct all way in then backed out the 1 3/4 turns. Now the throttle valve cutaway is that something i adjust or is that stating what it is like the jet needle and main jet size etc?
the air stop screw (idle screw) thats not also called the throttle valve cutaway is it ? and the 2.5 means turns out ? figured they would say turns out if that was the case.
If not, the air stop screw, where should i have that set ? i guess at high idle to enable me to easy start then when warm adjust to correct idle level....im guessing backed out heaps makes high idle? as intrudes less internally ?
Not going to polish the carby i like the standard look.
Cheers guys any info would be great, and your ideas on the slot 2 versus slot 3.


Friday night and saturday night at about 9:30pm i headed to the garage till around 1am lol...time flew wasnt even tired.
Finished wiring and fitted the trail tech dash with its 9V battery + switched tucked away under tank though accessible to turn off n on etc.
then i pulled apart the carby sat night and today i cleaned it all and refitted it all together.
It was gross, heaps of muck and gunk as you can imagine.
Carby cleaner worked great, better than i expected actually and stripped all the black paint that was already deteriorated anyway.
after cleaning it all i blew everything and everywhere with air gun and fitted everything back together.
Carby was simpler than i thought, i just used the exploded view in workshop book, i didnt go to the detailed area that explains how everything works, that would have confused me.
The needle (i think lol) showed basically zero signs of wear just like how it should be which is good.
All the stats on jets etc were identical to manual which is great, although the jet needle was on slot 2, where manual says 3. From what i know dad never adjusted etc so maybe incorrect position from factory ? i changed it to 3 so inline with book.
i left the float height alone, didnt bend tang as guessing fine from standard as ran correct before.
Question: I adjusted the air screw correct all way in then backed out the 1 3/4 turns. Now the throttle valve cutaway is that something i adjust or is that stating what it is like the jet needle and main jet size etc?
the air stop screw (idle screw) thats not also called the throttle valve cutaway is it ? and the 2.5 means turns out ? figured they would say turns out if that was the case.
If not, the air stop screw, where should i have that set ? i guess at high idle to enable me to easy start then when warm adjust to correct idle level....im guessing backed out heaps makes high idle? as intrudes less internally ?
Not going to polish the carby i like the standard look.
Cheers guys any info would be great, and your ideas on the slot 2 versus slot 3.

jaderd
Been Around the Block
Hi all,
did all the pre first start ever type checks, held oil pump on full as soon as started etc, was wondering if a way to get the oil already at head etc before starting, only way i found on net was using a power drill at back of pump....i figured that was too much effort.
Rebuilt petcock tonight, fitted up carby and installed fuel filter (bit long of a filter, will prob swap over soon)
chucked some fuel in.
2-3 push throughs of the kick start just to move some oil, then on the second actual kick it worked...started straight up.
Left choke on for a while, checked oil coming through etc, then turned off and assessed everything, no leaks from anywhere fuel or oil thus far which is good.
Headlight worked YIIPPEEE so all ready for my VJMC inspection, First go in with clutch it stalled and freed itself i think, then clutch worked fine, fanged down the road a little up to 3rd gear and back home asleep in garage now.
Havent adjusted idle screw yet, air screw is at factory 1 3/4 out etc.
Ran with no airfilter just for that few mins, Unifilter on way.
Digital dash all over the shop lol need to check earths on that and i think i have tacho interfering with speedo but all all brilliant soooo happy its not funny.
Thanks so far for everyones help and advice so far.
Vid below


