Follow along with the video below to see how to install our site as a web app on your home screen.
Note: This feature currently requires accessing the site using the built-in Safari browser.
We noticed you are blocking ads. DO THE TON only works with community supporters. Most are active members of the site with small businesses. Please consider disabling your ad blocking tool and checking out the businesses that help keep our site up and free.
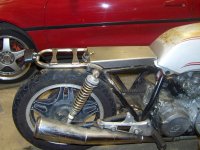
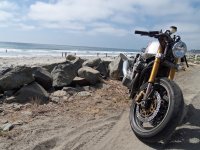
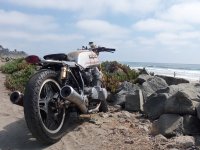
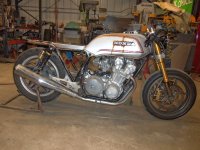
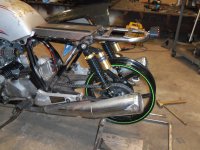
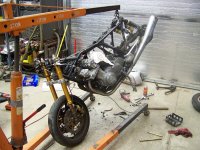
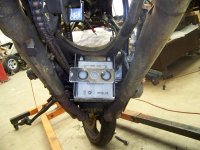
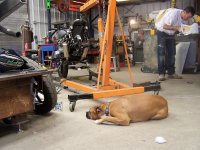
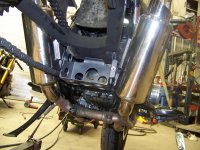
Ok here's how the battery mounts. It took a little bit of creative positioning to make it easy to work on, nothing too bad though lol. I lost the centerstand, but that's not a huge deal. The CS on this bike really sucked and was a pain to use, especially now that the bike is lower. The middle of the bike is now empty save for some wiring. Just gotta finish cutting off all the unused tabs and smooth out the frame.
I was a little worried about ground clearance, and considered using a smaller battery, but this one was brand spankin new, and I like the idea of having a bigger, more powerful battery on a bike I'm gonna use daily. As it turns out you can still barely see it when the bike is on the ground, and the bottom is still almost an inch higher than the exhaust under the front of the bike. I think it'll be fine.
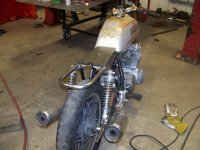
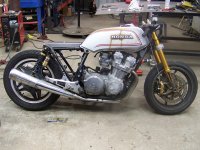
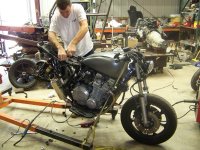
After cutting the back section of frame off I started to not really like how short the bike was looking. Too much like the choppers that guys run a springer seat on with no rear end. I also had to go back to my original reason for wanting this bike...to have something more sensible than my Duc. With no tail I'm still limited to what I can put in a back pack, so I decided to build a rack. Bent up some 1" tubing and made a nice little platform to strap stuff to. Been talking about doing a motorcycle camping trip with my buddy, so I figure I gotta have somewhere to put some gear.
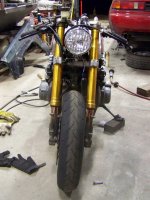
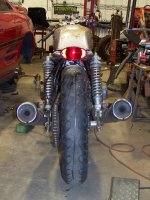
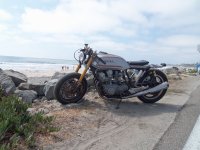
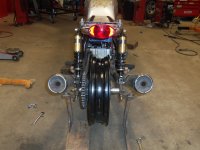
My tail light also arrived, so I got that mounted up, as well as the headlight that came in last week.
Funny you should mention it, the next big difficult part of this project is making a matching wheel fit. I cant stand non matching wheels. That was one of the biggest things that drove me crazy about that KT650 or whatever it was that Classified Moto built recently. They did all the work to put a single sided swingarm on an old bike, but couldn't put matching wheels on. They just used the stock kawi front and triumph rear, which looked like shit IMHO.
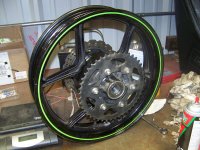
The catch for me is that the ZX6 wheel is WAY too wide so I cant use what I have. However a Ninja 250 wheel has the same spoke pattern and runs a 130 width tire stock which is what was on the CB as well. The baby ninja wheel is also a 17" which makes it easy to find rubber as well.
i love the way it looks with that front end....
they really do update these older bikes, and make em look tough as!
i havent finished mine enough to test ride it yet but a concern for me is the amount of steering i have.....
it looks like you have a similar range.... how does she feel???
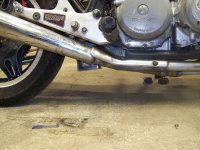
I did have to re-jet for the pod filters. Ended up just doing some google searching to see what people were running to pick jets. It's not perfect, but it runs pretty well now. When I bought it it wasn't running great, so I dont have a good baseline of what it should be though.
As for the steering, I did have to widen the stops a bit to keep the bars out of the tank. It doesn't exactly turn tight when you're moving it around, but when riding above parking lot speeds it's just fine. It's only inconvenient when trying to stuff it into some tiny spot in the garage.
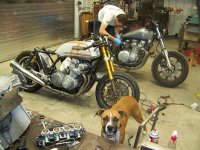
Thanks for the compliments. I'm a fabricator by day, so metal work is kinda my thing. Been thinking about shifting some of my time over to building more bikes, but I gotta make sure it'll pay the bills.
It's not so much a question of if I could do the work and get paid for it, it's more a question of is there enough demand for the type of work I want to do. Building custom bikes is only 2 wheels short of what I already do.
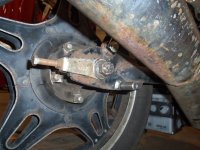
Ok on to the wheel swap. First thing on the list though was to add a couple lift points for a rear stand. Coming from riding sportbikes it felt odd to not have a place to lift from and without a centerstand there was no easy way to get the back tire in the air. I could have drilled and tapped the swingarm and bolted on spools, but somehow that just seemed a little too high tech, so I went with something a lot more simple and just welded a couple pins on instead.
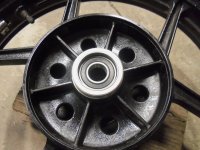
So here's where the real work came in. The Honda has a 20mm axle, but the Ninja 250 wheel is set up for a 17mm axle. Obviously that doesn't work.
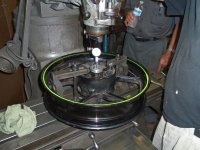
There are 3 bearings in the rear wheel, one in the cush drive, and 2 on the wheel itself. Fortunately the one on the cush drive actually has a 25mm ID, and uses a spacer to sleeve it down. This one was pretty easy, just chuck the spacer up in the lathe and bore it out to 20mm. No problem.
When I came to the wheel I got lucky on one side and was able to find a bearing with the correct OD to fit the wheel and the proper ID for the new axle. Simple swap there.
On the cush drive side of the wheel however I ran into a snag. The stock bearing is 40mm OD and 17mm ID. I couldn't find a 40x20 replacement bearing, the nearest size I could find was 42x20. Knowing that I didn't have the proper tooling to fix this myself I called a friend who's a master machinist and took the wheel over to his shop. We mounted the wheel up on his Bridgeport and bored it out to fit the new bearing. Well actually it wasn't that simple, we kinda got distracted catching up with each other and over bored the wheel a little bit......so then we had to cut a sleeve on the lathe, bore the wheel a bit more and press everything together. Oops. It all fits perfectly now though, just took a little longer than expected.
When I got back home I started mocking things up and taking measurements for the new spacers to center everything. A little time on my own lathe and the wheel is now in place.
This site uses cookies to help personalise content, tailor your experience and to keep you logged in if you register.
By continuing to use this site, you are consenting to our use of cookies.

")