Project Shinjimei- 73 TX500

Re: Project 3 the Hard Way- 73 TX500

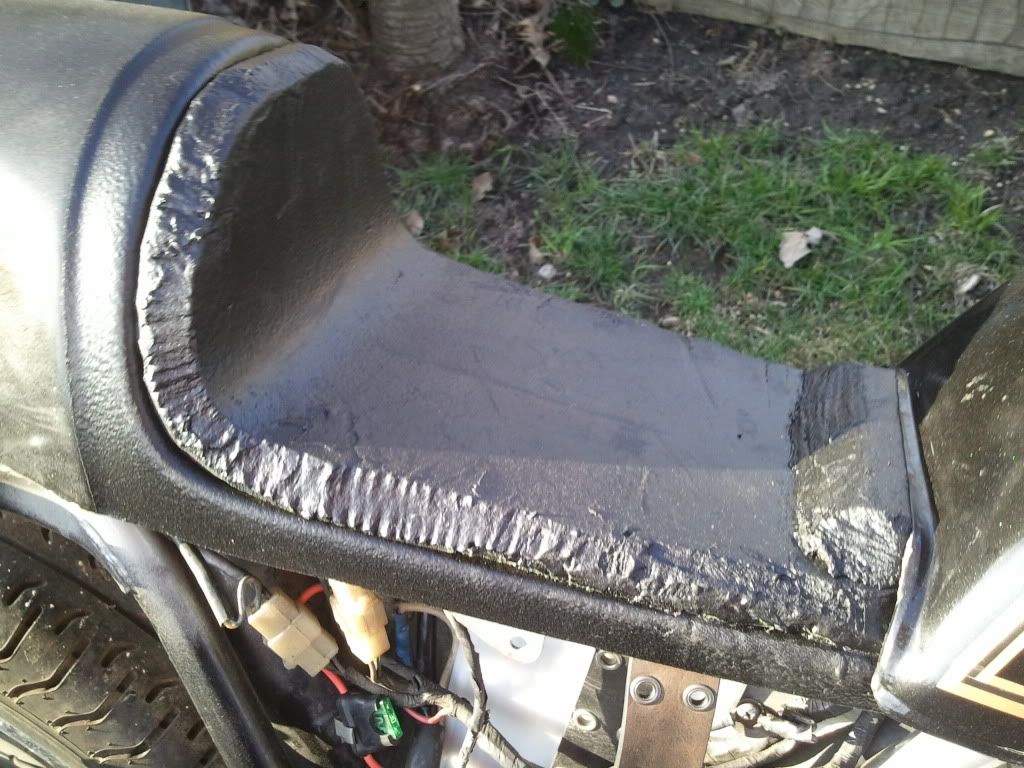
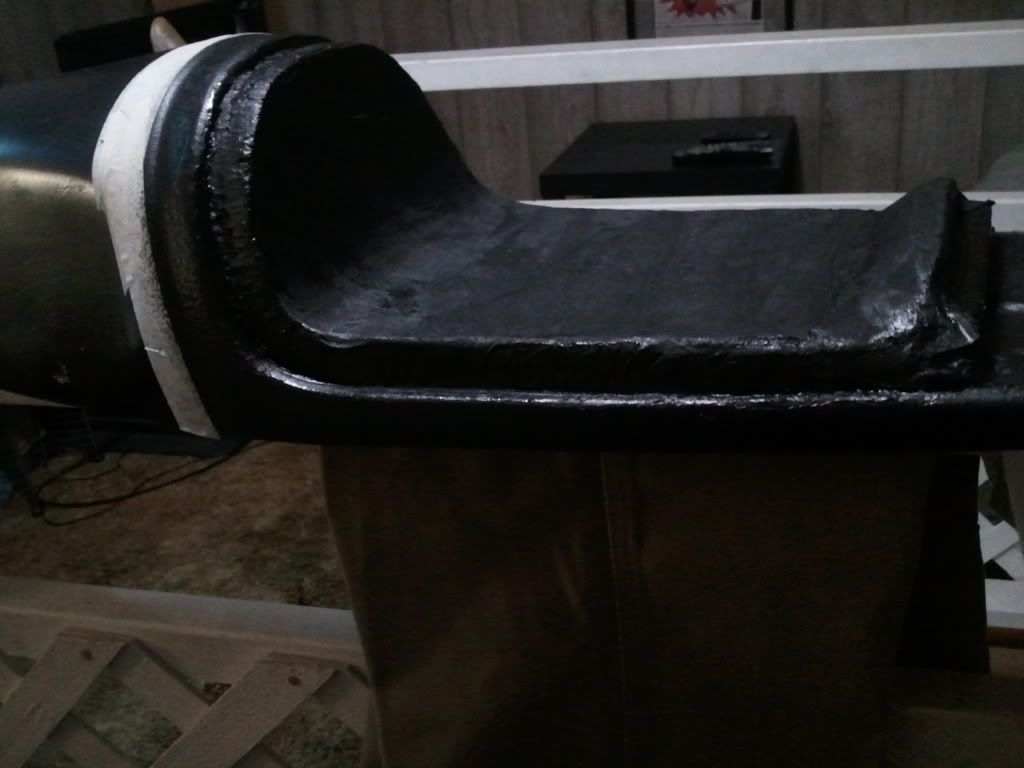
The Flex Seal did not work as expected..... It covered the foam very well, and looks good, but unfortunately stays rather sticky when applied to foam. On metal or fiber glass it dries hard to the touch, but the foam must soak up and hold onto the solvent that keeps the stuff liquid. Hopefully it will continue to dry over the next couple days. If not, I'll have to pick up some new foam and cover the seat in vinyl after all.
 
Re: Project 3 the Hard Way- 73 TX500

My offer still stands, if you want me to make you a seat cover. Where you at? PM me so we can discuss it a little more. The seat foam I'd suggest is at you local sporting goods store get the softest black foam exercise mat. Use the thickest you can find and use as many layers as it take to make the seat foam about 1-1/2 to 2 inches thick. Use an electric turkey carving knife to shape the foam, the pro's use a course hacksaw blade welded to a jigsaw blade. I've never tried that method but I'm sure it works well to. If you like I can do the foam for you as I have a reasonable source. Use 3M glue for foam to hold the layers together and when finished with the cover glue the cover to the foam and seat base, again if you'd like I can do all that for you in either vinyl or leather. If you've got an old leather jacket you cant wear anymore that could work well and look cool to boot.

How is your seat base attached to the frame? if your using fasteners that are effectively under the seat foam you might want the seat foam and cover to be removable, in that case a fiberglass under-seat pan must be made and the seat cover will need either snaps or a velcro attachment to the actual seat base. Again I can do all that for you if you'd like.

Hit me up. Talk soon, Travis....
 
Re: Project 3 the Hard Way- 73 TX500

Ironspade, I do appreciate the offer, but this is one of those things I need to do for myself. I have found a foam I really like, I just don't have the hang of shaping it yet. I used a bread knife for the first go-round, it works well, I just don't have the talent. It'll come with time. Stitching I do know well, though. I planned initially on using black denim, but I do a lot of foul weather riding and I don't like my ass getting soaked. I may just cover over the flex seal with material, now that the foam has been waterproofed. I haven't had a chance to check if it dried any more yet today, so that may become a moot point. Realistically, though, I'm going to plan to re-cover.
 
Re: Project 3 the Hard Way- 73 TX500

Well, the foam is officially dry to the touch, but it really looks like crap. I blame my lack of skill with shaping foam, and impatience.
2012-03-14170552.jpg


Now that I know the stuff works, though, I'll be fixing this disaster. I'm going to trim the edges away with a razor, then use a softer foam with straight edges to fill it in. After that, I'll glue some thin packing foam over the top and re-spray. I just have to remember to apply thin coats.
 
Re: Project 3 the Hard Way- 73 TX500

2012-03-20165307.jpg

Fitted my exhaust for mockup purposes today. I didn't realize until now that it had a different routing than any other 2 into 1 that I've seen for the TX/XS500. It actually required the removal of the centerstand to fit. This was, of course, not a problem, as I had planned to remove it anyway.

2012-03-20165324.jpg

The masking tape is where I'm going to chop the muffler off. I was also thinking of shortening the horizontal pipes before the collector to make it look more like the exhaust on the wrenchmonkees bike. That would also allow me access to the inside of the pipes where three dents are, so I can pound them out. If I could photoshop, I'd do it, but I'm sure the idea isn't lost. You can also see part of the brake linkage I'm working on in this shot.
2012-03-20165339.jpg

Here you can see one of the problems that arrose when I lifted the rear of the bike. The chain is trying to occupy the same space as the swingarm. I will be fitting a nylon rub block.
2012-03-20171151.jpg

The other problem caused by lifting the back was that the kick stand became too short. Phase one of correcting that is this: I lowered the front as much as I possibly could. Phase two will be moving the kickstand toward the front of the the frame about 2 inches. The frame sits lower there. ( the stand also interferes with my shifter, so it will correct that too.)
 
Re: Project 3 the Hard Way- 73 TX500

2012-03-23154254.jpg


I'd say this is an improvement. I did a little shaping with a sanding cloth. Needs another coat, and done! And if it still looks like crap, I can always put a cover over it. Lol.
Of course, now I have to think about some proper paint.....
 
Re: Project 3 the Hard Way- 73 TX500

I could be wrong, but the rear looks too high and the front looks too low. Have you calculated the Rake and Trail in teh current configuration?

To run that much rear end droop, you will probably have to raise the motor in the frame to get a decent chain run. The front end looks scarey low, but that's easy to change.
 
Re: Project 3 the Hard Way- 73 TX500

While I didn't take measurements of rake and trail, it's far less extreme than my GT380 was. The front end is exactly the height I wanted, but I might have to lift it back up another half inch, because the fender hits the frame at full compression. I don't want to admit it, but the back is too high. The shocks are at least an inch longer than the bike can tolerate, possibly more. I like them, and I don't want the hassle of trying to swap for shorter ones, so I'm going to make them work somehow. Probably a chain tensioner mounted to the swingarm.
 
Re: Project 3 the Hard Way- 73 TX500

2012-03-31160039.jpg
Nothing much to report. We've had a lot going on this last month, and I haven't had time or desire to do anything with the bike. About the only thing bike related that has happened is I lost the key to the gas tank some time during the move. Guess I need to visit the locksmith....
 
Re: Project 3 the Hard Way- 73 TX500

2012-04-16221330.jpg

I finally got back to work on this sucker for a short while.... This is a shot of the pieces I started with, in an attempt to make my rearsets quirk with my kickstart and rear brake.
2012-04-22144734.jpg

This is the right rearset assembly incorporating a linkage to operate the rear brake. I still need to get some heims and threaded rod to complete it. I did install some folding pegs.
2012-04-22144719.jpg
That, of course, was so this would work. I was going to heat the factory kicker and bend it into a "z", but a guy I work with decided it would be easier to make a whole new one out of 3/4" cold-rolled steel.
2012-04-22144656.jpg

This is in the upright and folded position, where you can see it doesn't interfere with my leg placement. That's all for now!
 
It's hard to do much in the way of updates when I can't find time to work on the bike, but I've got the last Newtronic ignition in Australia on it's way to me in Milwaukee. Other than that, not much to report. I've gotta snag a cam chain riveting tool before I can go any further than I am. At this point the only change is the name- I've decided to call her "Shinjimei". The Japanese word for"fuck you". Have a nice day!
 
Your going to like that Newtronic set up man . I'm running one in my 500 and it mounted right up and when i went to start it the bike just backed fired. So like they said in the papers that came with it spin it 180 degrees and it fired right up . Will say well worth the money !
 
I really hope so... I ended up overdrafting my bank account to pay for it.... >:\
 
Yea there a bit pricey but well worth it you'll like it im sure !
 
custom-ford-econoline-van-3.jpg

inspiration for what I want to do with my paint... The van is pretty much the same shape as my gas tank. Lol.
 
You planning on doing the stripeing or just the color of the van ? And im not much for a van but cool looking ride for sure ! Did you get your Newtronic set-up working ?
 
Thanks, guys! I'm planning on doing both the color and stripes. The Yamaha logo will be in relief. The frame will be silver hammertone. Dreadrock- the unit hadn't even shipped yet as of this morning... shouldn't take long to set up, though.
 
Cool yea seemed like it took forever for mine to show up but worth the wait . And sounds like its going to be a kick ass paint job man cant wait to see it !
 
Back
Top Bottom