Stifler's Mom

Congrats - on the title and the wife! My wife's mother's day will be spent on the MSF course as well, and I know she's not as grumpy about the timing as she pretends to be. :)
 
After the third ride in a row, giving hand signals to turn, and have some dumbass wave at me like I was a long-lost friend. ???
I bought some LED turn signals.
Drilled the rear tie-down bracket roughly on center, but the backside had a tab welded to it, so I made a plastic spacer to keep the light more or less level and square.
i-MXnMT7m-M.jpg


On the front, I drilled the gusset about 5/8" from the welds. On hindsight, not the best location, since the nut on the back is almost un-turnable (is that a word?).
i-pPc8vmj-L.jpg


Luckily all the wiring in the headlight bucket was in good shape, running new wires to the signals was easy, and everything worked on the first attempt. Except the flasher of course. I need to order a digital one. ::)

i-CLwt4c6-L.jpg

Kelly says that the fronts need to be extended out farther, I think that the reflections off the forks will make them more noticeable.
i-BcQZKxc-L.jpg


After ordering a new fuel cap gasket, having it back-ordered. And then getting an e-mail that they would not be available, I said screw it, and decided to make my own. When I was at the part store (auto) getting wiring supplies, I asked if they had any fuel compatible gasket material. They didn't......but the counter guy said he had a buddy that worked for "the gas company". ::) He gave him a call, and it just so happened that he was on his way into town, and just a few miles away. ;D He had a piece of scrap that was just big enough to do the job, for free. 8)

When I was through wiring, I made a drill fixture from a piece of scrap 2x6. Cut the center hole the right size with a hole saw. Then cut the O.D. with an Exacto knife.
After a bit of test fitting and trimming, the piece fit right. Then I had to shave the crosshatched side down to proper thickness. A tedious chore, that I am still surprised I pulled off without leaking red stuff all over the place. :p
i-rCK6BMr-L.jpg

Now I can ride with a full tank without spraying gas all over my crotch. :eek:
i-33H4gpw-L.jpg
 
I forgot to add that I squirted some RTV black inside the signals to help keep the wiring from wearing the insulation off from vibration. :-[
 
Had my first ride today in way too long. Was behind a semi, then a pickup coming into a tricky intersection, they both turned left leaving me a bit exposed. Our towns city attorney was hit here last fall.
I happened to be in the beefy part of the power-band, and when I throttled hard the front came up. I was a bit startled and didn't know if a cop was nearby, so I closed it just as hard, hit second gear and left. :-[
After about a mile I started hearing a grinding noise, so I headed to a buddies place. I lost drive after another quarter-mile and coasted (downhill) to within a block of his place, and into a parking space. I thought I had busted a chain. ::)
After dismounting, I found the bolts holding the sprocket to the hub were sheared. :eek:
My buddy was about to get off work, and happened to have a bike rack on the back of his truck, because he went to Springfield to pick-up a DT-360 just day before yesterday. So it was relatively easy to get the old girl home.
So now I need a new sprocket set and chain, any recommendations?
Getting the sheared bolt bodies out of the hub will be a piece of cake for me, I did a "ton" of them as a machinist. ;D
 
Re: Re: Stifler's Mom

[quote un-turnable (is that a word?).Sounds legit to me.
Now I can ride with a full tank without spraying gas all over my crotch. Always a good thing.
[/quote]
 
I'm sure I have the OEM headlight brackets around here somewhere. You're welcome to them if you want. They already have holes in them for aftermarket signals ;)

And... I can make you a "plug and play" LED taillight fixture (just like mine) for cheap too. Just say the word ;)
 
I think the signals next to the headlight tend to "blob" at night, so I'm good with where mine are. I may take you up on the taillight, it depends on where I go with a seat.
 
I pulled everything apart today. The chain/sprocket appear to be the originals.
As I removed the rear wheel, it jogged my memory from when I was checking the brakes. I remembered (I thought) that the bolt holes went through the hub.
i-nqK7gJp-M.jpg


That will make removal of the bolts a bit easier.
i-5TwC2Hs-L.jpg

i-xp394fR-L.jpg


Time to order some parts, I decided on a 530 conversion set. ;)
 
Things on the bike have been going slow. :-[ My Mom is living with us and recently had open heart surgery, so as primary care giver I have little free time.

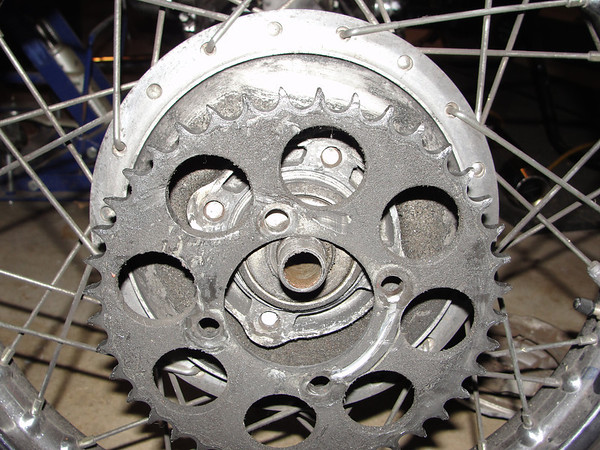
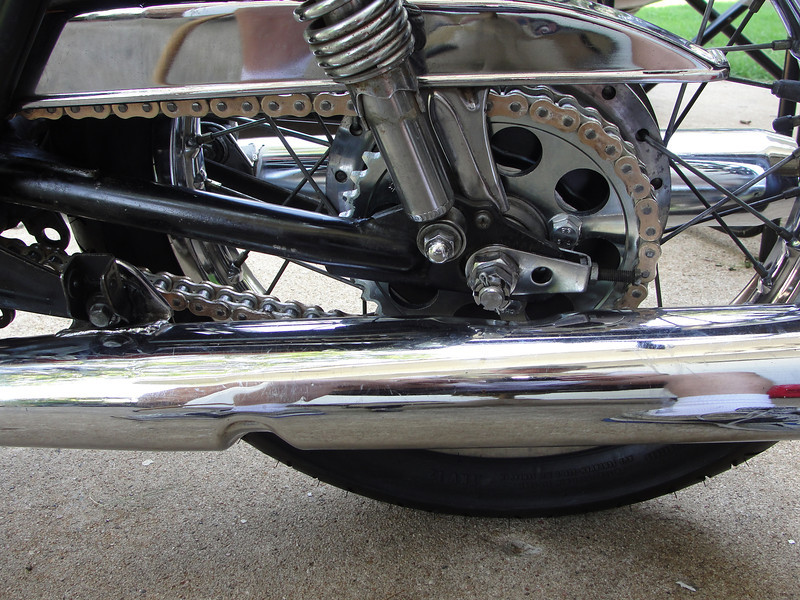
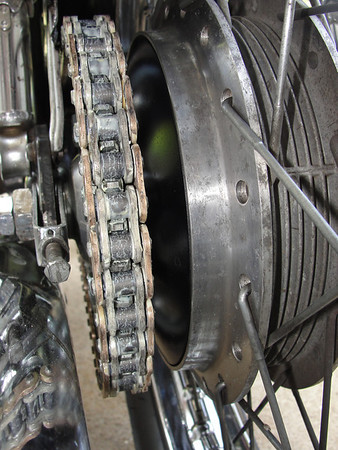
I got the new 530 chain and conversion sprockets in, and decided that since they looked so good I would paint the sprocket carrier. (it was too skinned-up to polish)
So it is now semi-gloss black.
i-8v4x6kG-L.jpg

i-WPP48XK-M.jpg

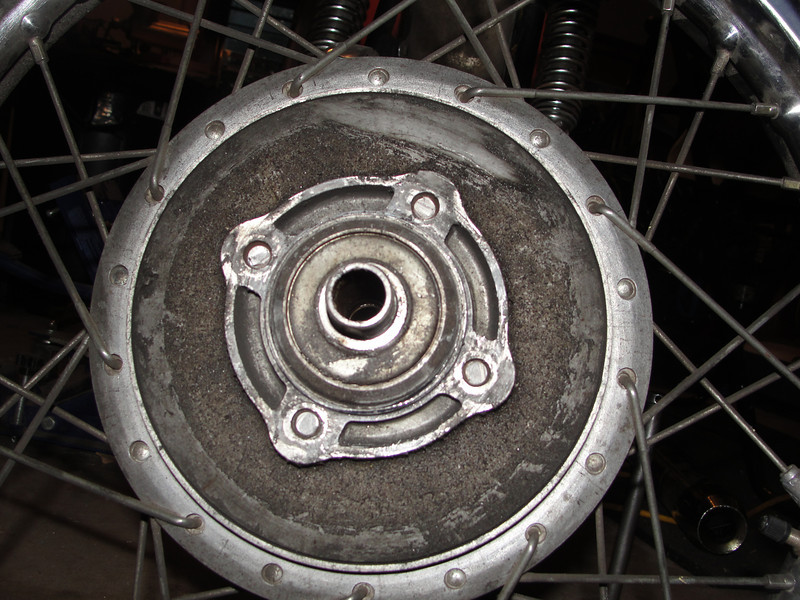
The problem is, it is making my hubs look grody. Maybe one day I will get some aluminum rims and re-spoke, then I will have an excuse to polish my hubs.
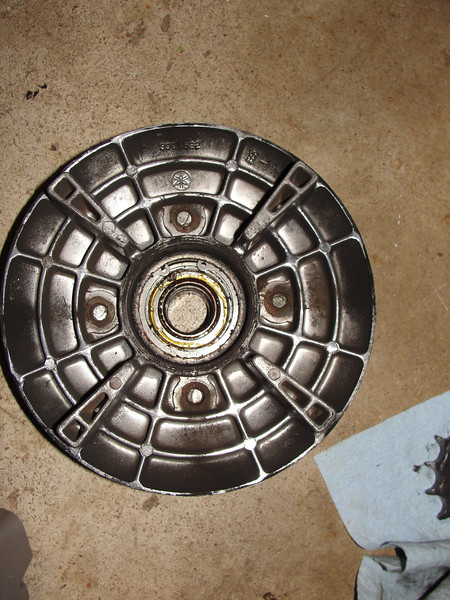
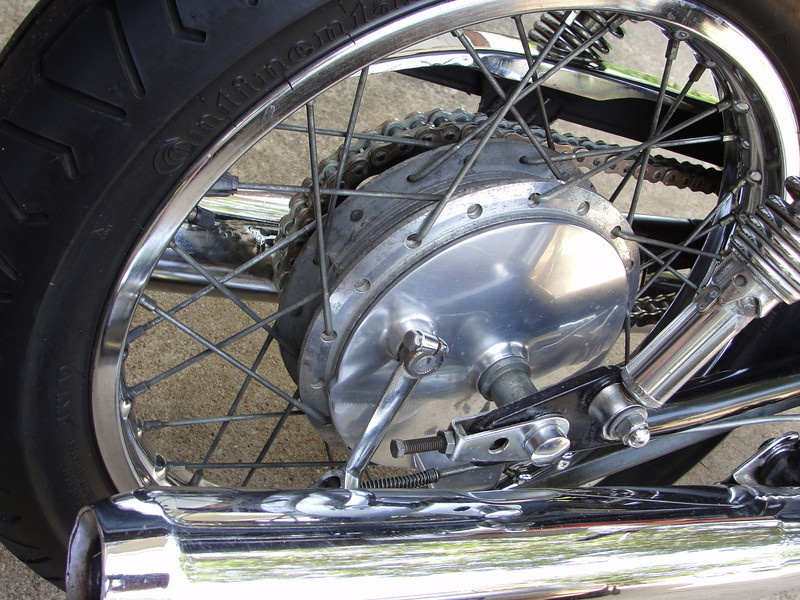
Since the sprocket was all shiny, I just had to polish the brake carrier while it was off. 200 grit-400 grit-1000 grit and polishing compound, it looked nice when I put it on but is already water-spotted. ::)
i-WM2n3fw-L.jpg


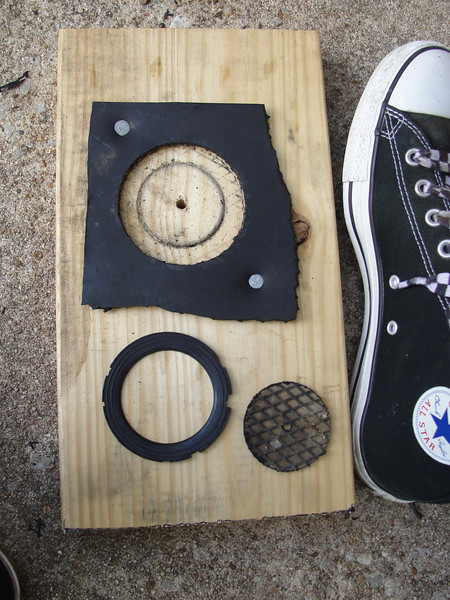
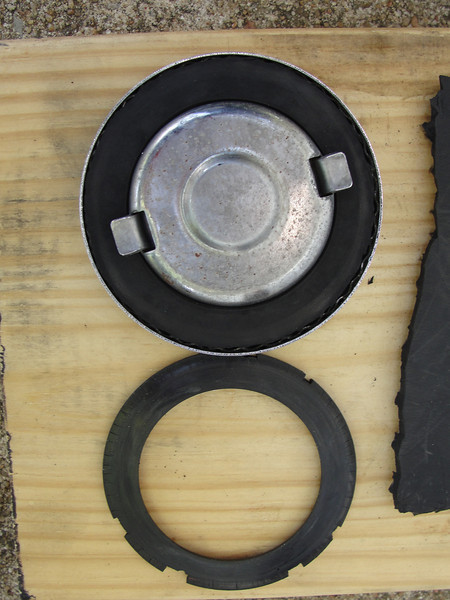
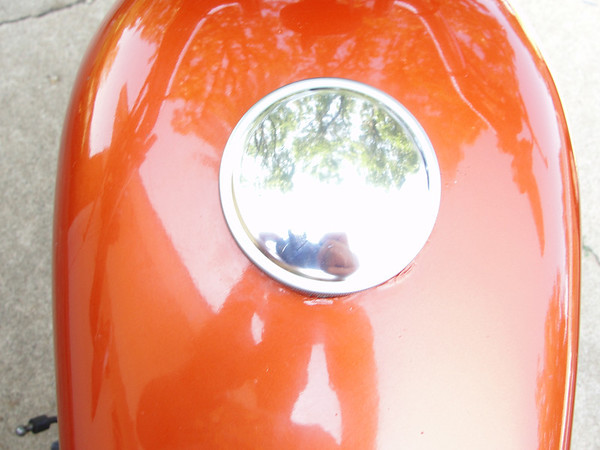
The seal I manufactured for my gas cap worked fine, as long as it was only exposed to gas-fumes. The first time I filled the tank completely it "grew" about 50% in diameter. The next time I pulled the cap off it sproinged out. ;D
So I ponied up the cash for a shiny new aftermarket one.
i-6tfCNqK-M.jpg


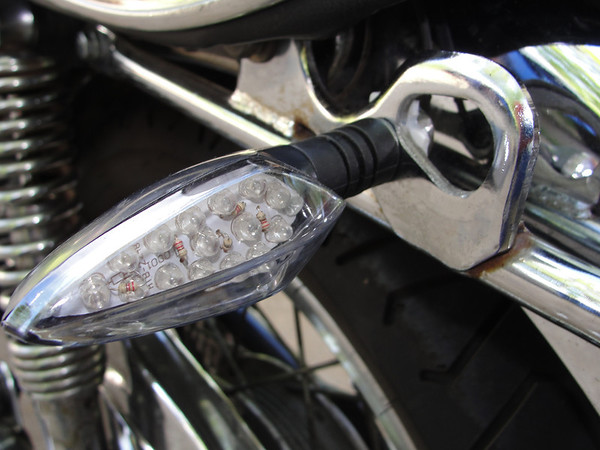
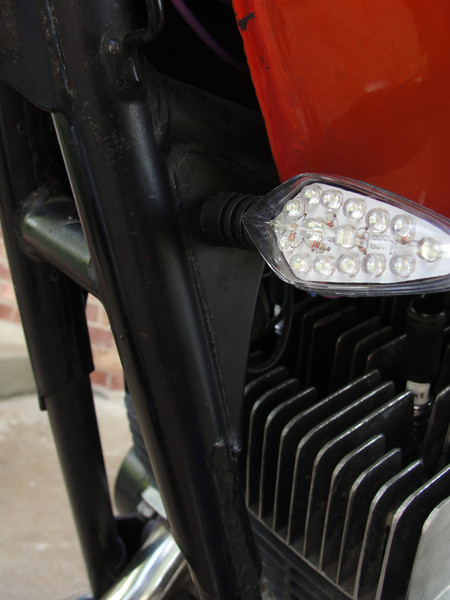
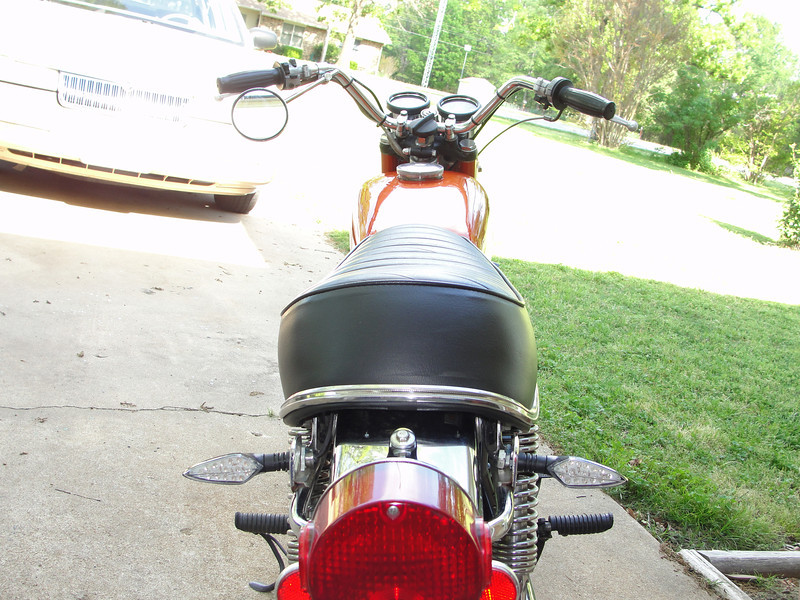
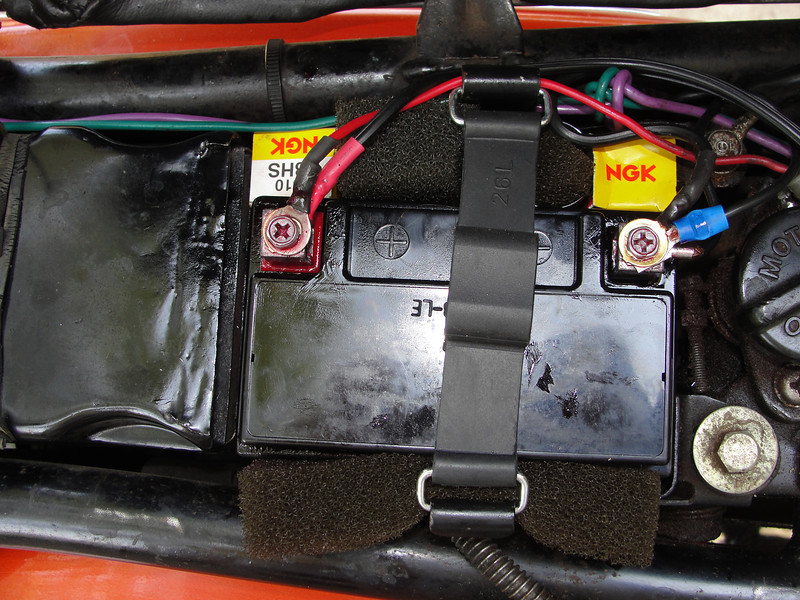
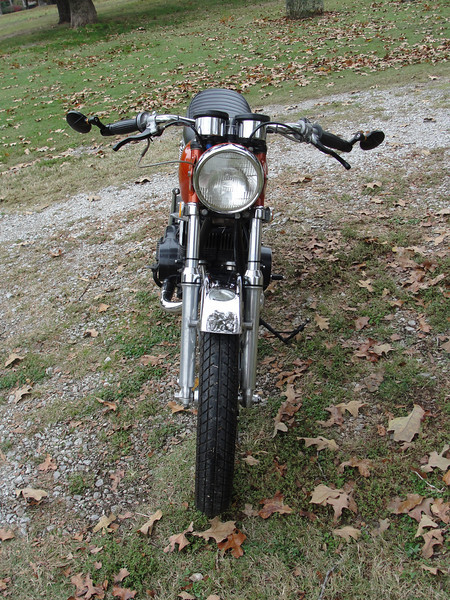
After putting the old gal back together, I replaced the flasher with a unit compatible with the new LED signals. As I was doing the trouble-shooting I had the battery charger hooked up. When everything was working I replaced the tank, closed the seat double-checked the lights......and nothing worked. :eek:
After cussing a blue streak, I said to hell with it and went in the house to eat lunch.
With a full belly and a calm mind, I returned. You could see the lightbulb go on over my head!
I hooked the battery charger back up....and everything worked! ;D Yup, the battery died while I was working on everything else. LOL
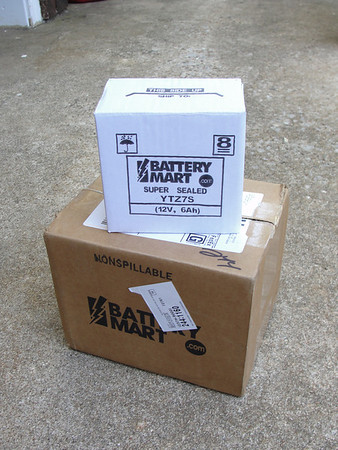
So a quick order to Battery Mart, and HVC and 3 1/2 working days later, I have the new battery, hold down, and some foam to hold the spare plugs and plug wrench.
i-FxZPhFP-M.jpg

i-mLVbq2p-L.jpg


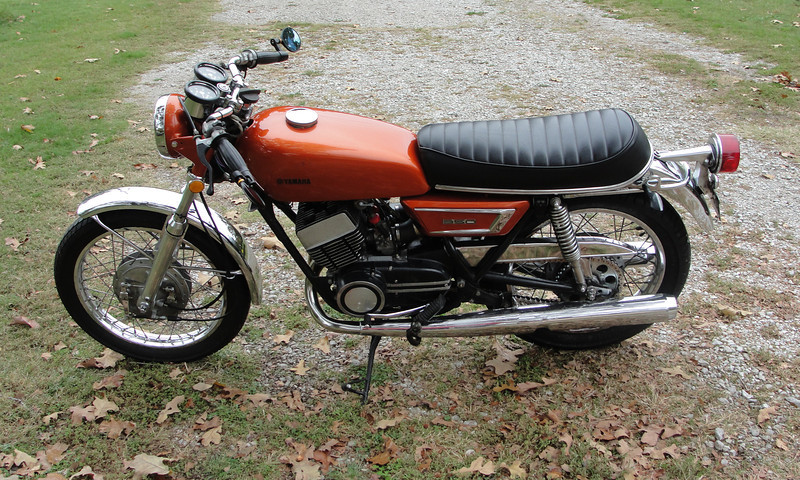
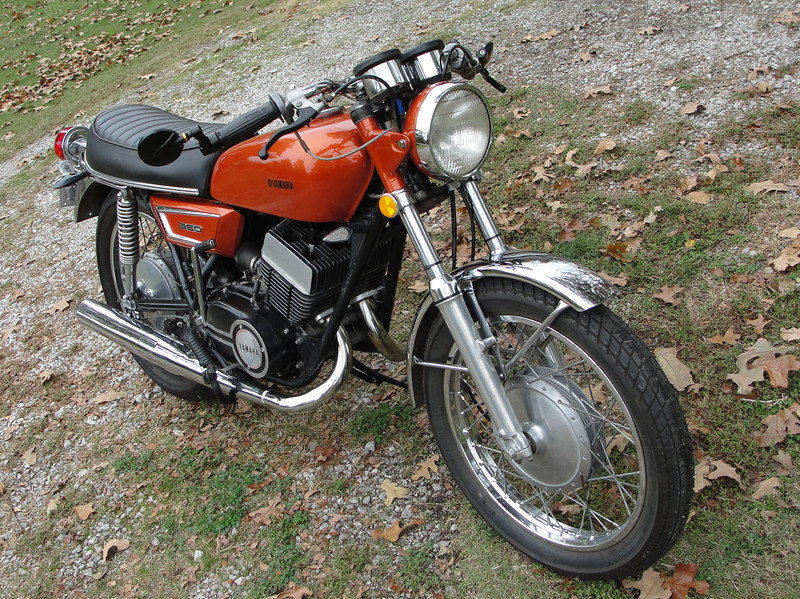
Finally back in the saddle again! 8) ;D
 
Condolences for your Mom.

The bike is coming along really well though. Taking this one to Barbers?
 
Yup, she's coming back again this year. Went out for an 80 mile ride Saturday, she is running fine. 8)
 
Despite being "nice ride-ed" by AceCR, it does my heart good to see the station wagon express back on the streets.
 
Thanks Kiley. She sure isn't where I figured I would have her by now. :-[
But at least with her back on the road, I can start improving on the $5 per mile average I have going. ::)

At least I followed the advice that we give all the kids, "Get it running reliably first, BEFORE tearing it all apart and changing things". ;D
 
Re: Re: Stifler's Mom

4eyes said:
Thanks Kiley. She sure isn't where I figured I would have her by now. :-[
But at least with her back on the road, I can start improving on the $5 per mile average I have going. ::)

At least I followed the advice that we give all the kids, "Get it running reliably first, BEFORE tearing it all apart and changing things". ;D

Yep, and that will pay off. And hell, she looks good as is anyhow! Its not like you have to ride a clunker before you get to make it pretty!
 
Prettier ;D

I was running errands on her today, and had a postman hang half out of his little postal-van, wave-point-grin-thumbs up. 8)
 
I picked up some new bars at the swap meet at the Barber Vintage Festival, and then ordered some new levers and mirrors from Dime City.
i-8FThBmm-M.jpg


After pulling the stock stuff off, I tried the bars for fit and comfort.
i-FsMb3g4-L.jpg


I decided that they were a bit wide for me, so I got out the air-compressor and cut-off tool and removed an inch from each end. I used my lever mounts as a gauge to square-off the ends with an angle grinder.
I had to modify my stock lever mounts to work with the Dime City shorty levers. Nothing a Sharpie, scribe, and a couple of files couldn't handle.
i-tHNC3m6-L.jpg

i-CxcnJKm-M.jpg


After mounting the levers, and cutting the ends out of my grips, and sliding them up on the bars to clear the bar-end mirrors. I de-burred the expanding sleeves on the mirrors and wrapped a couple of wraps of scotch tape around each piece for grip, and locktited the main bolt. Then I installed the mirrors, slid the grips back down to contact them,and adjusted the levers and mirrors.
The whole assembly is now about the same width as the bars were before shortening them.
i-SBvJpG7-L.jpg


It's amazing how a simple modification can change the "attitude" of a bike. ;)
i-pbnSrkB-L.jpg

i-hb329PN-L.jpg

i-CJfgQ5j-L.jpg


I like these bars a lot. They are about the same grip angle as the stock bars, but without the rise. 8)
 
Oh yeah, I had to use some nylon washers to take-up the extra room between the stock lever mounts and the new levers. ;D

i-jL58pqK-L.jpg

i-bLMf5dX-L.jpg
 
You might want to put a nylon washer on each side of that lever, instead of both on the bottom. Should make it a little smoother and it shouldn't wear out that way.
 
Back
Top Bottom