AgentX
Over 1,000 Posts
Hey, all—my second bike here, following on my Royal Enfield adventures. Originally wrote about picking it up way back a few years ago at https://www.dotheton.com/index.php?threads/1965-matchless-g15-cs.66578/, and have cross-posted this latest info on AccessNorton.
So I had original thread over there about my initial attempt to get it running, tapping into all the expertise of the members there. (https://www.accessnorton.com/NortonCommando/matchless-g-15cs-get-it-running.21369/). It kind of lost focus, and I figured I’d start another, more concise thread with some updates.
Long story short, obtained the bike from the original US owner (friend of mine) in 2016 while I was living overseas; he saw the work I had put into my Royal Enfield (my first bike) and thought I’d be a good next caretaker, which meant a lot to me. He had conducted what he termed a “redneck restoration,” including the paint job, in the mid-90s. Ran when parked…but it had been a while. Due to living and work situations, it’s been hard to get to a place where I could work consistently on it.
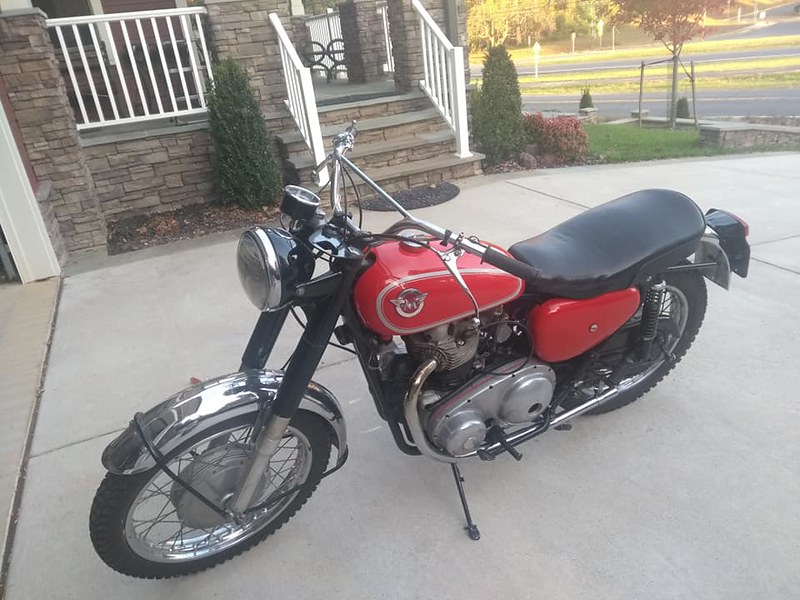
As to why it's here in the "dirt" section...the G15-CS is a hybrid of a Norton Atlas engine with a Matchless/AJS frame and transmission, intended as a factory bike in the style of the California desert racers. (Sold with both Norton and Matchless badges and nomenclature...identical bikes aside from the tank badge.) It’s got of legend surrounding its creation, possibly having been mocked up in the US as an actual race bike then picked up by the factory for production…or, according to some seemingly less-reliable speculation, simply cobbled together from off-the-shelf parts during the consolidation of Britbike companies under AMC. Either way, it’s a pretty massive engine in a pretty small, stiff frame, and now that I have done some shakedown rides, I can vouch for how well it handles.
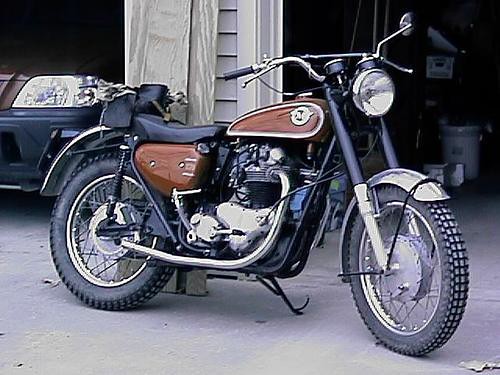
What I saw before I got the bike:
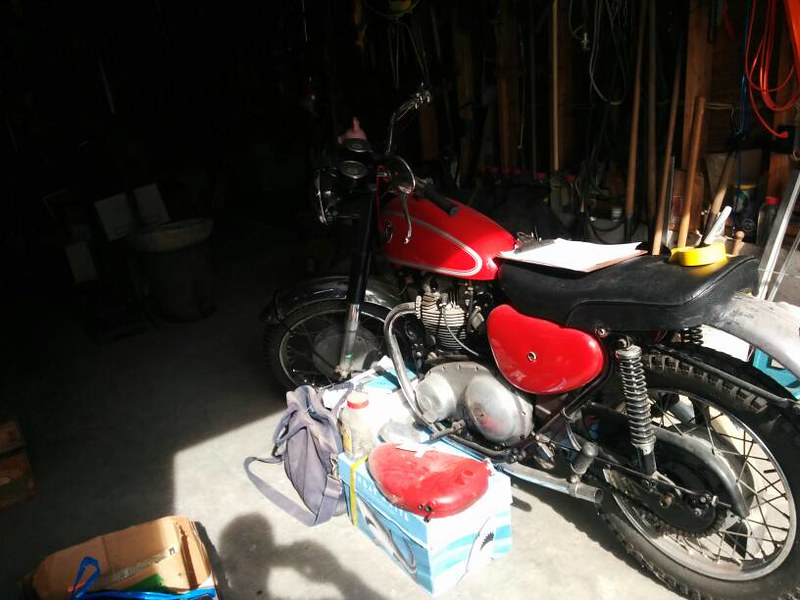
Picking it up….first view in the garage.
 Loaded[/url] by https://www.flickr.com/photos/185106507@N04/]Mick Doul[/url], on Flickr
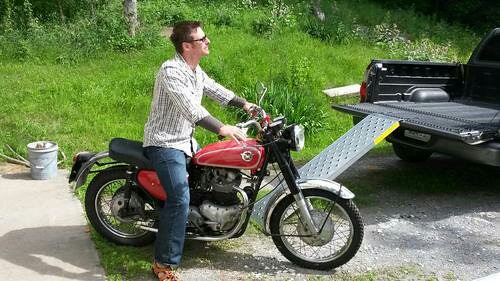
Got home and got full approvals for the acquisition
Then got to work
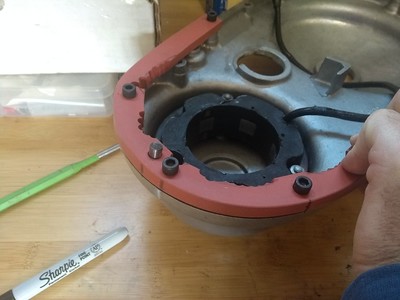
Off the bat, I found the magneto wasn’t working, so had that re-done with the Brightspark Easycap replacing the old Lucas paper capacitors...this puts the more-reliable modern capacitor in a place you can reach, and deletes the old school cap way down in the guts of the mag body.
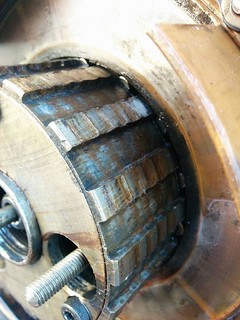
The clutch hub was really notched up, and it didn’t seem cost-effective to try and clean it up, so I replaced it. The clutch pressure plate stripped in the center adjuster while I was working on it, so I put on a new, machined repop replacement and some barnett friction plates.
The carb slides were also sticking like hell, so I had them sleeved, then I rebuilt with new jets and gaskets.
Over an extended period of time, I also installed a reversing cam plate in the transmission so it would match my other bike, which is a right-hand, 1-down pattern. Had the Ceriani shocks rebuilt by a guy Irk Miller referred who’s into that stuff…no one else would touch them, and they appear to work well.
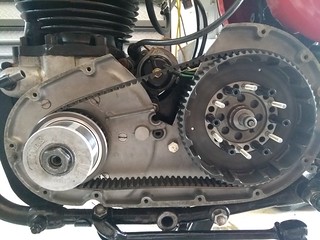
After finally getting it timed properly so it ran on both cylinders, I found the primary was a leak-fest. After multiple attempts to seal it, I installed a Newby belt primary, which was inevitable since I have one and love it on my Enfield. With both bikes, being able to access/remove the primary to get to other stuff without having a wet mess and constant gasket re-fitting was as much a motivation as performance…just wish I’d have ponied up to do it before fixing up the original clutch. I know I could have dressed the gasket surfaces, but it was just a mess I hated dealing with, and the Newby clutch is so much better.
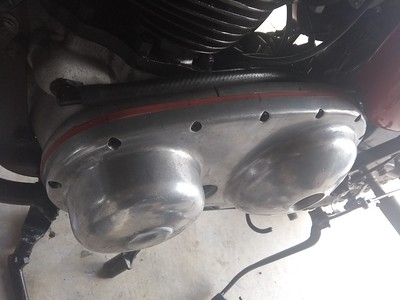
Newby setup snap; you can see the access I cut into the rear cover to get to the magneto more easily, which is going to be a huge help...it will be closed off when the front cover is on, however:
Full Install report here: https://www.accessnorton.com/NortonCommando/newby-clutch-installation-report-g15-cs.29138/
I have found that the swingarm seems like it’s spaced too widely (https://www.accessnorton.com/NortonCommando/g15-cs-rear-wheel-spacer-issue.28979/#post-443070), but after a struggle with my original speedo drive which led to replacement with one of the British-made repops, I just tightened it down. Now it’s rolling without a hitch, so I’m going to leave well enough alone there, for now.
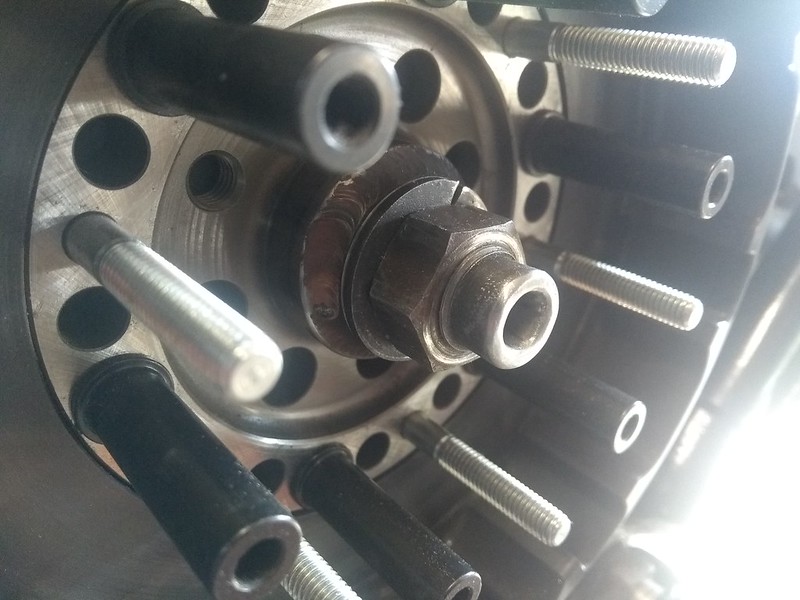
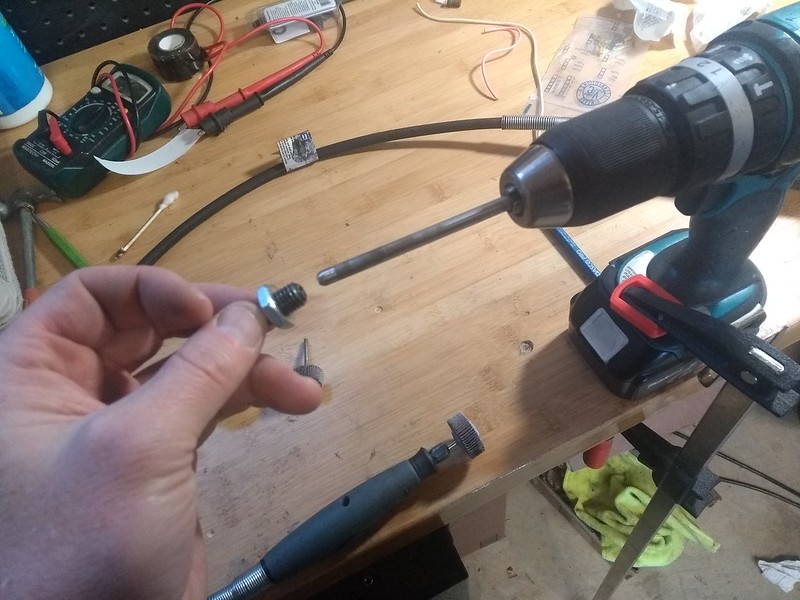
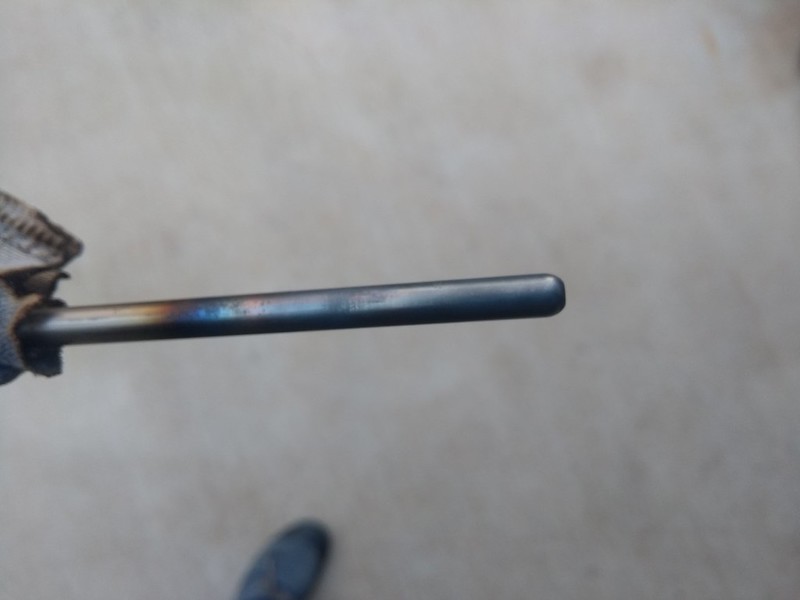
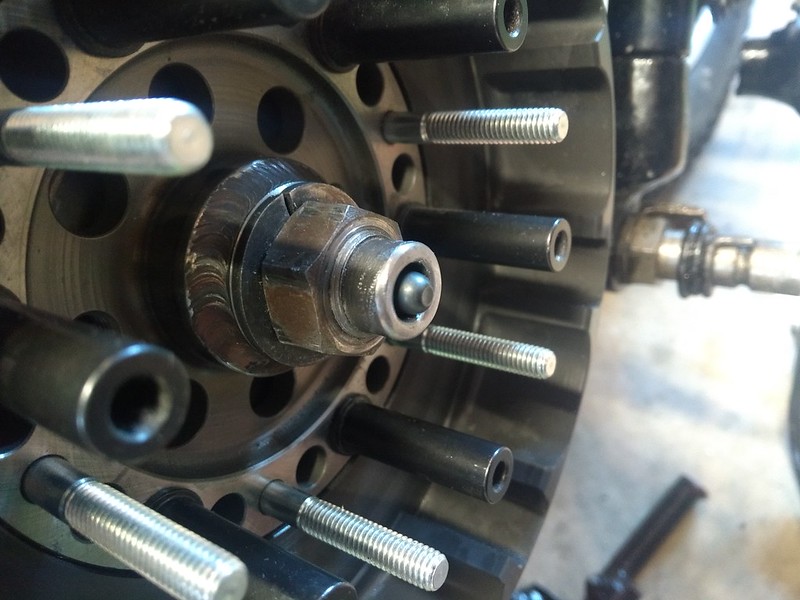
The tacho was also breaking every cable I put in it, so I think that’s due for a servicing. Haven’t yet sent it off yet, but should soon. Was focused on functional items first.
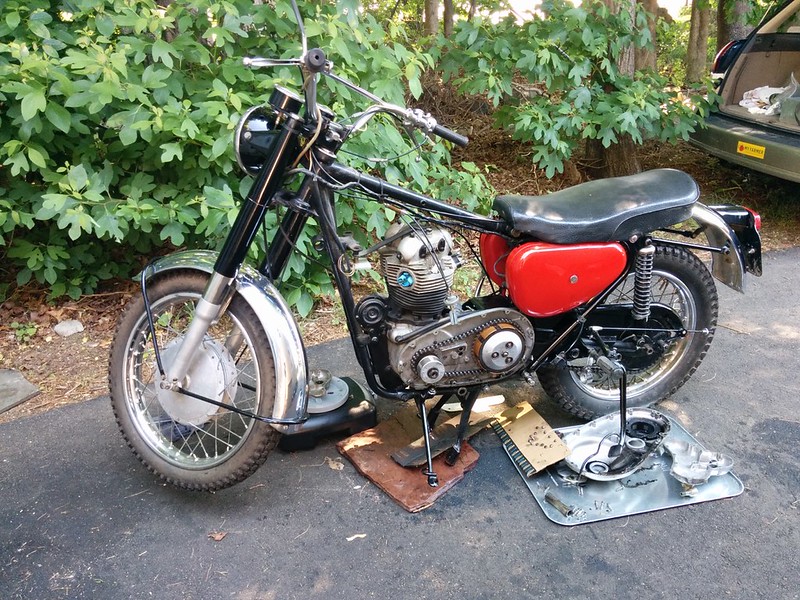
So here I sit now…
I need to do some minor cosmetic work, get the brakes optimized, and get it registered for the road and give it some more thorough shakedown rides, and also get into the forks to see what awaits me there. Previous owner said they had the typical top-out issues endemic to Roadholders, so I’m planning on doing the conversion described on the JSM Motorsports site (https://jsmotorsport.com/technical-fork-damping-sleeves/) assuming what I see inside the fork matches what the site describes. Was considering changing the solid metal fork shrouds out for the original flexible boots, but since the bike is about to be put up for three years in the spring, I’ll wait on doing that till I have the bike back in hand, and might put some of the JSM turcite bushings in at that point too.
So I had original thread over there about my initial attempt to get it running, tapping into all the expertise of the members there. (https://www.accessnorton.com/NortonCommando/matchless-g-15cs-get-it-running.21369/). It kind of lost focus, and I figured I’d start another, more concise thread with some updates.
Long story short, obtained the bike from the original US owner (friend of mine) in 2016 while I was living overseas; he saw the work I had put into my Royal Enfield (my first bike) and thought I’d be a good next caretaker, which meant a lot to me. He had conducted what he termed a “redneck restoration,” including the paint job, in the mid-90s. Ran when parked…but it had been a while. Due to living and work situations, it’s been hard to get to a place where I could work consistently on it.
As to why it's here in the "dirt" section...the G15-CS is a hybrid of a Norton Atlas engine with a Matchless/AJS frame and transmission, intended as a factory bike in the style of the California desert racers. (Sold with both Norton and Matchless badges and nomenclature...identical bikes aside from the tank badge.) It’s got of legend surrounding its creation, possibly having been mocked up in the US as an actual race bike then picked up by the factory for production…or, according to some seemingly less-reliable speculation, simply cobbled together from off-the-shelf parts during the consolidation of Britbike companies under AMC. Either way, it’s a pretty massive engine in a pretty small, stiff frame, and now that I have done some shakedown rides, I can vouch for how well it handles.
What I saw before I got the bike:
Picking it up….first view in the garage.
Loaded[/url] by https://www.flickr.com/photos/185106507@N04/]Mick Doul[/url], on FlickrGot home and got full approvals for the acquisition
Then got to work
Off the bat, I found the magneto wasn’t working, so had that re-done with the Brightspark Easycap replacing the old Lucas paper capacitors...this puts the more-reliable modern capacitor in a place you can reach, and deletes the old school cap way down in the guts of the mag body.
The clutch hub was really notched up, and it didn’t seem cost-effective to try and clean it up, so I replaced it. The clutch pressure plate stripped in the center adjuster while I was working on it, so I put on a new, machined repop replacement and some barnett friction plates.
The carb slides were also sticking like hell, so I had them sleeved, then I rebuilt with new jets and gaskets.
Over an extended period of time, I also installed a reversing cam plate in the transmission so it would match my other bike, which is a right-hand, 1-down pattern. Had the Ceriani shocks rebuilt by a guy Irk Miller referred who’s into that stuff…no one else would touch them, and they appear to work well.
After finally getting it timed properly so it ran on both cylinders, I found the primary was a leak-fest. After multiple attempts to seal it, I installed a Newby belt primary, which was inevitable since I have one and love it on my Enfield. With both bikes, being able to access/remove the primary to get to other stuff without having a wet mess and constant gasket re-fitting was as much a motivation as performance…just wish I’d have ponied up to do it before fixing up the original clutch. I know I could have dressed the gasket surfaces, but it was just a mess I hated dealing with, and the Newby clutch is so much better.
Newby setup snap; you can see the access I cut into the rear cover to get to the magneto more easily, which is going to be a huge help...it will be closed off when the front cover is on, however:
Full Install report here: https://www.accessnorton.com/NortonCommando/newby-clutch-installation-report-g15-cs.29138/
I have found that the swingarm seems like it’s spaced too widely (https://www.accessnorton.com/NortonCommando/g15-cs-rear-wheel-spacer-issue.28979/#post-443070), but after a struggle with my original speedo drive which led to replacement with one of the British-made repops, I just tightened it down. Now it’s rolling without a hitch, so I’m going to leave well enough alone there, for now.
The tacho was also breaking every cable I put in it, so I think that’s due for a servicing. Haven’t yet sent it off yet, but should soon. Was focused on functional items first.
So here I sit now…
I need to do some minor cosmetic work, get the brakes optimized, and get it registered for the road and give it some more thorough shakedown rides, and also get into the forks to see what awaits me there. Previous owner said they had the typical top-out issues endemic to Roadholders, so I’m planning on doing the conversion described on the JSM Motorsports site (https://jsmotorsport.com/technical-fork-damping-sleeves/) assuming what I see inside the fork matches what the site describes. Was considering changing the solid metal fork shrouds out for the original flexible boots, but since the bike is about to be put up for three years in the spring, I’ll wait on doing that till I have the bike back in hand, and might put some of the JSM turcite bushings in at that point too.
Last edited: