1974 CB550 Build

alexcb550

Active Member
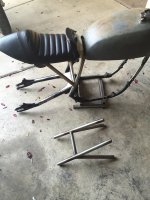
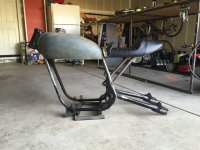
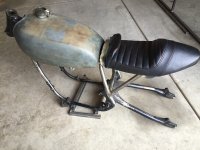
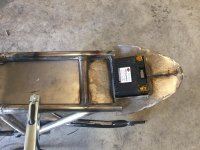
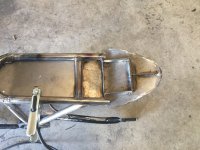
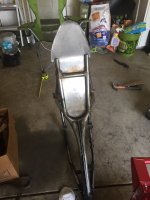
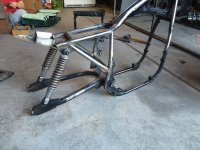
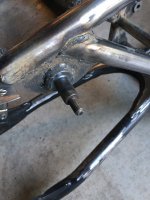
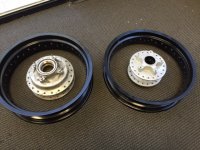
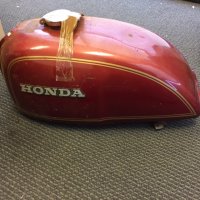
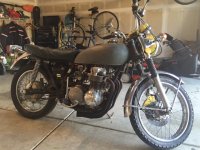
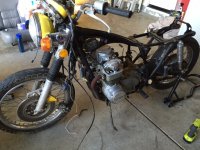
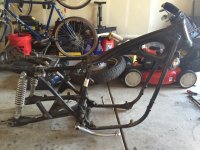
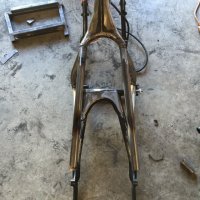
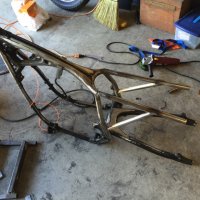
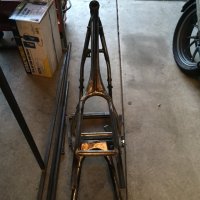
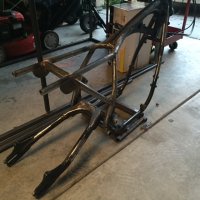
I got inspired by searching through these forums and also from a magazine where I saw a build of a cb750. I want to give a lot of credit to Speed Bump on his build as his visions are somewhat parallel to mine. I purchased this bike in April and have been going slowly at it. I have built many newer bikes but never have I modified a frame before, and I must say that I feel I have found a new love for older bikes. I am sure this build will carry on for month's but I figured I would post on my progress as I go.
 

Attachments

  • IMG_4840.JPG
    IMG_4840.JPG
    136.3 KB · Views: 1,517
  • IMG_4846.JPG
    IMG_4846.JPG
    144.5 KB · Views: 1,508
  • IMG_4848.JPG
    IMG_4848.JPG
    135 KB · Views: 1,490
I cut up the rear section of the frame and re framed it. I made my own suspension brackets from a piece of 1/4" steel that I stenciled onto and used up about 4 metal cutting wheels and a grinding wheel to create.
 

Attachments

  • IMG_5333.JPG
    IMG_5333.JPG
    95.7 KB · Views: 1,445
  • IMG_5334.JPG
    IMG_5334.JPG
    174.8 KB · Views: 1,441
  • IMG_5335.JPG
    IMG_5335.JPG
    72.2 KB · Views: 1,441
  • IMG_5336.JPG
    IMG_5336.JPG
    148.9 KB · Views: 1,452
I wanted to be able to utilize the starter so I did some research and I think this battery should work fine. It amazes me that a battery this small can pack so much power. I also figured I would post a picture of one of my other rides for the hell of it.
 

Attachments

  • IMG_5346.JPG
    IMG_5346.JPG
    126.3 KB · Views: 1,613
  • IMG_5264.JPG
    IMG_5264.JPG
    89.4 KB · Views: 1,595
Great start to ya build ;) framework always a big jump :eek: look forward to ya project updates , sweet daily ride mate proper all year rounder 8)
 
So I was not happy with the alignment of the rear frame I built so I started over and now I am pleased with the new. I will be using a CB500T tank that is on its way to me. The tank pictured came with the bike and will not be used.
 

Attachments

  • image.jpg
    image.jpg
    1.4 MB · Views: 329
  • image.jpg
    image.jpg
    1.7 MB · Views: 323
  • image.jpg
    image.jpg
    1.8 MB · Views: 306
Battery box and under tray's done.
 

Attachments

  • image.jpg
    image.jpg
    813.3 KB · Views: 303
  • image.jpg
    image.jpg
    1.8 MB · Views: 314
  • image.jpg
    image.jpg
    1 MB · Views: 297
  • image.jpg
    image.jpg
    1.1 MB · Views: 304
I utilized the stock upper shock bolts and cut them out of the factory frame. Worked out pretty good. Did a test fir with stock suspension and everything works and ligns up. Will most likely use 14.5" rear shocks. Have to clean up some of the splatter from the flux core welder.
 

Attachments

  • image.jpg
    image.jpg
    1.9 MB · Views: 320
  • image.jpg
    image.jpg
    1.1 MB · Views: 307
Nice work mate ;) are ya gonna get the frame powder coated, think I might use same idea for battery storage looks cool 8)
 
yes, frame will be powder coated gloss black. I am going to try my hand at polishing the hubs today and if they turn out nice I will strip the black outer rims and polish those as well.


Sent from my iPhone using Tapatalk
 
Now that's some sweat n tears & hard work there mate :p but worth the result especially the hubs look forward to the pics
 
Update on my polishing project. So far I only got the front wheel done with about 10 hours of work into it. I first Chemical stripped the black anodizing with Easy Off Heavy Duty Oven cleaner then started with 180 grit sanding and finished at 600 grit. I used a three step polishing with Black Emery, Red Tripoli, and White Rouge. I finished it off with the Mothers power ball Mini and mothers aluminum polish. I will be doing the hubs and rear wheel this weekend but will take them all the way up to a 1500 grit before polish and if those results are noticeably better I am going to redo the front. Wheels will go off to get Laced on Monday.
 

Attachments

  • IMG_4449.JPG
    IMG_4449.JPG
    146.9 KB · Views: 1,033
  • IMG_4448.JPG
    IMG_4448.JPG
    162.8 KB · Views: 1,030
  • IMG_4434.JPG
    IMG_4434.JPG
    114.8 KB · Views: 1,061
  • IMG_4430.JPG
    IMG_4430.JPG
    100 KB · Views: 1,038
  • IMG_4426.JPG
    IMG_4426.JPG
    148.5 KB · Views: 1,033
New tank just got it! Have to fix a dent on top but not a big deal. Anyone have any tricks to get rust out from inside? I have done vinegar and poured nails in before, but I do not feel like shaking it for 3 hours...
 

Attachments

  • IMG_5418.JPG
    IMG_5418.JPG
    185.8 KB · Views: 934
Well you are not afraid to work, that's for sure.

Just a little point that people seem to miss. Bike handle best when weight is appropriately placed and the worst place to put weight is way back in the hump. Yes, I know it's a smaller lighter battery but that is probably the least optimal place to put it.

Weight should really be further forward and preferable centralized, but at least close to the motor. Just sayin'....
 
teazer said:
Well you are not afraid to work, that's for sure.

Just a little point that people seem to miss. Bike handle best when weight is appropriately placed and the worst place to put weight is way back in the hump. Yes, I know it's a smaller lighter battery but that is probably the least optimal place to put it.

Weight should really be further forward and preferable centralized, but at least close to the motor. Just sayin'....

I totally agree, but my battery only weighs 1.46 Lbs ;) . When it is all said and done, it should be a "significant" weight reduction on the rear of the bike over stock. I considered other options with putting the battery up front but nothing that would be aesthetically pleasing to myself.
 
put the vinigar and nails in the tank wrap it in some old towels and throw it in the dryer on air only and leave it for an hour or so. works great.
 
Maritime said:
put the vinigar and nails in the tank wrap it in some old towels and throw it in the dryer on air only and leave it for an hour or so. works great.

Lol, Genius! I will give that a shot, Thanks!
 
Back
Top Bottom