Follow along with the video below to see how to install our site as a web app on your home screen.
Note: This feature may not be available in some browsers.
We noticed you are blocking ads. DO THE TON only works with community supporters. Most are active members of the site with small businesses. Please consider disabling your ad blocking tool and checking out the businesses that help keep our site up and free.
Hello everyone. I've been reading on this site non stop for about two weeks now. The information and people are awesome and I'm hoping to get some of that gracious help with my first ever cafe project. The story of this bike is a bit less harsh and bada$$ than most cafe projects. I did not have to go chopping through a dense undergrowth of weeds with a machette or dig it out of a weathered old barn littered with cows and scrap metal. A now older gentleman bought this bike new back in 1974, rode it for a couple years and then covered it up. There it sat like "the one ring" for 36 long years until a wandering hobbit....umm...wait...some nosey guy in the mans garage uncovered the bike and bought it. The 2010 owner started the cafe project with handlebars and painting the tank but I guess he forgot to do any real work on the bike and it quit running on him. He then sold the bike to me last summer with 7,098 miles on it. It had a cracked carb, needed tires replaced, and some general maintenance. I rode it most of the summer but now I've finally drug it into the basement to do the full cafe restoration. Here are a couple pics of the bike in its current state. I've got the tank off and drained noticing a little bit of rust in there. My plan is to take out the engine and do a gasket kit along with new stainless bolts. I will probably end up painting a few parts of it as well. Any thoughts, criticisms, or ideas are welcomed as I know just enough to be dangerous!
Rear 'loop' is slightly different on CJ as is exhaust hanger
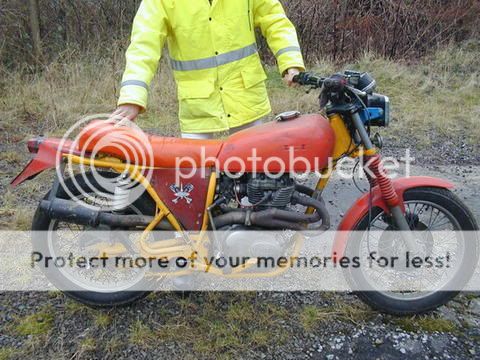
Here's myCJ 250 with 390 conversion
CB tank, Maico enduro rear mudguard/light, RD350 carbs, Yamaha XT bars, Suzuki GS125 headlight, CB400 exhaust pipes and collector, 2 liter Ford expansion box/tailpipe
British ones never came with drum brakes though
You are correct in saying it was in good condition. It was well stored for al those years and the second owner was headed in the right direction but just gave up to soon!
Being fairly new to marriage I find myself needing to give good reason for wanting to slide off the couch mid evening and sneak into the basement to be with my 360. It's not that I don't want to spend time with my wife, I just don't want to sit idle on the couch watching Modern Family when I could be down stairs getting oil on my shirt and busting a couple of knuckles. That said I was able to do about 5 loads of laundry and work with the bike a little more.
I like to plan out everything before I dive into something. Being that I have never done something like this I want to be extremely careful. Last nights work consisted of removing the seat, carb covers/filters, tool box and rear wiring. I then did a lot of sitting and staring at the bike. My plan through the end of this week is to get the bike torn down and the motor out to where I can see what all it needs. I want to replace the gaskets, paint and replace the screws/bolts since several are stripped. I'll post some pics along the way.
After a 12.5 hour work day the only thing I wanted to do was get into the dying cockroach position and remain there until morning. I got home with a pizza in tow and sat down to dinner with the wiff. Thats when it started, like Edgar Allen Poe's Tell Tale Heart. First it started as a low dull sound much as watch enveloped in cotton and in 45 minutes time the clicking sound of a socket wrench was deafening in my ears. It was like the Honda was calling to me from under the floor boards. After all my position in the kitchen was directly over top the bike in the basement. I had to do it. I could not go to bed until I had gone down stairs and worked on this thing. O.K. a bit theatrical but all the same, I really wanted to work on the bike!
I started in on the bike last night a little harder than I was expecting to. You just get into the work and all of a sudden that 30 minutes turns into an hour and a half. I managed to remove the exhaust, battery/box, foot pegs, shocks, and some other random bits. As I previously stated this is my first time dealing with a motorcycle in depth and I got a pretty good wake up call removing all that wiring. I've seen where some guys on here are talking about a simplified wiring set up. Please tell me I do not have to stuff that octopus back in there? I feel pretty comfortable with all the work on the bike but that wiring has been eating at me all morning. Here are a few pics of the progress I made last night.
Tip -
take lots of pictures when you are disassembling it. Pack and mark stuff up (even if you are planning on tossing it later). Mark wires on both sides of the connectors. use zip lock bags and small boxes to keep items together. I had a infant when I was taking mine apart, so I had lots of plastic containers from formula that was perfect for sorting and storing.
Thanks for the tip. I didn't show it in the pictures but over to the left sit about 30 ziplock bags full of parts and descriptions I have also been taking lots of videos when I approach unfamiliar territory. Did you end up using the original wiring when you put it back together?
It's amazing what you can accomplish with the help of a friend and craft beer at 4 in the morning. I had planned on spending a little time on the bike this weekend, nothing crazy, and it turned out to be a lot more progress than I had hoped for. My friend and I ended up getting the bike completely taken apart with the exception of front forks, gauges and wheel. We would have finished it up but neither one of us had a big enough wrench to get the tree apart. Darn....looks like I'm gonna have to go buy some more tools. I hate buying tools Here are some pics of the progress and I sure am glad for the zip lock labeling system! I ran across a few stripped screws on my motor and they sure aren't going anywhere. Any suggestions on how to deal with those would be major help.
It has been a few days since my last post but I spent the entire weekend working on the motor. I think a couple posts back I mentioned something to the effect of being overwhelmed by the project. I can say that after taking the motor apart on the top end I am numb. I have no idea how i will ever get this thing back together with out some extreme headaches. Thats the fun though, right? If its not extremely difficult then what fun is it?
My checklist for the weekend was to:
Order Seat
locate a set of CL360 scrambler pipes
find rearesets
tear down the top
clean...clean...clean...scrub...cuss...clean
Prime
I did pretty much all of these. Found a guy in Kansas who is supposed to call me back about a set of scrambler pipes, got on the waiting for a set of 360 specific rearests from Durgam_K and I fought with the engine the other 95% of the time. I can not believe how much of a pain these set screws were to get off. I ended up with probably 10-12 screws that stripped out on me. All the gaskets had turned into brittle gunk so I will be ordering that kit today. As cruddy as some of these parts were I am really surprised at what some degreaser, break parts cleaner and a scrub brush will do! I Even got around to priming some of the stuff but I can not figure out my paint scheme for this bike yet. It is driving me crazy.
I'm really happy with the way the paint turned out. I thought I was going to pull out my hair trying to get a paint scheme down (I work in printing and design so color is a big deal to me). That said I started to paint the motor black and polished but thats been done about 12,000 times on these cafes. I always like to try something a little different so I substituted a flat, iron grey paint.
I know there are some who will scold me for not prepping my parts a little better or filling in some of the pitted areas or just "going at it" but I am personally happy with the way it turned out and most importantly, I did it myself. I was going to sub-contract out the work in the beginning but A) that is way to expensive for a poor guy and B) the entire point of the cafe racer culture is doing this work yourself! It may not be perfect in the end but I will be really happy with the fact I tackeld this myself.
Enough motivational speaking....here are some pics of paint job.
Wow, I think your color choice and finish quality is pretty spot-on!! I noticed in one of the pictures that you used some sort of foaming paint remover? What product did you use?
Wow, I think your color choice and finish quality is pretty spot-on!! I noticed in one of the pictures that you used some sort of foaming paint remover? What product did you use?
Thanks! The paint stripper is Klean-Strip brand in a gold spray can. It was about 7 bucks and really worked well. I let the parts sit for about 10 minutes and then went back with a bunch of throw away rags and wiped it all off. Make sure you wear some chem resistant gloves, that stuff will burn you! All the old paint just wiped right off. After that I took some non-chlorinated break parts cleaner and sprayed it all down.
This site uses cookies to help personalise content, tailor your experience and to keep you logged in if you register.
By continuing to use this site, you are consenting to our use of cookies.


")