75 CB200T build

MrMister

Been Around the Block
DTT BOTM WINNER
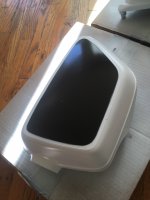
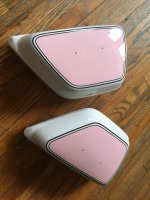
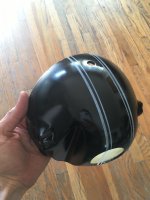
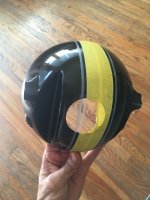
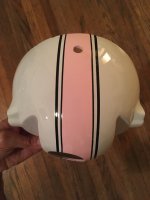
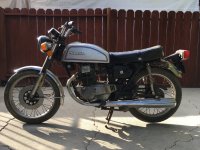
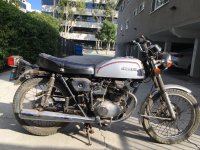
Picked up a little runner that needs some tlc, for my wife to learn on.
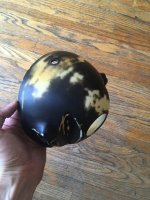
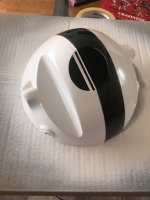
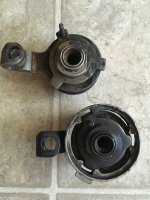
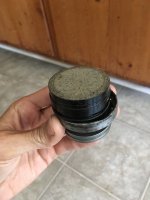
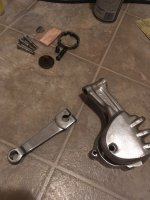
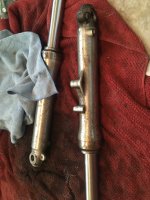
All that was needed was the front brake. (Which I later learned wasn’t an easy part to track down.)


Sent from my iPhone using DO THE TON
 

Attachments

  • IMG_1961.JPG
    IMG_1961.JPG
    1.9 MB · Views: 464
  • IMG_1964.JPG
    IMG_1964.JPG
    2.2 MB · Views: 475
Ordered a whole brake assembly from eBay, the actuator was shot to hell so I found a new one from the Philippines. Turns out they have a slightly different CB200 model there and it didn’t fit in properly. So I borrowed some parts from the old unit to make it work.
While I was de furring the old unit, I accidentally dropped it while testing it with the new actuator and it broke. So I got a nice reference from pidjones to try davidsilverspares.com

I also cleaned up the housing and I think I’m going to leave it metallic and just clear coat it.
 

Attachments

  • 3AF1401F-47BD-4393-AE75-F4C326612F4B.jpeg
    3AF1401F-47BD-4393-AE75-F4C326612F4B.jpeg
    1.5 MB · Views: 448
  • 55FB2796-4702-4DCB-89D5-2AC1BED32F25.jpeg
    55FB2796-4702-4DCB-89D5-2AC1BED32F25.jpeg
    1.4 MB · Views: 419
  • 6D097749-3816-434B-B29A-5BB3FD2DEE36.jpeg
    6D097749-3816-434B-B29A-5BB3FD2DEE36.jpeg
    1.2 MB · Views: 407
  • 629F4C8A-7DA5-4DC4-A1EB-1EAC856033CF.jpeg
    629F4C8A-7DA5-4DC4-A1EB-1EAC856033CF.jpeg
    1.7 MB · Views: 419
After having the same bike for a couple years (also for my wife to learn on), I can confidently say that mechanical disc front brake is garbage. If I had seen this before you tracked down the apparently hard to find parts, I'd have tried to convince you to just swap it out for a drum or a better disc.
 
+1 to that last comment.

They don't have a good reputation. Motor is fine and forks are the best of the 160/175/200 range, but the brake - not so much.

Look for a CB160 front wheel.
 
CB350, CB360, CB400f, CB400t, CB450, CB550k and f, and CB500 are all pretty much direct swaps for a CB200, as far as 70s disc options go.
 
I’m sure this has been shared before. But for people that don’t know about it. These little abrasive pads for the dremel are fantastic. I used them on my last bike and now for this one too. They don’t last very long, but $15 for 80, you can’t go wrong.

https://www.amazon.com/dp/B07T89FTYQ/ref=cm_sw_r_cp_api_i_PhKLDb64V88RV


Sent from my iPhone using DO THE TON
 

Attachments

  • IMG_2163.JPG
    IMG_2163.JPG
    173.1 KB · Views: 428
  • IMG_2162.JPG
    IMG_2162.JPG
    1.6 MB · Views: 436
  • IMG_2161.JPG
    IMG_2161.JPG
    1.8 MB · Views: 429
  • IMG_2161.JPG
    IMG_2161.JPG
    1.8 MB · Views: 417
  • IMG_2159.JPG
    IMG_2159.JPG
    1.9 MB · Views: 453
Those discs do a nice job! I used them to clean and polish a pair of Honda Trail 90 hubs a couple of years ago.
 
I could never understand why Honda fitted a mechanical disk brake to that bike. It's basically a go kart/mini bike application and Honda had plenty of options. I have a CB250 Nighthawk sitting in the corner. I also could never understand why Honda put a disk on the Rebel and a tiny drum on the Nighthawk.
 
75 CB200T build

Primed and painted rims with max 2k clear. Put new spokes on, trued and balanced. Ready to go.


Sent from my iPhone using DO THE TON
 

Attachments

  • IMG_2110.JPG
    IMG_2110.JPG
    1.6 MB · Views: 425
  • IMG_2191.JPG
    IMG_2191.JPG
    1.7 MB · Views: 434
I have forks to clean up - ordering some of those abrasive bits for my Dremel :)
 
Spraying the air filter covers today. Black base first for the pin stripe outline. (Always paint your stripe color first. Don’t try to tape the lines and do it last. It won’t end well.) Then did the white part of the two tone. Pink next. Yes pink.


Sent from my iPhone using DO THE TON
 

Attachments

  • IMG_2214.JPG
    IMG_2214.JPG
    1.7 MB · Views: 430
2K clear coat immortalized some cat hairs in the covers. Disadvantages of apartment living in the city. ‍♂️


Sent from my iPhone using DO THE TON
 

Attachments

  • IMG_2217.JPG
    IMG_2217.JPG
    3 MB · Views: 413
stroker crazy said:
tidy work, even with the cat hairs!

Crazy

Thanks. I skipped showing a couple of steps. But they’re the most important. Sandable primer, 800 then 1000 grit wet sand to smooth it out. Light coat, then 2 medium coats 15 minutes apart.
And use vinyl tape for stripes.


Sent from my iPhone using DO THE TON
 

Attachments

  • IMG_2226.JPG
    IMG_2226.JPG
    2.5 MB · Views: 419
Headlight bucket stages. Wet Sand with 400 and 800.
2 coats of Sandable primer,
800 then 1000 wet sand. 1 light coat then 2 medium coats.


Sent from my iPhone using DO THE TON
 

Attachments

  • IMG_2233.JPG
    IMG_2233.JPG
    1.7 MB · Views: 403
  • IMG_2222.JPG
    IMG_2222.JPG
    1.5 MB · Views: 397
  • IMG_2221.JPG
    IMG_2221.JPG
    1.7 MB · Views: 403
  • IMG_2220.JPG
    IMG_2220.JPG
    1.6 MB · Views: 396
  • IMG_2219.JPG
    IMG_2219.JPG
    2 MB · Views: 407
Thats NICE

1 How long do you allow it to dry before tape and color coats.

2 And how long do you let it dry before spraying clear coat?
 
trek97 said:
Thats NICE

1 How long do you allow it to dry before tape and color coats.

2 And how long do you let it dry before spraying clear coat?

Wait 24hrs to tape. Otherwise it will lift the paint. Tack the tape on your skin to lose a bit of stickiness first as well. Especially with the masking tape. (Yellow in photos)

About 2 hours before clear coat. I’m still figuring out the best method to clear coat. Seems like fairly medium/heavy, comes out smoother.


Sent from my iPhone using DO THE TON
 
MrMister said:
Wait 24hrs to tape. Otherwise it will lift the paint. Tack the tape on your skin to lose a bit of stickiness first as well. Especially with the masking tape. (Yellow in photos)

About 2 hours before clear coat. I’m still figuring out the best method to clear coat. Seems like fairly medium/heavy, comes out smoother.

Thanks my man. 8)
 
Building something different. Got a $30 amazon special that I’m using as a base. Want to keep the open/close function. Seems to work alright. This moldable plastic came in handy to fill the gaps. I might cover the top with fiberglass to strengthen it.


Sent from my iPhone using DO THE TON
 

Attachments

  • IMG_2320.JPG
    IMG_2320.JPG
    1.6 MB · Views: 381
  • IMG_2326.JPG
    IMG_2326.JPG
    171.1 KB · Views: 375
  • IMG_2327.JPG
    IMG_2327.JPG
    1.5 MB · Views: 394
  • IMG_2330.JPG
    IMG_2330.JPG
    1.7 MB · Views: 410
Back
Top Bottom