
Better use more than painters tape. I recently put in a SOHC engine in a restored bike and was scared shitless to scratch the frame (my first engine transplant), so I taped a bunch of hand towels to the frame and it worked perfectly. The blue tape wont do sqaut (in my experience) with engines and frames. Wrap it up!
We noticed you are blocking ads. DO THE TON only works with community supporters. Most are active members of the site with small businesses. Please consider disabling your ad blocking tool and checking out the businesses that help keep our site up and free.
You are using an out of date browser. It may not display this or other websites correctly.
You should upgrade or use an alternative browser.
You should upgrade or use an alternative browser.
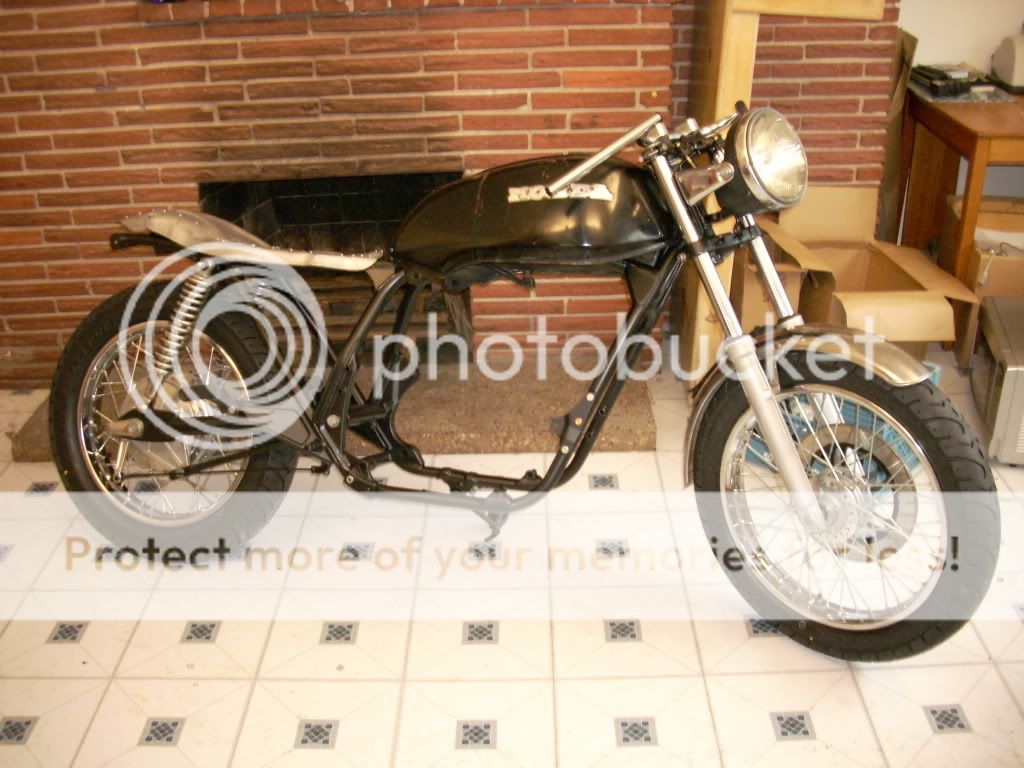
79' CB750K Rebirth
- Thread starter thirsty 1
- Start date
bikeboy
Over 1,000 Posts
thirsty 1 said:http://www.cb750c.com/ Tons of good info. These guys are more into resoration and not custom jobs. Dont mention pod filters you wont get anywhere with them at this site. Good people though.
If you think the custom boys are a tough crowd, you'd better stay away from the guys over at cb1100f.net

Just kidding.
But they did lamb-baste some guy for taking a disc grinder to one of his shims : Nice build tho. Best of both worlds - DOHC, and spoked wheels.
cheers
ian
johnny gaijin
Been Around the Block
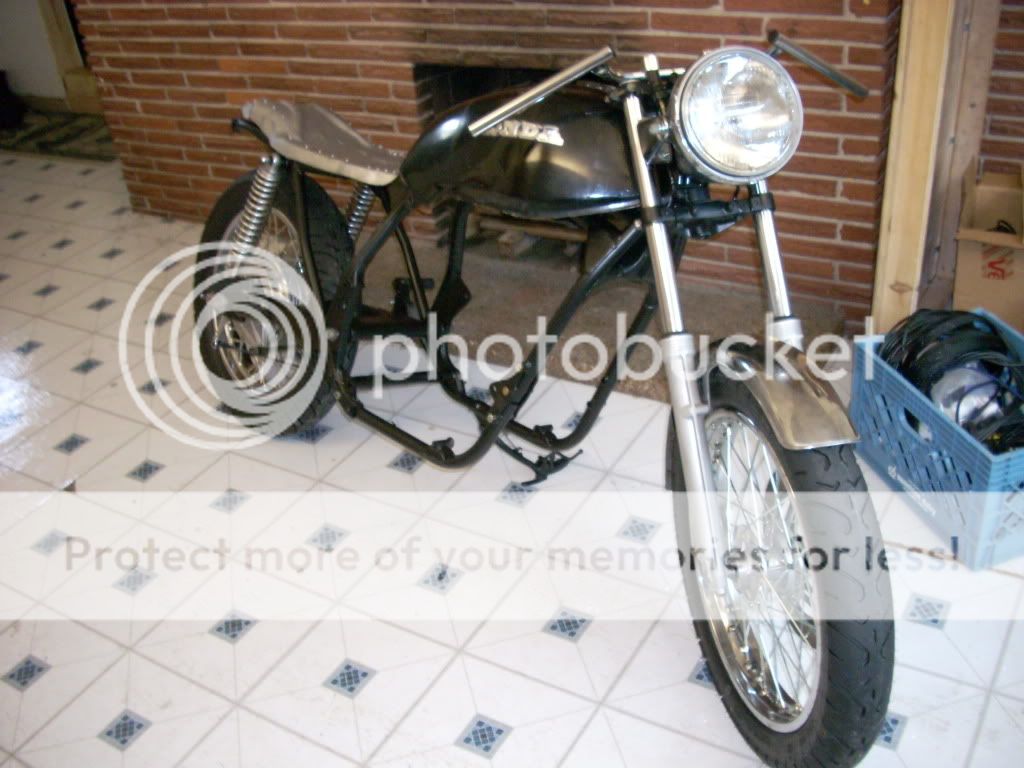
whoa! that looks like a cafe racer!
CresentSon
Over 1,000 Posts
Man I'd cut the frame rails and leave the seat pan just like that with some neoprene padding.
thirsty 1
In a blind world, The one eyed man is King!
I thought about it but I think I might get a set of RC51 integratered tail lights to put in there. I'm still not sure yet though. I should get the engine in tonight or tomorrow so ? I could always do it later.
CrescentSon said:Man I'd cut the frame rails and leave the seat pan just like that with some neoprene padding.
thirsty 1
In a blind world, The one eyed man is King!
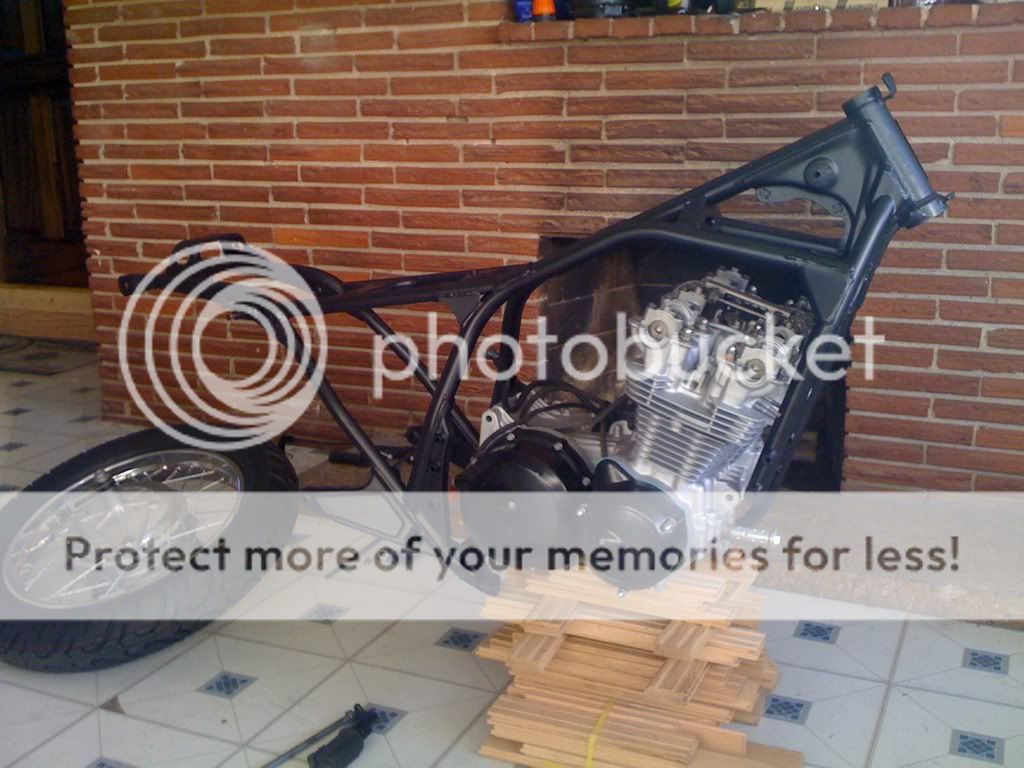
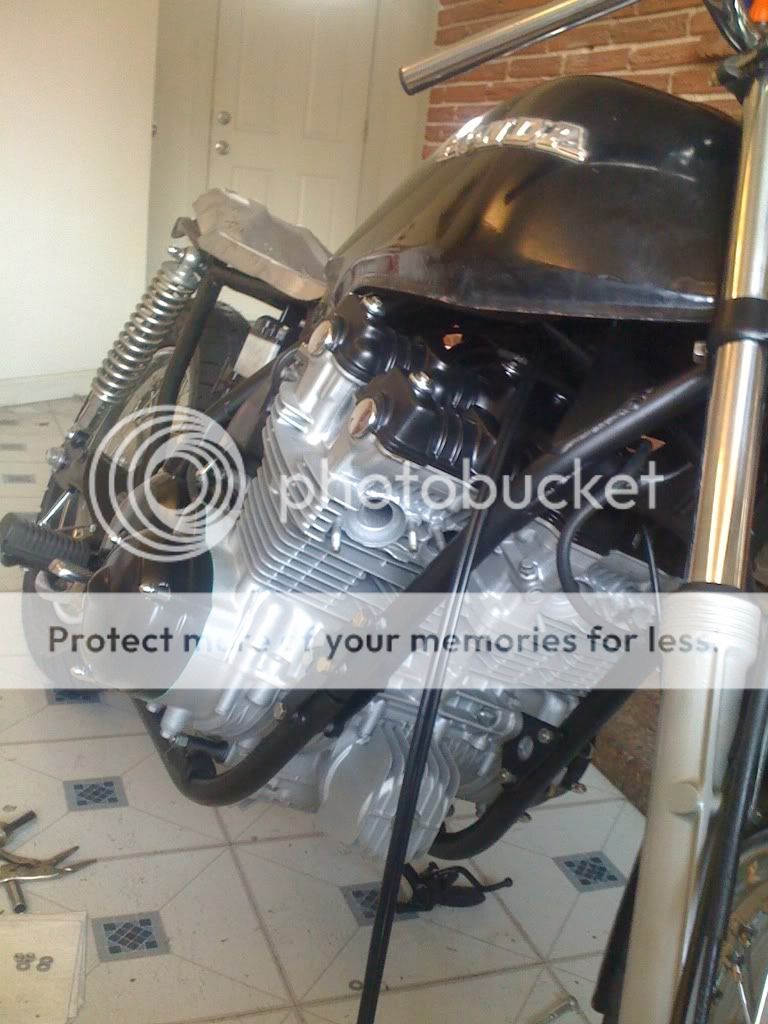
Well I finally got that big F'in lump of a heavy bitch engine in!! Jesus H! You'd think it put out 500 hp just from how heavy it is. Done bitching now.
It is nice to be able to sit on it and get a feel for how it's comming along...no more cleaning of the big parts YES YES YES!!
Had to take it all back apart so I could wrap the frame around it. It went in so nice and easy I couldn't hardly believe it..
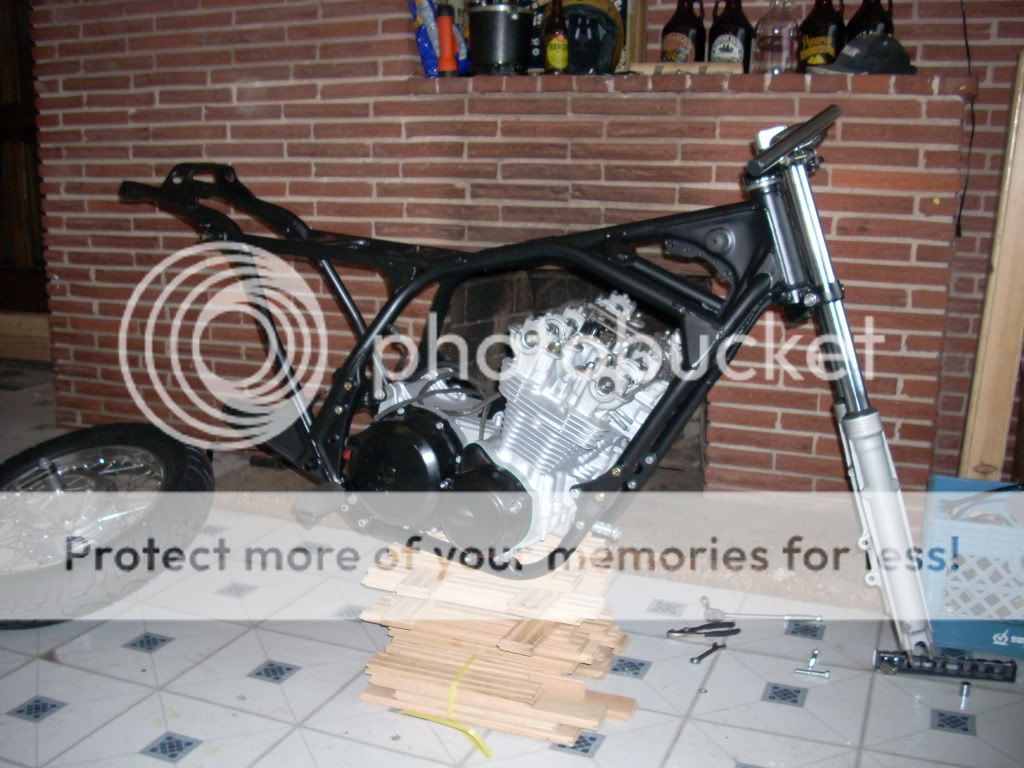
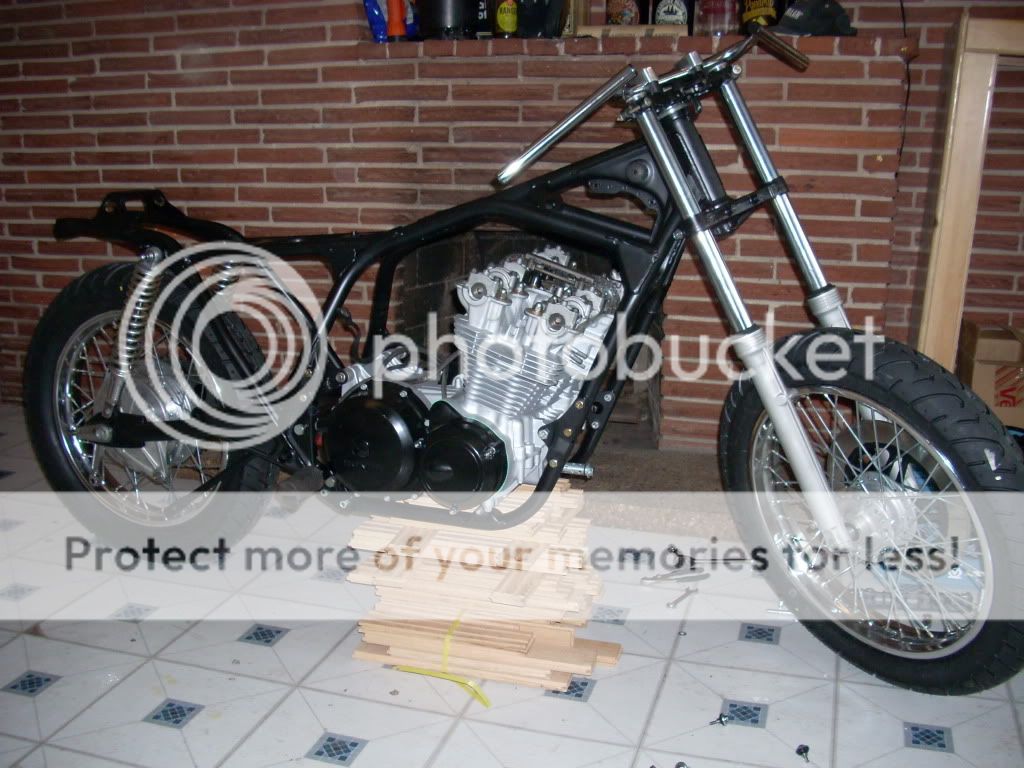

Now on to carbs, wiring, and all that fun piddley shit@!
Done bitching now. It is nice to be able to sit on it and get a feel for how it's comming along...no more cleaning of the big parts YES YES YES!!
Had to take it all back apart so I could wrap the frame around it. It went in so nice and easy I couldn't hardly believe it..
Now on to carbs, wiring, and all that fun piddley shit@!
thirsty 1
In a blind world, The one eyed man is King!
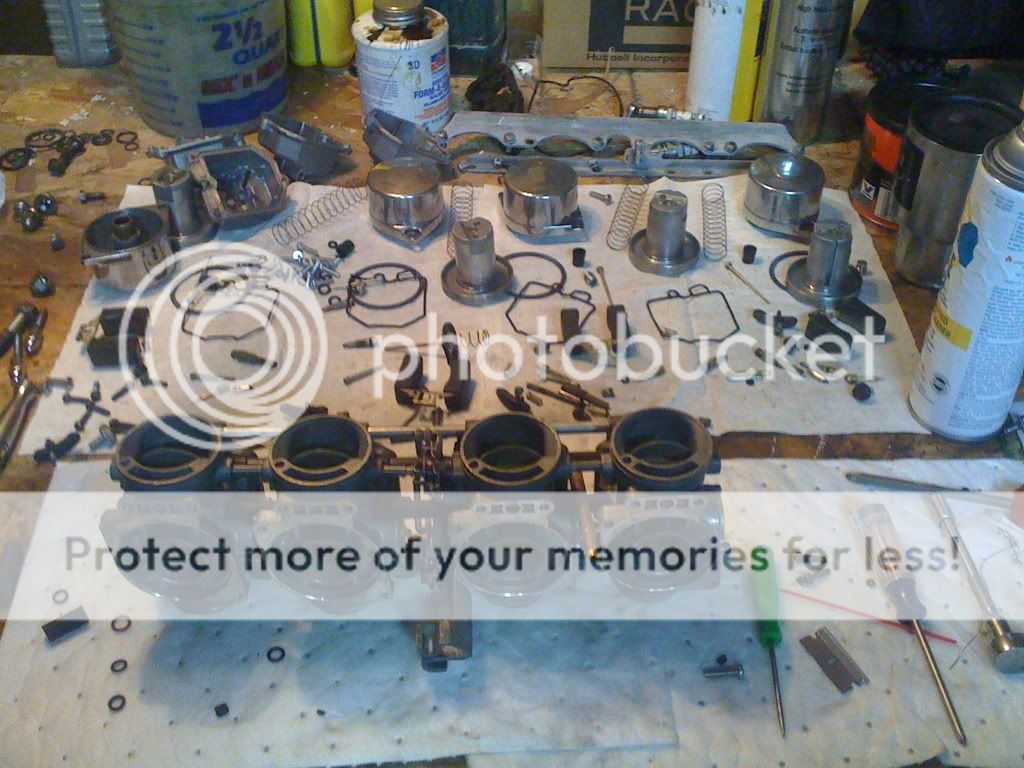
Well it took me all most all weekend but I have my carb's cleaned and reassm/rebuilt. I used Original Pin-Sol to get all the crud out. Man that stuff works awsome!!! Brought the housings back to there original aluminum casting shine - Sweet!!! Bench sync. is do too!! Unfortunatly I might have to split the two halves to put in a "T" between carbs 2-3 because I didn't know about it until after they were together but oh well at lease I caught it before they were on....
On to the front caliper. I cleaned it and painted it but it looks like a butcher job. Needs a good sesion in the glass bead machine and then repainted.
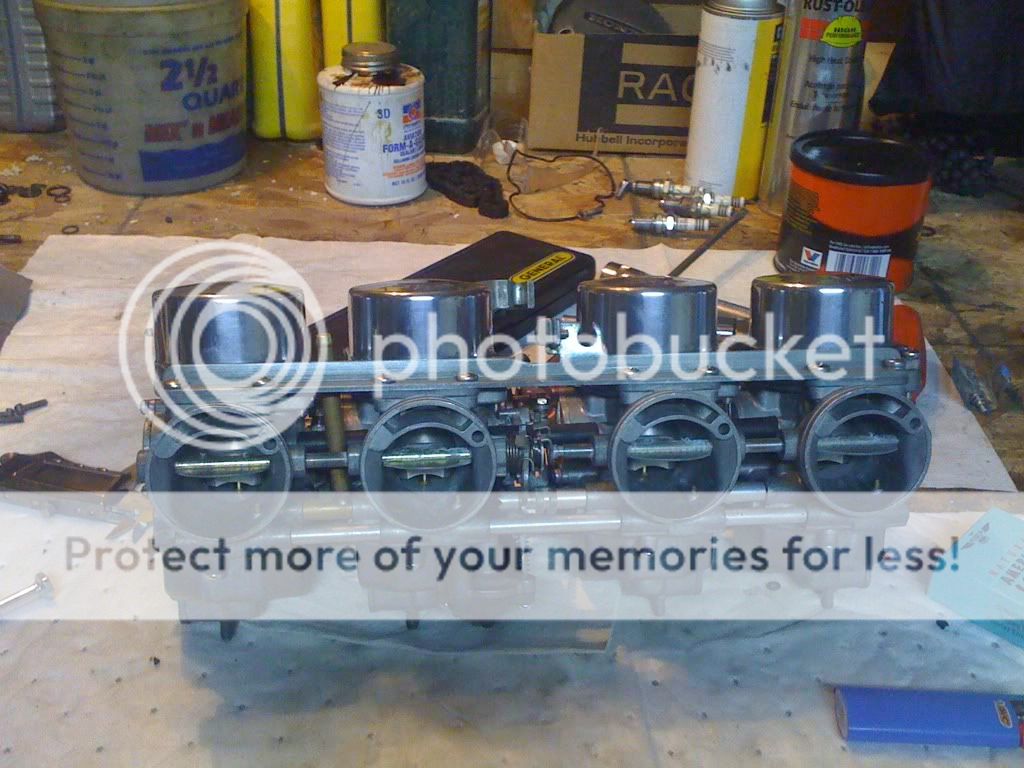
On to the front caliper. I cleaned it and painted it but it looks like a butcher job. Needs a good sesion in the glass bead machine and then repainted.
biker_reject
Over 1,000 Posts
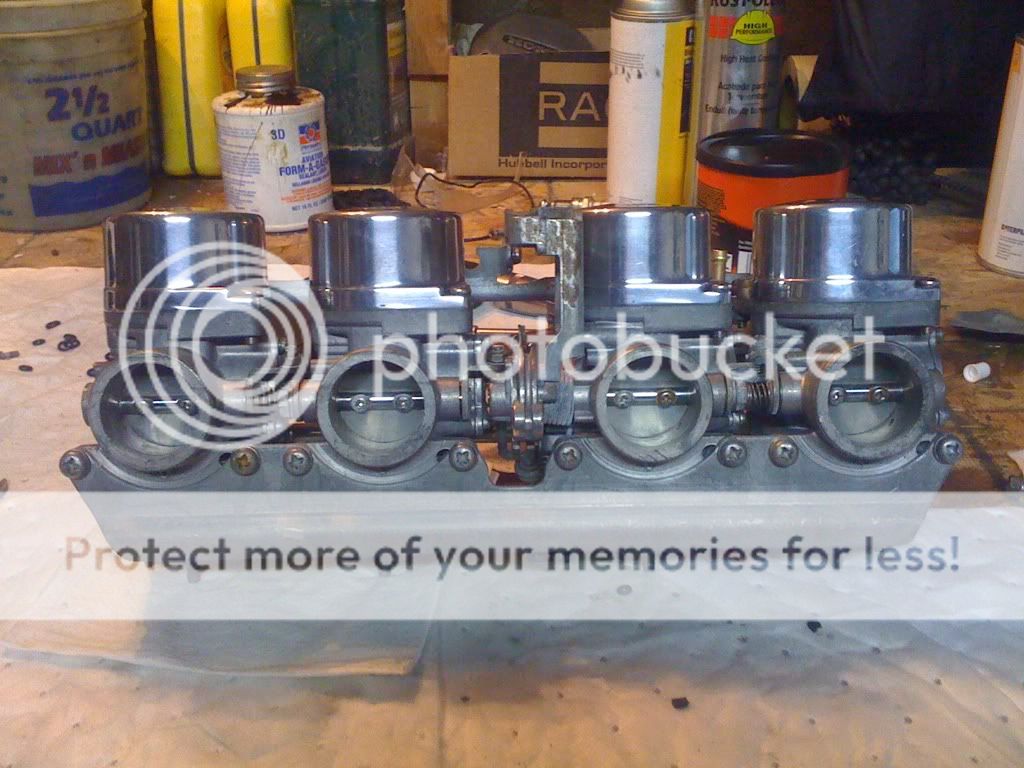
Carbs lookin' good!
thirsty 1
In a blind world, The one eyed man is King!
biker_reject said:Carbs lookin' good!
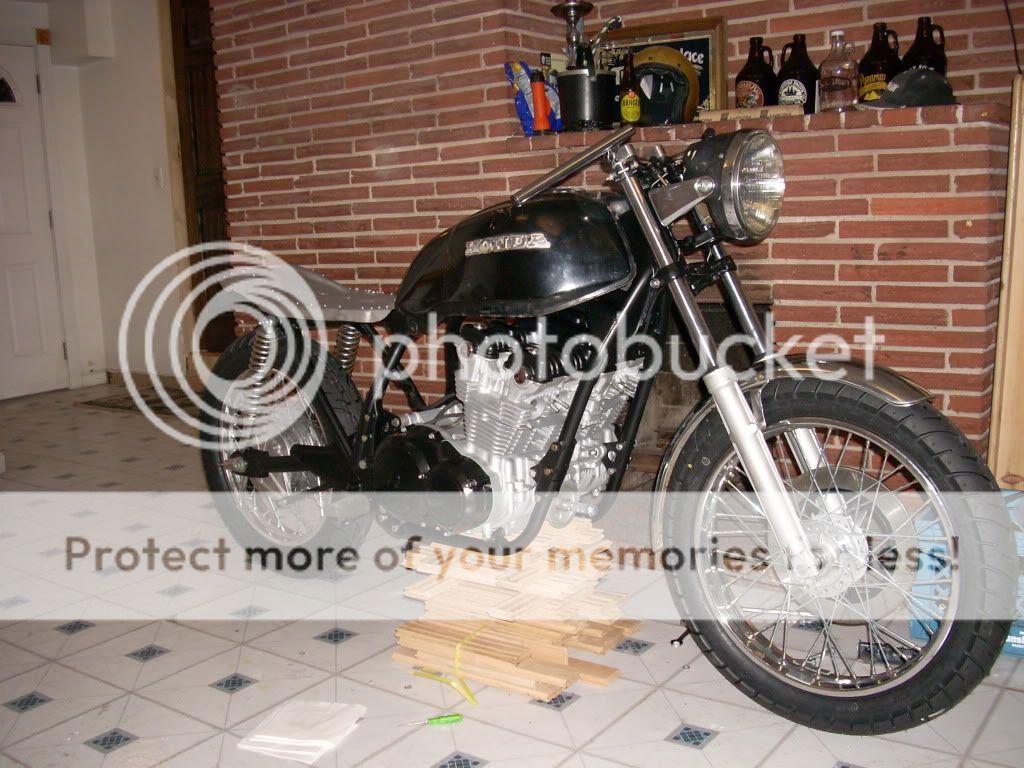
Thanks man you need to get that one of yours finished. That thing is looin' good. I can't believe the amount of polishing you did! Way more patients than I have. I did end up taking the carbs apart into to pieces to get the bowl vent T installed. A bit of a pain but then after that I had one of the needles leaking and a accel. pump squirter not working. Back apart again to open the ports and get the needles to seat. I suppose they'll leak again and I'll end up with them apart again...oh well! I really want the Gixxer carbs but the funds won't let me. Anyhow I got the carbs on along with the airbox after cleaning and paint. I think I'm up to about $600 bucks w/ the purchase price and registration so I guess I'm doing good!
It's pretty bad when my Iphone takes better pictures than my camera....

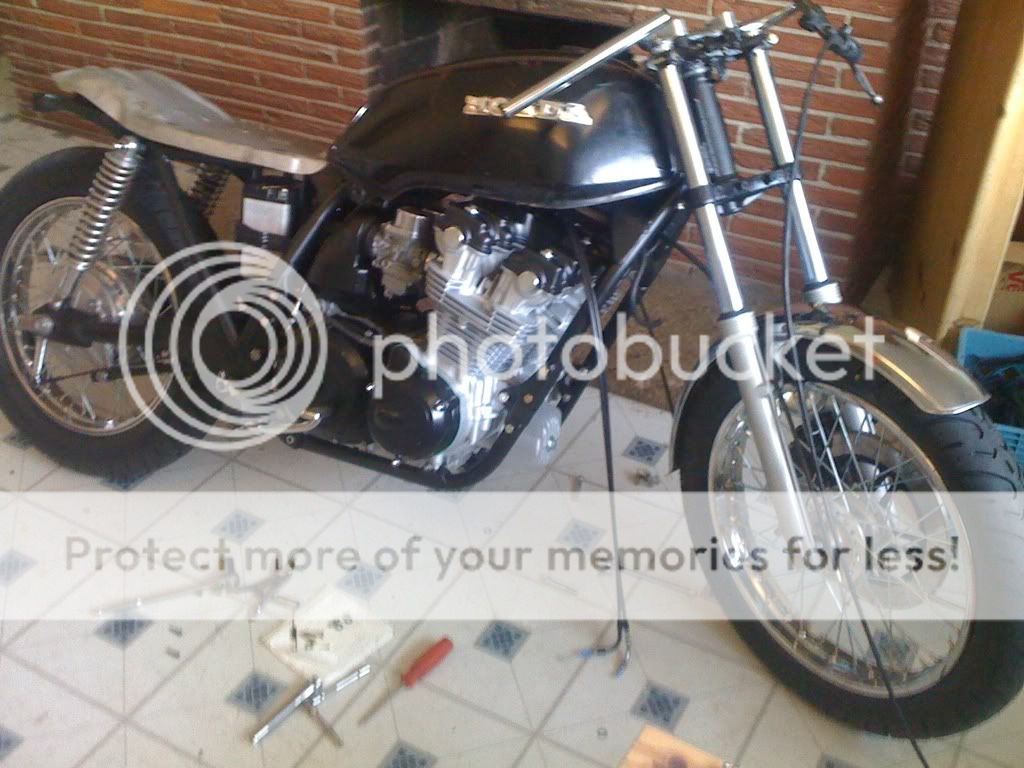
I also decided to take that big ass head light and bucket off and switch it for a 5" light. Just going with a tach only to keep it clean up top! Tank, seat, and wiring next.
biker_reject
Over 1,000 Posts
I hear ya on the carb rebuilding! Ha! I didn't reassemble correctly the first time either! I keep hoping I did everything right. I think it took me at least three times to disassemble/reassemble them. Reminds me of when I decided to rebuild a Rochester 4 barrel carb on my Blazer years ago! I kept getting faster at the process. Today, I worked on the tach mount. It's made of a piece of 16 gauge steel and a major pain to work with. I think I'll have to make one out of aluminum. Still waiting on my rear set rods from Fast From the Past. Once those are sorted, it's on to the front brakes and undertail. The project should start moving again as the weather warms.
thirsty 1
In a blind world, The one eyed man is King!
You can buy those types of things from Grainger. Rod ends and rods pre-threaded. take a look www.grainger.com.
thirsty 1
In a blind world, The one eyed man is King!
my-79-750-k
Therapy is expensive. Riding is cheap. You decide.
Thirsty, are those the stock VM42A Keihins? They look waaay different than mine. The floats are completely different too. Mine are solid plastic, yours look like they're halves with a metal bracket connecting them? Build is looking great so far by the way!
thirsty 1
In a blind world, The one eyed man is King!
You have a set of carbs from an 80-82 if they dont have adjustable floats. There plastic where the needle hooks on right? One piece? You my friend, dont have to worry about float heights because you cant adjust them! From what I've learned there all the same they work on all DOHC bikes, except the 79 carbs have adjustable floats and some have pressed in slow jets which can be a real bitch to clean. Ya there VM42A's.
my-79-750-k
Therapy is expensive. Riding is cheap. You decide.
Well, I'll be damned. I'm just finding out all kinds of stuff about this bike I bought. Thanks.


