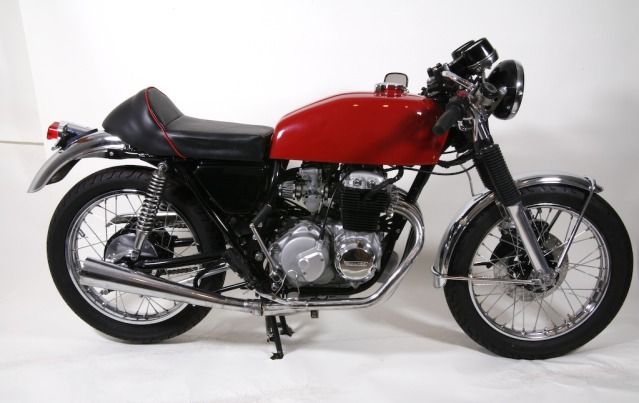
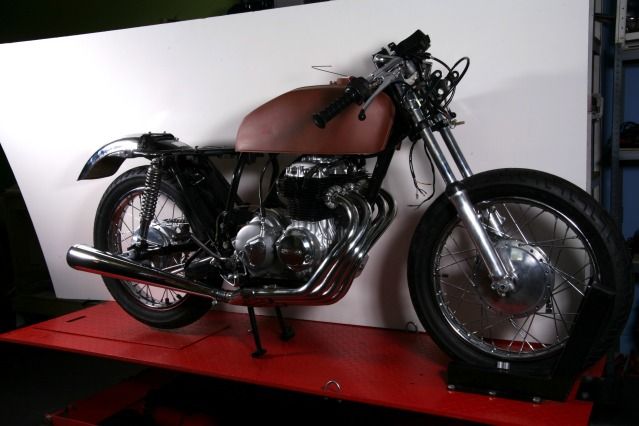
This is a bike build thread for a 1975 Honda CB400F Super Sport café racer with a series of catch-up images and an overview of the work I have done to date. This is my fourth CB400F crank up rebuild so I know this bike well but unfortunately I cannot keep this one for I need to sell it to finish my (overly documented) BSA Gold Star project. I am however building it as if I were keeping it and to my normal build standards. There are several bad cell phone images, so forgive some of the poor images.
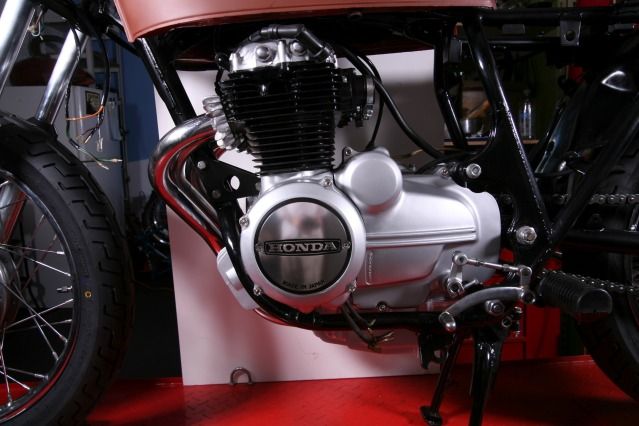
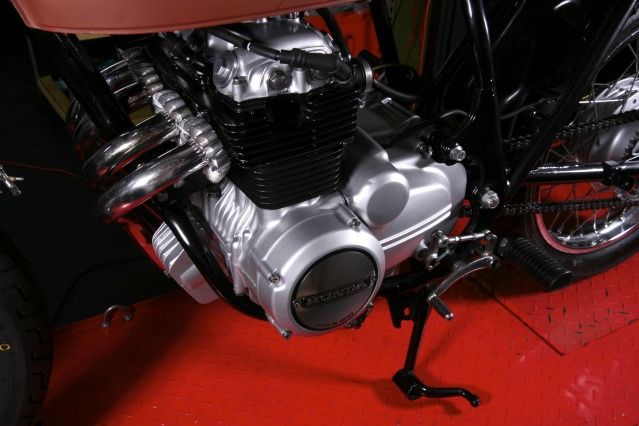
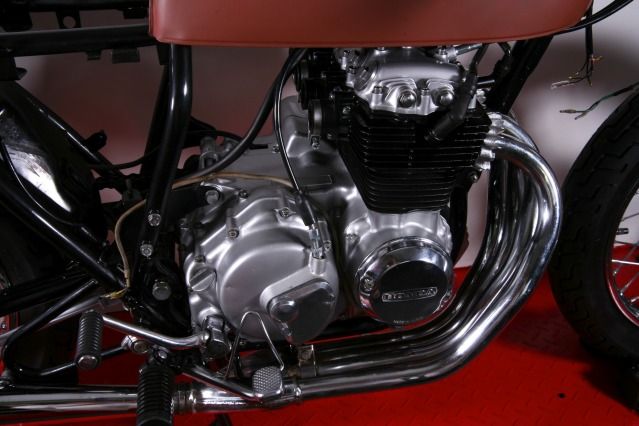
It will be rebuilt with slight cosmetic and mechanical modifications and the goal is to have it look like a came from the factory with British stylings (black cylinder, Honda front drum brake, custom Manx single seat, Lucas tail light, clubman bars, Dunstall replica exhaust etc). I deliberately did not hack up the frame or make any modifications so it could be converted to stock should the new owner wish to do so. It will be very similar to two other CB400f’s I built and sold:
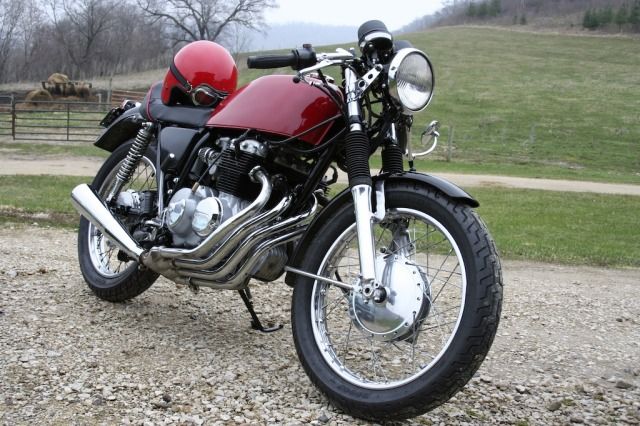
Honda CB400f’s were produced from 1975 to 1977 only as sleek, light and fast factory designed café racers. Café racer styled motorcycles did not sell very well in America in their day so in 1977 the handle bars were changed to be more upright and the foot controls more forward to appeal to American tastes. Only 5060 1977 CB400f’s were imported to North America. The CB400F has a cult following in Europe, Japan, Africa and America and most every part is available in NOS and/or aftermarket reproductions with a few notable exceptions. Also, Honda parts are much less expensive than the British parts I have been buying lately.

“The Honda CB400F is a marvel: It handles remarkably well, stops with authority, snaps through the gears precisely--and motors along smartly. The bike feels all of a piece, as if a hundred separate design systems fell into perfect synchronization. Yet the attraction of the 408 transcends its obvious competence. Even a card-carrying Anglophile would agree that the CB400F has real character. If you can't respond to the CB400F's electrifying mechanical presence, you should immediately switch your sport to checkers."--Cycle World, March 1975.
My bike is a low, low number (one of the first 750 ever built) and low mileage 1975 CB400f bought for cheap as a untitled basket case, missing the seat, tank, side covers, brake pedal but basically a roller (sorry, no dramatic “before” image). I titled and registered the bike and then stripped, cleaned, prepped, primed and painted the frame and put it in storage while I worked on my BSA Gold Star. During that time picked up a tank, side covers, brake pedal and a few other missing bits along with new bearings, seals and gaskets, hardware, tires and more. My friends and I now have a proper workspace (the Winona Riders workshop) and a lift table so I am now finally building this bike. I hate to sell it, but I have a Gold Star to finish and ride so here we go:
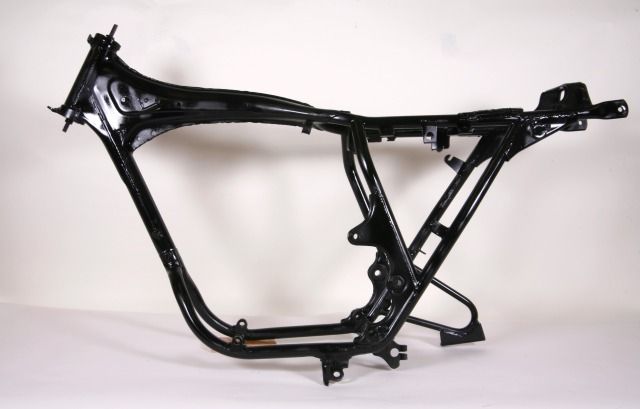
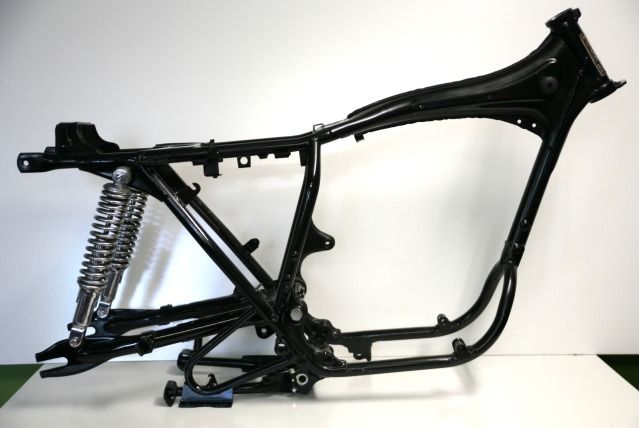
Frame and Forks:
The frame, triple trees, stands and other black bits were cleaned, inspected, prepped and painted with a two-part catalyzed gloss black automotive paint. The swing arm was installed with original bushings (still good). I cleaned up the rear shocks and installed them.
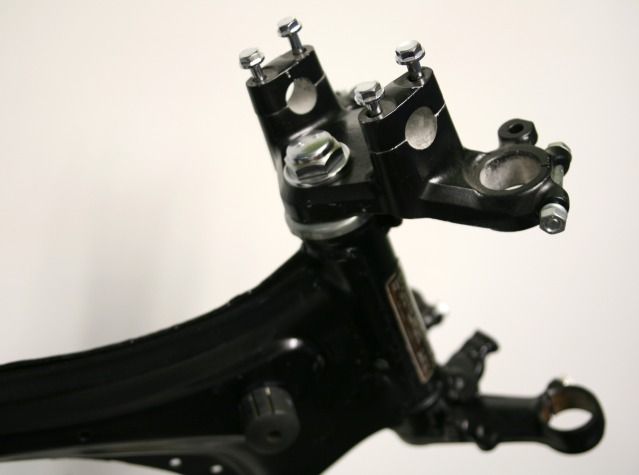
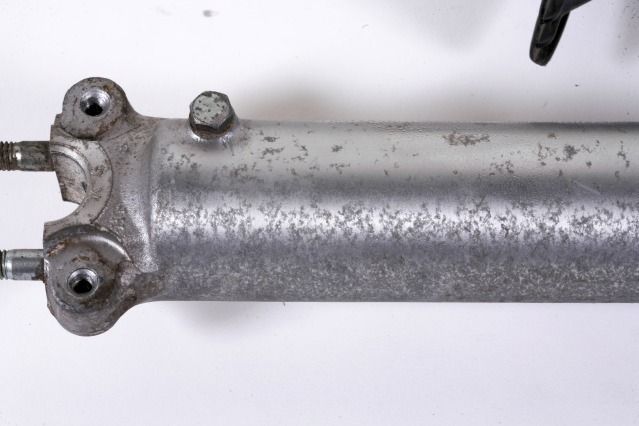
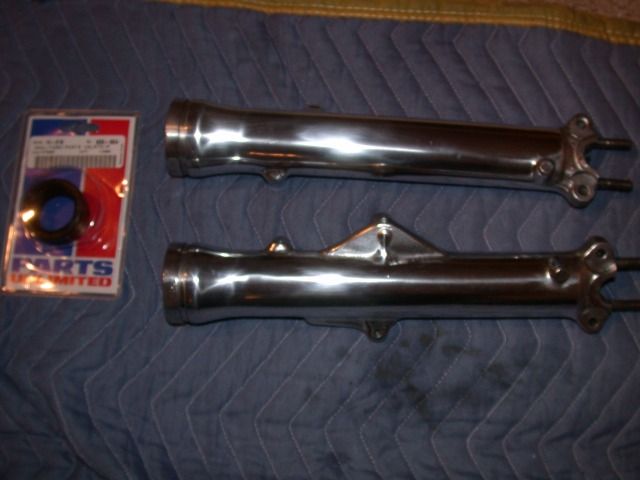
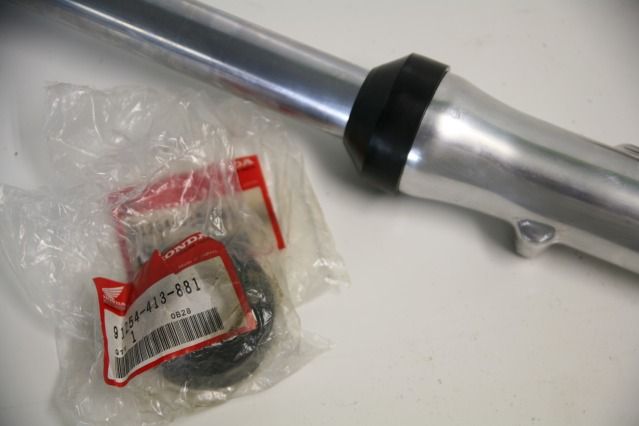
The original fork tubes are in fantastic shape with no wear or rust anywhere. They are the best I have ever seen on an old Honda. I meticulously cleaned everything and sanded, polished and buffed the sliders. New OEM bottom bolts, copper washers, dust caps and forks seals were installed. They were filled with fresh fork oil and work perfectly.
Wheels
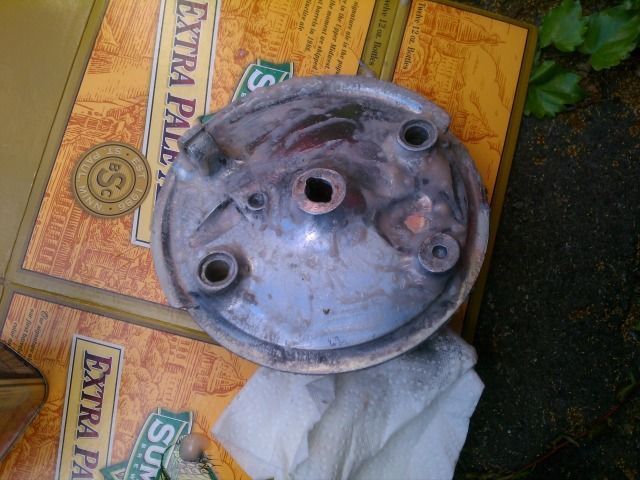
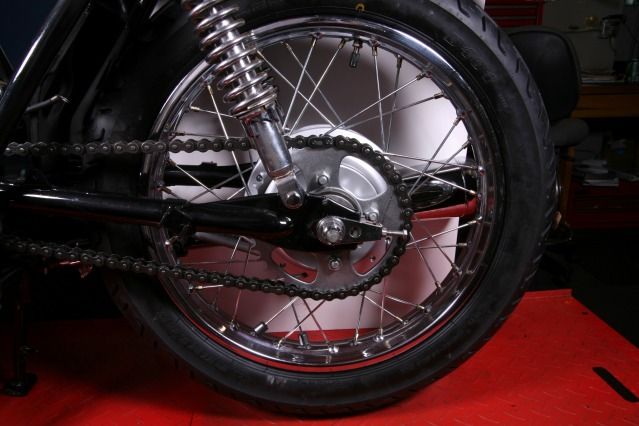
Although not for everyone, I used a Honda CL/CB 360 front drum brake on this bike. Many people are quick to hate drum brakes yet have not made the time to learn how to set them up, adjust and maintain them correctly. To my eyes they not only look better on a café racer than disc brakes, they do in fact work very well. I simply hate dealing with brake fluid (its feel, smell as well as its paint removing abilities) though I have rebuilt more Honda master cylinders than I can remember. I am also rebuilding the original front wheel and disc brake system with a great rim and new spokes as an option for the future buyer.
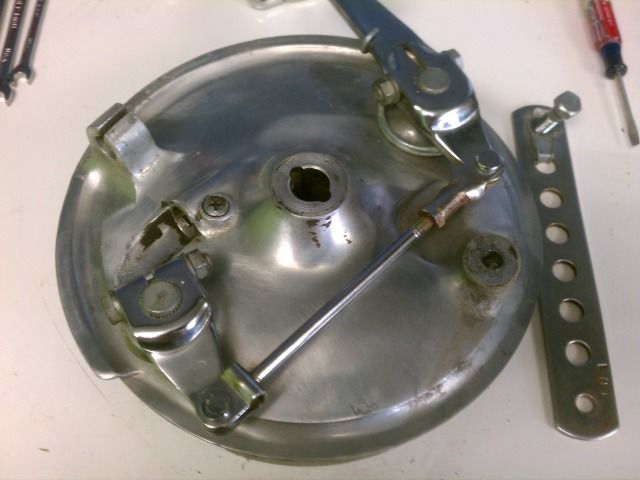
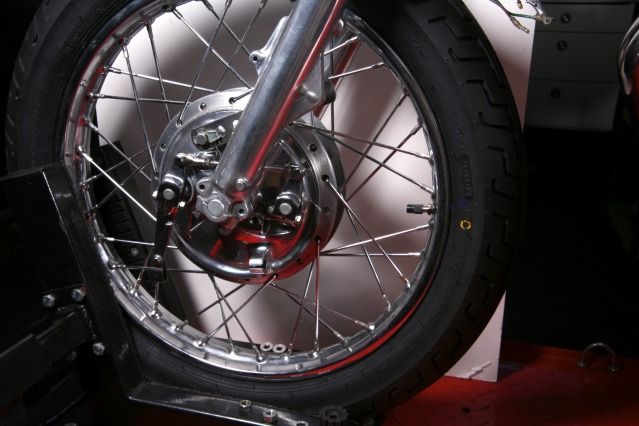
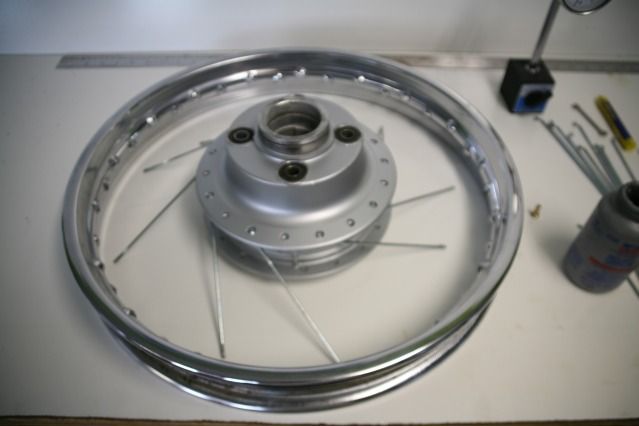
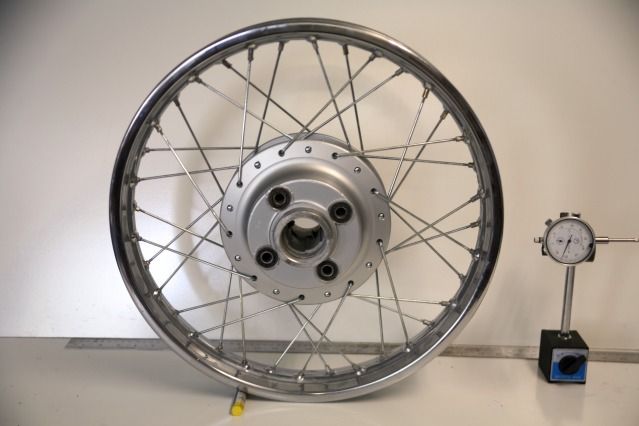
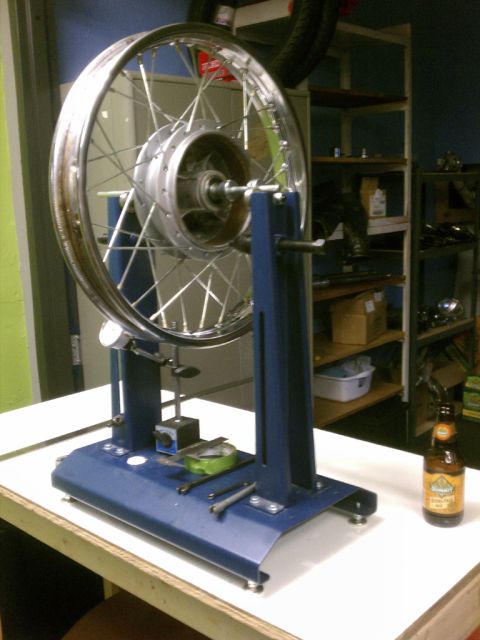
The front drum was in good shape so I dissembled everything for cleaning and polishing. The rim was in poor condition so I bought a correct used 18”rim in very good condition, (Honda no longer sells 18” DID rims in the US, grrrrr) The old factory finished of the plate and hub was removed with aircraft paint stripper, wet sanded with 400 to 1500 grit sand papers and polished and buffed with black, brown, red and white compounds. I laced and trued the rims with new spokes and nipples, pressed in new bearings and added new tube, rim strip and a new 100/90/18 Dunlop D404’ tire. I had a local shop dynamically balance both wheels on their computer. I got the front wheel perfect but the rear needed a few weights.
stripping factory finish
Beautiful and functional.
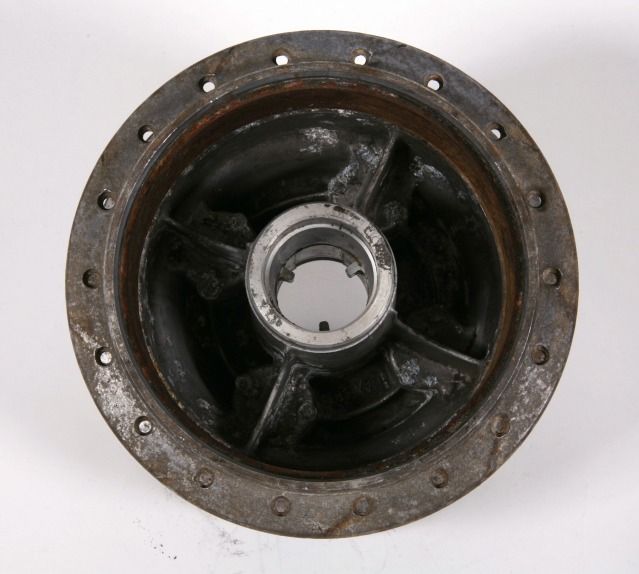
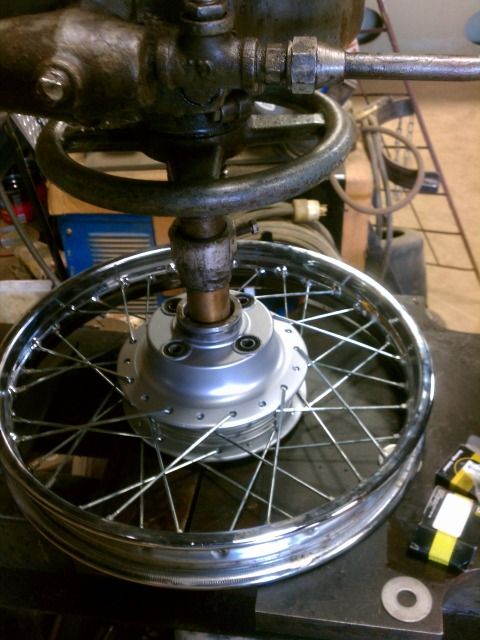
The rear hub was an absolute nightmare and took a lot of time and energy and I considered buying another used one, but in the end I tackled it. Good thing I like a challenge. It was covered in rock hard grease, oxidation and the brake shoes were frozen to the drum and the sprocket was not coming off until the BFH (big fuckin’ hammer) appeared.
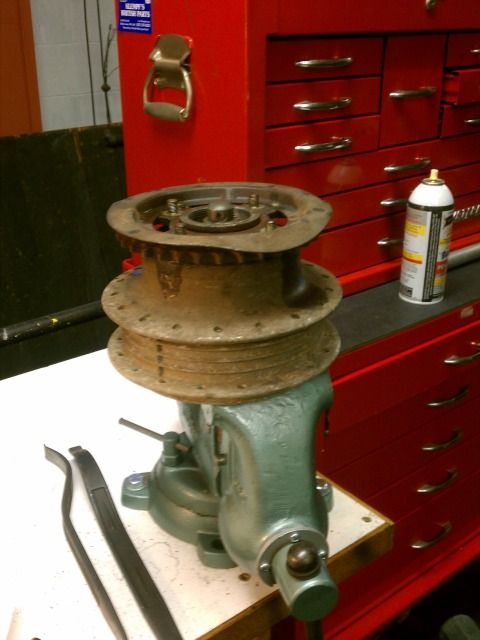
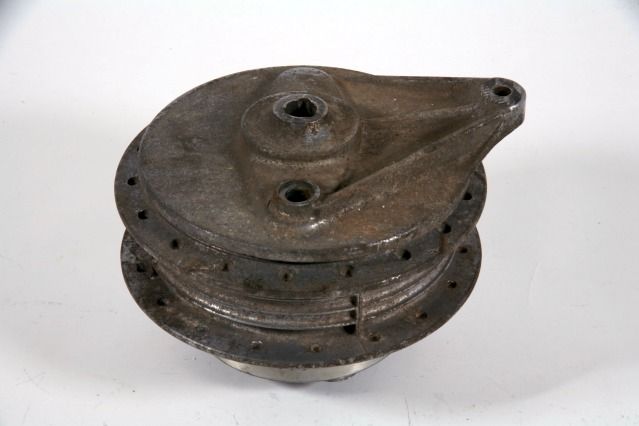
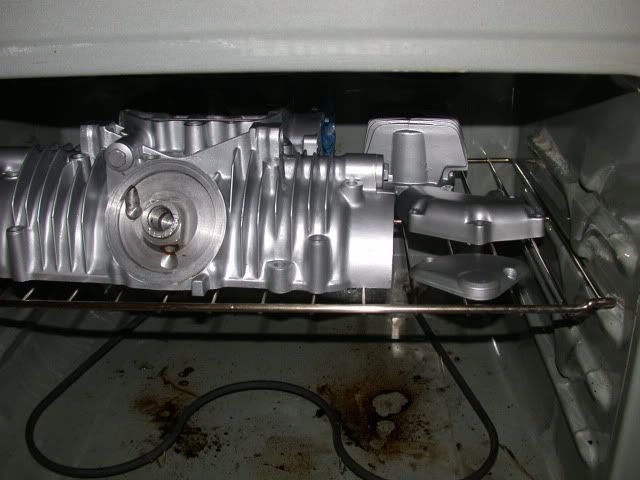
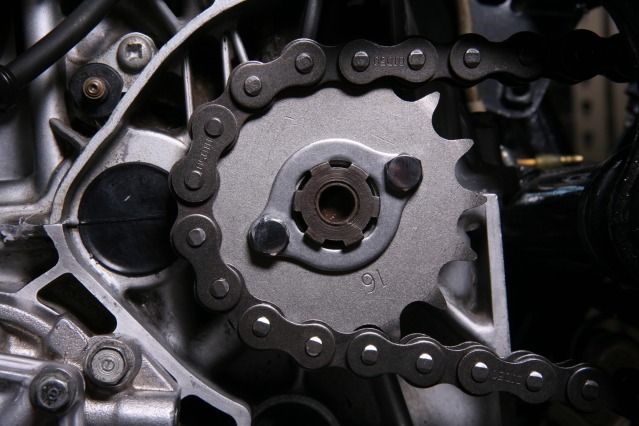
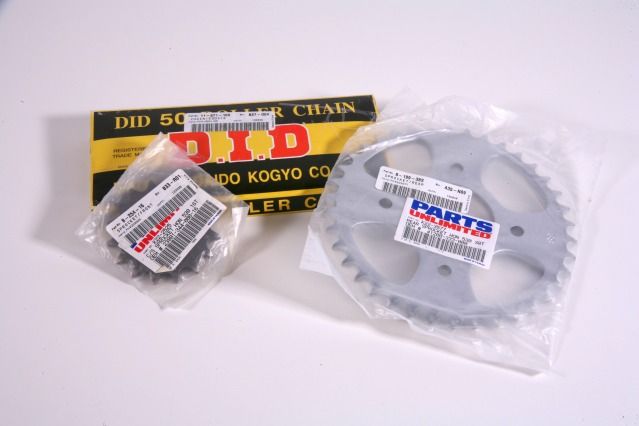
The OEM chain cover over the sprocket was removed by drilling out the rivets and though I repainted it, decided not to use it. After degreasing, scrubbing and media blasting, I painted the hub and cover with VHT silver paint and heat cured the parts in my oven. New bearings were pressed in, the rim polished, new spokes and nipples laced and trued the rims to .005” lateral and radial tolerence. The hardware was zinc plated, new brake shoes and springs and a new sprocket was installed. Both hubs were spun on the stand and I used varying degrees of sandpaper to remove the crud, rust and bring inner drum lining closer to truth.

Media blasted
Ahhhh, much better
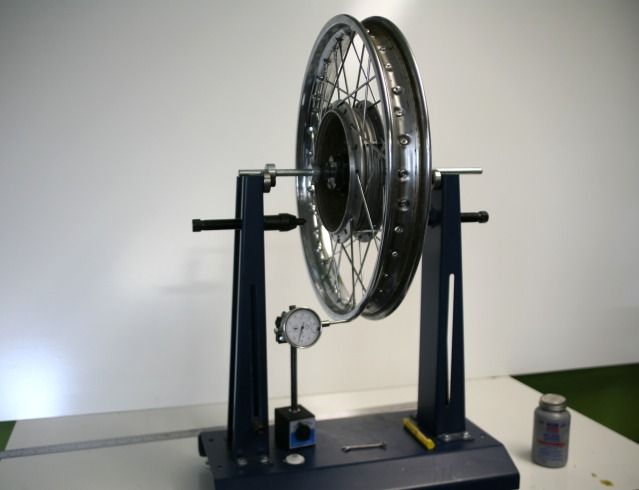
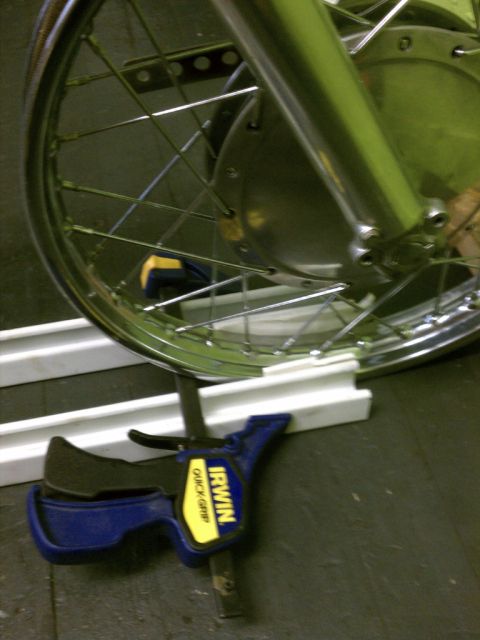
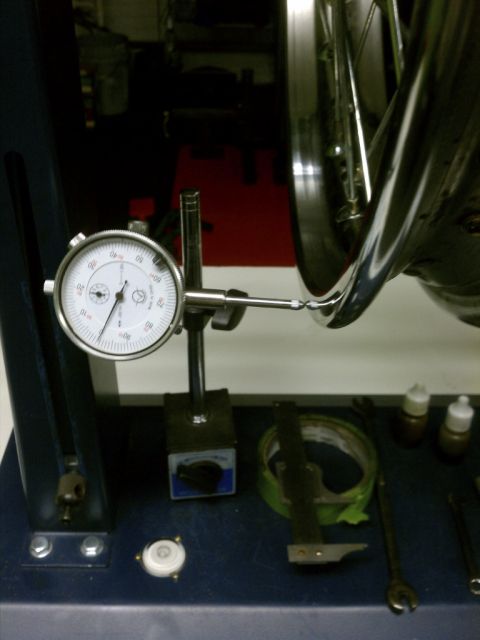
To determine the correct offset of the rear hub I centered the front rim between the forks, laced and trued it. Next I ran parallel straight edges from the trued front rim to the loosely laced rear rim to determine the correct position relative and in line to the front. then I measured the offset on both sides and then trued the rim in my stand. The centers of both rims are perfectly aligned.
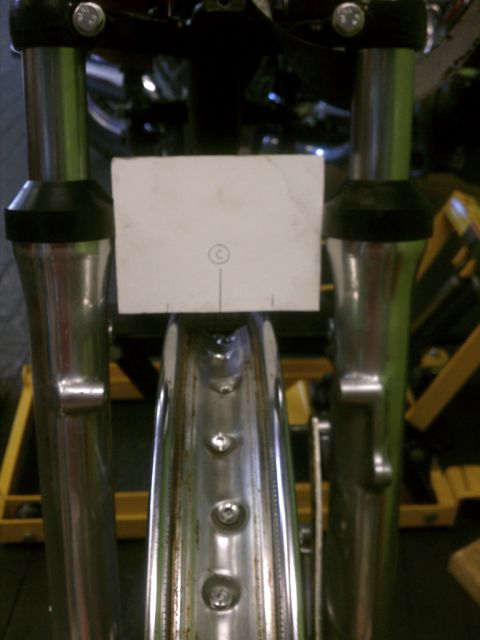
Centered front rim
 front to..
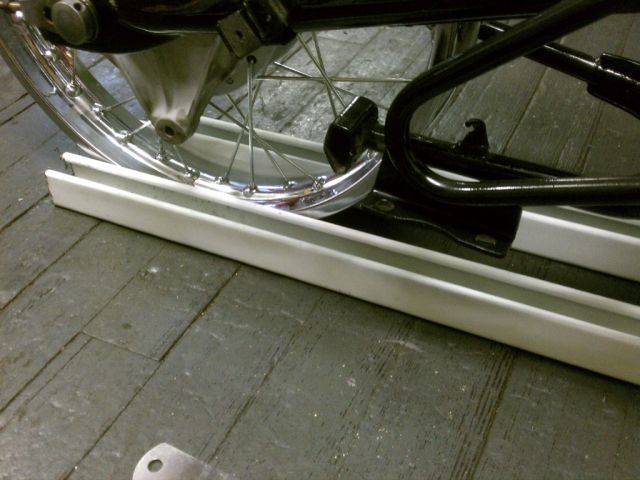 …rear
…rear
...to determine alignment and rear rim offset
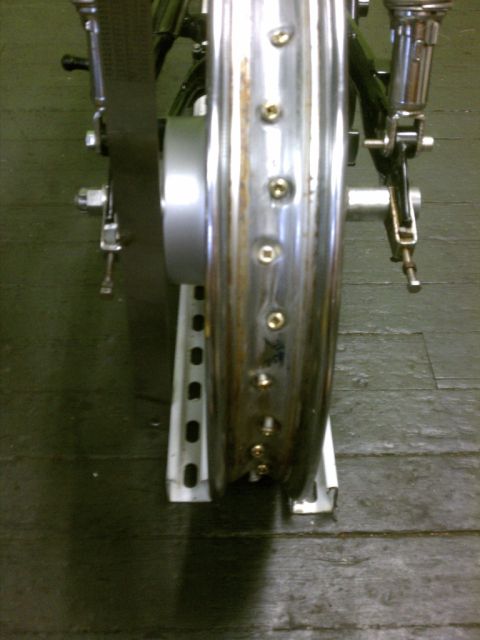
with the correct offset the rear rim was trued on the stand
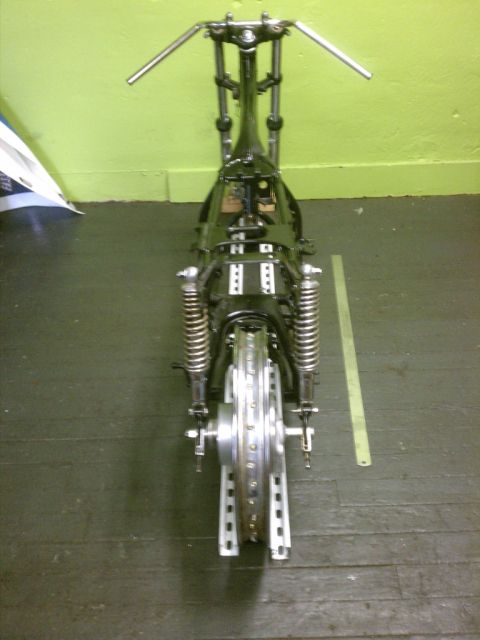
I mounted new Dunlop D404's (100/90/18 front and 110/90/18 rear), tubes and rim strips and got to one of the best moments of any build; ROLLING CHASSIS!

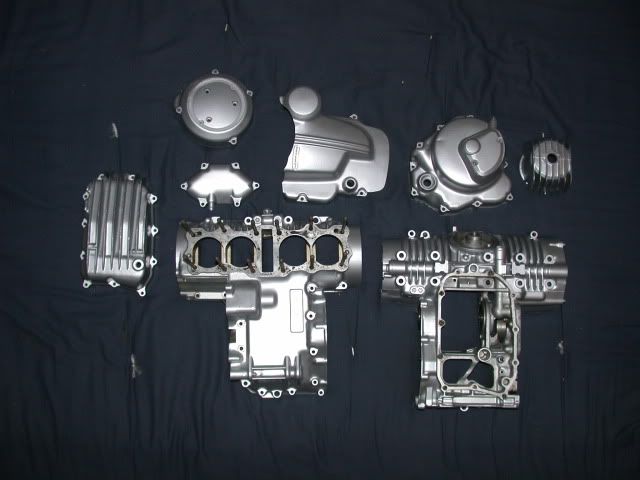
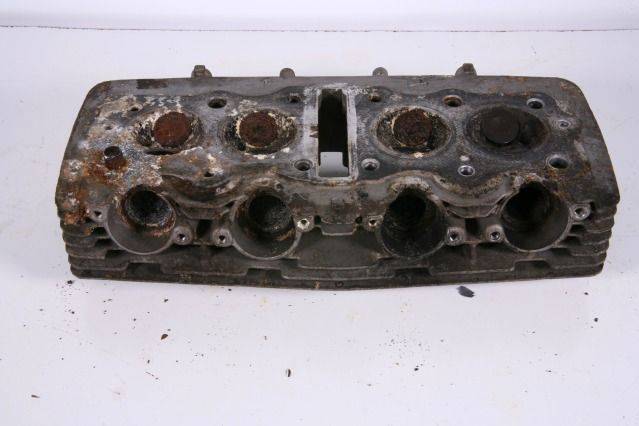
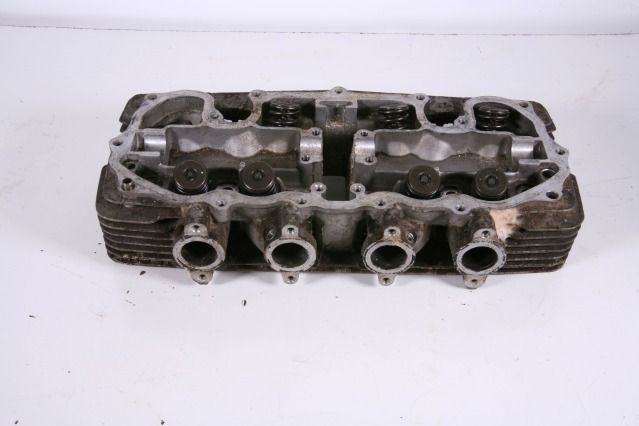
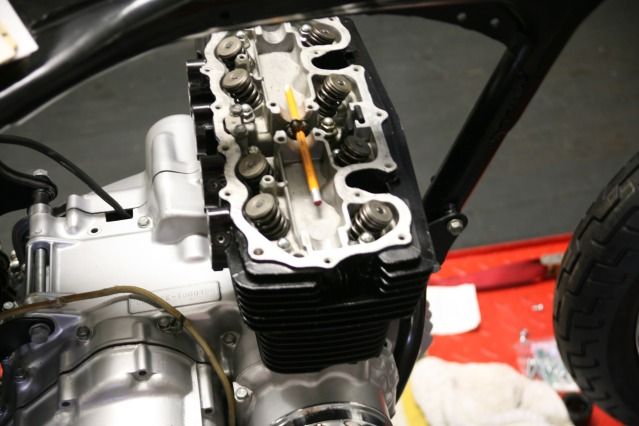
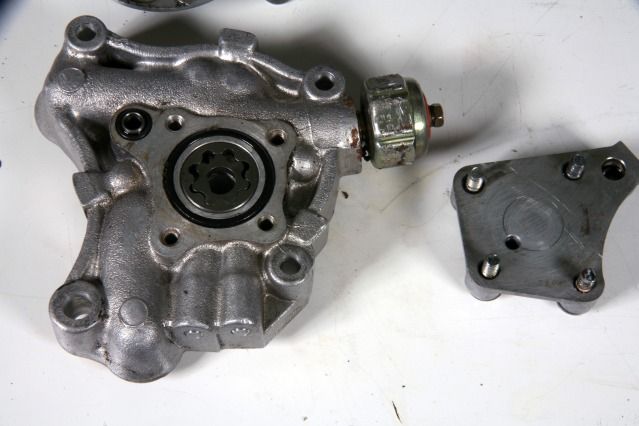
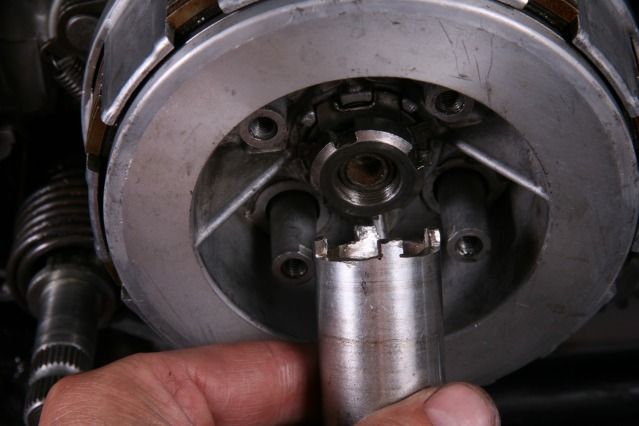
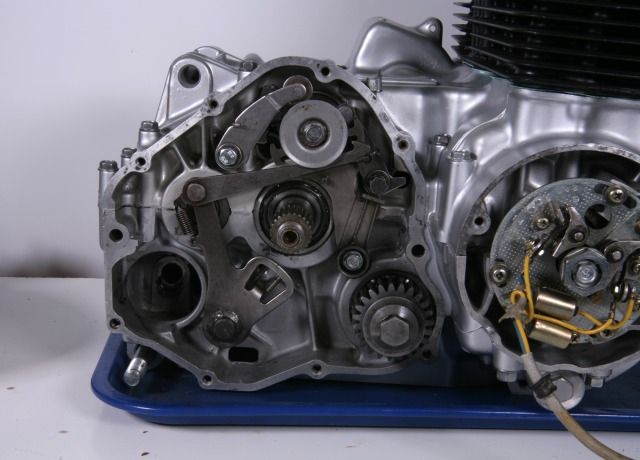
Motor rebuild coming next…
It will be rebuilt with slight cosmetic and mechanical modifications and the goal is to have it look like a came from the factory with British stylings (black cylinder, Honda front drum brake, custom Manx single seat, Lucas tail light, clubman bars, Dunstall replica exhaust etc). I deliberately did not hack up the frame or make any modifications so it could be converted to stock should the new owner wish to do so. It will be very similar to two other CB400f’s I built and sold:
Honda CB400f’s were produced from 1975 to 1977 only as sleek, light and fast factory designed café racers. Café racer styled motorcycles did not sell very well in America in their day so in 1977 the handle bars were changed to be more upright and the foot controls more forward to appeal to American tastes. Only 5060 1977 CB400f’s were imported to North America. The CB400F has a cult following in Europe, Japan, Africa and America and most every part is available in NOS and/or aftermarket reproductions with a few notable exceptions. Also, Honda parts are much less expensive than the British parts I have been buying lately.
“The Honda CB400F is a marvel: It handles remarkably well, stops with authority, snaps through the gears precisely--and motors along smartly. The bike feels all of a piece, as if a hundred separate design systems fell into perfect synchronization. Yet the attraction of the 408 transcends its obvious competence. Even a card-carrying Anglophile would agree that the CB400F has real character. If you can't respond to the CB400F's electrifying mechanical presence, you should immediately switch your sport to checkers."--Cycle World, March 1975.
My bike is a low, low number (one of the first 750 ever built) and low mileage 1975 CB400f bought for cheap as a untitled basket case, missing the seat, tank, side covers, brake pedal but basically a roller (sorry, no dramatic “before” image). I titled and registered the bike and then stripped, cleaned, prepped, primed and painted the frame and put it in storage while I worked on my BSA Gold Star. During that time picked up a tank, side covers, brake pedal and a few other missing bits along with new bearings, seals and gaskets, hardware, tires and more. My friends and I now have a proper workspace (the Winona Riders workshop) and a lift table so I am now finally building this bike. I hate to sell it, but I have a Gold Star to finish and ride so here we go:
Frame and Forks:
The frame, triple trees, stands and other black bits were cleaned, inspected, prepped and painted with a two-part catalyzed gloss black automotive paint. The swing arm was installed with original bushings (still good). I cleaned up the rear shocks and installed them.
The original fork tubes are in fantastic shape with no wear or rust anywhere. They are the best I have ever seen on an old Honda. I meticulously cleaned everything and sanded, polished and buffed the sliders. New OEM bottom bolts, copper washers, dust caps and forks seals were installed. They were filled with fresh fork oil and work perfectly.
Wheels
Although not for everyone, I used a Honda CL/CB 360 front drum brake on this bike. Many people are quick to hate drum brakes yet have not made the time to learn how to set them up, adjust and maintain them correctly. To my eyes they not only look better on a café racer than disc brakes, they do in fact work very well. I simply hate dealing with brake fluid (its feel, smell as well as its paint removing abilities) though I have rebuilt more Honda master cylinders than I can remember. I am also rebuilding the original front wheel and disc brake system with a great rim and new spokes as an option for the future buyer.
The front drum was in good shape so I dissembled everything for cleaning and polishing. The rim was in poor condition so I bought a correct used 18”rim in very good condition, (Honda no longer sells 18” DID rims in the US, grrrrr) The old factory finished of the plate and hub was removed with aircraft paint stripper, wet sanded with 400 to 1500 grit sand papers and polished and buffed with black, brown, red and white compounds. I laced and trued the rims with new spokes and nipples, pressed in new bearings and added new tube, rim strip and a new 100/90/18 Dunlop D404’ tire. I had a local shop dynamically balance both wheels on their computer. I got the front wheel perfect but the rear needed a few weights.
stripping factory finish
Beautiful and functional.
The rear hub was an absolute nightmare and took a lot of time and energy and I considered buying another used one, but in the end I tackled it. Good thing I like a challenge. It was covered in rock hard grease, oxidation and the brake shoes were frozen to the drum and the sprocket was not coming off until the BFH (big fuckin’ hammer) appeared.
The OEM chain cover over the sprocket was removed by drilling out the rivets and though I repainted it, decided not to use it. After degreasing, scrubbing and media blasting, I painted the hub and cover with VHT silver paint and heat cured the parts in my oven. New bearings were pressed in, the rim polished, new spokes and nipples laced and trued the rims to .005” lateral and radial tolerence. The hardware was zinc plated, new brake shoes and springs and a new sprocket was installed. Both hubs were spun on the stand and I used varying degrees of sandpaper to remove the crud, rust and bring inner drum lining closer to truth.
Media blasted
Ahhhh, much better
To determine the correct offset of the rear hub I centered the front rim between the forks, laced and trued it. Next I ran parallel straight edges from the trued front rim to the loosely laced rear rim to determine the correct position relative and in line to the front. then I measured the offset on both sides and then trued the rim in my stand. The centers of both rims are perfectly aligned.
Centered front rim
...to determine alignment and rear rim offset
with the correct offset the rear rim was trued on the stand
I mounted new Dunlop D404's (100/90/18 front and 110/90/18 rear), tubes and rim strips and got to one of the best moments of any build; ROLLING CHASSIS!
Motor rebuild coming next…
") lucky new owner to have you rebuil this, good job.....
lucky new owner to have you rebuil this, good job.....