
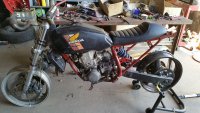
Billy I love this build, it's gonna look sweet! However if it were me I would have to trim the bottom protrusion from the tank sides and also lower the rear mounting slightly to drop it down a touch at the back. I think it would look better with your seat that way just mho tho. Are you going to modify the subframe where it extends beyond the seat? I personally like the led strip lights that have brake tail and turn signals in them. Nice job on the slip rol repair, exactly the same thing happened to mine!
We noticed you are blocking ads. DO THE TON only works with community supporters. Most are active members of the site with small businesses. Please consider disabling your ad blocking tool and checking out the businesses that help keep our site up and free.
You are using an out of date browser. It may not display this or other websites correctly.
You should upgrade or use an alternative browser.
You should upgrade or use an alternative browser.
Building my own two-stroke "Mongrel" - Inspired by CharlieT & TedT
- Thread starter BillyGoat4130
- Start date
BillyGoat4130
Been Around the Block
Thanks! I am trying to decide on leaving the lines of the stock sub-frame (will do a lot of trimming and bracketry removal) or make a new one and make it have some roll bends to meet and follow the radius of the back point of the seat.
Tune-A-Fish
BOTM LOSER Proudly Deplorable
you can paint the tank so the drool sorta goes away: Not sure why the choice in the first place tho/
For sure a tire hugger lashed to swinger is the best solution for an inner rear fender.


For sure a tire hugger lashed to swinger is the best solution for an inner rear fender.
BillyGoat4130
Been Around the Block
Thanks for the idea and suggestion on the rear tire hugger. I'm now browsing and looking for something suitable I can use for that ") And the tank will definitely get some paint. Or maybe stripped,brushed, clear coated...
And the tank will definitely get some paint. Or maybe stripped,brushed, clear coated...
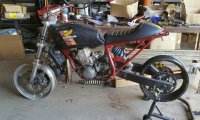
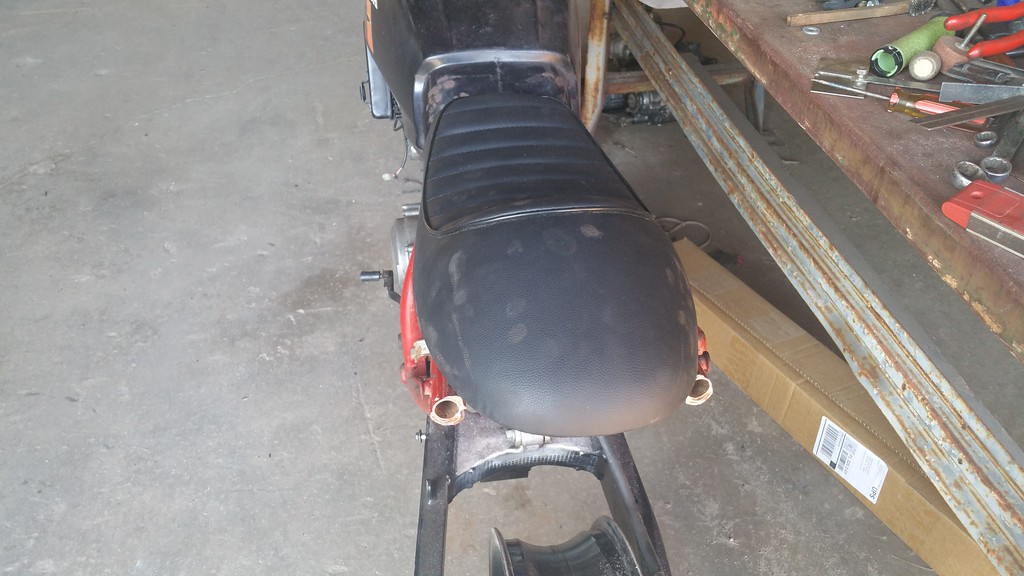
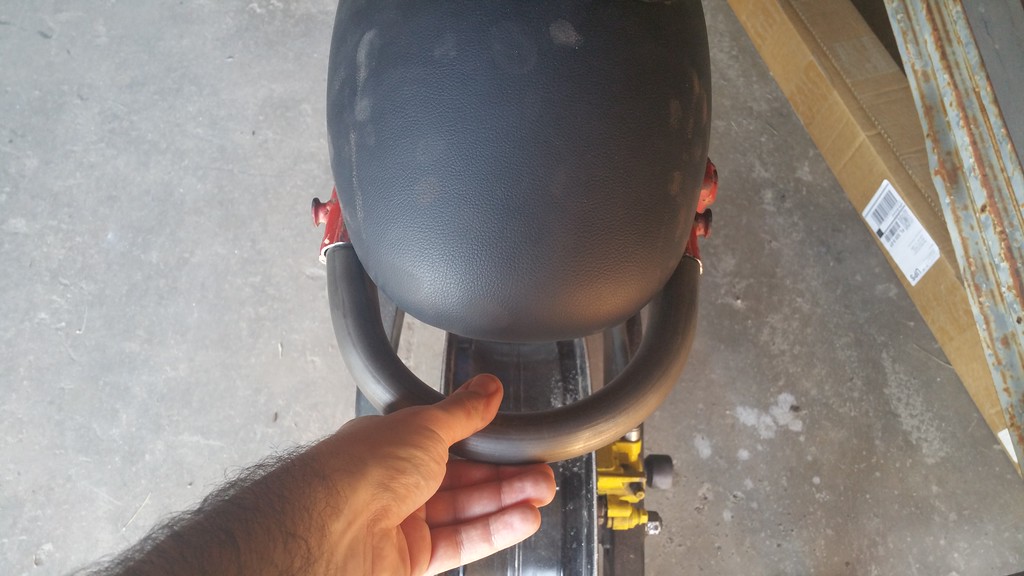
Haven't accomplished a whole lot in the last week. Figuring out how to mount this seat, and putting it where I really wanted it has been a bit trickier than I expected it to be. The front mounts on the seat kept getting in the way of it sitting down low enough, on the back edge of the frame back bone above the rear shock mount and general area where the gas tank bolt down is there. Had to trim my rear tank mount (it needed it anyways), and cut a notch out of the front of the seat pan, tried and retried the front bracket about 5 times till I decided to flatten it in the vise and turn it over backwards + weld some studs in it. So basically I wound up making the plate bolt to the pan, and then the plate will bolt to the sub frame further back to stay out of the way of that shock tower and rear tank mount area with enough room to actually get a wrench or socket on the nuts. Plan is a simple piece of split rectangular tubing ran cross ways of the frame for the front mounts. Rears will probably be the same but run parallel inside the subframe tubes.
Pic attached is pretty close to position the seat will be in. I am not hunting up some suitable rubber bushings/isolators to mount to the sub frame to put between it and the seat pan.
sidebar; I almost wish my ride height was as high naturally as it is on the stand is it would make the decision to build an underslung pipe much much easier...
And the tank will definitely get some paint. Or maybe stripped,brushed, clear coated...Haven't accomplished a whole lot in the last week. Figuring out how to mount this seat, and putting it where I really wanted it has been a bit trickier than I expected it to be. The front mounts on the seat kept getting in the way of it sitting down low enough, on the back edge of the frame back bone above the rear shock mount and general area where the gas tank bolt down is there. Had to trim my rear tank mount (it needed it anyways), and cut a notch out of the front of the seat pan, tried and retried the front bracket about 5 times till I decided to flatten it in the vise and turn it over backwards + weld some studs in it. So basically I wound up making the plate bolt to the pan, and then the plate will bolt to the sub frame further back to stay out of the way of that shock tower and rear tank mount area with enough room to actually get a wrench or socket on the nuts. Plan is a simple piece of split rectangular tubing ran cross ways of the frame for the front mounts. Rears will probably be the same but run parallel inside the subframe tubes.
Pic attached is pretty close to position the seat will be in. I am not hunting up some suitable rubber bushings/isolators to mount to the sub frame to put between it and the seat pan.
sidebar; I almost wish my ride height was as high naturally as it is on the stand is it would make the decision to build an underslung pipe much much easier...
Attachments
stroker crazy
crazy as a fox
Looking forward to seeing the pipe underway!BillyGoat4130 said:I almost wish my ride height was as high naturally as it is on the stand is it would make the decision to build an underslung pipe much much easier...
Crazy
BillyGoat4130
Been Around the Block
stroker crazy said:Looking forward to seeing the pipe underway!
Crazy
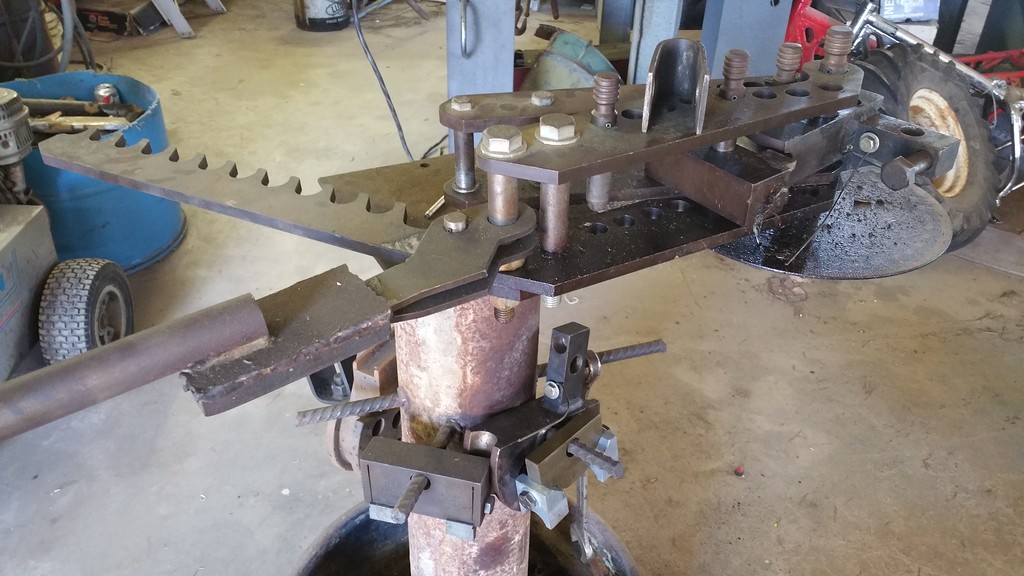
Just finished working through the hardest parts... :-X
Will wind up with a pipe that has a largest nominal diameter of about 4.5 inches vs the first one I built that used Blair's formula and was like 9 inches around. Will make the possibility of going underslung much better.
Attachments
hooligan998
Been Around the Block
Late, but I'm in.
BillyGoat4130
Been Around the Block
Got my front seat mount finally sorted. More complicated than it should have been as I had to make a bracket to basically move the existing bolts in the pan further back so they didn't interfere with the back of the frame and back tank mount.
I also trimmed off several brackets from the subframe, guess I'm moving forward with using it for now
Little here, little there. Be ready to order some tires for it before too much longer hopefully.
I also trimmed off several brackets from the subframe, guess I'm moving forward with using it for now
Little here, little there. Be ready to order some tires for it before too much longer hopefully.
Attachments
BillyGoat4130
Been Around the Block
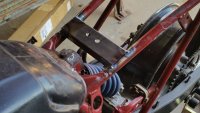
Well I dropped the old girl on the left side and radiator in the shop earlier today...I guess better there than on the road :
Cut some more off the sub frame.

Went to work with the JD2 Model 3 and came up with something like this to cap off the back of it
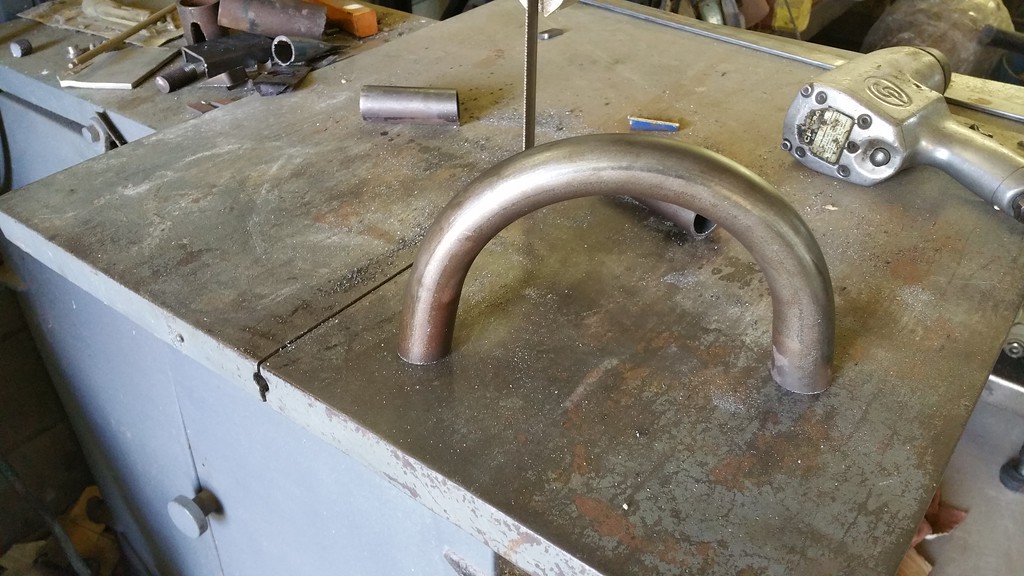
Hope to have it looking something like this on the bike

Going to leave the space on the back between it and the seat to kind of work as a grab bar type structure I think.
Cut some more off the sub frame.
Went to work with the JD2 Model 3 and came up with something like this to cap off the back of it
Hope to have it looking something like this on the bike
Going to leave the space on the back between it and the seat to kind of work as a grab bar type structure I think.
BillyGoat4130
Been Around the Block
Hadn't thought of that....would be kind a trick to run about a 1/2 end mill around the outside into the tube following the radius and countersink in a red LED strip for L R and Brake lights. Hmmmm

BillyGoat4130
Been Around the Block
Well thats neat as shit! Really cool and original idea by whoever dreamed that up. I doubt I could make something look quite that clean and good
Maritime
Over 10,000 Posts
there are a couple of threads here with folks who have done this. One neat way was a guy bent a smaller diameter tube the same radius as the hoop and then cut it in half, then cut a slot in the hoop the size of the smaller half tube and welded it in. I bet you can do that. I'd link the thread but have no idea what build I saw it in now.
Cheers
Cheers
BillyGoat4130
Been Around the Block
I see cognito sells just the flexible LED strip and wiring also. I'm gonna have to put that on my to-do list. I've kinda been wondering how/what I would do about lighting and license plate positioning. That could be a nice solution.
I hate working on electrical stuff, and building a harness for this thing to wire in all the lights, a battery, getting a re-wound stator and all that jazz makes my brain itch at the thought of. All the little details of work like that is what makes building a machine from scratch such a pain in the tail.
I hate working on electrical stuff, and building a harness for this thing to wire in all the lights, a battery, getting a re-wound stator and all that jazz makes my brain itch at the thought of. All the little details of work like that is what makes building a machine from scratch such a pain in the tail.
Re: Building my own two-stroke "Mongrel" - Inspired by CharlieT & TedT
Sent from my iPhone using Tapatalk
Or a satisfying, fun challenge. All in the mindset.BillyGoat4130 said:All the little details of work like that is what makes building a machine from scratch such a pain in the tail.
Sent from my iPhone using Tapatalk
BillyGoat4130
Been Around the Block
Maritime said:Spark Moto. Matt will do you a custom harness for reasonable rates and will help you with install instructions etc.
Thanks will definitely check them out!


