CL450BB "Bastard Brat"

Ross.

over there.....
Been a member since last year but really not posted much. Have been reading about all the great projects on here. So thought I would throw my own into the mix here......

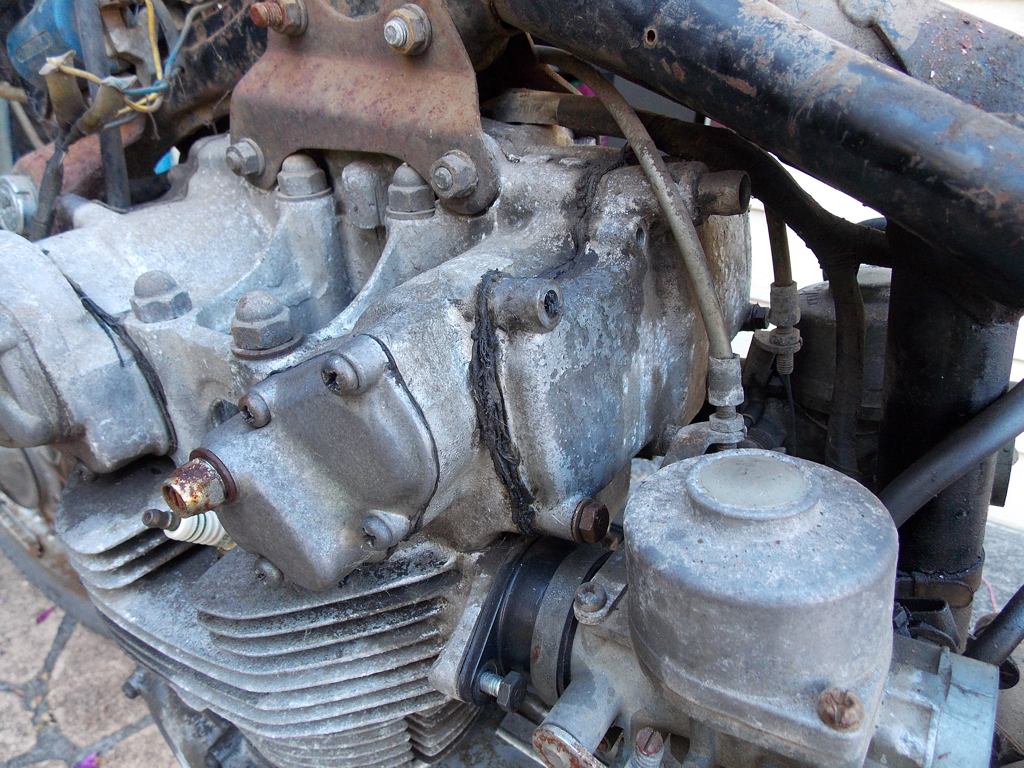
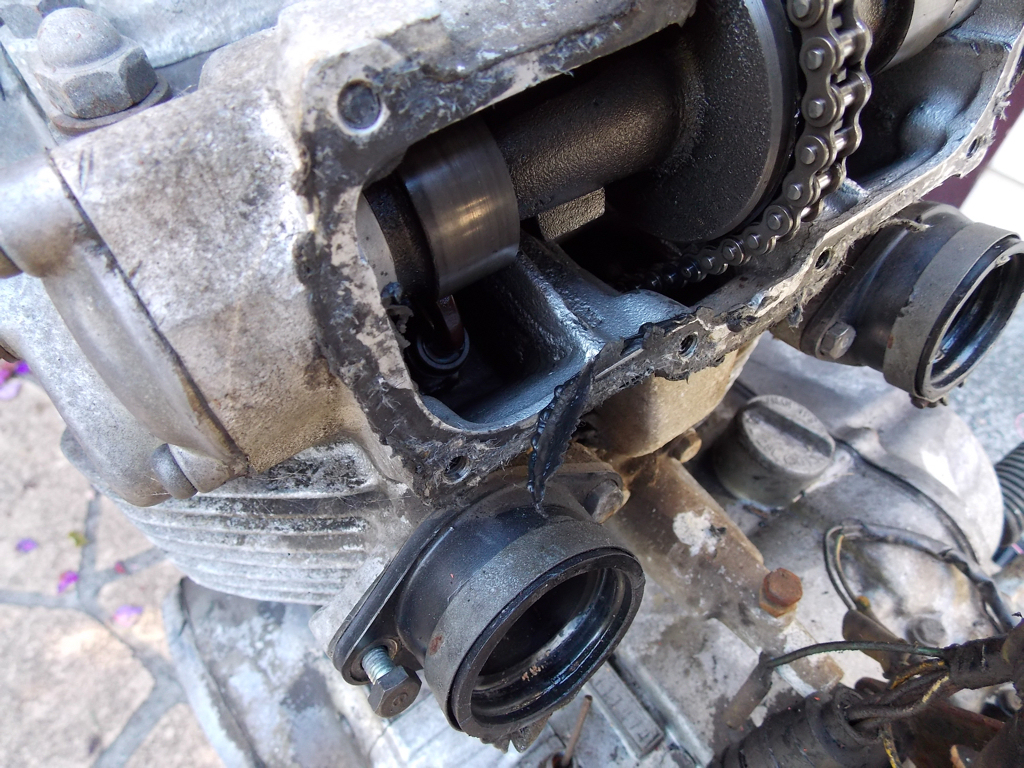
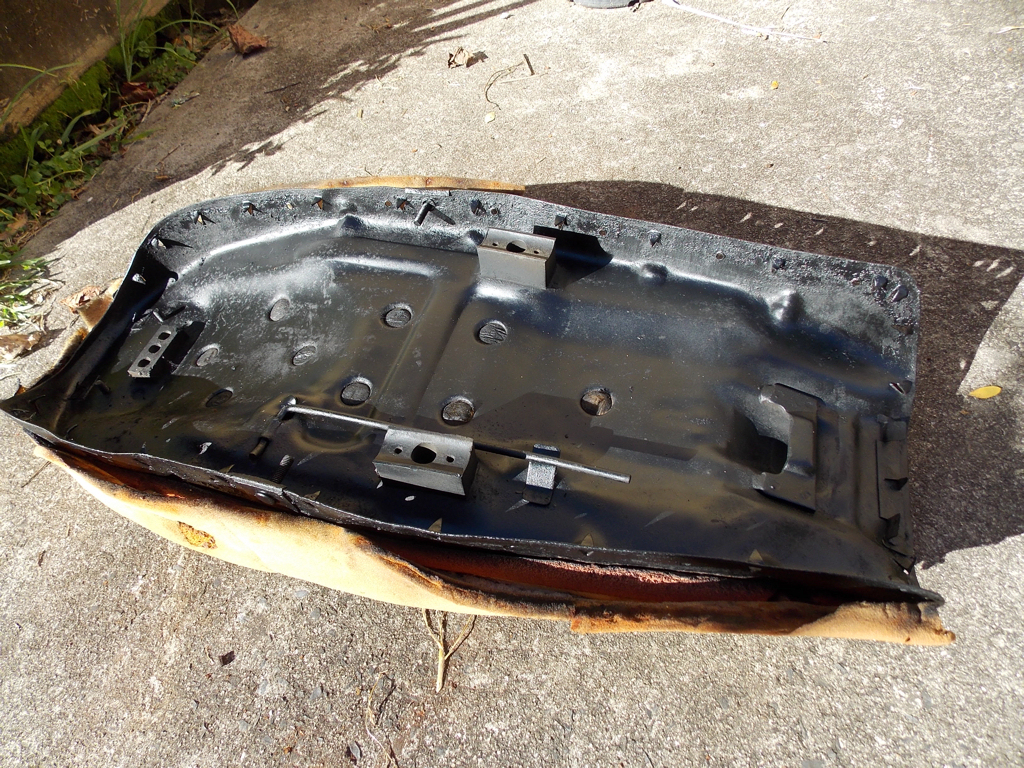
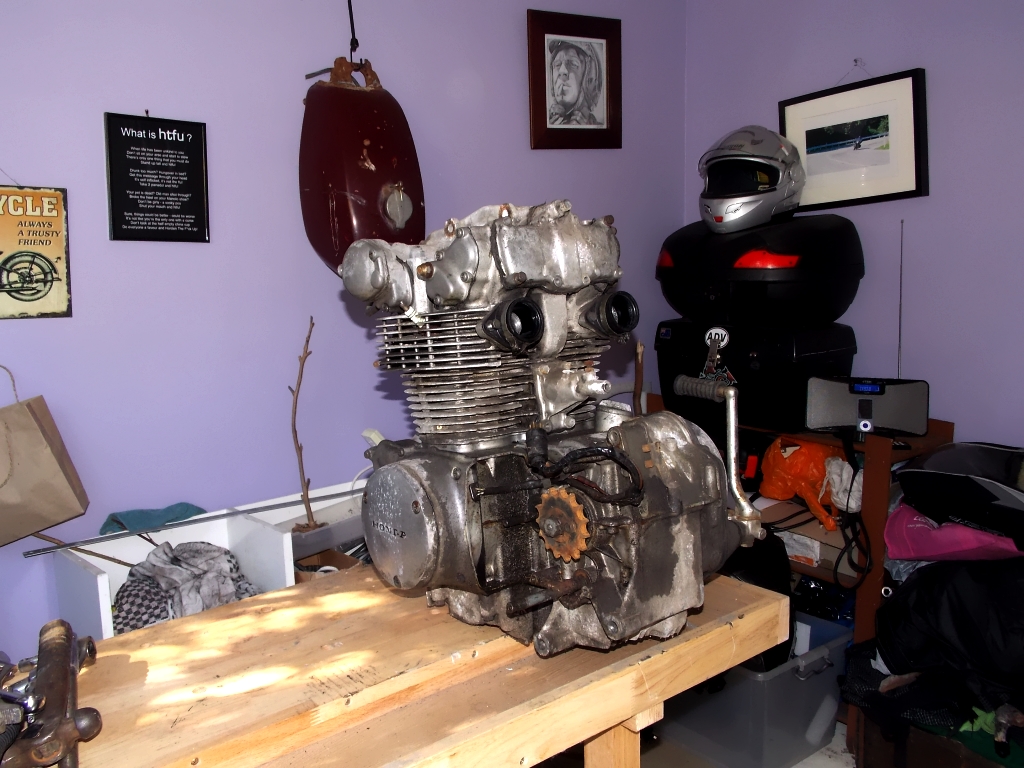
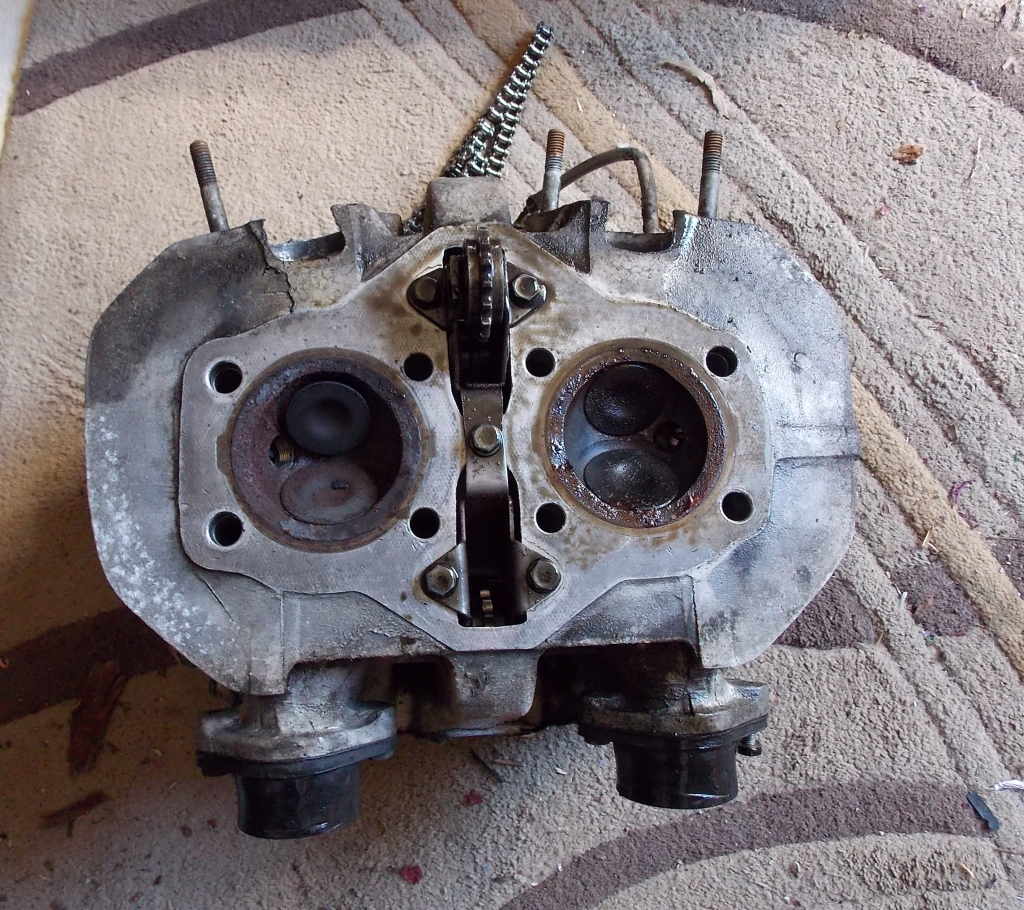
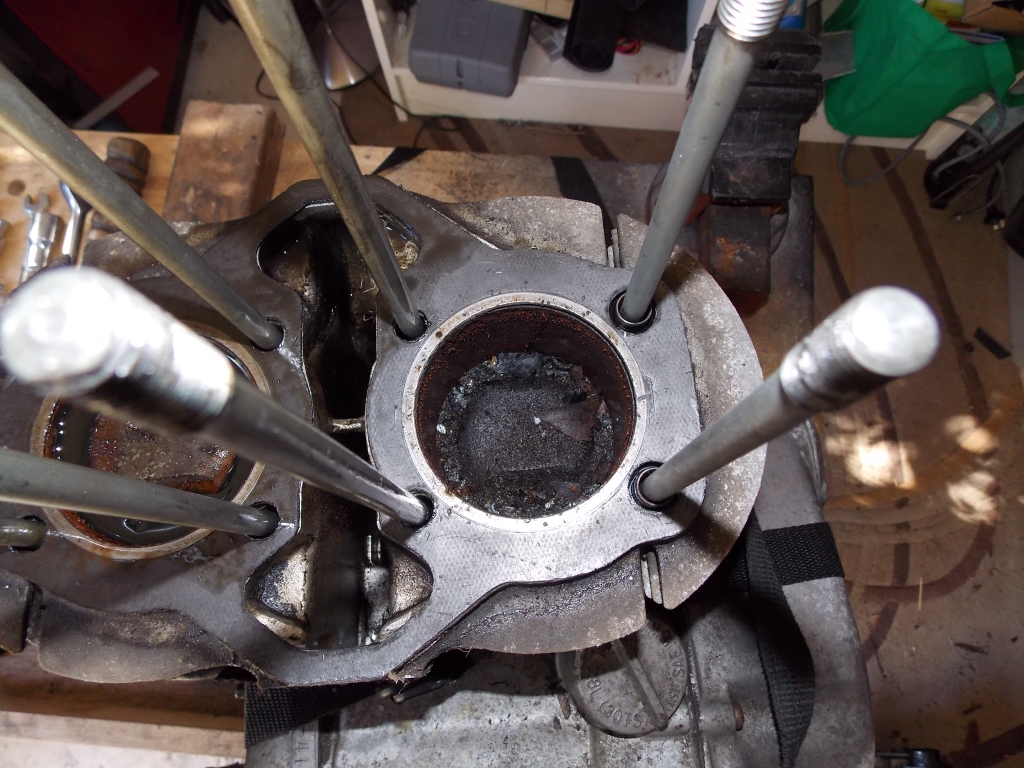
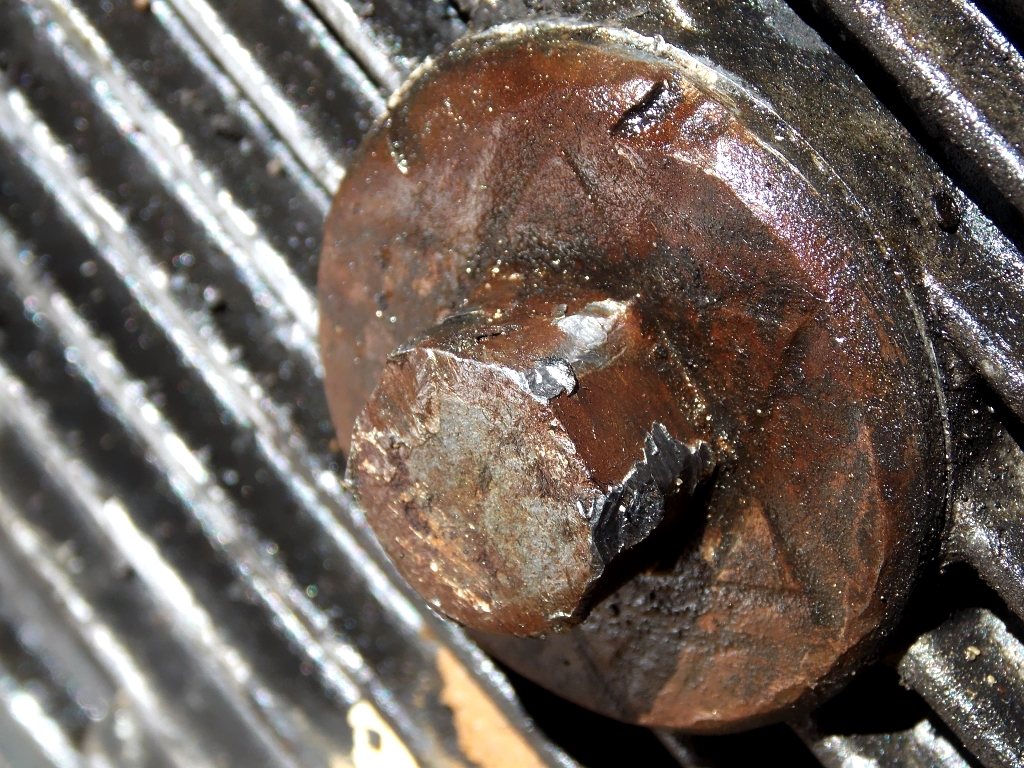
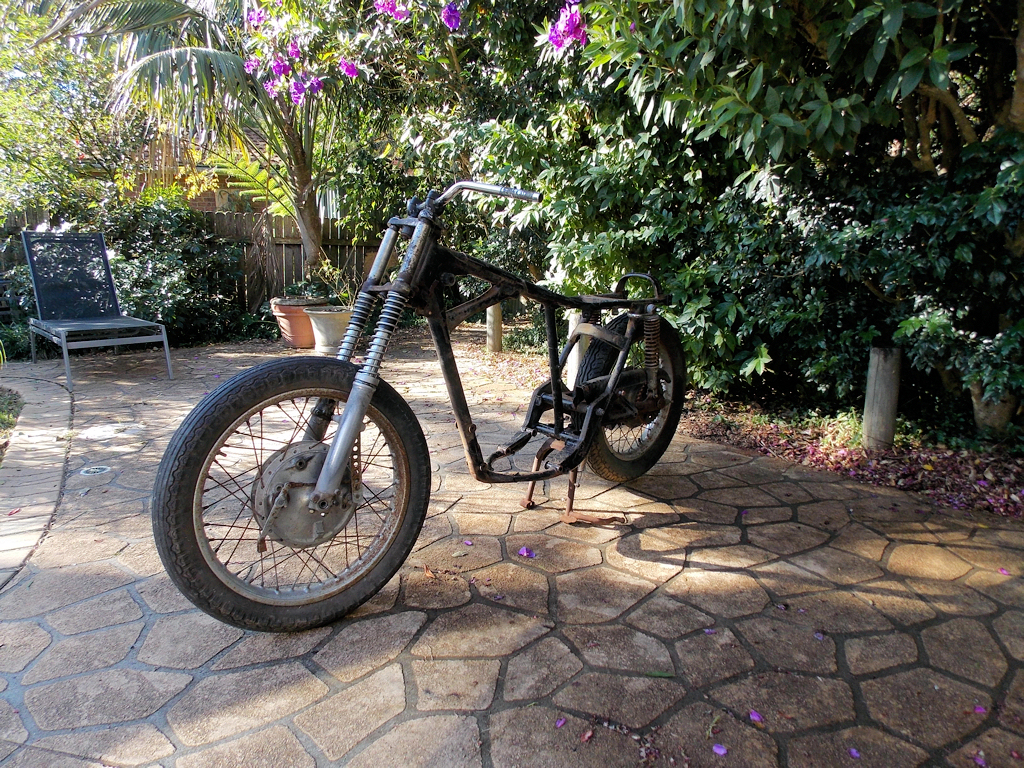
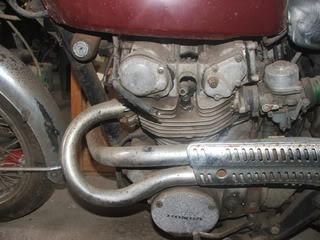
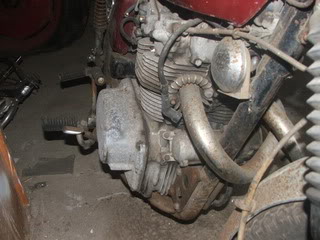
I bought a 1972 CL450 off a mate Ken. It has a seized engine. Spark plug broke off and dropped into the engine. Have no idea how bad this will be. I really don't care as I have the nouse to fix it. Pulled enough engines down to know what to do.

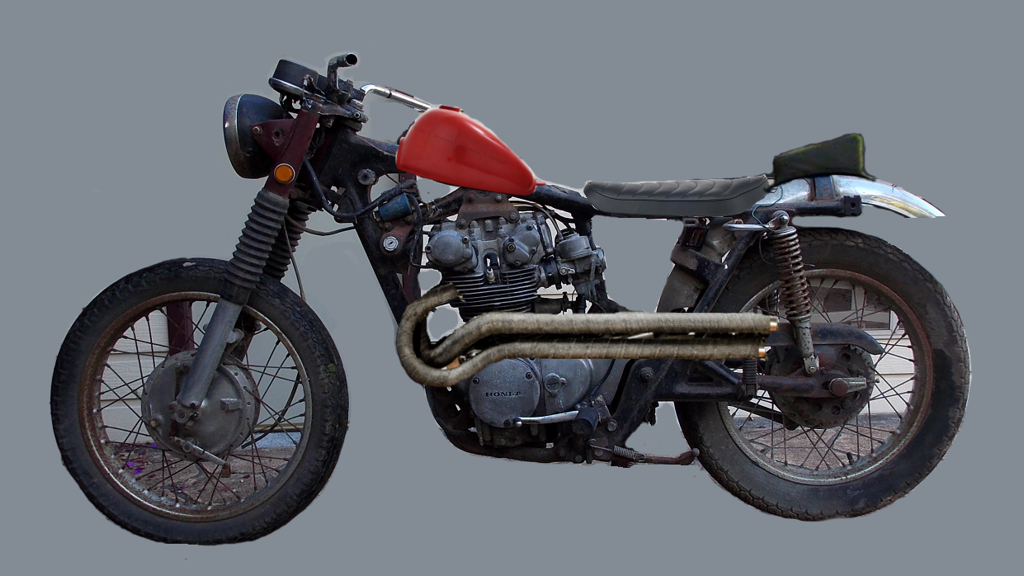
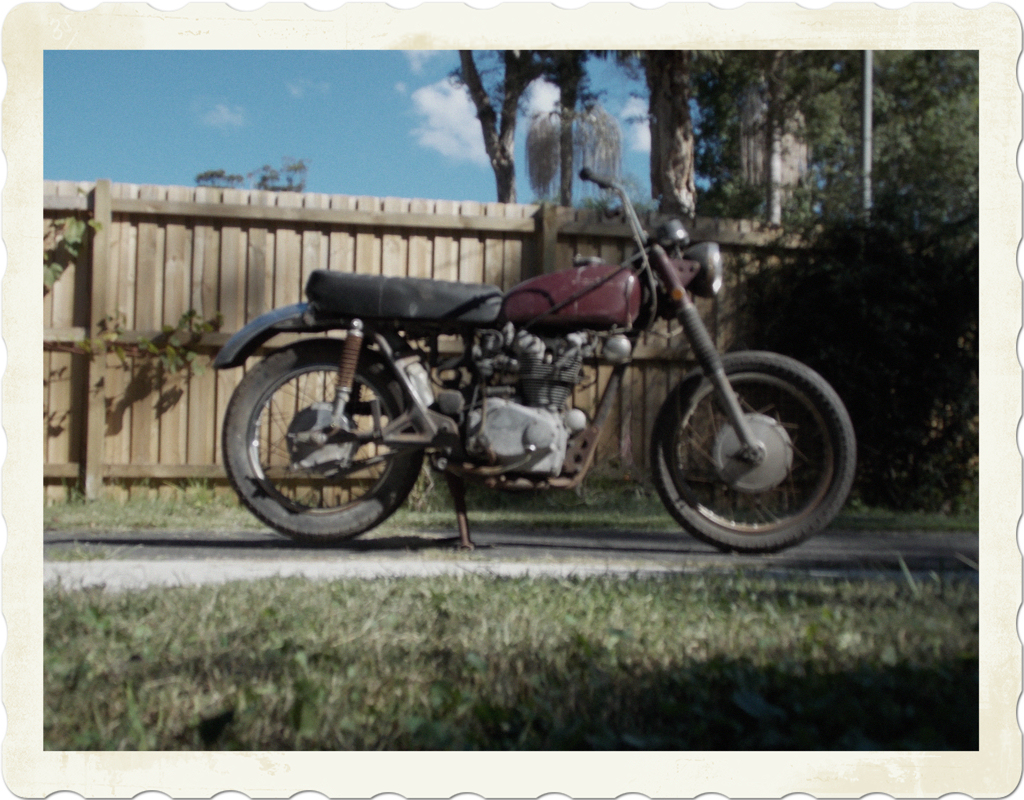
Here is what it looked like when it was bought by Ken.

2004_0105_150435AA.jpg


2004_0105_150427AA.jpg


2004_0105_150509AA.jpg


2004_0105_150522AA.jpg


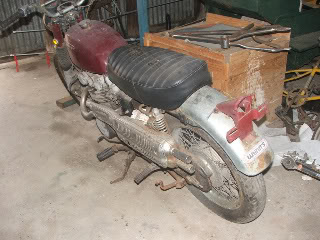
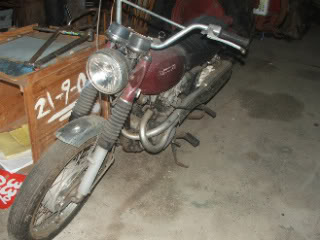
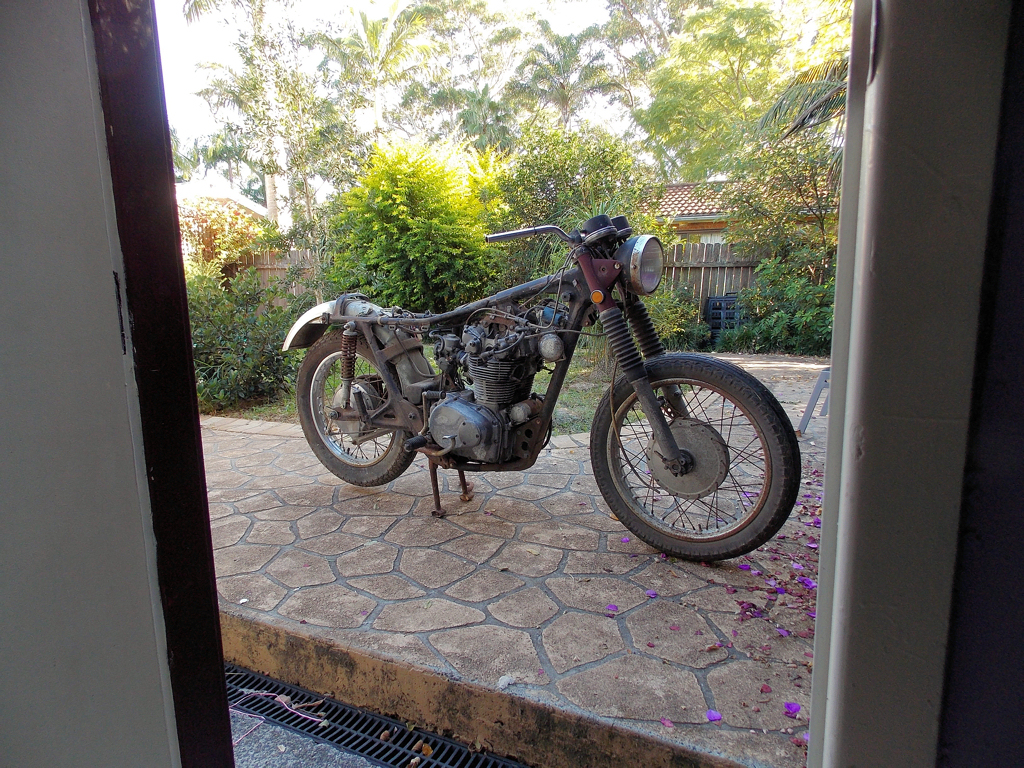
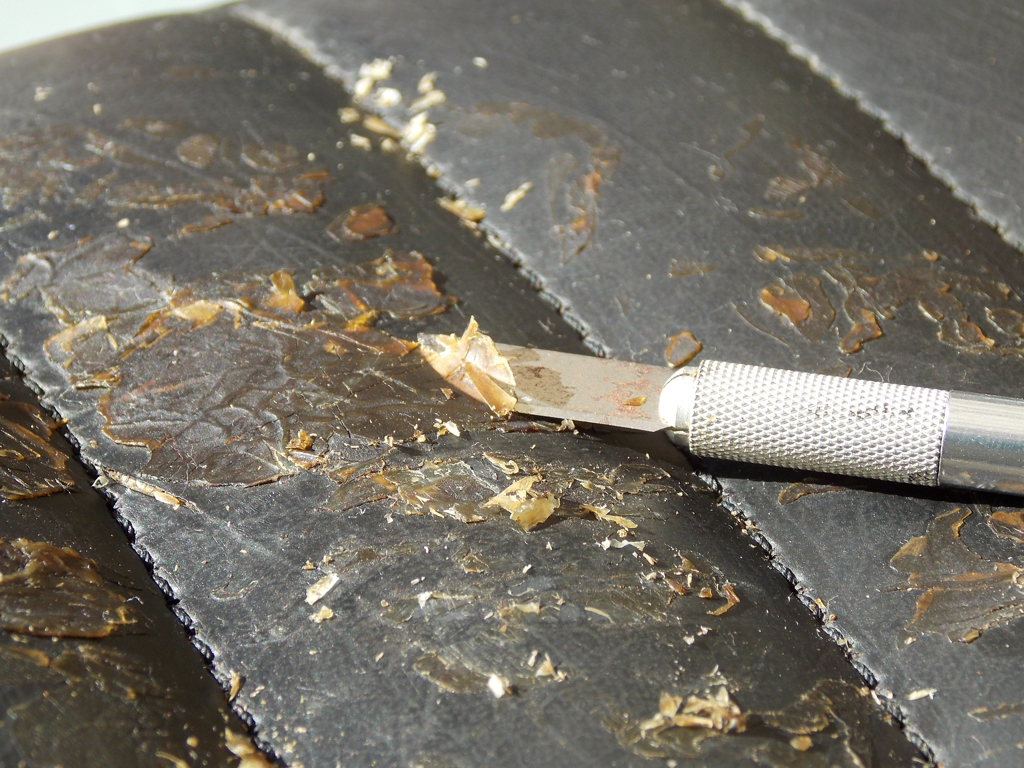
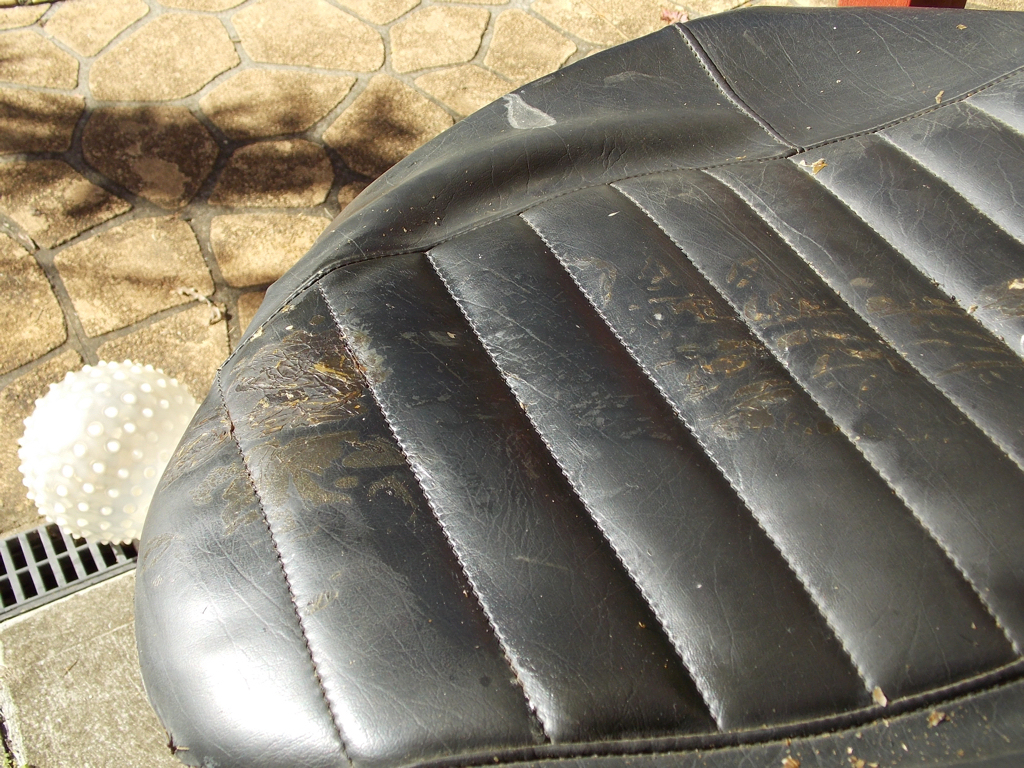
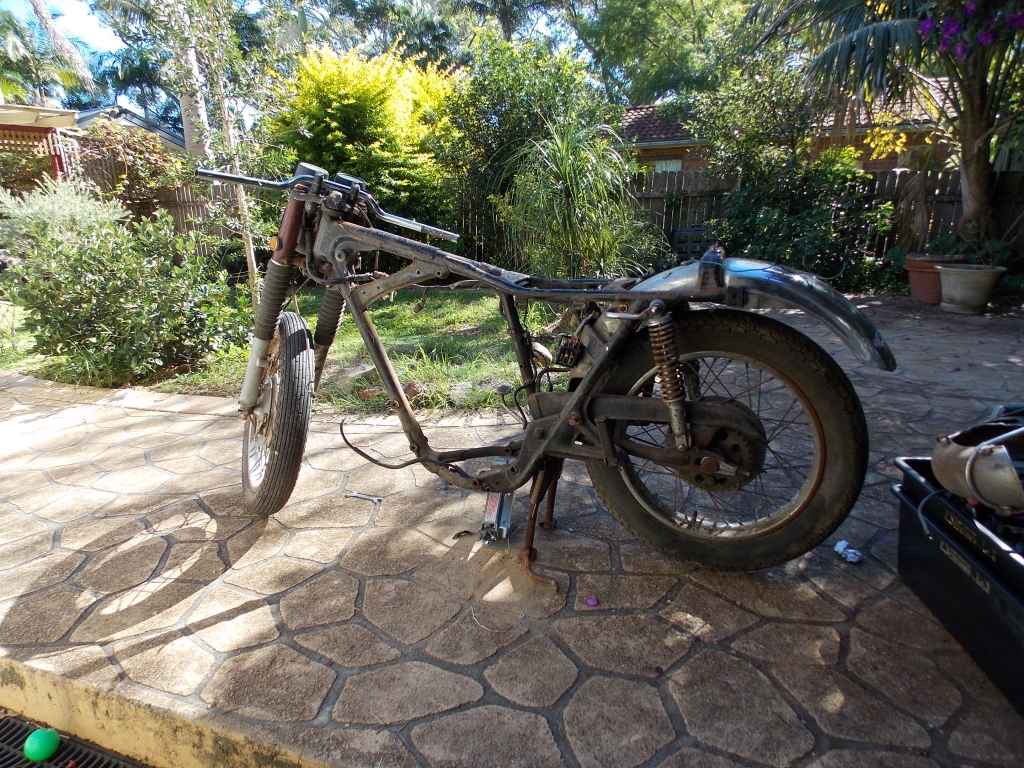
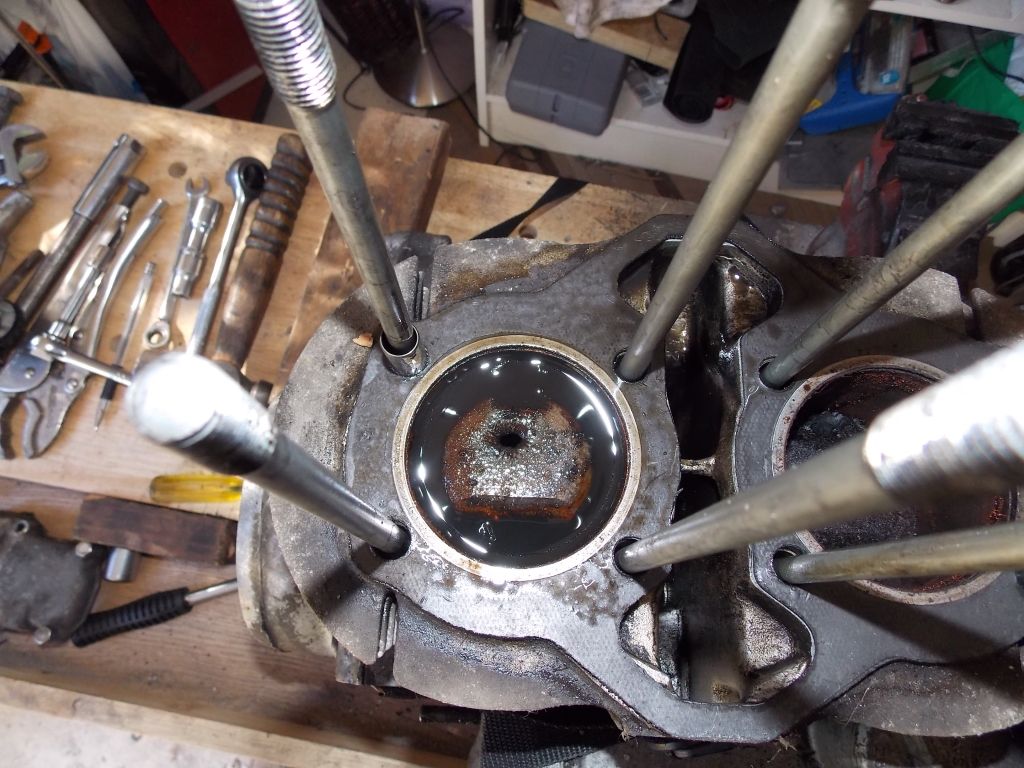
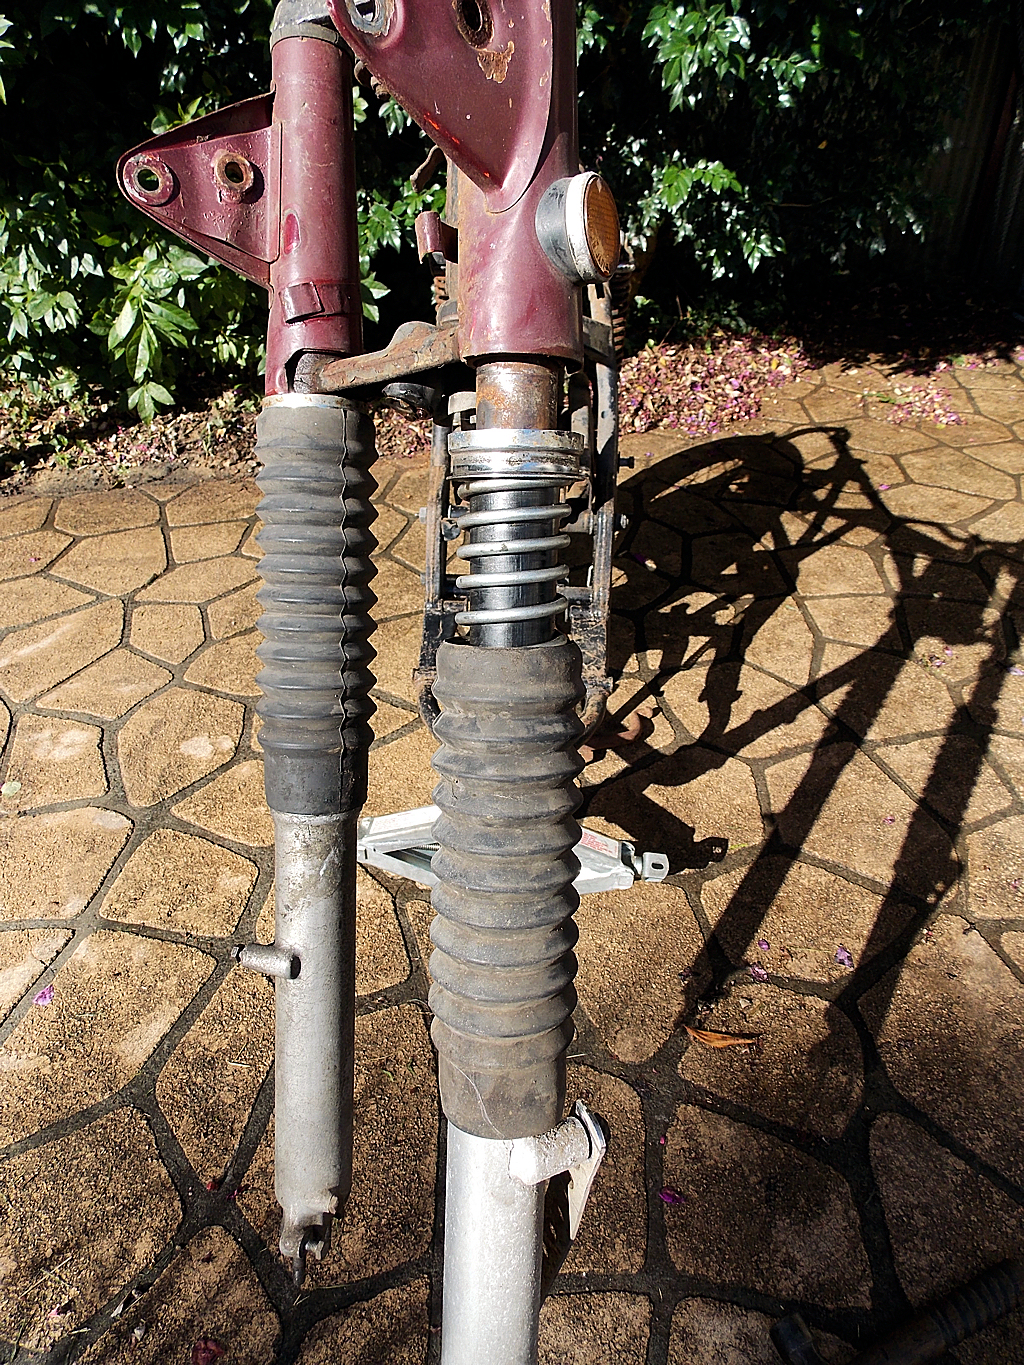
So the CL450 arrived about 3 weeks ago. The patina so cool. So much rust and oxidation.

I don't know how Ken moved the bike around his place let alone load it by himself. I had to break the chain to get the back wheel to turn. Some of the links had rusted together. :)

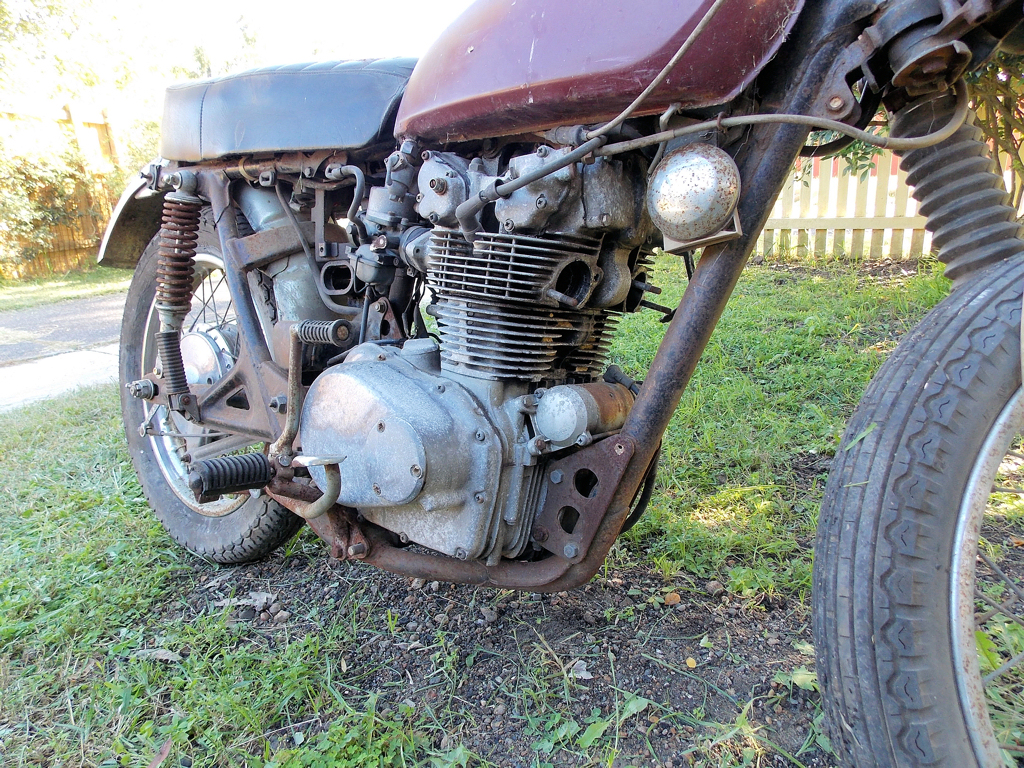
After a photo session it was wheeled around the back. WD40 sprayed on all the engine bolts. They will all be replaced with hex head bolts. I can see my impact driver will be getting a workout to get these bolts out.

So now to officially rename the bike the "CL450 BastardBrat" or "CL45BB" for short.

Looking at the VIN it would seem that the bike is in fact a 1971 model not a 72.
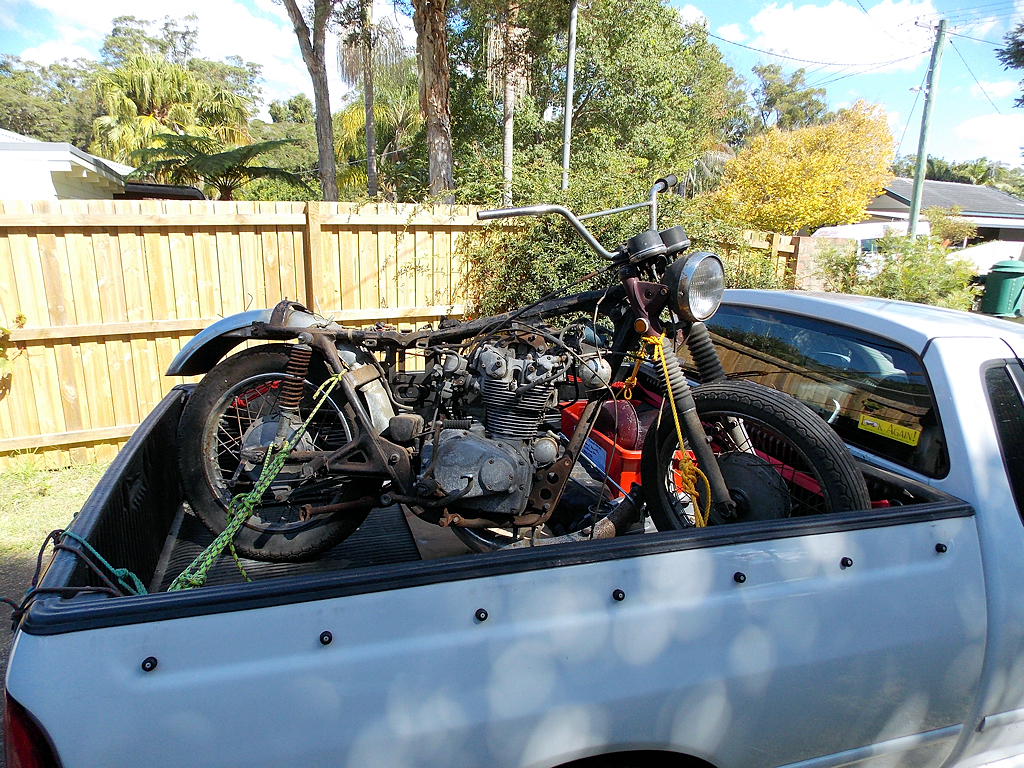
1024xCL450+arrives+002.jpg


1024xCL450+arrives+012.jpg


1024xCL450+arrives+013.jpg


1024xoldie+CL450+arrives+006.jpg
 
I hates gasket goo.

I have started to take bits off. Stuff that will not be needed. Like tool box etc. The frame has way more rust on it than I first thought.

The engine will have to come out of the frame for its rebuild. So then the frame can be stripped and repainted. I did want to keep the patina. Ha! Its rust.

1024xgasket+goo+001.jpg


Any engine cover that has oil behind it has multiple layers of gasket applied to the mating surfaces. AAARRRGGGHH!! I would not be surprised if some had not made its way into the engine and blocked some of the oil ways. I had to use a drift and hammer on one rocker cover to break the gasket goo seal.

1024xgasket+goo+010.jpg


1024xgasket+goo+012.jpg


Speaking of oil. WD40 on the engine oil filler cap over night. The cap came undone this morning. There is oil on the dip stick. Surprises keep happening with this bike.
 
A digital Prometheus. Victor Frankenstein may not agree.

Take the internet. Pick images of parts to buy. Then whack them into a graphics program. Spin myself around 6 times and start pushing the pixels.

what+it+might+end+up+as.jpg


This is rough as, but its where I would like this build to go to.

The rear guard will be chopped back further than in the picture. The speedo will be a tiny one mounted away from the head stem. Headlamp I am still thinking about what size and where to mount it. Seats, tank and exhaust I am liking. Tyres will be nice fat Firestones. Handlebars will be some really cool high Zed type.

The most critical part of this whole shemozzle is getting that seized engine running.
 
Spending me RDO fighting old glue...

Seeing as I am a cheap bastard, I am trying to reclaiming the seat off the Honda.

The base has a far amount of surface rust. A can of rust inhibiting paint has been applied to the seat base.

1024xGlue+on+seat+004.jpg


To get that Bratstyle seat look I will cut down the foam of the seat and then reuse the seat cover. Yes the seat cover that has so much old glue of some sort smeared over it.

1024xGlue+on+seat+001.jpg


Thankfully vinyl and glue do not like each other. The glue has not really bitten into the vinyl. Most none water based glues work on the principal of heat. The chemicals in the glue make heat which in turns melts what the glue is touching thus causing the bond.

So sitting in the lovely autumn sun I am using WD40 wiped over the glue and a curved hobby blade to slowly scrape and lever this old glue off.

1024xGlue+on+seat+006.jpg


1024xGlue+on+seat+009.jpg


Ok several hours have gone by and the seat cover is all cleaned up... So it was off up the road, 3 houses and across the road to Six String Brewing for a Pale Ale as a reward for my hard work....

1024xDSC00018.jpg
 
Struck oil...
The plan today was to drain the oil from the engine Then in a few days time take the engine out of the frame. Then open it up and see what adventures of seizure await. That was the plan. hahahahahahaha!!!!

Sump plug is stuck. Looks like I will need to get some spray that freezes metal so it shrinks. This should get the plug out. hahahahahahaha!!!!

Laid the bike on its side so I could get more leverage on the sump plug. Bear in mind that the carbs are off the engine as well. Jan comes down to see what i am doing. "Is that oil on the ground?" she says to me. Is that oil alright. Its pouring out of the left carb trumpet. hahahahahahaha!!!! Seems that the left piston and rings has no intention of holding back oil. I wonder if the piston has a head left on it?

Lay the bike on the right side. Guess what? Oil does not pour out. That's the side that the electrode from the spark plug is missing.

Worse comes to worse and I can't get the plug out I will have to buy a old new bottom end. That is something that will be decided when the engine is in bits.
 
The engine is out of the frame.

I stink of old engine oil as I type this. Old oil with water. That's what has come out of the engine.

My wife and I got the engine out of the frame this morning.

I stink of old engine oil as I type this. Old oil with water. That's what has come out of the engine.

My wife and I got the engine out of the frame this morning.

1024xengine+out+006.jpg


We got it up on to the work bench and I took to it with the spanners.

1024xengine+out+008.jpg


So how bad is that seizure? I will let the photos tell you. Will say though that the crank spins freely. I cant feel any grinding or sideways movement in the crank. I will be splitting the cases to clean out all the oil/water mix and check the bearings etc.

1024xengine+out+012.jpg


1024xengine+out+016.jpg


1024xengine+out+017.jpg


1024xengine+out+028.jpg


My universal block of wood and a hammer got the head first then the barrels off. So it was just rust in the bores stopping the engine from being kicked over.

I think a trip to an engineers shop and get the bores measured is called for. I am hoping all it needs is a re-bore and next size up pistons and rings.

That bloody sump plug.

1024xengine+out+030.jpg


I found my 8mm spanner. Good old BMW one. Was able to use it and a big hammer and got the plug undone.

The end of my impact driver has started to bur over after the pounding it got to get the engine casing bolts out. All of these bolts will be replaced with hex head ones.
 
Converting the original seat to a Brat style seat.

Scots are known for being spend thrift. I have Scottish blood in me. When I saw the price of some of the Cafe/Brat style seats for sale my Scottish blood boiled. So I made my own.

Took to taking the foam out and lowing the seat as it where. Took about 2 inches out of it.

1024xHow+to+make+Brat+Seat+001.jpg


1024xHow+to+make+Brat+Seat+002.jpg


Peeling the foam back. No mice had set up home in it.

1024xHow+to+make+Brat+Seat+003.jpg


1024xHow+to+make+Brat+Seat+004.jpg


Filled in the indents with foam from the base.

1024xHow+to+make+Brat+Seat+007.jpg


Yoga mat helps cushion my tender behind.

1024xHow+to+make+Brat+Seat+008.jpg


Done.

1024xHow+to+make+Brat+Seat+009.jpg


1024xHow+to+make+Brat+Seat+010.jpg


1024xHow+to+make+Brat+Seat+011.jpg


The vinyl at the front of the seat is hard and brittle. How long that will last I have no idea. I will make a small plate to go on the back of the seat that has "W'nR'n" engraved into it.

So far this seat has cost me nothing. Blood has stopped boiling. How comfy will it be? I really don't care.
 
Re: Re: CL450BB "Bastard Brat"

Ross. said:
So far this seat has cost me nothing. Blood has stopped boiling. How comfy will it be? I really don't care.

We're lucky nobody was kilt in the shaving of your seat. Nice work.
 
Rusted fork tops.

Decided to take the fork gaiters and headlamp mounts off the forks today.

I made some discoveries. So good and some not very good at all.

The not good.

The forks are rusted quite badly where they have been sitting in behind the headlamp mounts. Looks like the caps that hold the gaiters on has allowed water to pool there and the rust has spread upwards. I do not believe that re-chroming will help. So will have to source a better set of fork tubes. Off to eBay to hunt these down.

1024xforks+002.jpg


The good.

A look that I really like is the fork springs on the outside. When I pulled the gaiters down that's what I found. A very cool look indeed. Even more so with out the headlamp brackets.

1024xforks+006.jpg
 
Tweaked the seat today.

You know how the little things bug ya. Well the front of the seat was bugging me.

Since I cut the foam down in the seat it just did not look right. Then I realised that I needed to trim the seat base down to follow the curve of the frame tube at the front of the seat. Plus I had forgotten to put the plastic seat base trim back on. So off came the seat cover. Tin snips out. Trim the base. Plastic trim on. Back on goes the seat base.

I also wanted to add some upholstery rivets around the seat base as well. I like that studded look. Could not find any so used stainless washers and pop rivets. I really like the look of the seat now.

One last touch. A W'nR'n tag was added to the back of the seat. Used an old tea spoon for that.

1024xSeat+MarkII+002.jpg


1024xSeat+MarkII+005.jpg
 
Rust and chrome. Shudder.

I had been cruising through the net reading different forums about restoring bikes. Came a cross a thread where a guy said he could get rid of rust on chromed parts. He was dipping them into oxalic acid. I thought yeah right. He and a few others in this thread said it worked. So I hunted some down. I will give it a go. If it doesn't work I have only wasted a few doolars.

So I went and bought a bottle of Reviva http://www.intergrain.com.au/reviva.html which is mainly oxalic acid. This is used on wooden decking etc. It draws the water out off the wood. So it should draw rust out as it is water reacting with metal.

I did my exhaust nuts.

Before. You can see the rust in places. I did clean this with some kero as well to help get the road grim/many years of grim off them.

1024xexhaust+nut+before+after+002.jpg


1024xexhaust+nut+before+after+006.jpg


I let them soak in just about full strength Reviva for 24 hours.
You can see where it has eaten the rust away and left bare cast iron. It works to a degree. Sure makes the chrome shiny again.

1024xexhaust+nut+before+after+014.jpg


1024xexhaust+nut+before+after+015.jpg
 
rays650cafe said:
Very cool seat, liking the rivet idea.

Cheers mate. I saw the rivet type thing on some new seat that sell for around $500. I am so cheap.
 
The fleshy looking stuff coming off the parts is rust. These parts had been in this for no more than 5 minutes when I took this photo.

1024xrust+be+gone+002.jpg


I know you can get it odd with beadblasting but that takes all the coating off.
 
Some small work has been done to the Honda. Small amount due to me being very distracted with my "new" old bike I bought 2 days ago...

1024xGov+023.jpg


How I love twins.
 
Great job so far! I had great results with oxalic acid. Also known as wood bleach. I soaked my rims for 24 hours and they wiped clean with a rag. Bye bye rust.
 
Back
Top Bottom