
We noticed you are blocking ads. DO THE TON only works with community supporters. Most are active members of the site with small businesses. Please consider disabling your ad blocking tool and checking out the businesses that help keep our site up and free.
You are using an out of date browser. It may not display this or other websites correctly.
You should upgrade or use an alternative browser.
You should upgrade or use an alternative browser.
Down under, an idiot and a 400F
- Thread starter neevo
- Start date
neevo
Over 1,000 Posts
crazypj said:Swing arm brace is a good idea in my opinion
Any resources for fabricating one? At the moment I am just making it up.
crazypj
Split personality, I fake being smart
Nope, I bent a coat hanger, then found it wouldn't fit where I wanted and started over ;D
I was originally going to make it AHRMA legal, but it wanted to be in the same place as the torque arm so I'm doing something different and bracing drive side only
I was originally going to make it AHRMA legal, but it wanted to be in the same place as the torque arm so I'm doing something different and bracing drive side only
neevo
Over 1,000 Posts
crazypj said:Nope, I bent a coat hanger, then found it wouldn't fit where I wanted and started over ;D
I was originally going to make it AHRMA legal, but it wanted to be in the same place as the torque arm so I'm doing something different and bracing drive side only
That's the issue I'm having. I cannot work out how to clear the brake are and the chain,
neevo
Over 1,000 Posts
GoingsMoto said:You did a great job on the disc, the polishing looks amazing, I am sure that took a couple of hours. I am glad to see this thing coming along.
Thanks! Your build is one of the first I check out each day, definitely a bike that inspires me.
neevo
Over 1,000 Posts
Going to be attacking the cases this weekend as they are dirty, very dirty!
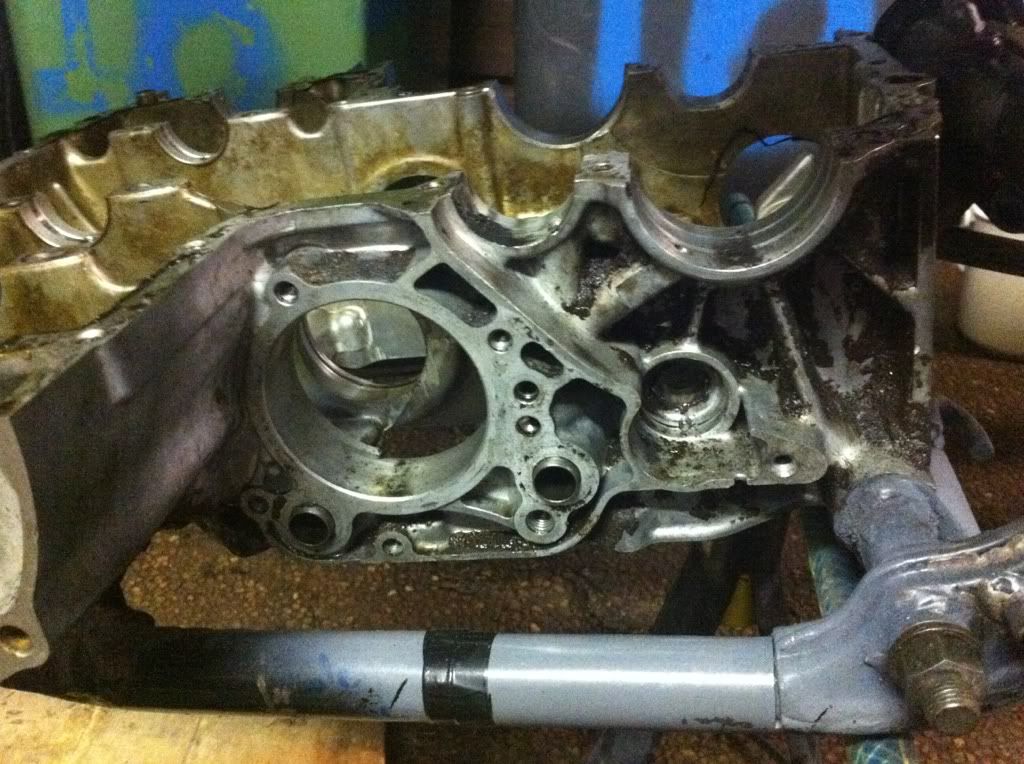

Going to give it the full spar treatment. Kicking off with a kerosene bath and scrub, simple green and pressure washer clean then final scrub in the soda blasting cabinet.
Finishing touches are going to be VHT natural finish engine enamel. Anyone know who stocks it in Australia?
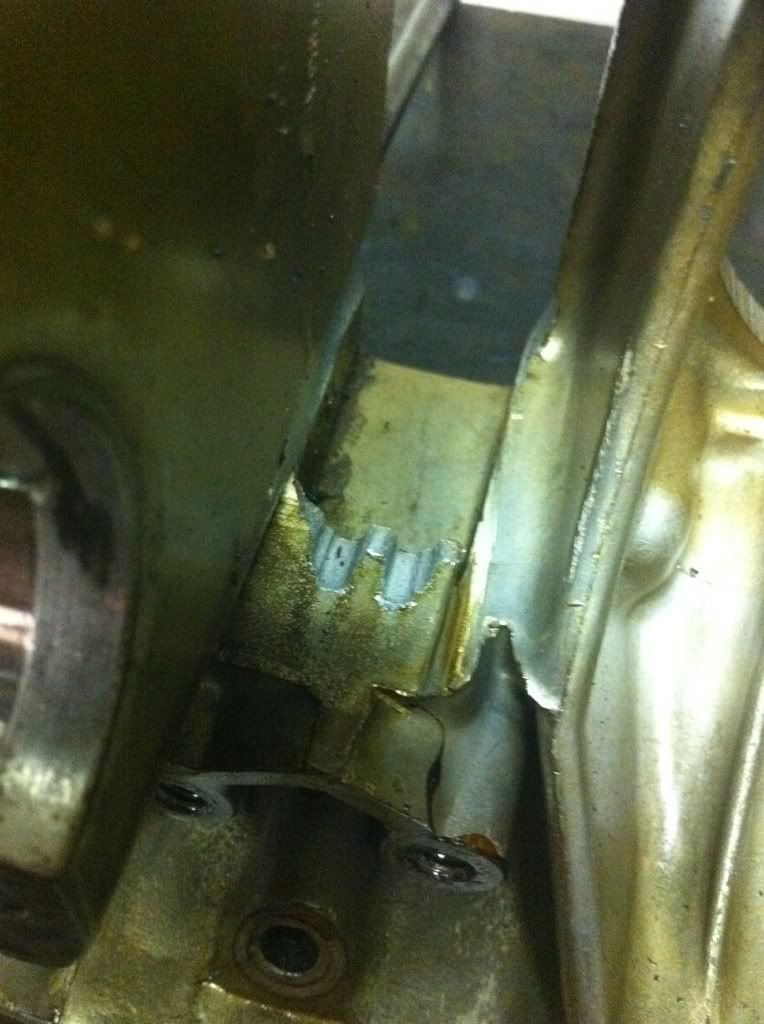
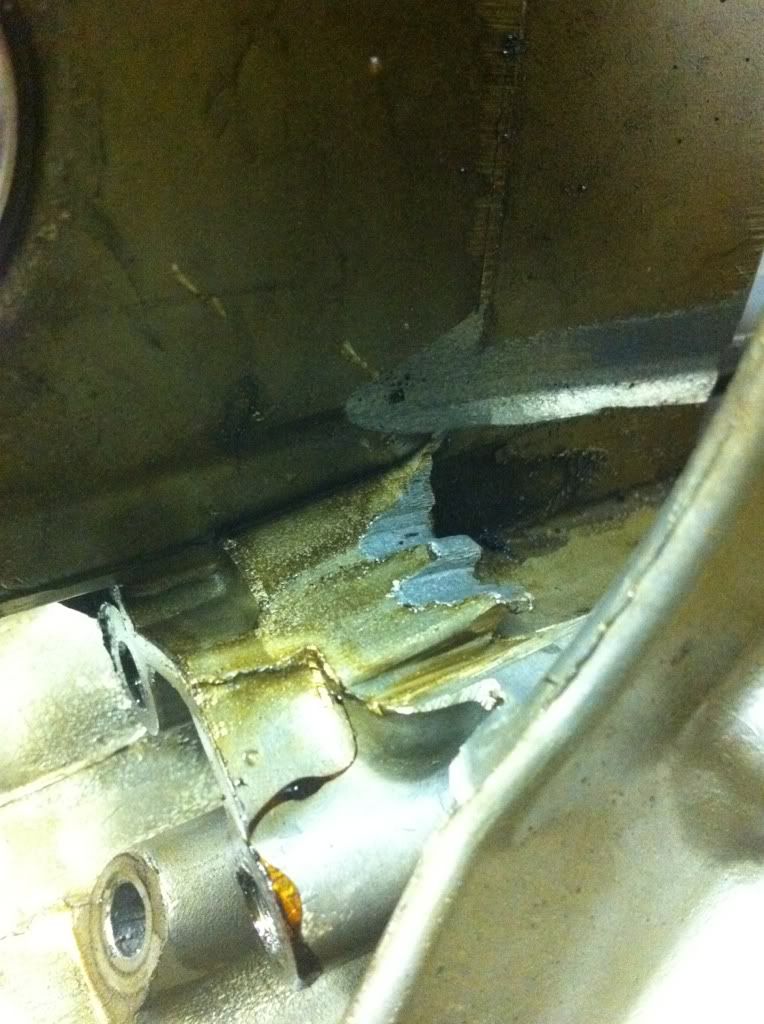
Looks like the cam chain has been slapping around a bit as its chewed out a bit of the case. Not too bad as there is still plenty of depth there to accept the rubber c damper. Anyone confirm my diagnosis?
Lastly, I will be swapping out the crank bearings. Do I put the same ones back in or is there some other technique to it? Here is one of them removed:

I think it says D6B-A STD.
Going to give it the full spar treatment. Kicking off with a kerosene bath and scrub, simple green and pressure washer clean then final scrub in the soda blasting cabinet.
Finishing touches are going to be VHT natural finish engine enamel. Anyone know who stocks it in Australia?
Looks like the cam chain has been slapping around a bit as its chewed out a bit of the case. Not too bad as there is still plenty of depth there to accept the rubber c damper. Anyone confirm my diagnosis?
Lastly, I will be swapping out the crank bearings. Do I put the same ones back in or is there some other technique to it? Here is one of them removed:
I think it says D6B-A STD.
bikeboy
Over 1,000 Posts
neevo said:Going to give it the full spar treatment. Kicking off with a kerosene bath and scrub, simple green and pressure washer clean then final scrub in the soda blasting cabinet.
Finishing touches are going to be VHT natural finish engine enamel. Anyone know who stocks it in Australia?
I'll start with a question for you Ed
") Where do you get your simple green?
Where do you get your simple green?Burson's down here stock VHT, but I don't think I've seen that colour? What's a "natural finish? Is it a clear? I used their "cast aluminum" on other projects and it held up well. The Supercheap stuff is rubbish IMO. POR-15 do a very durable paint as well, but the silver is just too shiny for a stock look.
Lastly, I will be swapping out the crank bearings. Do I put the same ones back in or is there some other technique to it? Here is one of them removed:
Well. To do it 'properly' you need to have the clearances measured, then compared with the colour-code chart in the manual which will give you the bearing size. There's 4 (or5?) to choose from to allow for variations in manufacturing. It can get a bit complicated for those of us that don't do it much, and I've heard of guys having success with just "going for the yellow" bearings. I'm lucky enough to have an engine-rebuilding friend with all the gear and knowledge, so I took advantage of that ;D
Just had one of the locals here go through this with his 400-f, and he ended up with something like 3 sets of yellow, 2 brown (or something ???)
Not sure what you want to do with any of this info, but have fun
cheers
ian
neevo
Over 1,000 Posts
Ian I get the simple green from Bunnings, in the cleaning section. Used to be able to get it in a window cleaning spray bottle but that's not been around for a little while. I get it in a bulk pack at the moment, only about $20.
The finish for the paint is the one you mentioned (cast Alu). Had a look on the VHT distributors website and it looks like its available at all the major car parts places (Auto 1, Repco etc).
Will grab some in the morning. How many cans for the cases? How many coats?
The finish for the paint is the one you mentioned (cast Alu). Had a look on the VHT distributors website and it looks like its available at all the major car parts places (Auto 1, Repco etc).
Will grab some in the morning. How many cans for the cases? How many coats?
bikeboy
Over 1,000 Posts
Thanks Ed, I'll go shopping tomorrow. You should get it done with 1 can, but I'd buy 1 for back-up. Just realized the VHT is a sub- brand of PJ1, which I've just used on my 400 in a satin black. It's even better than the VHT, but harder to source :-(
Cheers
Ian
(probably) Sent from my shed using my iPhone and Tapatalk
Cheers
Ian
(probably) Sent from my shed using my iPhone and Tapatalk
crazypj
Split personality, I fake being smart
Case wear is 'pretty normal' when maintainance hasn't been done and tensioner gets burred so can't adjust.
File off any sharp edges that could fall off in future, dismantle 'horse shoe' part of tensioner, file/grind off the burrs and push pin back in.
'Grooves' don't seem to make any difference when it moves free. (done several over the years)
BTW,if you have a small carbide burr for Dremel, it's not a bad idea to remove some of the casting 'flash' inside case
neevo
Over 1,000 Posts
Muffler bracket has been modified to clear the swingarm as the plan was longer shocks from the beginning so no issues there.
The options I have are Hagons or these. I would prefer new better handling shocks but I also love the look of the reservoir. New with a reservoir is a bit pricey for my budget.
The options I have are Hagons or these. I would prefer new better handling shocks but I also love the look of the reservoir. New with a reservoir is a bit pricey for my budget.
neevo
Over 1,000 Posts
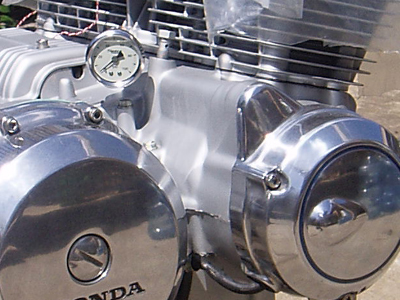
Got me some paint today ready to do the cases and rest of motor. Barrels and head fins will be black, the rest silver.
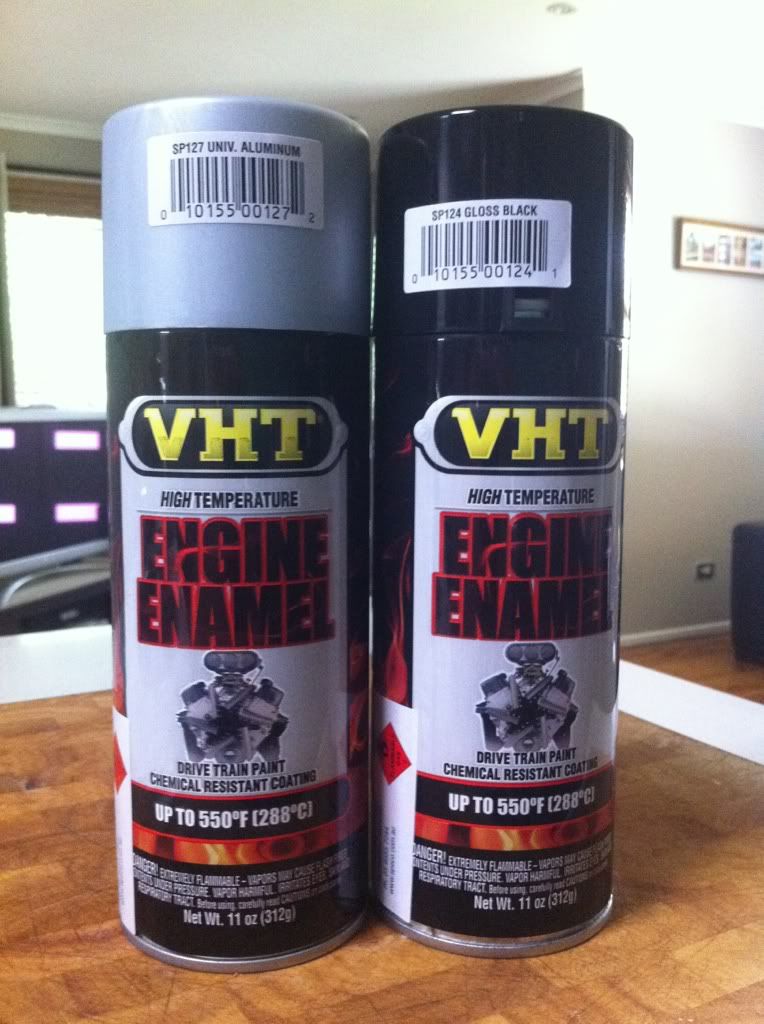
Waiting on my blast cabinet gloves so I can finish the cleanup.
Here are my switch blocks. The actions on some of the parts are pretty rough. Hoping a good clean will get them working like new. Some of the buttons however are well past it. Can you buy these on their own or am I looking at throwing these in the bin?
Left is not too bad:
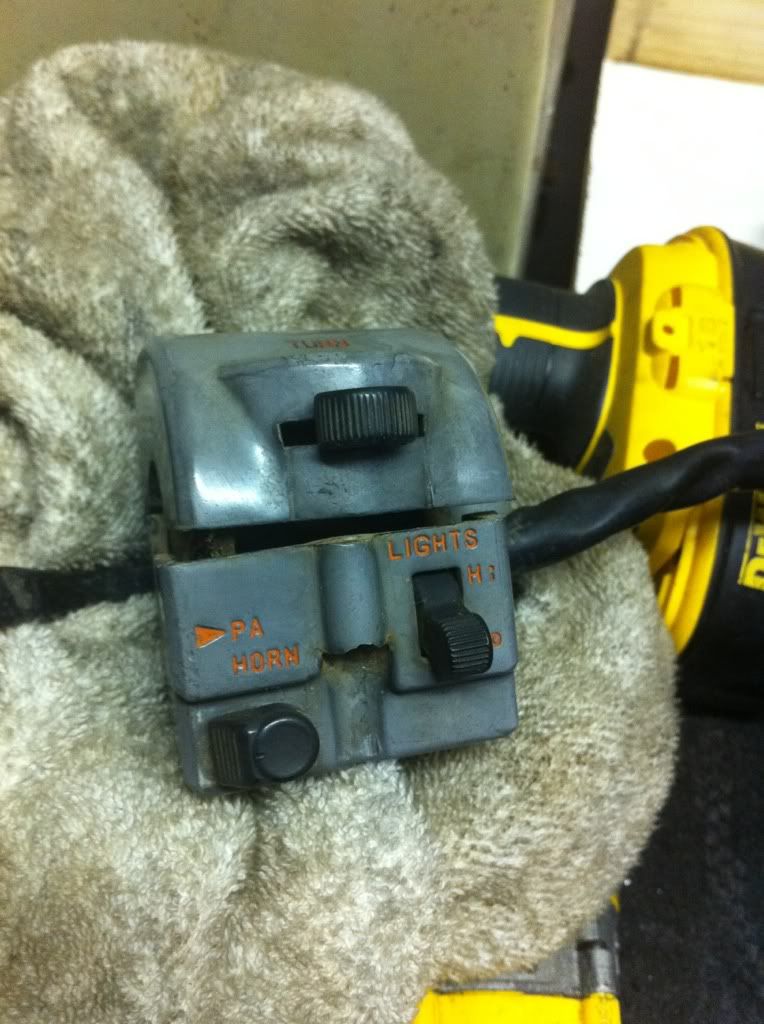
Right has damage on all the switches:
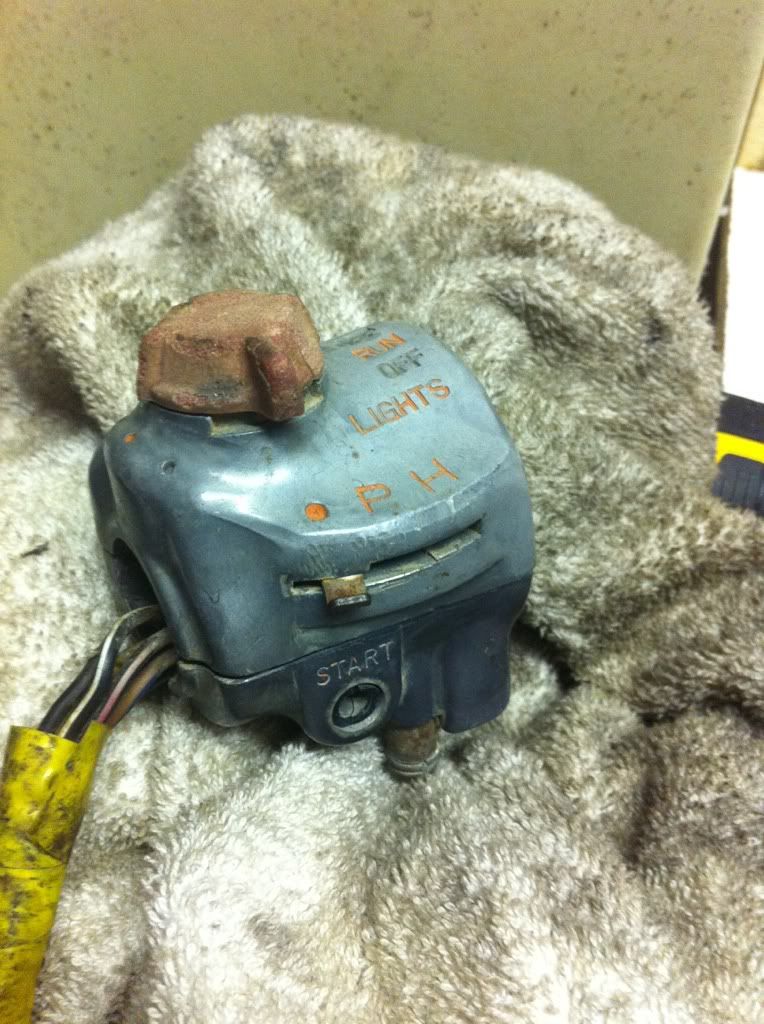
Plan was to polish them and repaint letters.
Edit:
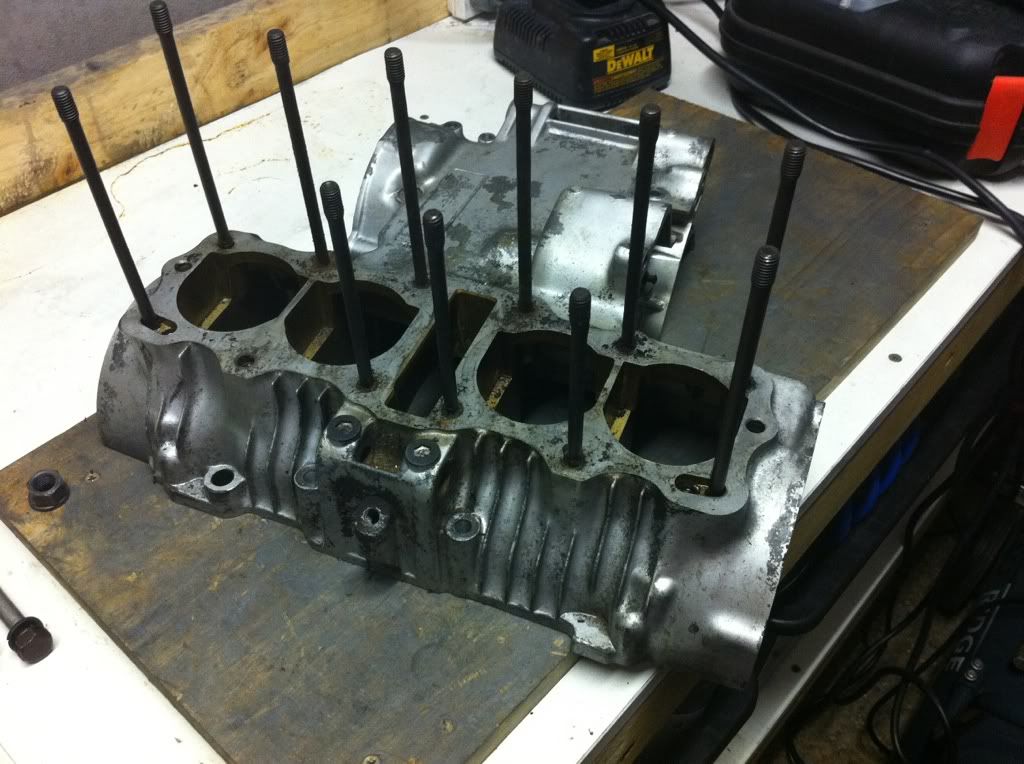
Got stuck into the cylinder studs. Double nutting them worked until the last 3. So I bent the studs over hoping to twist them out that way but they are still not moving and I am worried I will fatigue the metal and snap them. Anyone got some pointers for me?

Waiting on my blast cabinet gloves so I can finish the cleanup.
Here are my switch blocks. The actions on some of the parts are pretty rough. Hoping a good clean will get them working like new. Some of the buttons however are well past it. Can you buy these on their own or am I looking at throwing these in the bin?
Left is not too bad:
Right has damage on all the switches:
Plan was to polish them and repaint letters.
Edit:
Got stuck into the cylinder studs. Double nutting them worked until the last 3. So I bent the studs over hoping to twist them out that way but they are still not moving and I am worried I will fatigue the metal and snap them. Anyone got some pointers for me?
crazypj
Split personality, I fake being smart
Bending the studs wasn't a good move.
Best bet now is to clean around them as much as possible, apply release oil and heat case.
Allow to cool and do it all over.
Hopefully the heating/cooling will allow release oil to creep down the corrosion
I would straighten them out, double nut and tap on the tops while trying to unscrew them, use a combination wrench on lower nut. (or two so you can keep nuts locked together)
May need couple of tries over a few days, you really don't want to snap or cut them off
rub some hand soap on the case, if it turns brown, your getting too hot.
You'll probably need a drill press to get to the one you snapped off, at least 400 cases are relatively easy to do as they are parallel base/split
BTW, you can full dismantle the switches to polish the alloy


