
We noticed you are blocking ads. DO THE TON only works with community supporters. Most are active members of the site with small businesses. Please consider disabling your ad blocking tool and checking out the businesses that help keep our site up and free.
You are using an out of date browser. It may not display this or other websites correctly.
You should upgrade or use an alternative browser.
You should upgrade or use an alternative browser.
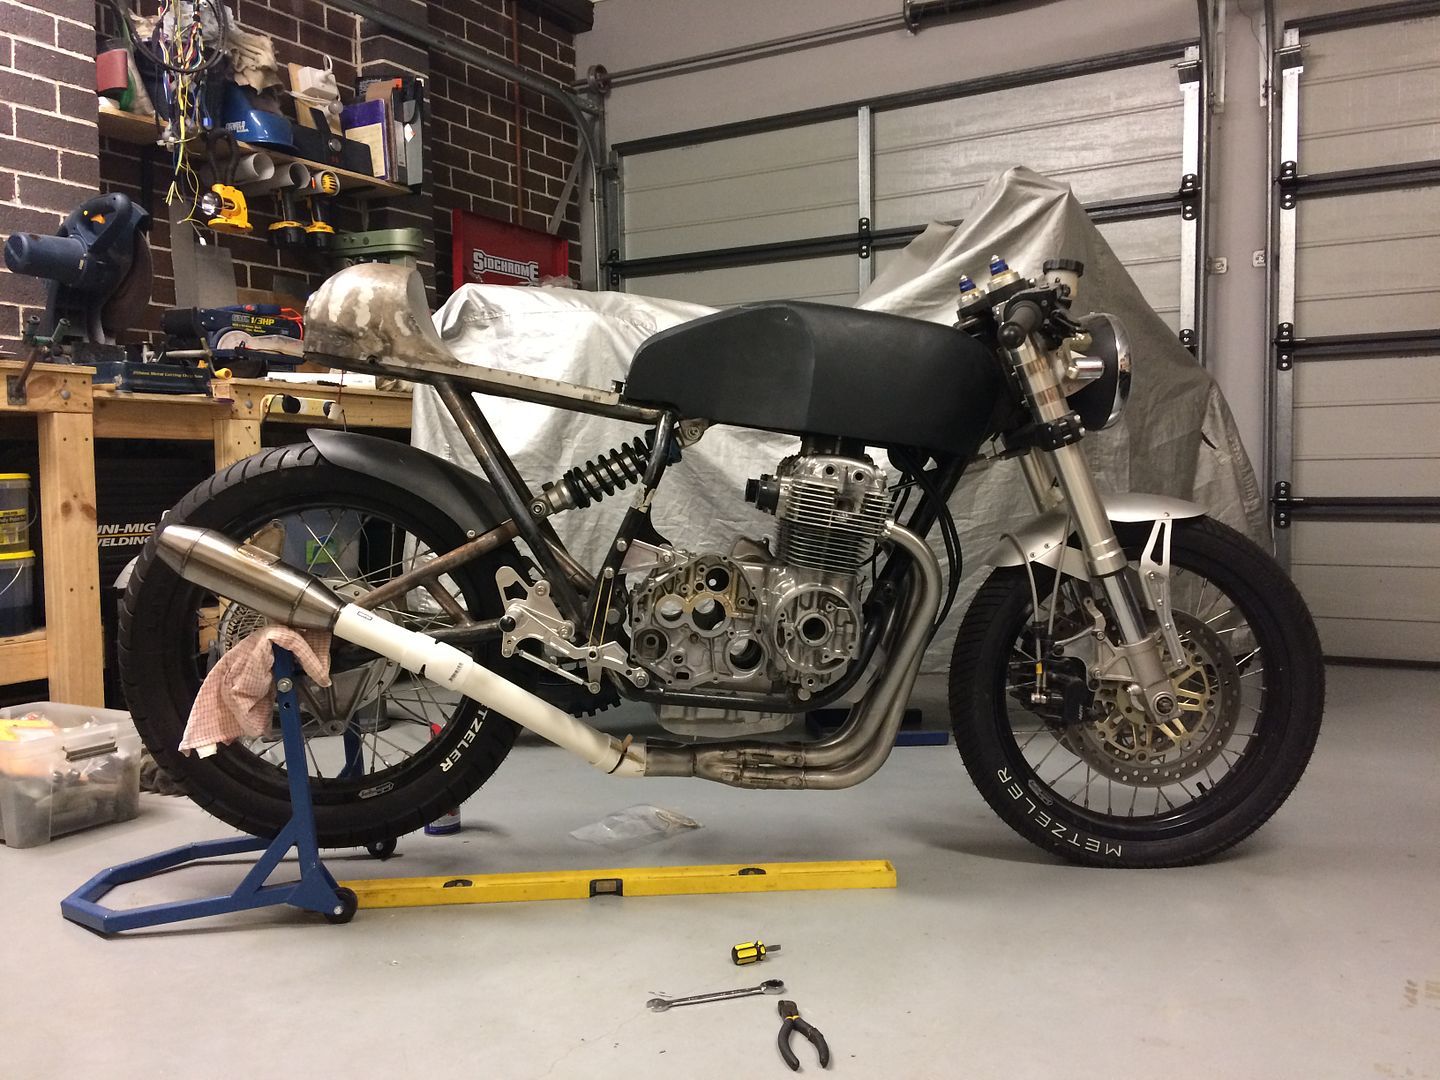
Down under, an idiot and a 400F
- Thread starter neevo
- Start date
neevo
Over 1,000 Posts
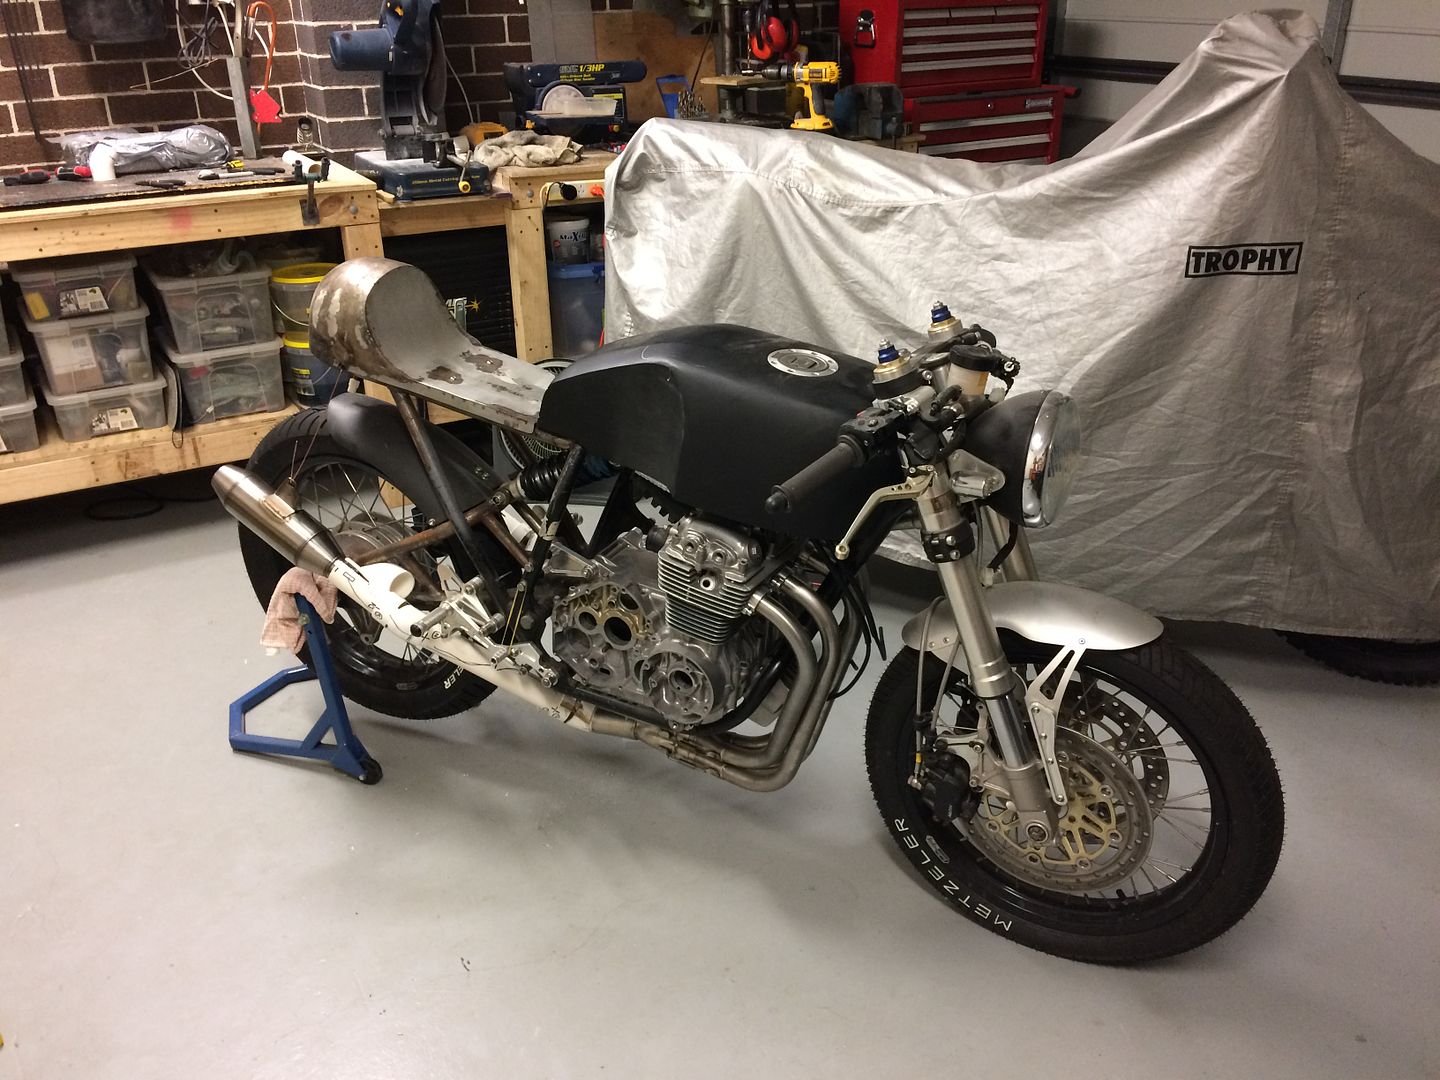
Thanks champ. It's been a long journey but I'm actually motivated to get back at it and plough on with the build.
Luckily all my side projects are done now and so finger needs to be pulled from my own backside and get busy with the building.
Hope to have the solution to having the exhaust finished off by end of Jan. This includes:
* exhaust hangers for my mufflers including a mounting solution to the frame too
* mid pipe templates done in PVC pipe ready for tube bender
* while kit and kaboodle shipped off to my buddy Darren for welding up
I promise to all those that have followed along and to those few that have been instrumental in getting me to this stage, I will give you consistent updates this year (notice I'm not making promises of getting it done!).
neevo
Over 1,000 Posts
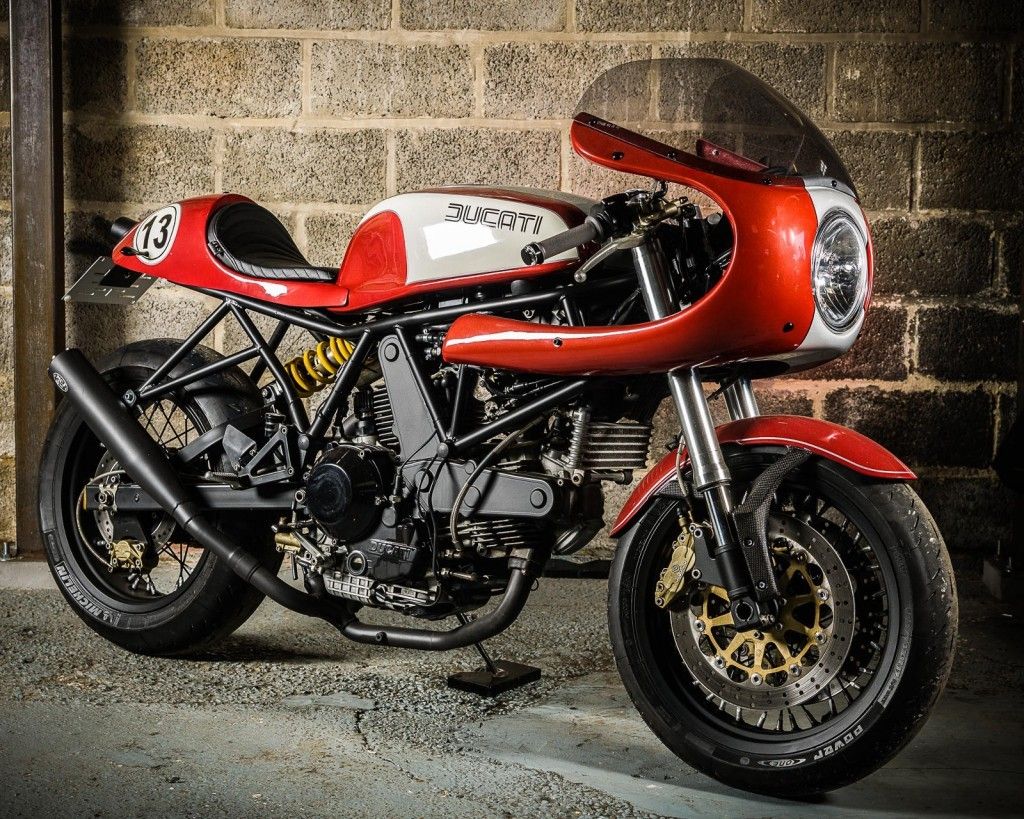
OK brains trust. I need some exhaust hanger ideas. Anyone have any ideas?
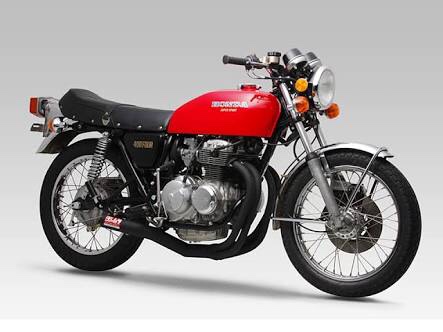
Looking to mount the exhausts twin style like a Ducati facing upwards just like this:
This means I need a sturdy way to attach the hangers to the frame, plus will need some hangers that will offset the mufflers to clear the rear wheel and swing arm.
Any thoughts that people can share? Pics of setups would be appreciated too.
This is my current idea:
But with a kink in the hanger to clear the swing arm like this:
stroker crazy
crazy as a fox
neevo said:This is my current idea …But with a kink in the hanger to clear the swing arm
That would be ideal!
Crazy
neevo
Over 1,000 Posts
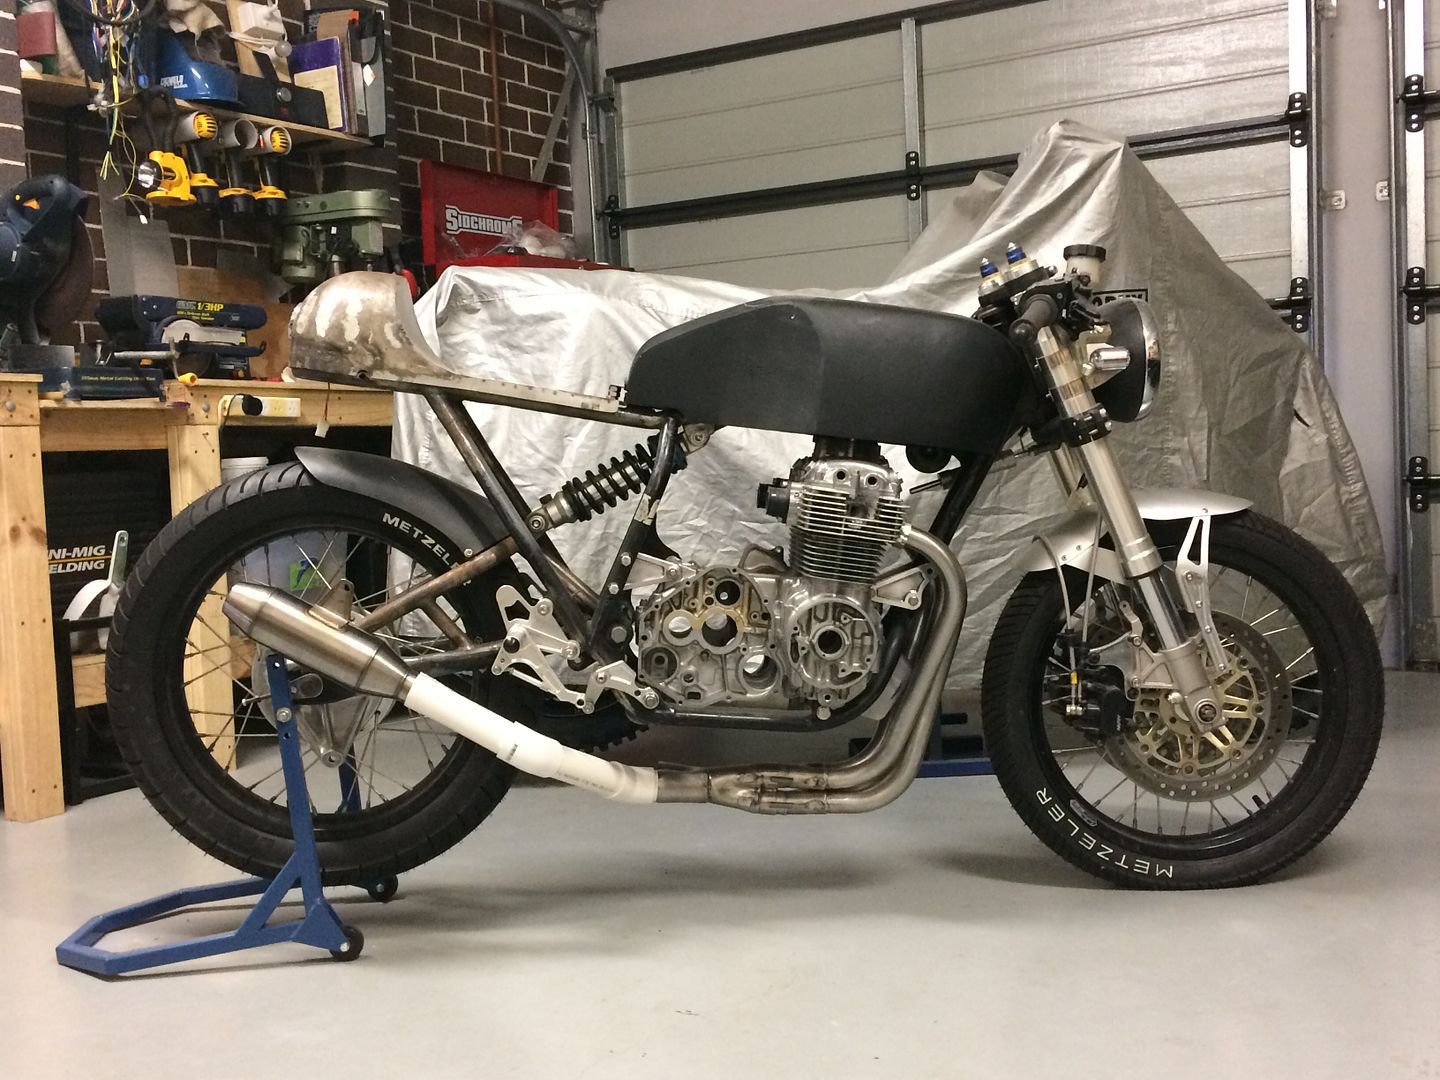
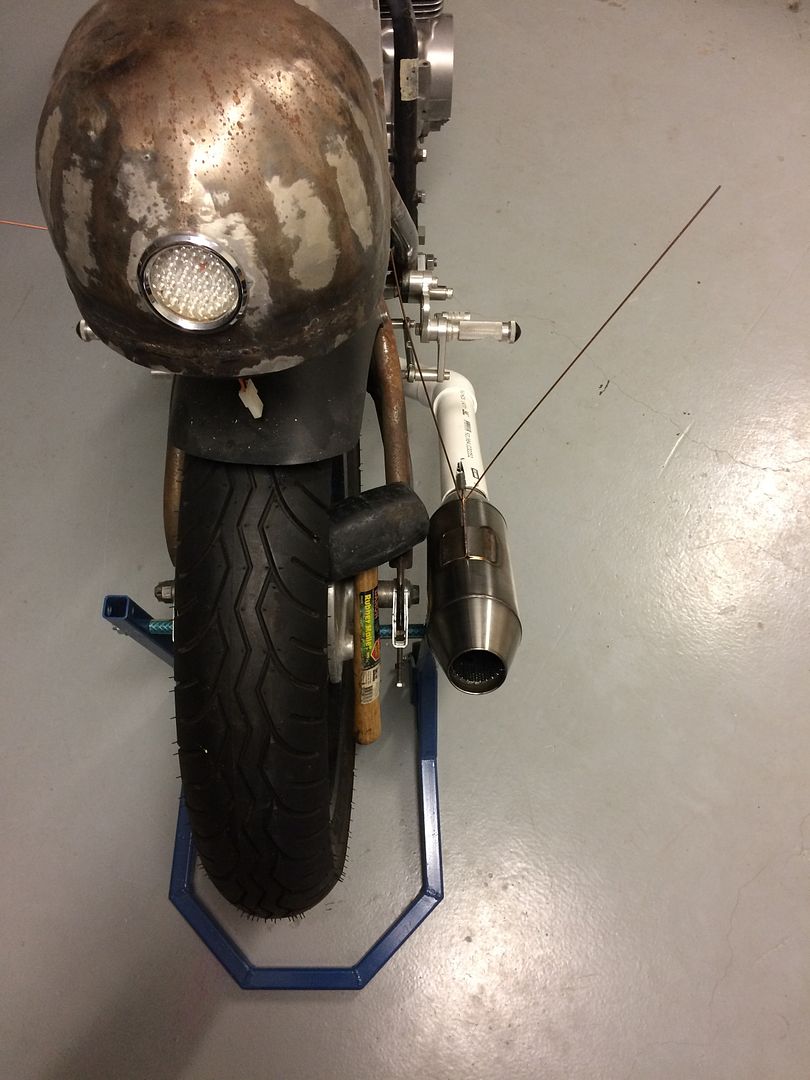
Thought I would try some secondary exhaust options today as the missus and sister were watching a film I had no interest in.
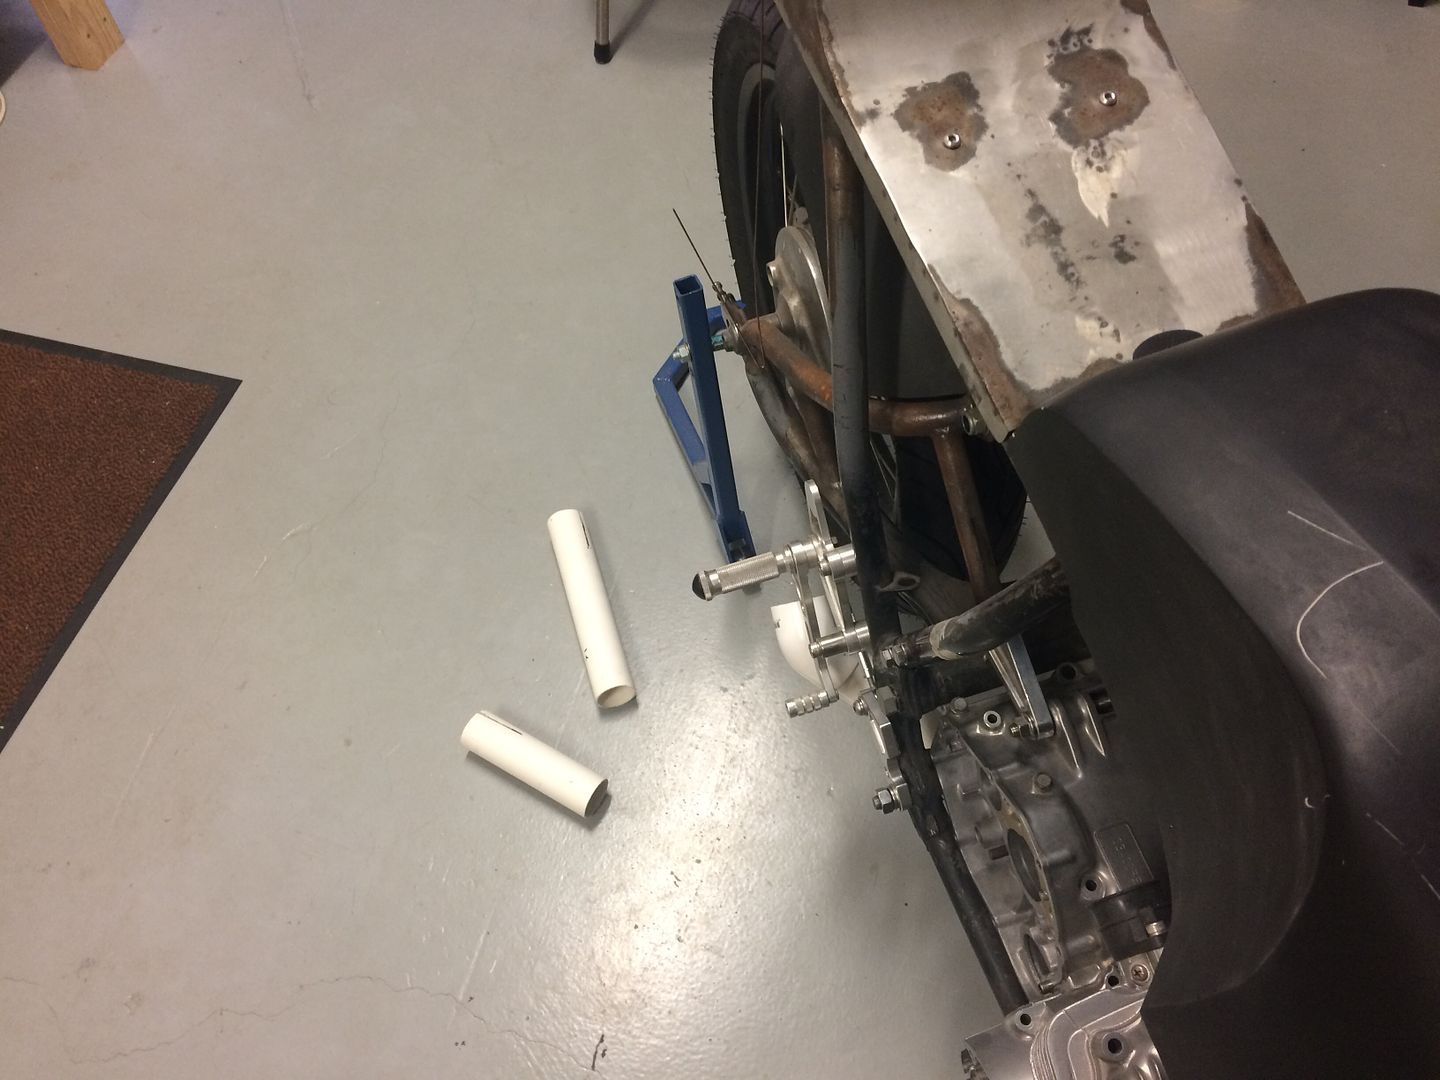
Cracked out the PVC pipe to make some templates and try a couple of different options (short and long).
Option 1:
Option 2:
I prefer option 2 for a few reasons.
A. The additional length of exhaust
B. I prefer the length and where the mufflers finish as it matches the arc of the rear wheel better
C. Both options I like the angle of the sweep upwards as it's the same angle again from the frame tubes. Eg upright frame tube, angled frame tube and then exhausts all appear roughly the same angle
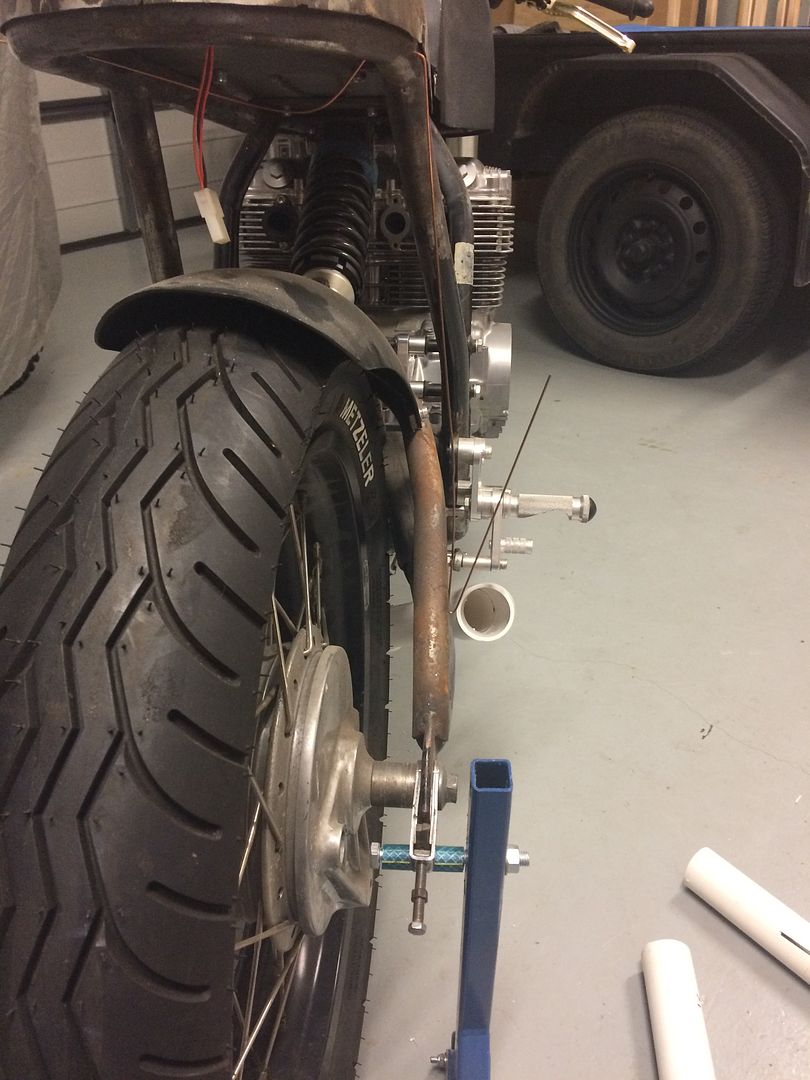
So I pushed on with the longer one and made sure I had a good view from the rear (will look great with another one on the other side):
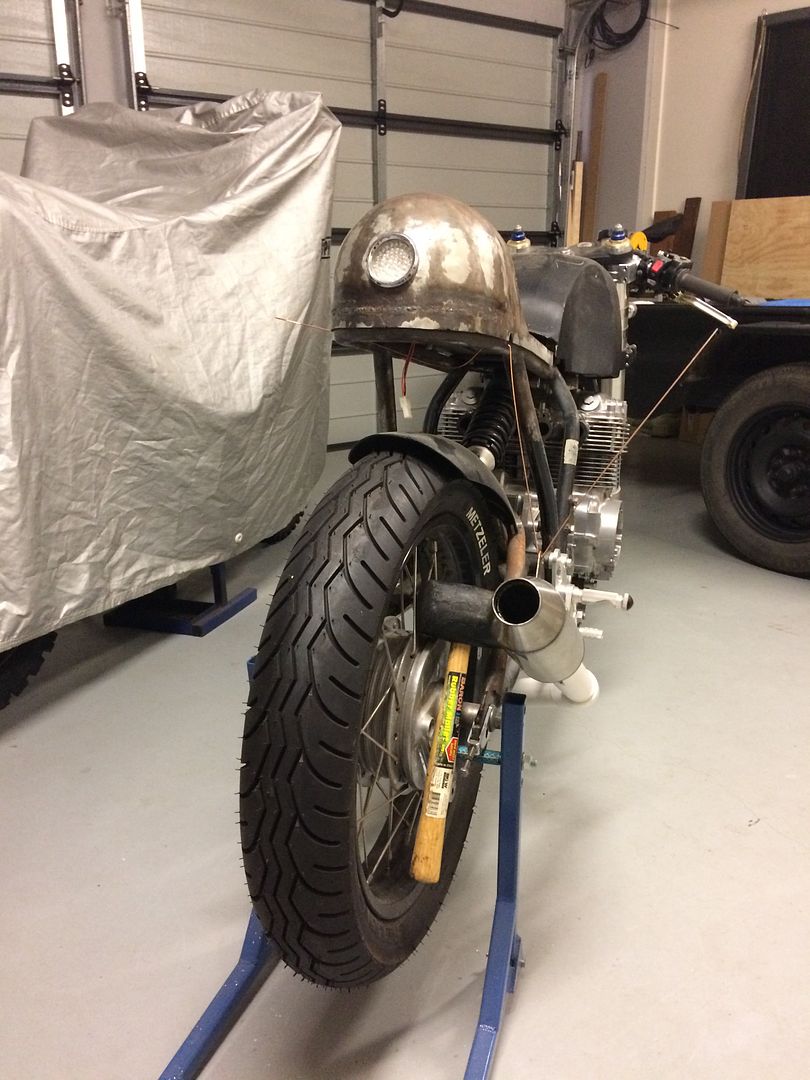
Then I checked the clearance by attaching all the rear brake setup and checking clearance to the swingarm. Looks to be ok as I have about 1/2 - 3/4" clearance to the swingarm:
Cracked out the PVC pipe to make some templates and try a couple of different options (short and long).
Option 1:
Option 2:
I prefer option 2 for a few reasons.
A. The additional length of exhaust
B. I prefer the length and where the mufflers finish as it matches the arc of the rear wheel better
C. Both options I like the angle of the sweep upwards as it's the same angle again from the frame tubes. Eg upright frame tube, angled frame tube and then exhausts all appear roughly the same angle
So I pushed on with the longer one and made sure I had a good view from the rear (will look great with another one on the other side):
Then I checked the clearance by attaching all the rear brake setup and checking clearance to the swingarm. Looks to be ok as I have about 1/2 - 3/4" clearance to the swingarm:
stroker crazy
crazy as a fox
Agreed on the longer one …
Crazy
Crazy
Tune-A-Fish
BOTM LOSER Proudly Deplorable
did you try plugging it right into the 45? Hanging it seems to become an issue and the long ass rod from frame to can may be unstable.
Tune's right that the bend will likely drag going round corners. I'd think about pulling the collector up tighter below the motor - a little cutting and welding required and then pull those bends in tighter to the frame with less acute angles.
You could also play with no up angle on the muffler and see if it can be tucked in tight under the swingarm.
You could also play with no up angle on the muffler and see if it can be tucked in tight under the swingarm.
neevo
Over 1,000 Posts
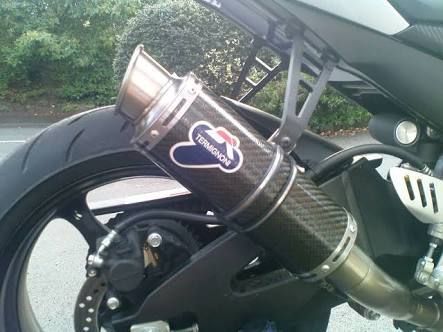
You have me worried about the collector clearance so I checked a few images on google and came up with this Yoshimura system:
Do you think I'll have clearance issues (bear in mind the oil pan isn't on the bike but the collectors hug that pretty tight) as my setup is almost identical to this.
Do you think I'll have clearance issues (bear in mind the oil pan isn't on the bike but the collectors hug that pretty tight) as my setup is almost identical to this.
neevo
Over 1,000 Posts
With concerns of exhaust pipe scraping on turns I have relooked at the mid pipe. I think I can redo some of the angles to get a much tighter match to the frame and either have the muffler pointing slightly outwards from each other, or adding a third bend in to get the exhausts tighter to the swingarm without really compromising turn angle and items scraping the floor:

Also as I think about solutions to attach the mufflers to the frame, I'm beginning to think that this solution, where the muffler hangers are welded to the frame, is likely to be the cleanest and strongest solution:
Also as I think about solutions to attach the mufflers to the frame, I'm beginning to think that this solution, where the muffler hangers are welded to the frame, is likely to be the cleanest and strongest solution:
Tune-A-Fish
BOTM LOSER Proudly Deplorable
It creates a lot of work to custom fit a header, but what we are concerned with is the gap shown below.
If you have the ability to bring the header (chop cut weld) straight up to almost tight to the frame you would have a much easier task getting the rest to a tight fitment... I like a no less than 4" radius in any bend on exhaust.
If you can't do it you'll have to make due, but with some creative mandrel bends you can wiggle it into position.
Most important... make it fun
Attachments
Tune-A-Fish© said:It creates a lot of work to custom fit a header, but what we are concerned with is the gap shown below.
The sump for the engine will occupy that space when it is assembled, so the pipe can't be much higher than it is directly under the bike.
Tune-A-Fish
BOTM LOSER Proudly Deplorable
jpmobius said:The sump for the engine will occupy that space when it is assembled, so the pipe can't be much higher than it is directly under the bike.
Ahh yes, the sump on the 400 does poke out the bottom a good ways...
Never mind

Sent from my iPhone using DO THE TON
neevo
Over 1,000 Posts
jpmobius said:The sump for the engine will occupy that space when it is assembled, so the pipe can't be much higher than it is directly under the bike.
Correct. The header hugs the sump pretty tight. I will try and get the sump back on so you can see the clearance.
stroker crazy
crazy as a fox
Glad to see that you're on the ball so early in the year!
Crazy
Crazy
neevo
Over 1,000 Posts
What better way to see in the new year than to get in the shed and get roasted doing some bike work.
First on the agenda was putting the copper washers on the manual cam chain tensioner. No idea why I hadn't done this earlier as I've been sitting on the copper washers for ages. I actually need to grab some M5 washers for the smaller bolt but I tested the concept with an M6:
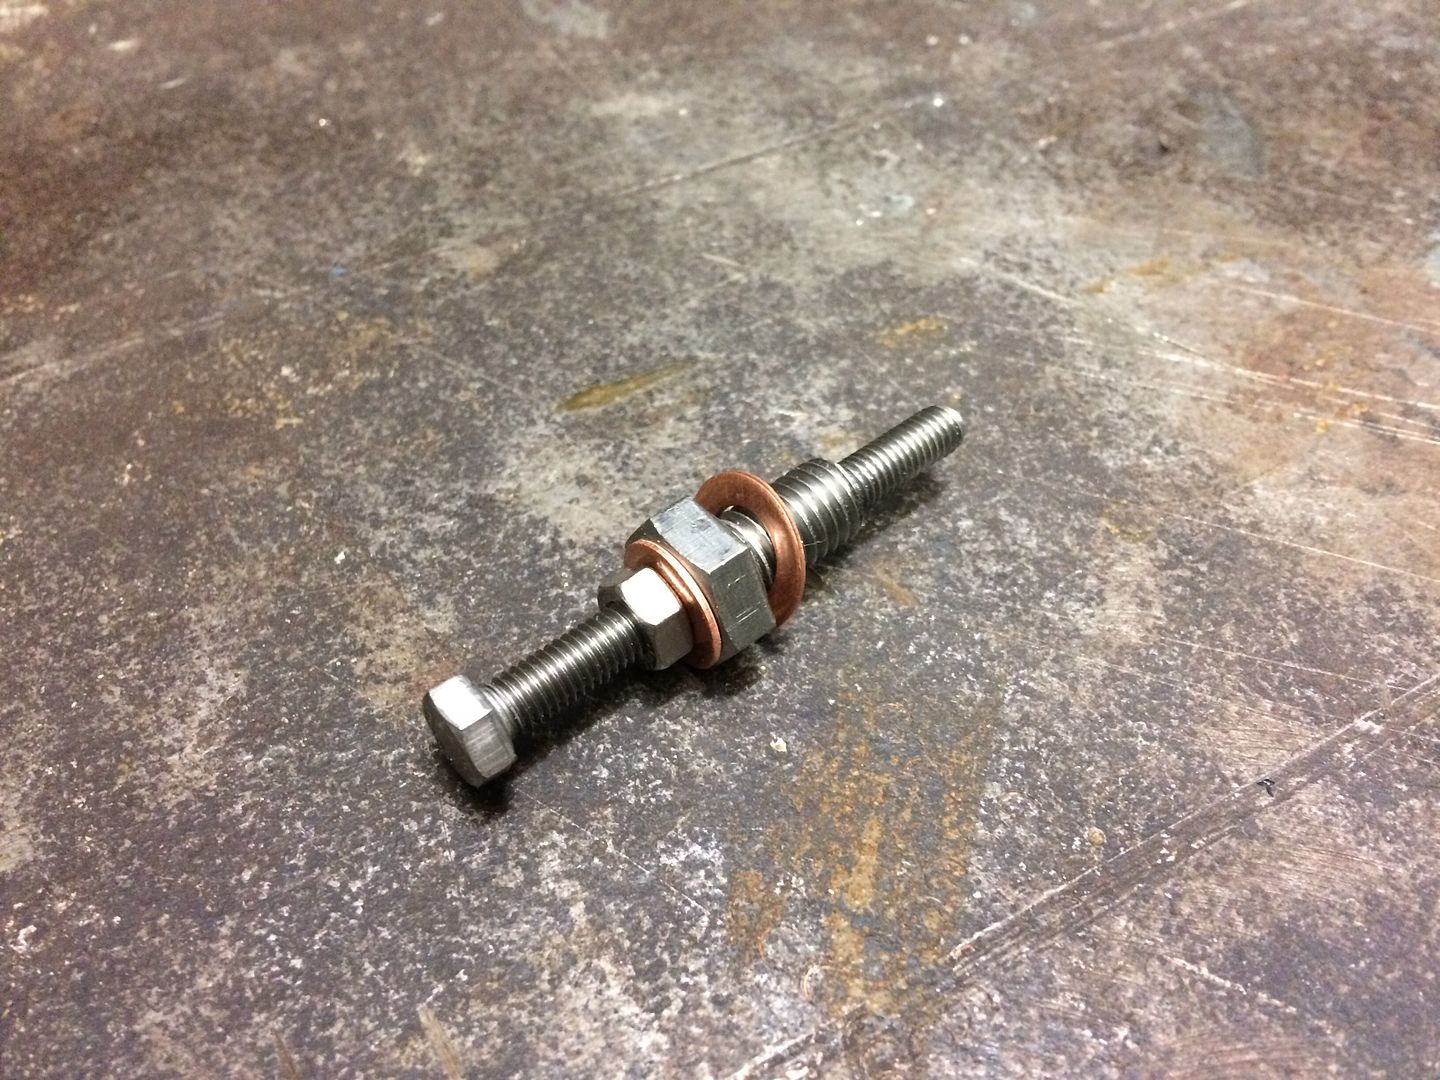
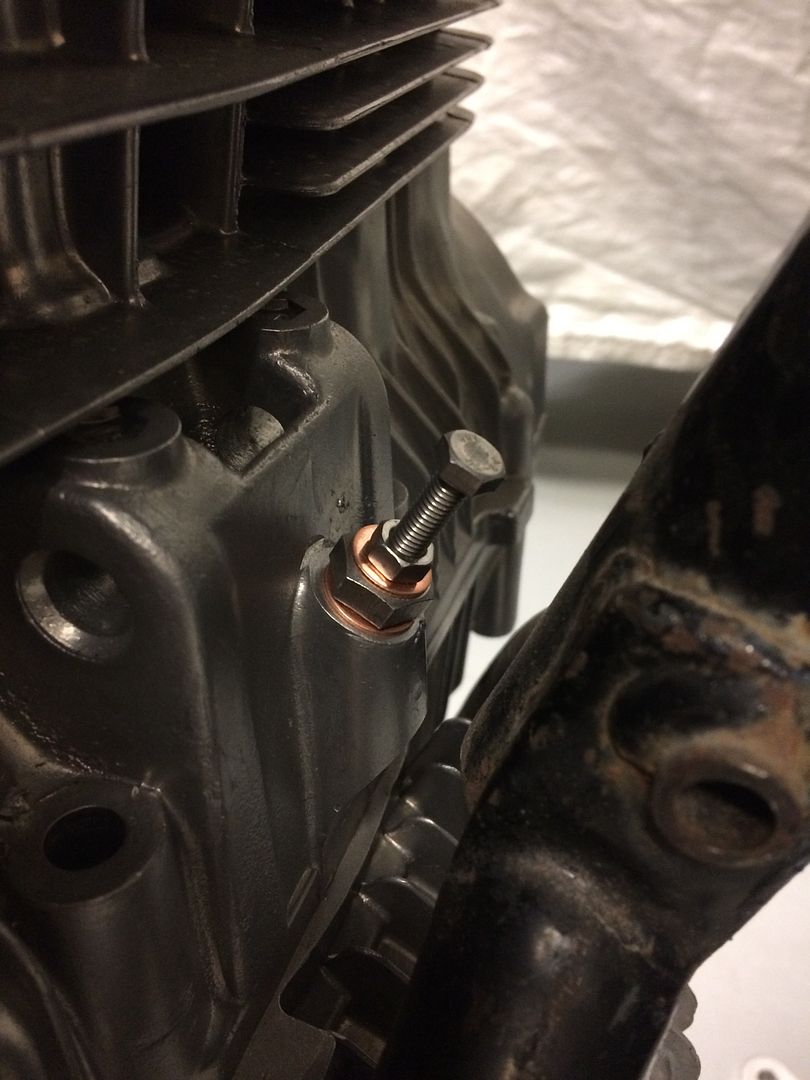
No idea if it will hold the oil in, but keep your fingers crossed. I still need to fashion a plug for the front bolt hole, thinking an M10 x 10mm with another copper washer and some sealer Loctite (hopefully red would stand up to the heat of the motor).
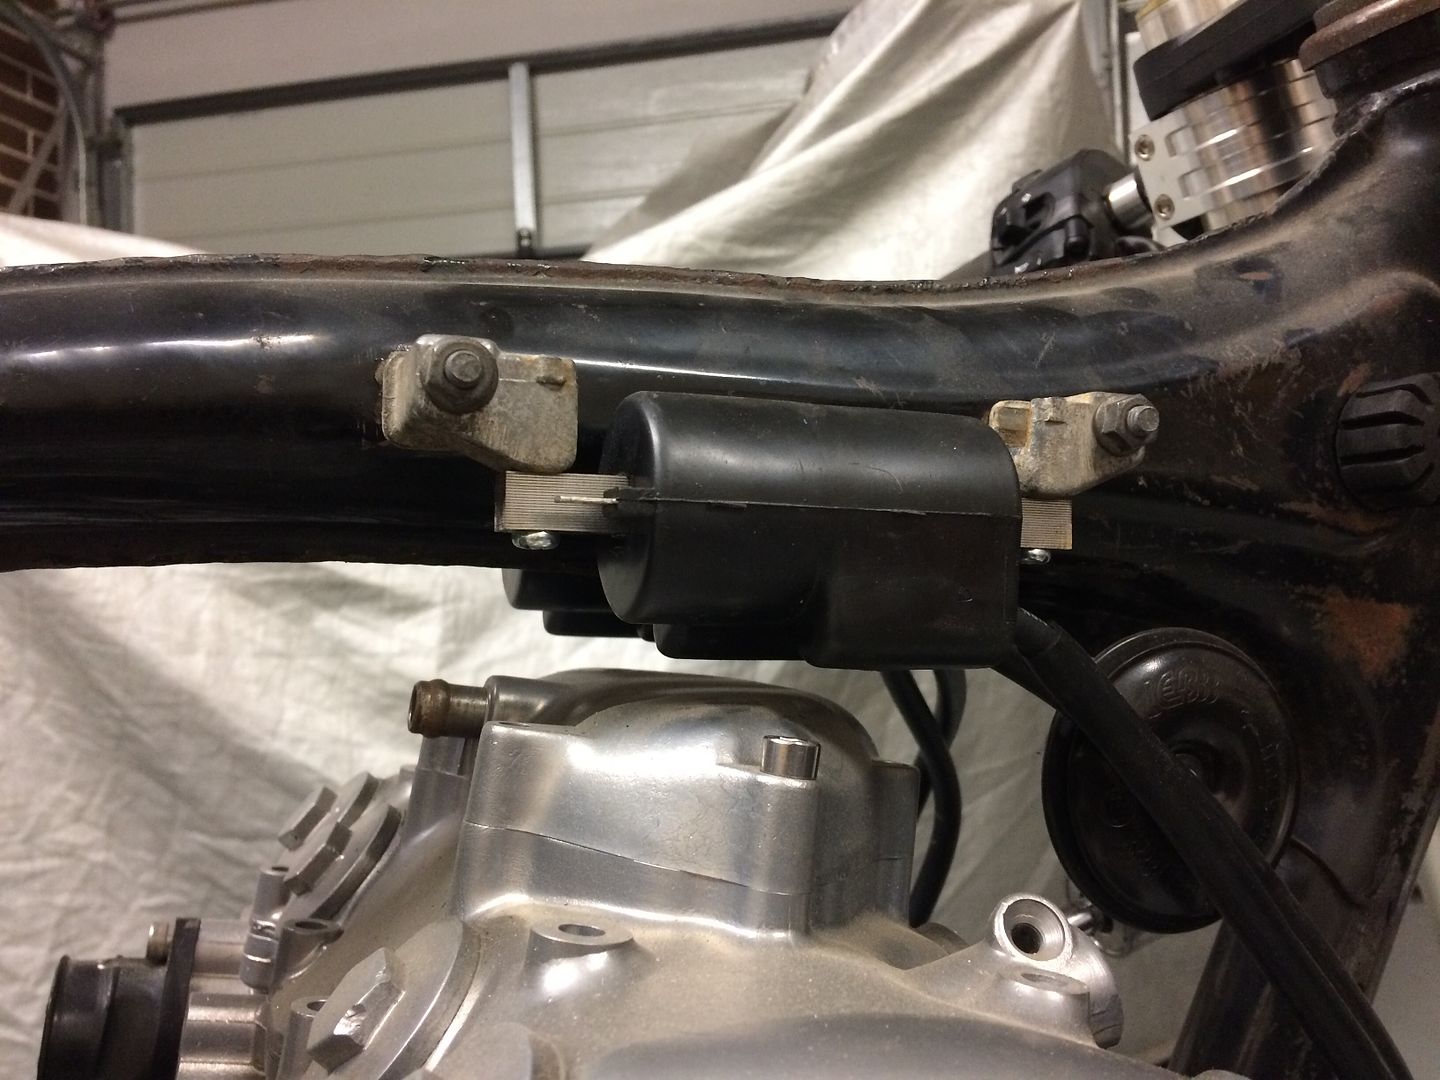
Second on the agenda was seeing if I could mount my coils. Because of the fuel line pickups on the tank, the stock setup hit the coils and so I needed another option:
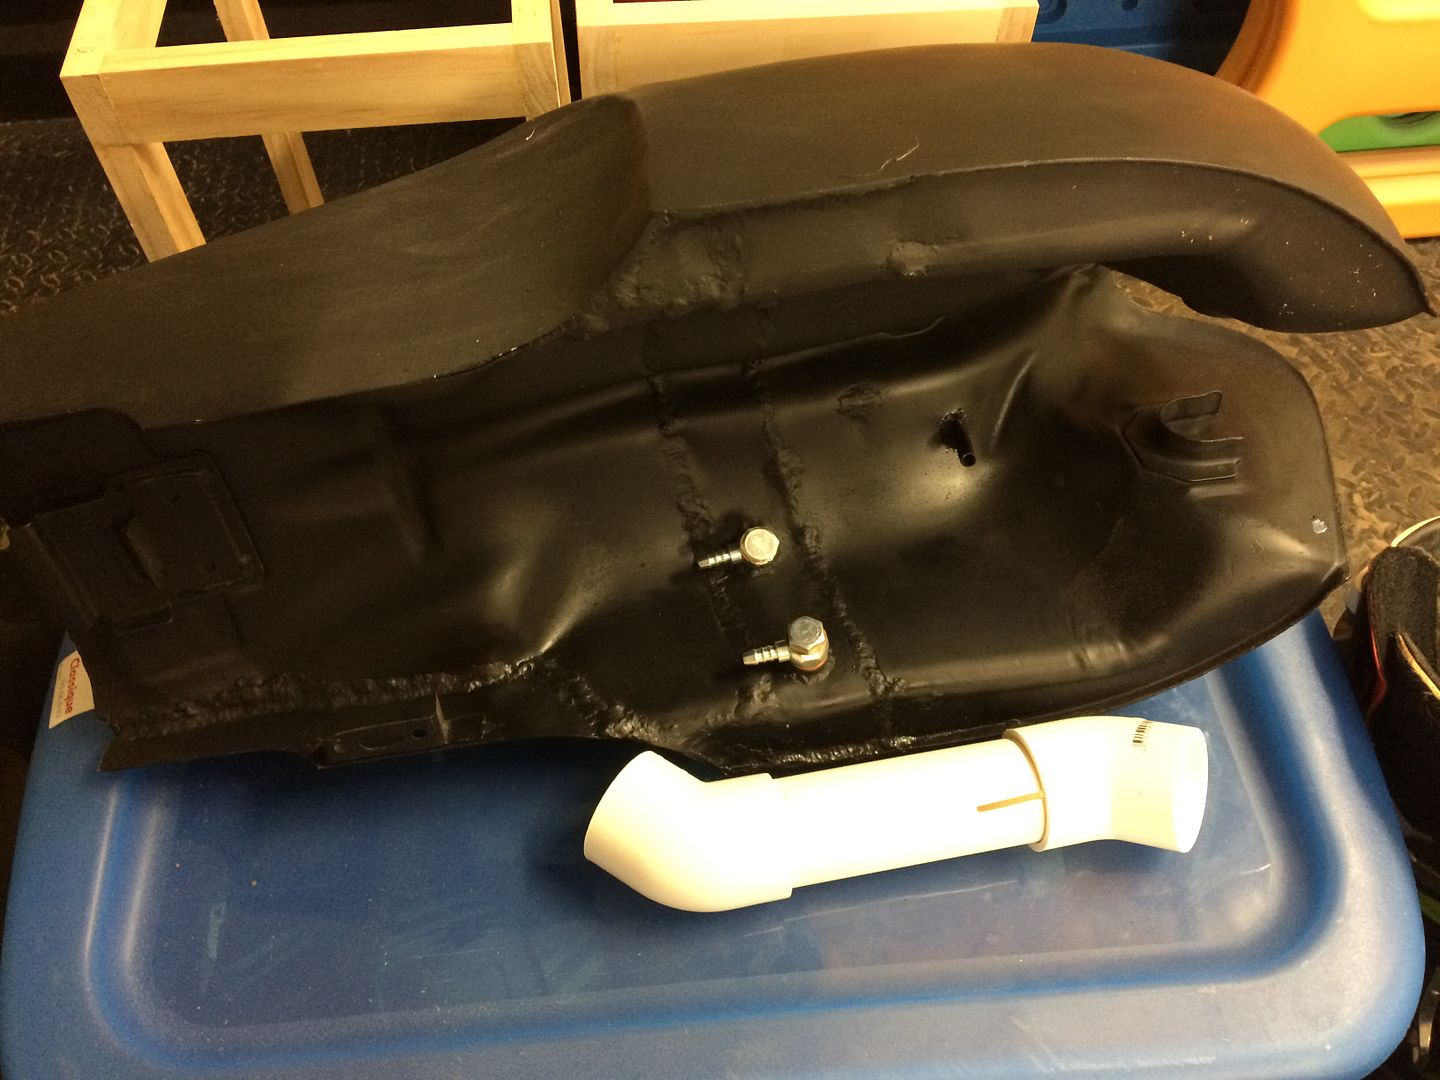
My solution was to mount the coils on the underside of the coil brackets. It has the coils a bit close to the top of the motor so I'm thinking I will fabricate some heat shields to go in between to stop the coils cooking too much:
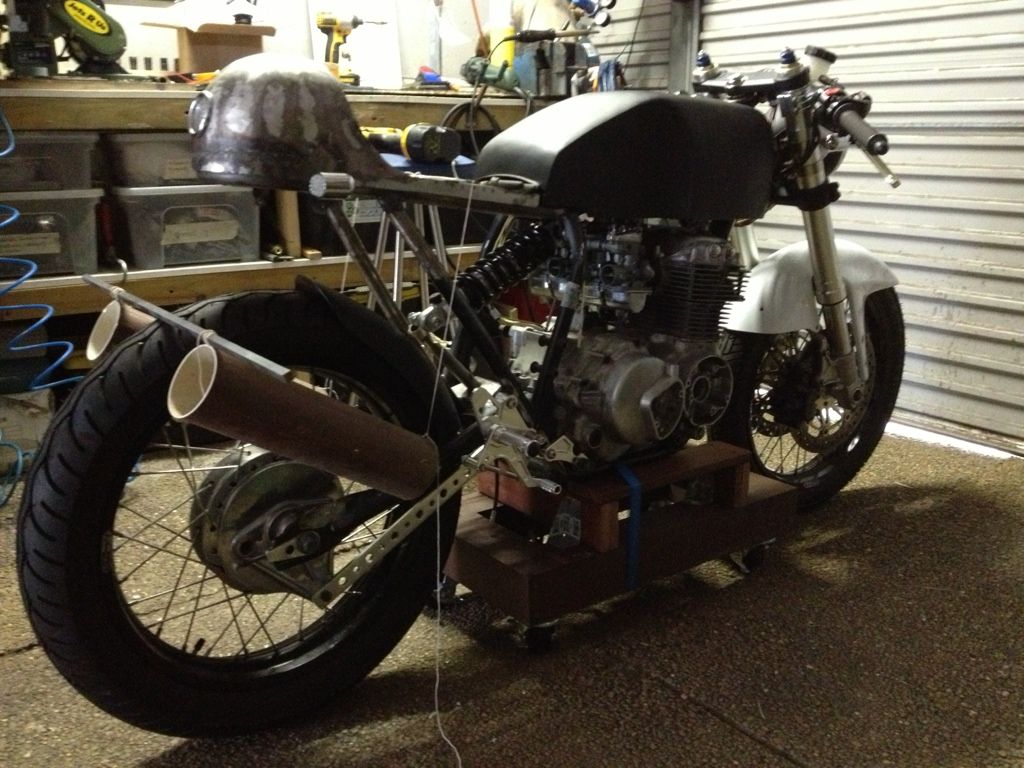
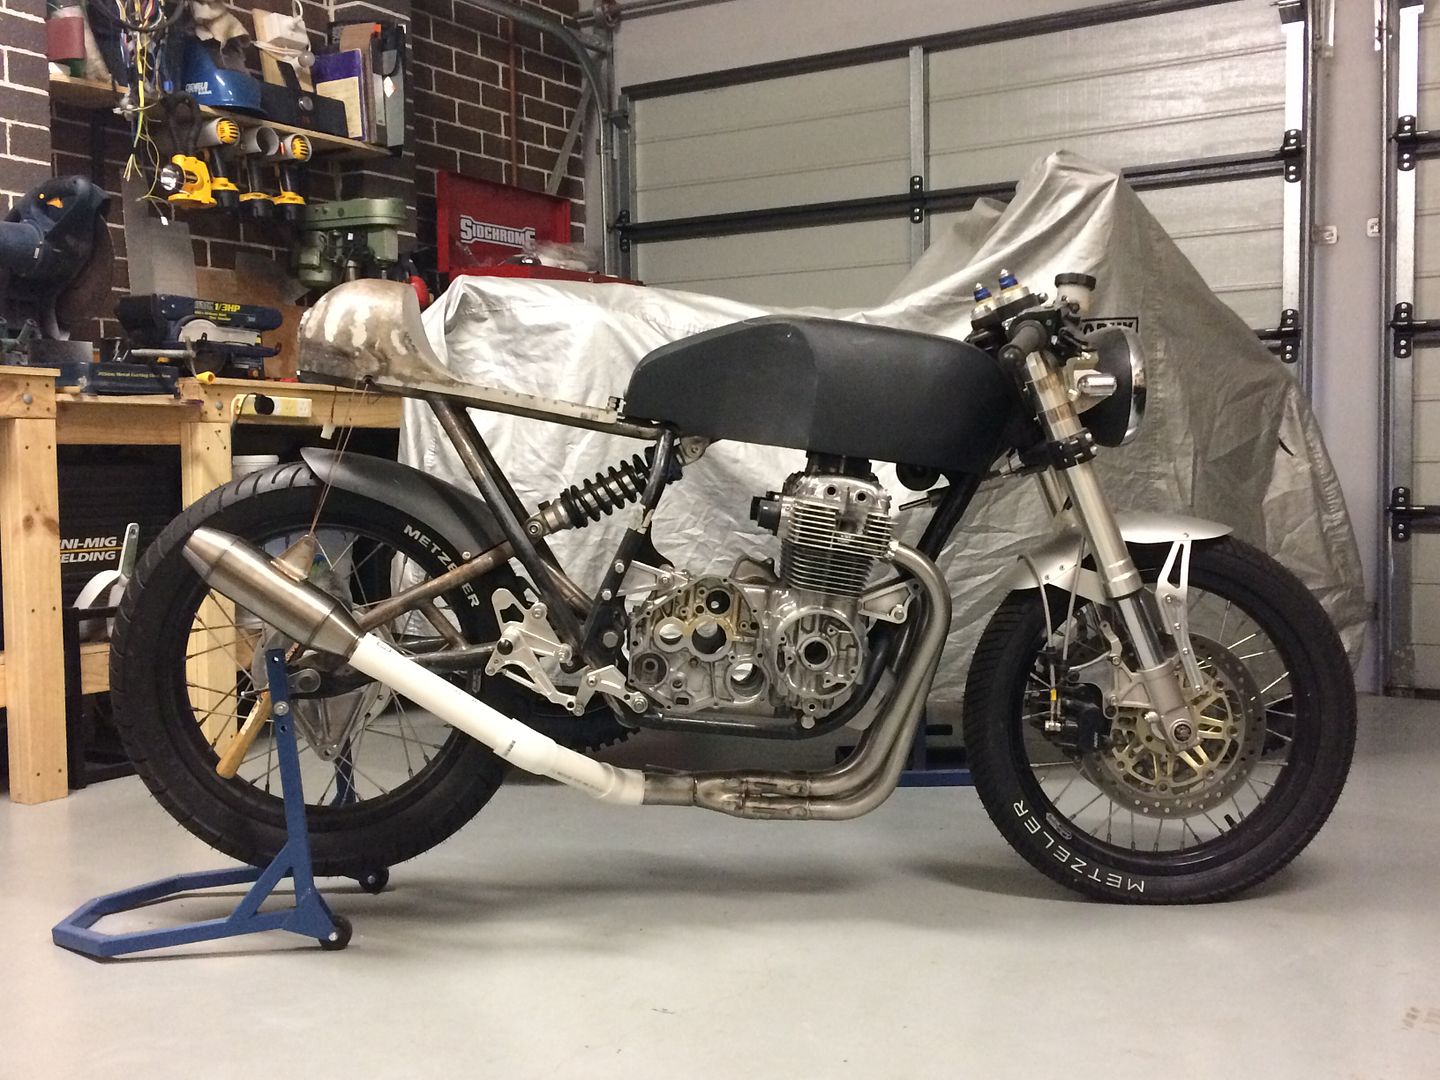
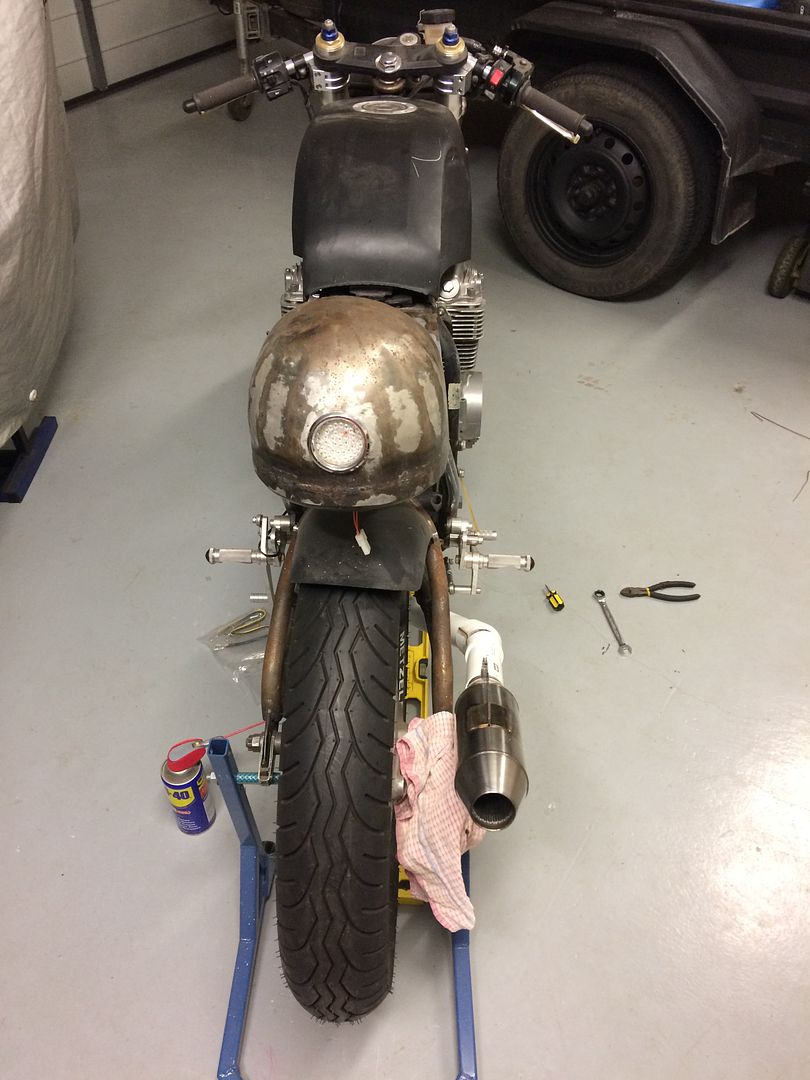
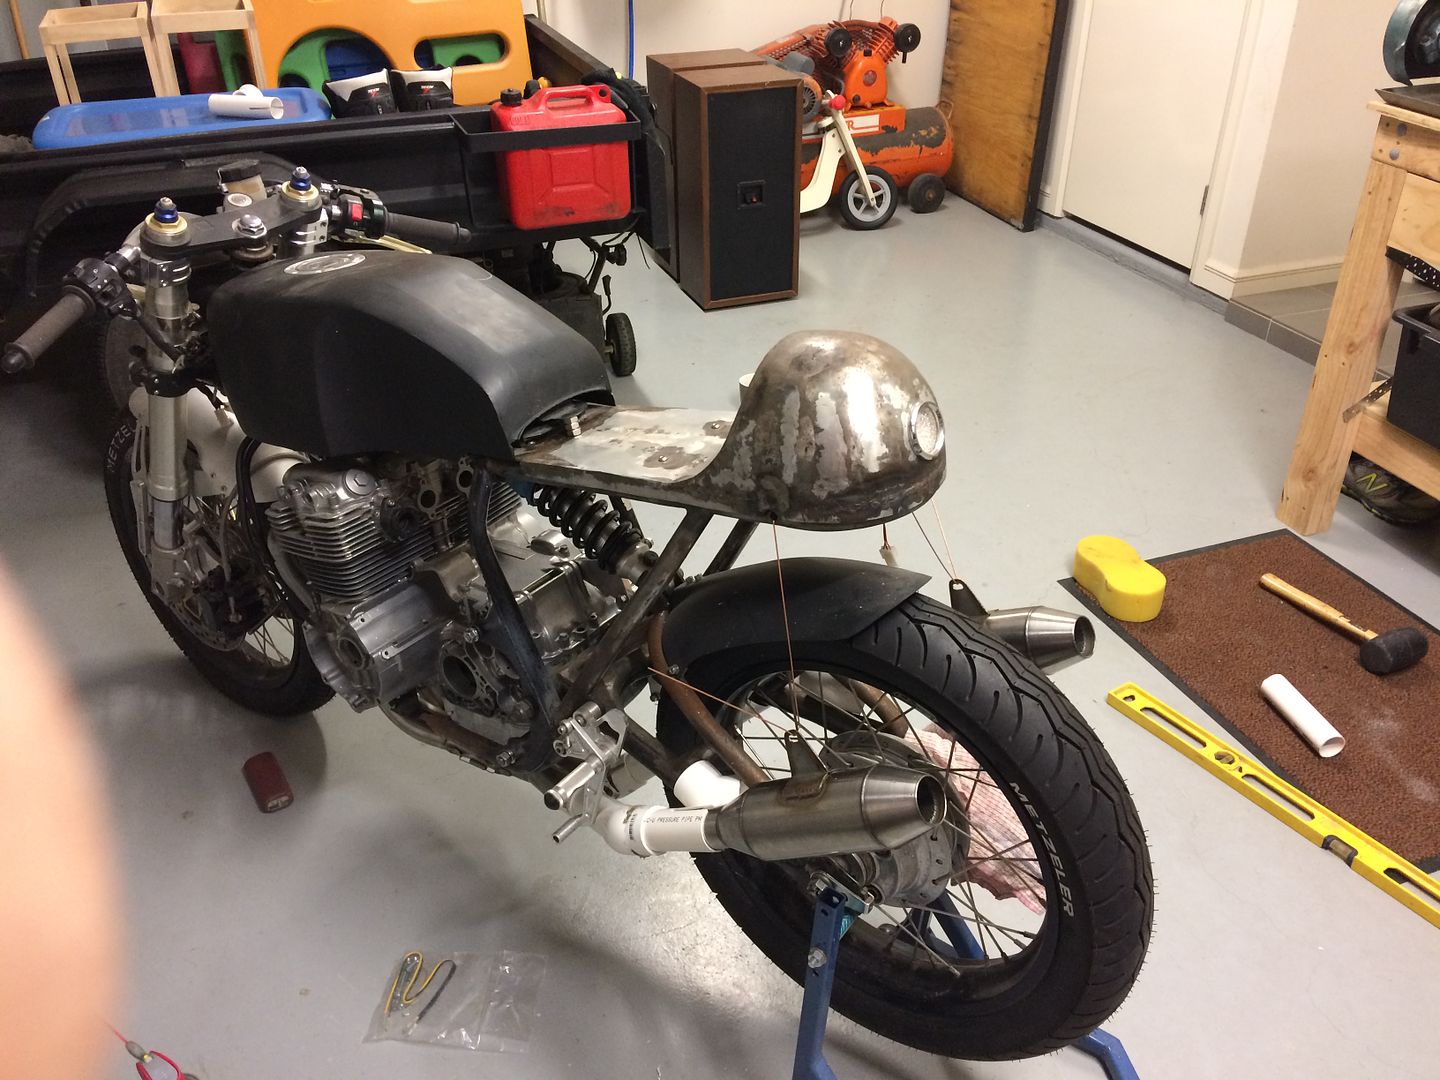
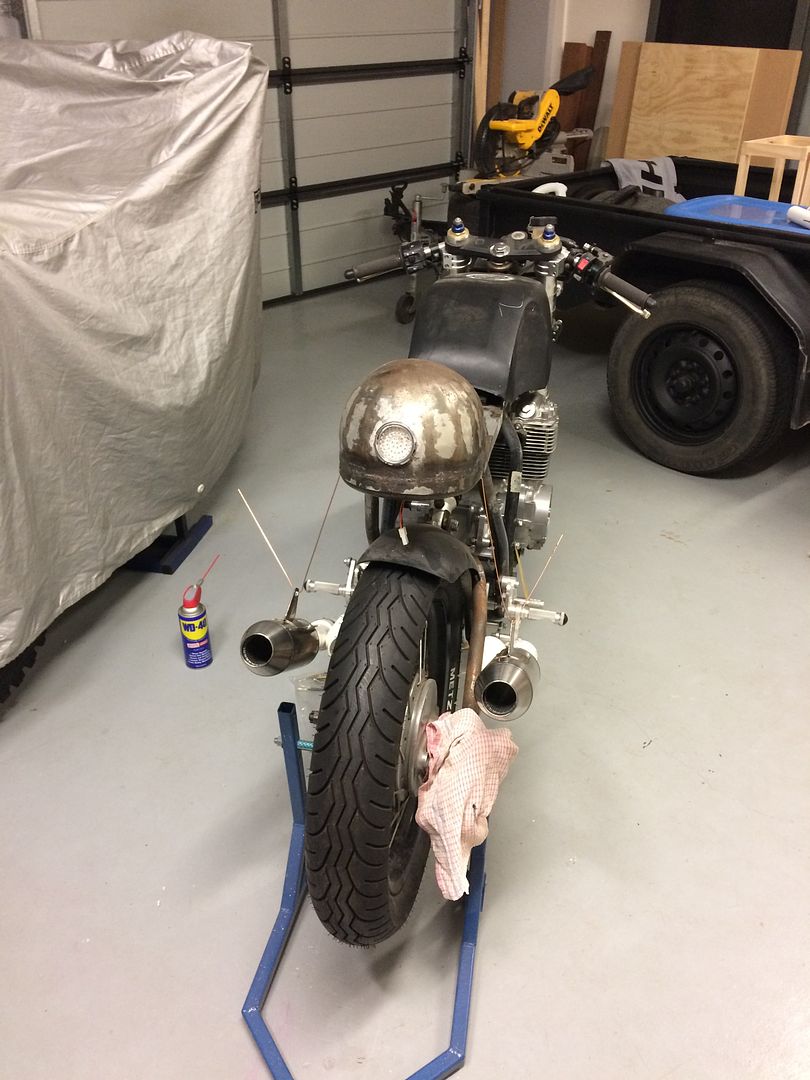
Next up I grabbed some more PVC pipe from the local hardware store and set about getting the exhausts finished off. Used the tried and tested method of cutting angles and hot glueing them in the correct angle:
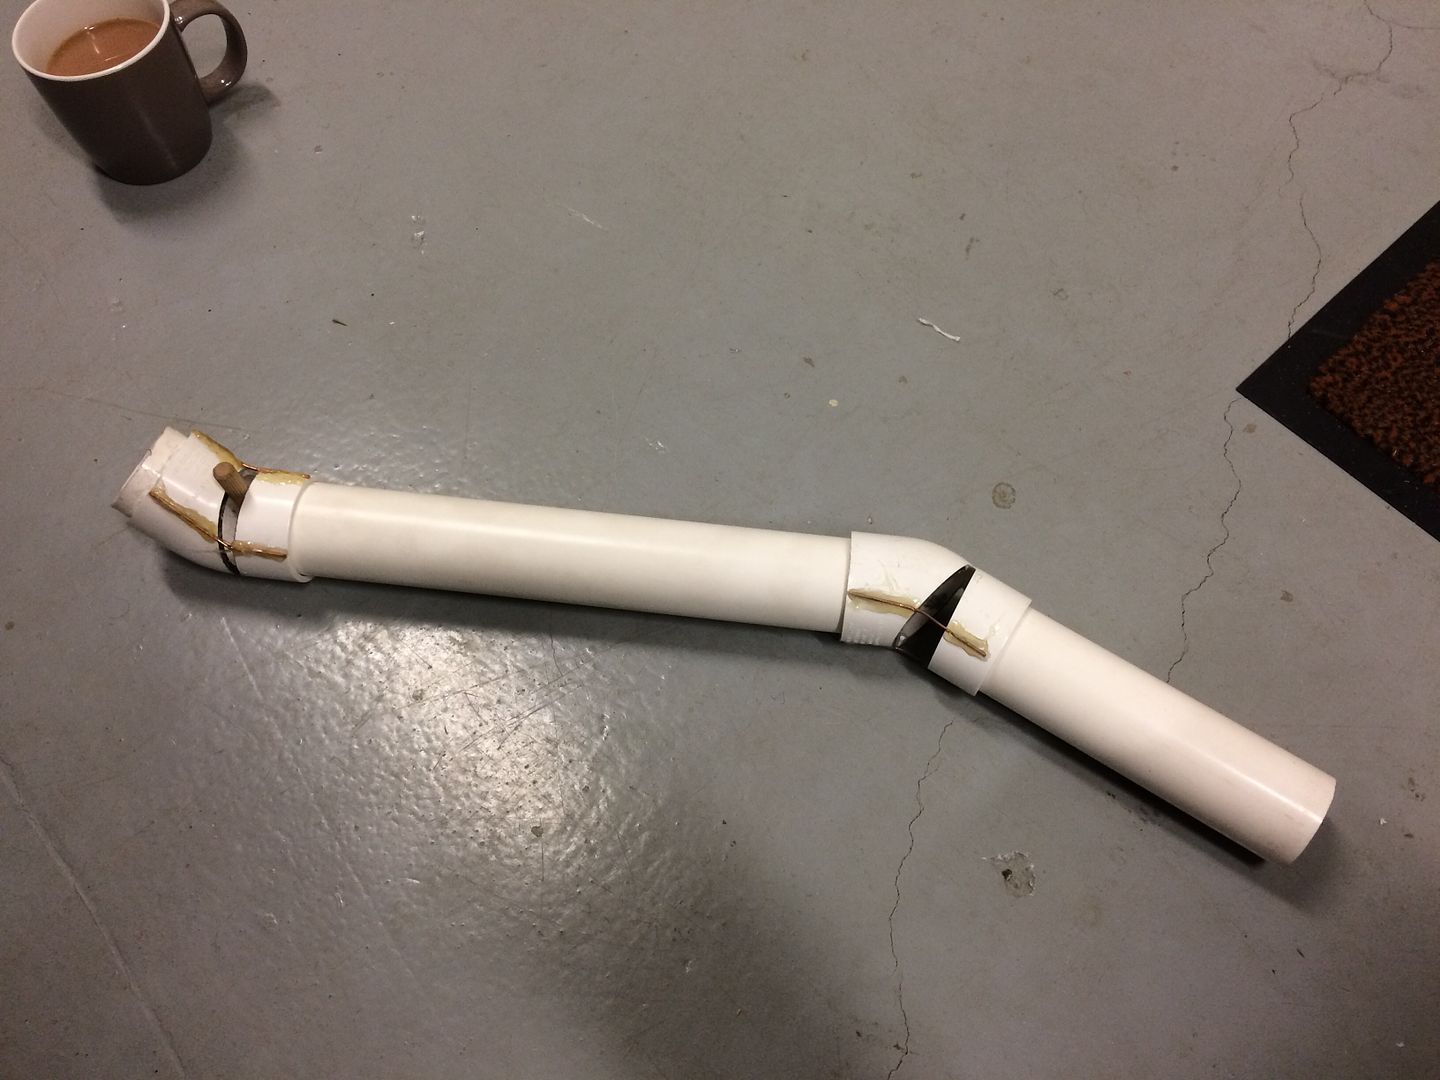
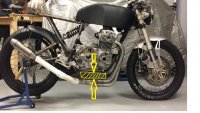
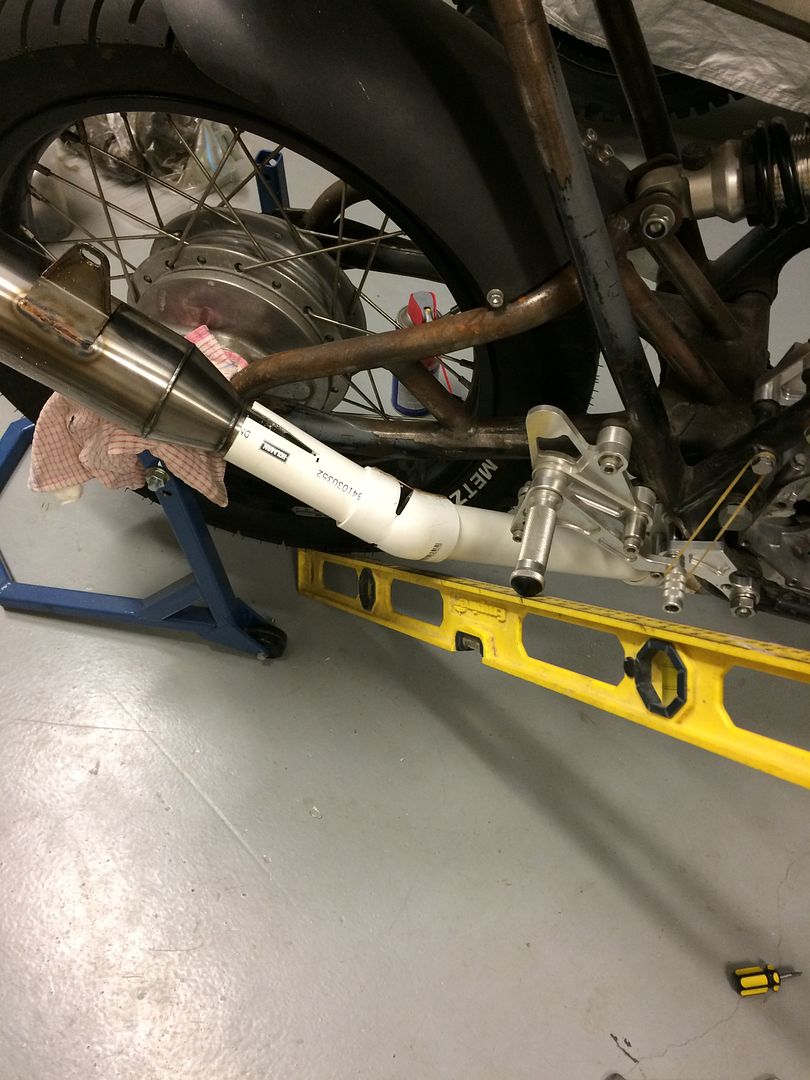
Used a much tighter angle out from under the swingarm to try and get as much clearance as possible (you'll also notice I put the oil pan back on too):
Much better, plus I will have the radius on the actual bends much wider so I can hug the tyre and swingarm even more, so I think I'll get a bit more clearance back then too:
Tested the lean angle and it's getting better, however this is without the rear shock compressed so I will still be looking to get a bit more clearance with the final thing:
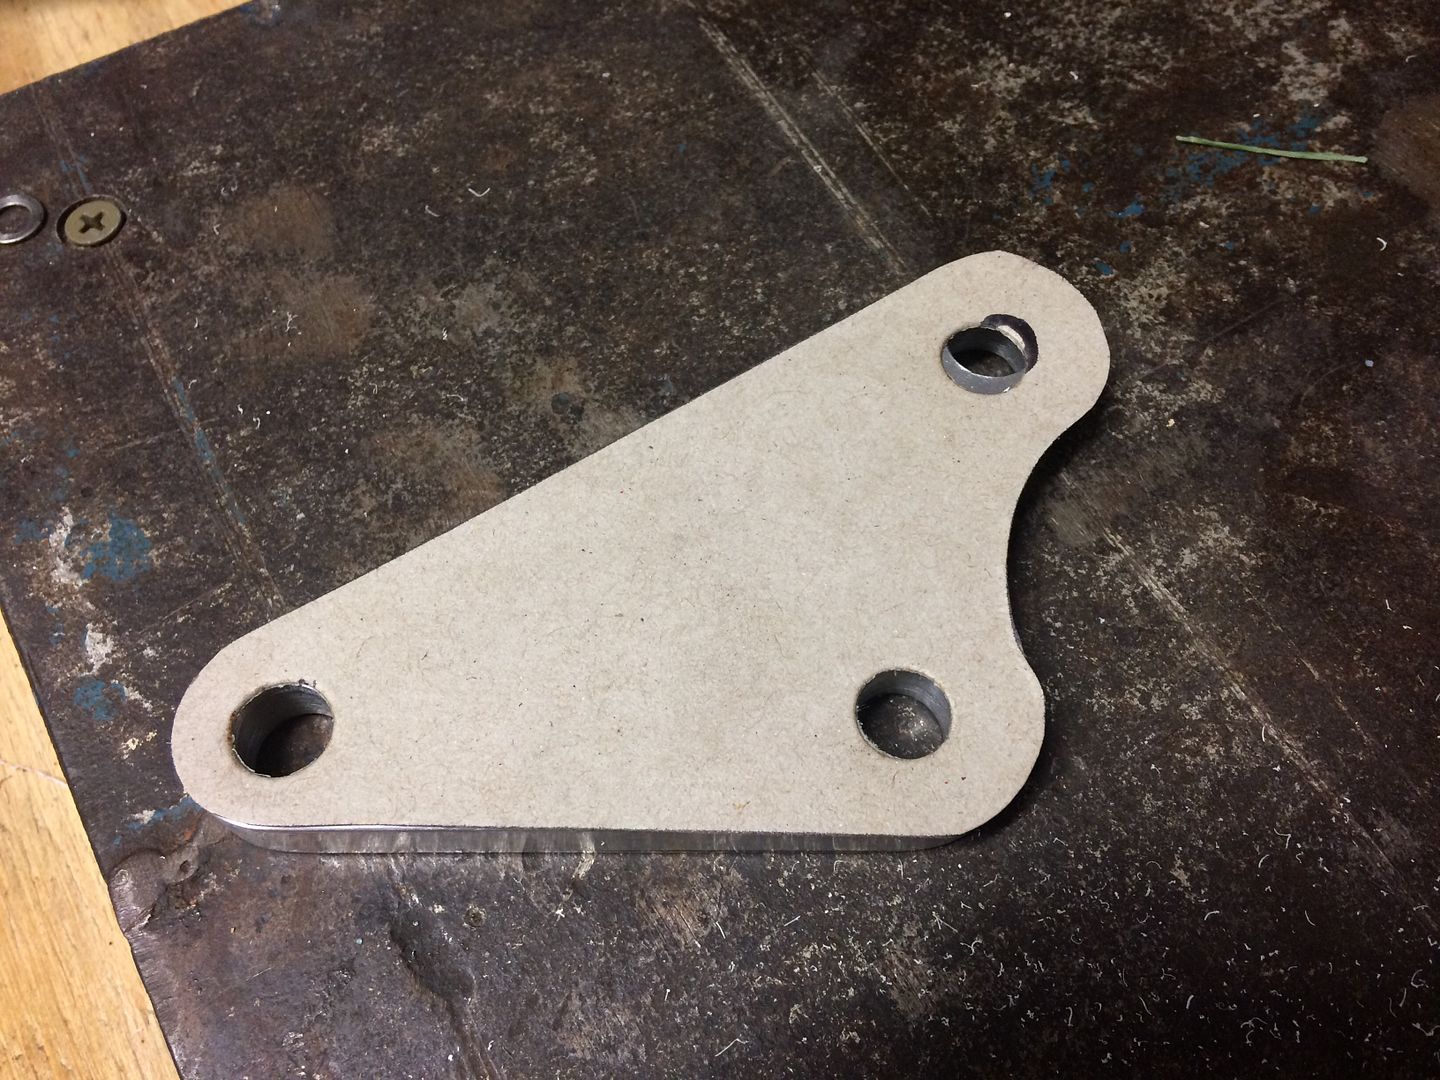
It was at this stage I need a bit of a break from cutting PVC pipe and hot glue. I turned my attention to getting all the engine mounts finished off. The rear I was able to tweak as it wasn't lining up perfectly, an easy fix by reducing the width of the spacers and opening up the holes a touch. The front however wasn't lining up at all and it turned out one of the holes was not in the right place. Given they were CNC machined I would need to have them redone and so set to creating a template in cardboard:
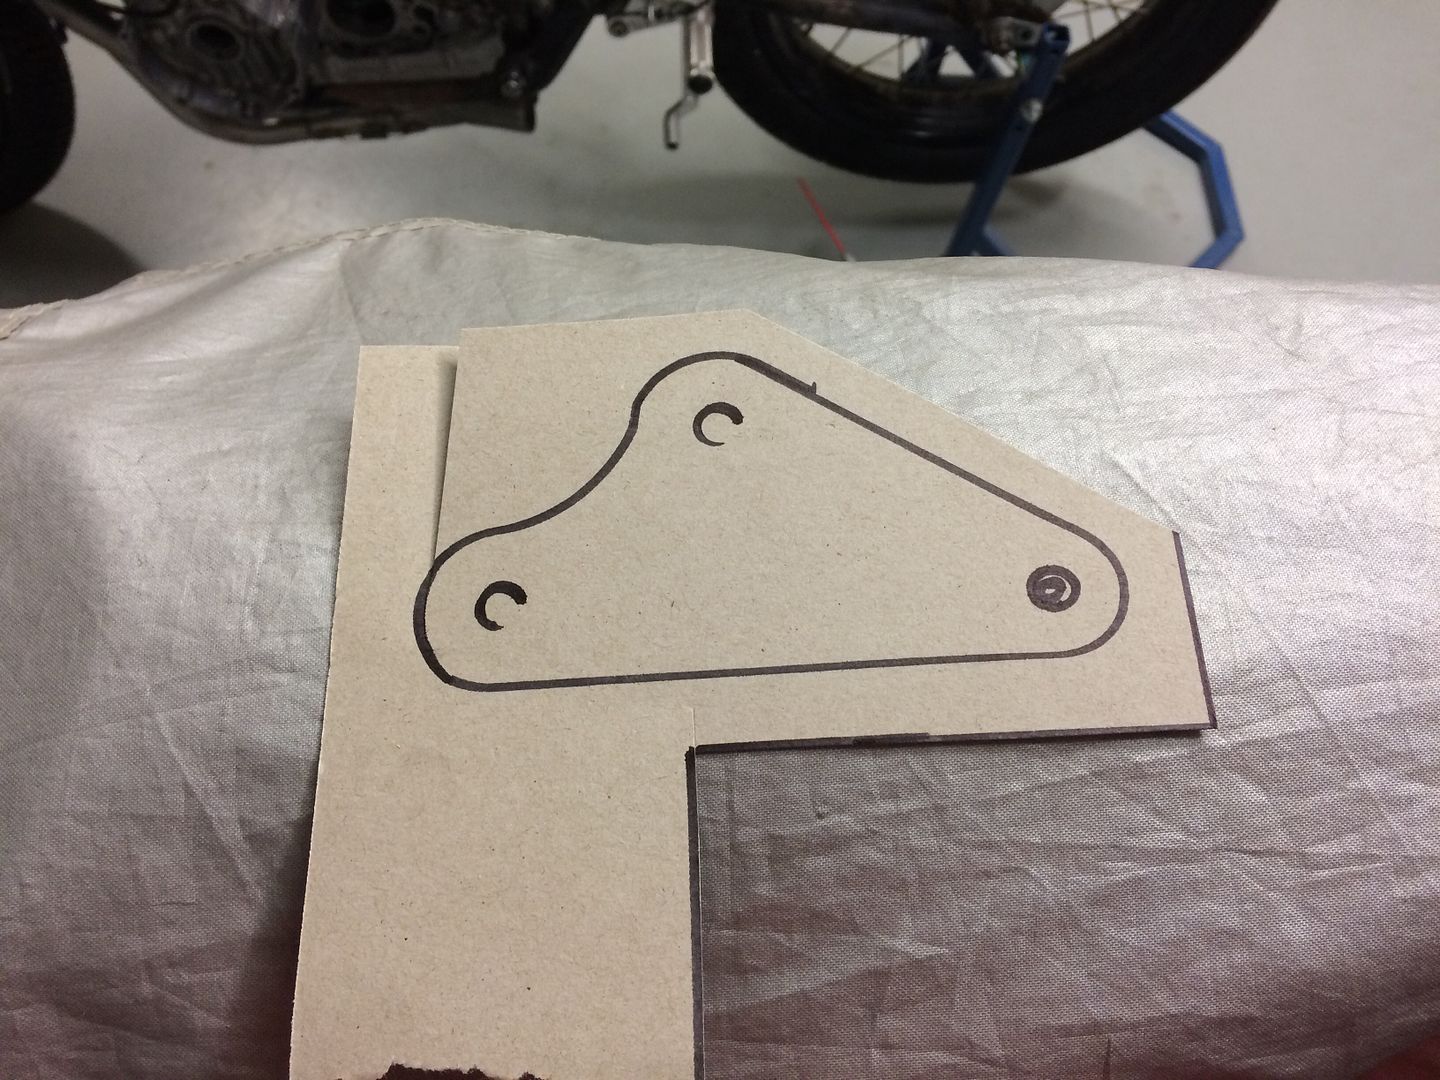
All done and here you can see how far off one of the holes was:
Whilst I was feeling in the building mood I though I would press on with the exhausts and see if I could finish off the templates. I used the one I had created to make up another one as a mirror image and use that as a guide to get all the angles right. Surprising enough the mirror image was not that close to what was required and a fair chunk of adjustment had to be made to the length of the run out from the swingarm (shorter) and also the angles.
If I'm honest I wasn't really feeling the exhaust up until this point, however I persevered and kept tweaking it. Making sure it was symmetrical and also the angles matched from left to right. Took bloody ages and the more time I put into it the sweeter it got.
In the end it's fair to say the result is bloody close to what was in my minds eye all along (very exciting) and I'm sure once they're done in stainless with more gradual bends it will look fantastic. The left hand side still needs a bit of tweaking to get it tighter to the swingarm, but it's getting close!
First on the agenda was putting the copper washers on the manual cam chain tensioner. No idea why I hadn't done this earlier as I've been sitting on the copper washers for ages. I actually need to grab some M5 washers for the smaller bolt but I tested the concept with an M6:
No idea if it will hold the oil in, but keep your fingers crossed. I still need to fashion a plug for the front bolt hole, thinking an M10 x 10mm with another copper washer and some sealer Loctite (hopefully red would stand up to the heat of the motor).
Second on the agenda was seeing if I could mount my coils. Because of the fuel line pickups on the tank, the stock setup hit the coils and so I needed another option:
My solution was to mount the coils on the underside of the coil brackets. It has the coils a bit close to the top of the motor so I'm thinking I will fabricate some heat shields to go in between to stop the coils cooking too much:
Next up I grabbed some more PVC pipe from the local hardware store and set about getting the exhausts finished off. Used the tried and tested method of cutting angles and hot glueing them in the correct angle:
Used a much tighter angle out from under the swingarm to try and get as much clearance as possible (you'll also notice I put the oil pan back on too):
Much better, plus I will have the radius on the actual bends much wider so I can hug the tyre and swingarm even more, so I think I'll get a bit more clearance back then too:
Tested the lean angle and it's getting better, however this is without the rear shock compressed so I will still be looking to get a bit more clearance with the final thing:
It was at this stage I need a bit of a break from cutting PVC pipe and hot glue. I turned my attention to getting all the engine mounts finished off. The rear I was able to tweak as it wasn't lining up perfectly, an easy fix by reducing the width of the spacers and opening up the holes a touch. The front however wasn't lining up at all and it turned out one of the holes was not in the right place. Given they were CNC machined I would need to have them redone and so set to creating a template in cardboard:
All done and here you can see how far off one of the holes was:
Whilst I was feeling in the building mood I though I would press on with the exhausts and see if I could finish off the templates. I used the one I had created to make up another one as a mirror image and use that as a guide to get all the angles right. Surprising enough the mirror image was not that close to what was required and a fair chunk of adjustment had to be made to the length of the run out from the swingarm (shorter) and also the angles.
If I'm honest I wasn't really feeling the exhaust up until this point, however I persevered and kept tweaking it. Making sure it was symmetrical and also the angles matched from left to right. Took bloody ages and the more time I put into it the sweeter it got.
In the end it's fair to say the result is bloody close to what was in my minds eye all along (very exciting) and I'm sure once they're done in stainless with more gradual bends it will look fantastic. The left hand side still needs a bit of tweaking to get it tighter to the swingarm, but it's getting close!
Tune-A-Fish
BOTM LOSER Proudly Deplorable
oooh ahhh ;D


