We noticed you are blocking ads. DO THE TON only works with community supporters. Most are active members of the site with small businesses. Please consider disabling your ad blocking tool and checking out the businesses that help keep our site up and free.
You are using an out of date browser. It may not display this or other websites correctly.
You should upgrade or use an alternative browser.
You should upgrade or use an alternative browser.
First Build - CB350 Twin
- Thread starter halekai
- Start date
rockcitycafe
I make things.
halekai said:Not much progress today on the Honda. This morning I got a burr in me to totally rip apart the shop and repack everything. You know how it goes when you are in the middle of a big project and suddenly it looks like a tornado went through the place. If one of the neighbors came by they would have thought it was a crack den...so I cleaned...
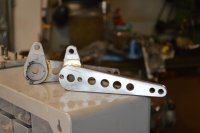
I did get the brackets 90% done and I layed out the levers for the rearsets. So on with the pictures.
love the multi thousand dollar surface plate used as a snack table
")
halekai
Active Member
Roc City...Yes I love that snack table...accurate to 0.005" from corner to corner! I bought it from a robot designer.
Mgros, thank you, As I said these were supposed to be quick and dirty but...
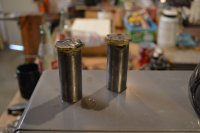
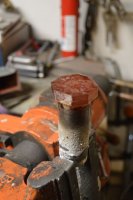
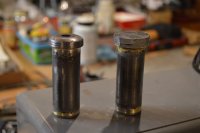
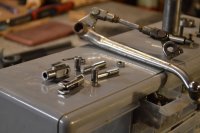
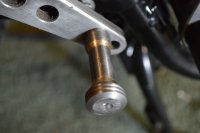
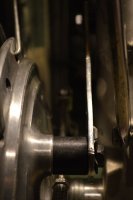
On to the pictures...I I finished the King Pin/through bolt today and made a few washer spacers. brazed together the footpegs and turned them down to finish. I plan on putting grooves all along the short axis of the footpegs to prevent outward slip.
I hooked up the rear brake and planned out the final pieces of the jack shaft/extension tube.
Mgros, thank you, As I said these were supposed to be quick and dirty but...
On to the pictures...I I finished the King Pin/through bolt today and made a few washer spacers. brazed together the footpegs and turned them down to finish. I plan on putting grooves all along the short axis of the footpegs to prevent outward slip.
I hooked up the rear brake and planned out the final pieces of the jack shaft/extension tube.
Attachments
halekai
Active Member
Got down to the nitty gritty today...
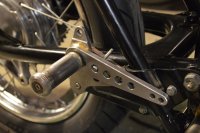
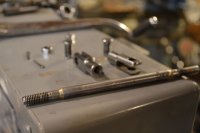
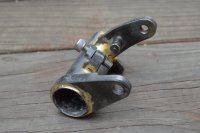
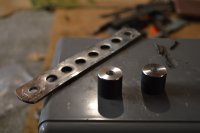
Dismantled a shifter linkage from this CB350. I cut the push rod in half, turned down each end to 6mm and then brazed the two threaded ends into a new push rod extension that I milled out to accept the old halves...Essentially adding to the middle of the push rod.
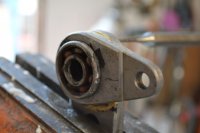
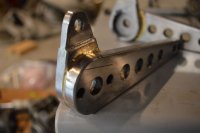
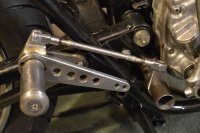
I also made the jack shaft pivot arm. I bored it out so it is a tight fit. This way it stays in place while I figure out the best orientation...then braze it all together...
Tomorrow is the toe pedal and final touches on the brake side...On to the pictures.
Dismantled a shifter linkage from this CB350. I cut the push rod in half, turned down each end to 6mm and then brazed the two threaded ends into a new push rod extension that I milled out to accept the old halves...Essentially adding to the middle of the push rod.
I also made the jack shaft pivot arm. I bored it out so it is a tight fit. This way it stays in place while I figure out the best orientation...then braze it all together...
Tomorrow is the toe pedal and final touches on the brake side...On to the pictures.
Attachments
halekai
Active Member
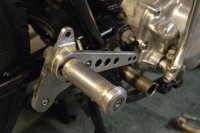
A small update today. I made the toe peg for the brake. I was going to make a shark fin shaped hand carved one but I started it and it did not look right so I came up with a different design. The right design as it turns out as it matches the footpeg...
Attachments

rockcitycafe
I make things.
nice work man I love to see time and effort put into the little parts that matter
I love to see time and effort put into the little parts that matterhalekai
Active Member
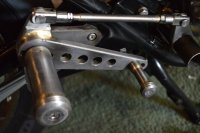
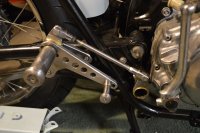
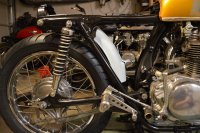
Well, "finished" the rearsets today. I crashed the lathe twice making the toe peg for the shifter side. I dont have the chuck that I should be using and so I couldnt hold the work as tightly as I would want. In the end I used very sharp bits and very light passes and she turned out fine. Crashing a lathe and watching the tool steel deform and then explode sending red hot shards toward your face made me glad I always wear safety glasses. The only things left to do with them is mill out for the bolt head one the toe pegs and final polish followed by gun bluing and oiling. Ill be gun bluing the clipons as well so Ill do that at the same time. The clipons will get a clear varnish.
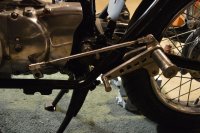
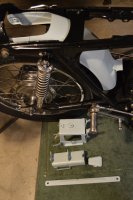
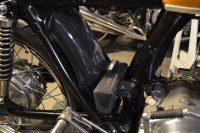
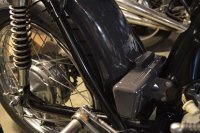
Other things done include modification of rear fender, Primed a bunch of accessories like battery box and stash compartment. I have always liked the way the lower rear fender is fixed by the little glove box so I saw no reason to change what I think Honda did right. I also like the battery sitting as low as possible. If I had more time and energy I would find a way to place the battery even lower like a flat gel bettery under the swingarm area.
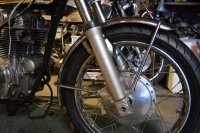
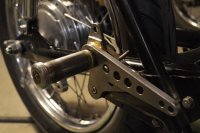
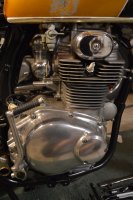
I should also mention here the subtle modification I did to the drive sprocket cover. When I polished out the motor I smoothed out the corner where the chainguard mates up. Nothing too crazy.
Other things done include modification of rear fender, Primed a bunch of accessories like battery box and stash compartment. I have always liked the way the lower rear fender is fixed by the little glove box so I saw no reason to change what I think Honda did right. I also like the battery sitting as low as possible. If I had more time and energy I would find a way to place the battery even lower like a flat gel bettery under the swingarm area.
I should also mention here the subtle modification I did to the drive sprocket cover. When I polished out the motor I smoothed out the corner where the chainguard mates up. Nothing too crazy.
Attachments
halekai
Active Member
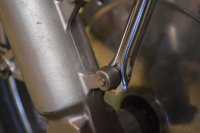
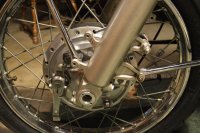
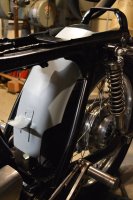
Another thing I got done was the front fender. I just need to figure out how to attach the middle brace to the forks and I can take off the extra tabs on the fork and ready it for paint. The forks, tank and cowl will get painted the same Beluga Gray as the stash box and rear fender.
I cut the fork supports and spooned out the ends on my anvil with a ballpin hammer, drilled new holes and it seemed to work pretty well. The chrome on these old hondas is pretty tough although I would expect that it will eventually start to flake and corrode where I deformed the metal. time will tell.
I cut the fork supports and spooned out the ends on my anvil with a ballpin hammer, drilled new holes and it seemed to work pretty well. The chrome on these old hondas is pretty tough although I would expect that it will eventually start to flake and corrode where I deformed the metal. time will tell.