
We noticed you are blocking ads. DO THE TON only works with community supporters. Most are active members of the site with small businesses. Please consider disabling your ad blocking tool and checking out the businesses that help keep our site up and free.
You are using an out of date browser. It may not display this or other websites correctly.
You should upgrade or use an alternative browser.
You should upgrade or use an alternative browser.
'Hamasaki' formerly known as the '82 KZ305 cafe racer - first build
- Thread starter Rustyhama
- Start date
The_Doctor
New Member
Rustyhama,
I joined this forum just so that I could post a message about your very ambitious, well planned and well executed build of your kz305 cafe racer!
I was feeling nostalgic about my first motorcycle, a -you guessed it 82 kz305 CSR, and came across your thread. Mine wasn't in quite as good of shape as yours, but then again I paid $25 for it. Over the corse of my 17th and 18th year of life, I did my best to restore it to working order and only succeeded to dump money into a bike that had a blown head gasket, notched steering bearing, mushy forks, worn swing arm bearing, ect. But it was still my first motorcycle!
Going through your pictures and seeing your project transform from stock to cafe racer has been fascinating. I love how your bike has turned out and although I have no experience building a cafe racer, I want to say that I have been truly inspired to try.
I wish I still had my 305 as now some 15 years later I have the tools and knowledge to attempt such a build.
I am excited to see your finished product.
Keep up the good work!
Cheers,
D
Awww thanks Doc! That's what I'm talking about! Contrary to what the experienced old dogs say on here I only rode her for about 2 weeks before she went in for the cosmetic & heart surgery so I'm itching to ride again. I keep thinking 'all I need to do is slosh a little petrol in the tank & strap a cushion across the battery then fire her up' But then the little angel on the other shoulder reminds me that I need to ride it pretty hard on the first ride to get the new rings seated properly etc. I'm taking the kids over to Oz next week so the start up wont be till after we return. I might do a few video's of that.
The beauty of building a bike is - no experience necessary and there are no rules, you do what ever you want. What ever looks good to your eyes is perfect...
The beauty of building a bike is - no experience necessary and there are no rules, you do what ever you want. What ever looks good to your eyes is perfect...
The_Doctor
New Member
Yes, there is no point in cutting corners now that you are so close to the end. You'll want that motor properly broken in and a real seat for your bum!
Thanks for the link to the cherry kwaker 305. It's nice to see that they still pop up now and again.
Have a nice upcoming trip and please do some vids when you can for all the fans!
Thanks for the link to the cherry kwaker 305. It's nice to see that they still pop up now and again.
Have a nice upcoming trip and please do some vids when you can for all the fans!
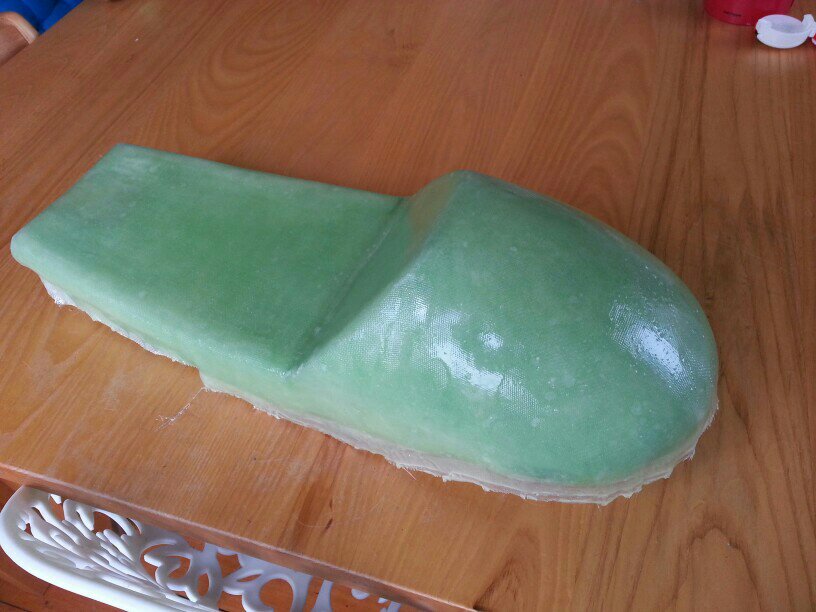
Fibreglass went well over the weekend. I know I have a mounting issue to over come where my sassy side covers kick up at the back. The Damn kick up rears it's ugly head again!
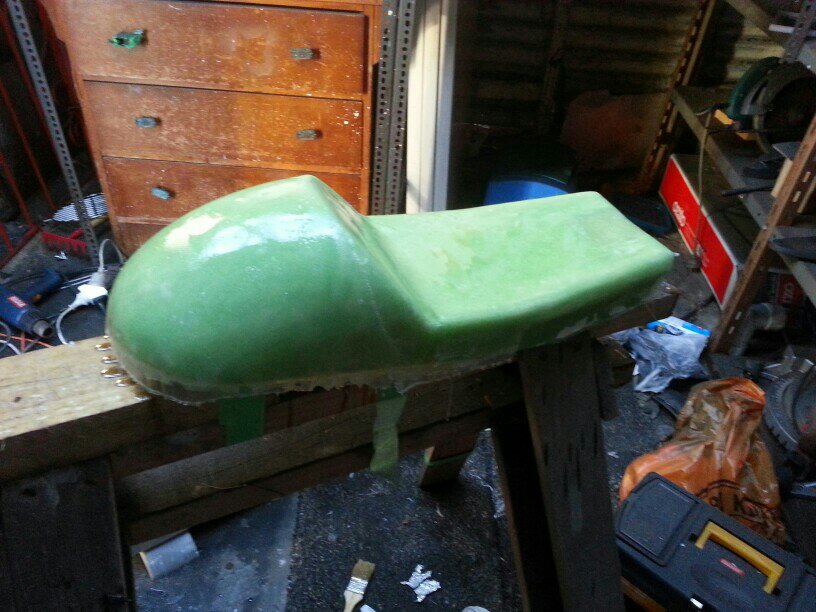
Second layer of cloth, just two cuts just at the front of the hump.
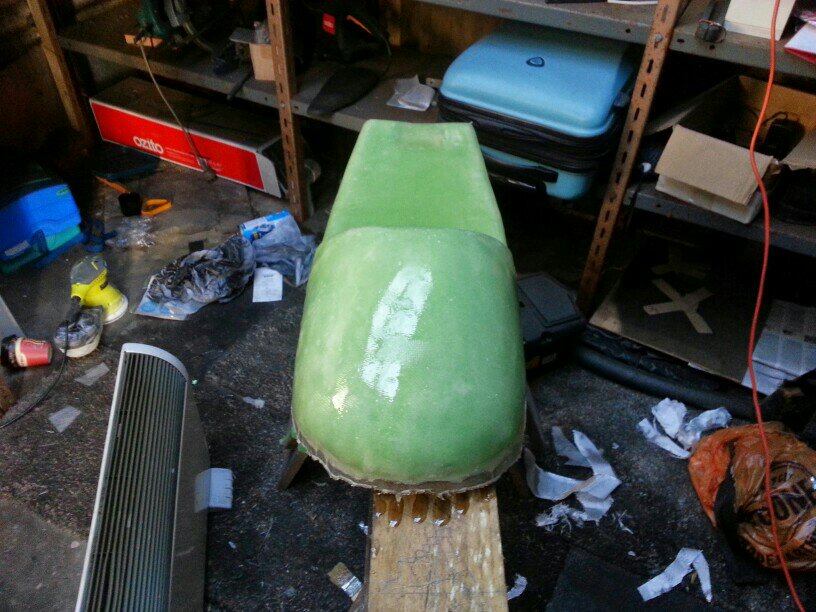
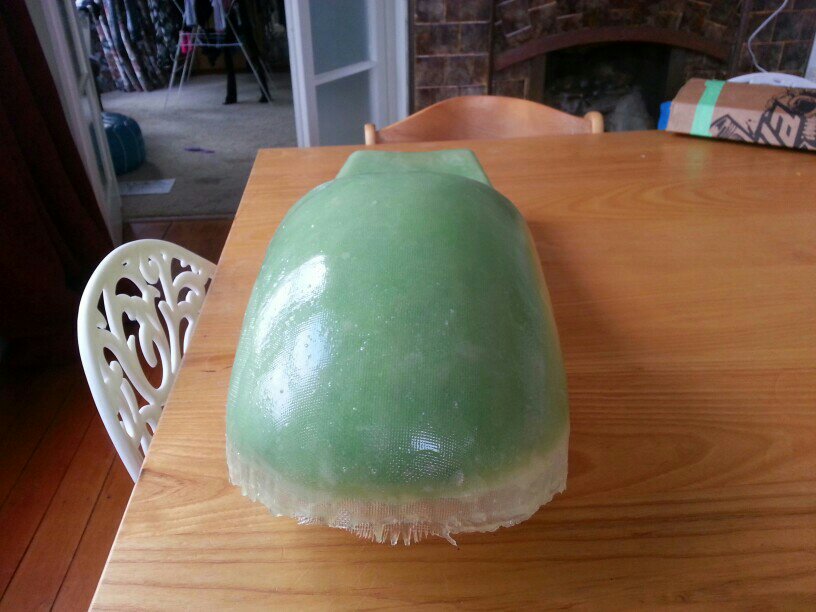
3rd and last layer of cloth below. I managed to shape the cloth with no cuts! Very happy with how smooth the part is already!
Second layer of cloth, just two cuts just at the front of the hump.
3rd and last layer of cloth below. I managed to shape the cloth with no cuts! Very happy with how smooth the part is already!
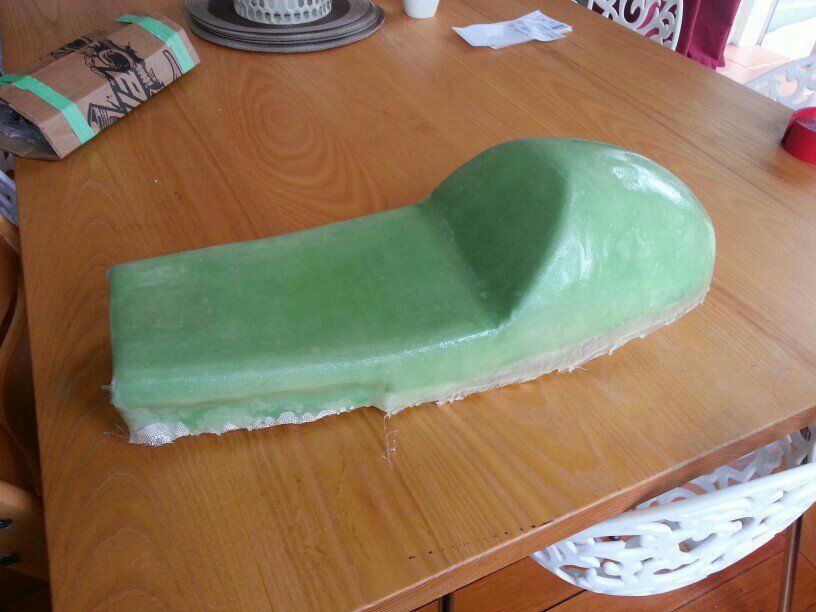
Damn it! I'm over the fiberglass work. After looking at the above pics I can see I cut too much off it at some stage - taking more work to get it right again. The front part is coming right though and overall it's a good fit. Hopefully I'll be finished with it by the end of the weekend.
Sent from my GT-N5110 using Tapatalk
Sent from my GT-N5110 using Tapatalk
Fibreglass is all sorted. I added some aluminium clips at the back to secure it to the frame. I've shaped and laminated a few different kinds of foam for the seat and sewed the seat cover. The tank and tail are at the painters and will be finished next week. I've even cleaned out my garage. The only thing I didn't do was take photos. The next photos will be of the finishing touches. All going well the Hamasaki will be on the road on Saturday October 4th.
Mounting the seat was something I thought was always going to be difficult. By the time I had it all fitted on the frame I could see how all the parts came together then it was easy to figure out how to mount it. I started with the stock 'clip' at the front that tucks under the back of the tank. Then the back of the seat has to push down just like the stock seat. Once it was in place I made up some 'Z' shaped brackets and fibreglassed them to the inside of my tail hump. The just clip on nice n tight, no mechanical fixing. I'll put up some photos when I get it back.
gearhead231
Been Around the Block
Nice build man. Im looking forward to more.
Well the build is finished. And after finding a wire had come away from one of the coils we got her fired up and running ok. It won't drop down to a steady idle yet but I can rev it and it sounds pretty awesome for a wee bike. Hopefully I'll get it to the K dealer tomorrow for a few tweaks. HAMASAKI!


