We noticed you are blocking ads. DO THE TON only works with community supporters. Most are active members of the site with small businesses. Please consider disabling your ad blocking tool and checking out the businesses that help keep our site up and free.
You are using an out of date browser. It may not display this or other websites correctly.
You should upgrade or use an alternative browser.
You should upgrade or use an alternative browser.
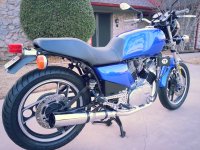
HollywoodMX's xv920/TR1 Cafe super-dupe!
- Thread starter HollywoodMX
- Start date
Cuba Libre
Been Around the Block
XVRacer said:Hey Hollywood!
This thread is so much better than the one on the XV site. SO many more photos.
Any motor updates?
Cheers!
Hellgate
This thread will step up when the motor starts coming into being, I think. Edge of the seat stuff!
(XVRacer, your nick sounds suggestive. Have you built any XVs? Do tell)
M.
HollywoodMX
Coast to Coast
Ya sorry guys. I hit 240 hours in October and travelling so I'm beat. November isnt looking much better. I want to sand blast the cylinders before I finish the blue printing. Which I hope to do Tuesday as its a holiday.Cuba Libre said:This thread will step up when the motor starts coming into being, I think. Edge of the seat stuff!
(XVRacer, your nick sounds suggestive. Have you built any XVs? Do tell)
M.
XVRacer said:I do. Here's my '82 XV1100R. It has a hybrid XV/XVS engine and many other goodies.
Nice bike! Details please.
ABCanuck
Coast to Coast
XR750 said:Nice bike! Details please.
Perhaps in another thread or pm so as not to hijack what Hollywood has going on here.
HollywoodMX
Coast to Coast
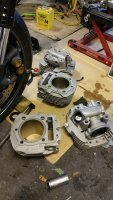
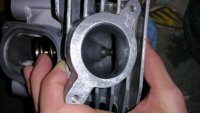
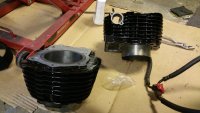
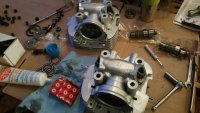
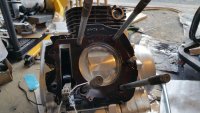
Cleaned the heads and cylinders and removed the fin rubbers. (There is a lot!). Spayed steel parts with product the protects from rusting and drys to the touch because I didn't want to use oil near what I'm painting.
Mildly ported the heads. Probly a waste of 2 hrs for hardly any hp gains..lol.
Now all set for paint. I have por engine paint to try out in this build. I higher expectations over the standard engine rattle can but we will see. The plan to paint them is this weekend.
Mildly ported the heads. Probly a waste of 2 hrs for hardly any hp gains..lol.
Now all set for paint. I have por engine paint to try out in this build. I higher expectations over the standard engine rattle can but we will see. The plan to paint them is this weekend.
Attachments
HollywoodMX
Coast to Coast
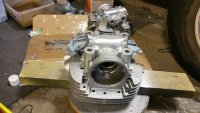
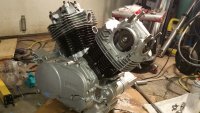
I took a break but started at it again. Painting the engine bits.
Xmas holidays I will have time to make more progress. The rest of the engine is cleaned up and painted too just some imperfections to fix. So assembly is next after the paint drys.
Xmas holidays I will have time to make more progress. The rest of the engine is cleaned up and painted too just some imperfections to fix. So assembly is next after the paint drys.
Attachments
HollywoodMX
Coast to Coast
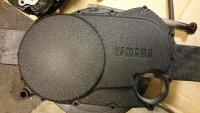
Not sure how but the engine fell off the stand while drying.. clutch side. 
Looks like I need a new cover and a new oil pickup at minimum.

Looks like I need a new cover and a new oil pickup at minimum.
HollywoodMX
Coast to Coast
Ya I inspected further and the clutch cover is all that is damaged. What I thought was the oil pickup was an oil sensor cover that I can hammer back out. The sensor was unscathed.rundown said:Damn, sorry to hear about the setback with the engine. Hope you can get it straitened out without too much time and effort.
HollywoodMX
Coast to Coast
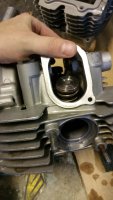
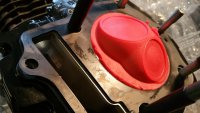
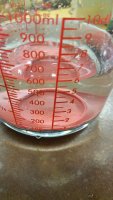
I won't lie.. I have been lazy. I did do a mold check of the combustion chamber to test out clearance with the custom pistons. It gave me some good assurances so far for valve clearance. Next test is with the cams to see what the space is with the valves moving.
Rest time over as this weekend I'm at it again.
Rest time over as this weekend I'm at it again.
Attachments
HollywoodMX
Coast to Coast
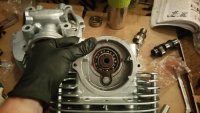
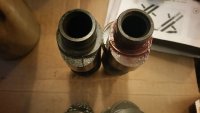
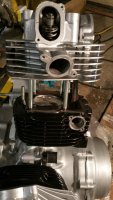
Valve train reassembled. Stage 3 cams comparison with stock. Big difference! I actually like the stage 3 better than the 4 and 5 because 3 had a much longer duration with obviously less lift. In the end a better race street combination.
Attachments
HollywoodMX
Coast to Coast
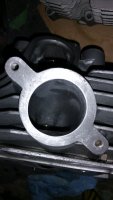
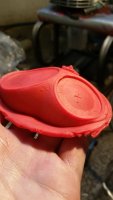
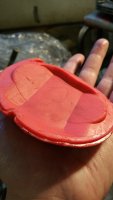
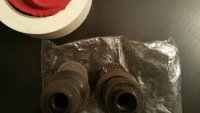
Been struggling the past 2 weekends on the wrist pins. Currently working with arias to sort out. Also I cc'd the dome again for higher accuracy. This is part of the blue printing process. So far everything is to spec. I really want to the action to pick up on this build but I need the finish with the engine.
Also fixed up the new used clutch cover.
Also fixed up the new used clutch cover.
Attachments
HollywoodMX
Coast to Coast
Ya to be honest it was a big worry that the valves could end up hitting the new pistons and the pistons actually being the right compression with both upper and lower gaskets. With this last clay sample it looks to be right to arias spec which is very positive news.Tim said:Incredible stuff - nice to be able to follow along step by step.
Lessons learned. I don't think building a race engine that is not mainstream is worth it though. Too much fiddling around to get custom things right and too much money.
Nuckingfuts
Been Around the Block
HollywoodMX said:Ya to be honest it was a big worry that the valves could end up hitting the new pistons and the pistons actually being the right compression with both upper and lower gaskets. With this last clay sample it looks to be right to arias spec which is very positive news.
Lessons learned. I don't think building a race engine that is not mainstream is worth it though. Too much fiddling around to get custom things right and too much money.
I agree but it's still damn fun to try and squeeze out power from any powerplant. You're doing it right and it's fun to follow.
HollywoodMX
Coast to Coast
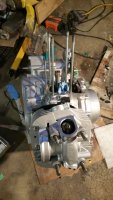
Ok new wrist pins are here and this weekend is a long weekend for us Canadians so should be some good progress on the bike.
I have had a few problems with my custom pistons with arias but their customer service is pretty sweet. They air mailed me the wrist pins from usa to Canada in 1 day so I would have them this long weekend.
I have had a few problems with my custom pistons with arias but their customer service is pretty sweet. They air mailed me the wrist pins from usa to Canada in 1 day so I would have them this long weekend.
HollywoodMX
Coast to Coast
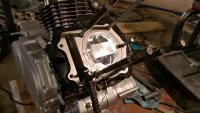
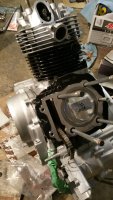
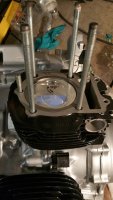
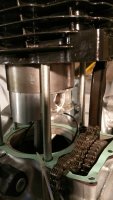
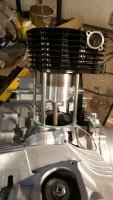
Pay attention to pic 3. The best way to install a piston. Piston and rod pin and one clip installed prior to dropping in the cylinder. Add generous amounts of assembly grease. 

Attachments
-
 uploadfromtaptalk1424064530311.jpg1.8 MB · Views: 328
 -
 uploadfromtaptalk1424064505251.jpg1.8 MB · Views: 310
 -
 uploadfromtaptalk1424064482408.jpg1.6 MB · Views: 310
 -
 uploadfromtaptalk1424064462340.jpg1.7 MB · Views: 365
 -
 uploadfromtaptalk1424064440967.jpg1.7 MB · Views: 310
 -
 uploadfromtaptalk1424064414998.jpg2 MB · Views: 332
 -
 uploadfromtaptalk1424064391493.jpg1 MB · Views: 306
 -
 uploadfromtaptalk1424064556866.jpg3.8 MB · Views: 318


