HollywoodMX's xv920/TR1 Cafe super-dupe!

Bootsey said:
Wow, that KZ is insane! Race bike?

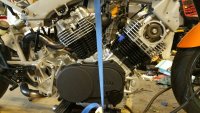
Street terror? Its alcohol injected 1075cc, 1980 Drouin SC kit. Did I mention I have 1979 Bimota body kit for it too and it has a full 07-10 R1 front and rear? Lol.

In the end it's a bike that when it rolls up to the bar/cafe people are like WTF!
 
Ok making a custom 9 disk high performance clutch now from various Yamaha and EBC bits. More pressure, more lubrication and hopefully more bite.
 

Attachments

  • uploadfromtaptalk1426961255519.jpg
    uploadfromtaptalk1426961255519.jpg
    1.5 MB · Views: 336
  • uploadfromtaptalk1426961287868.jpg
    uploadfromtaptalk1426961287868.jpg
    3.9 MB · Views: 345
  • uploadfromtaptalk1426961338996.jpg
    uploadfromtaptalk1426961338996.jpg
    4 MB · Views: 349
  • uploadfromtaptalk1426961361051.jpg
    uploadfromtaptalk1426961361051.jpg
    3.8 MB · Views: 354
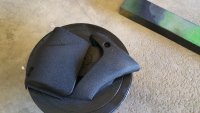
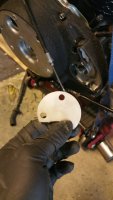
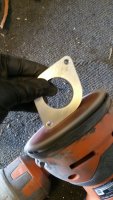
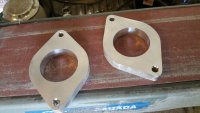
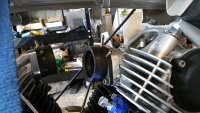
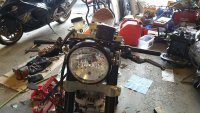
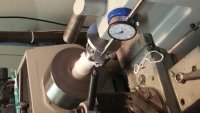
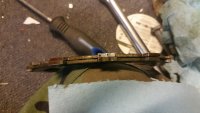
New goodies to help me continue on. Looks like I have the carb figment issue solved for the most part.. Lol. I think I may want to do something slightly different tho. Might build some spacers.

Did some more painting too.
 

Attachments

  • uploadfromtaptalk1428728055405.jpg
    uploadfromtaptalk1428728055405.jpg
    2.1 MB · Views: 314
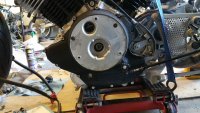
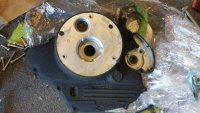
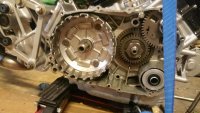
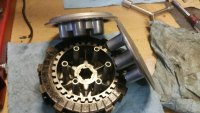
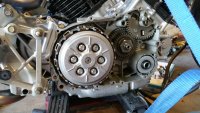
Ok finally figured out the clutch engagment issue. I was trying to follow yamaha spec to set the clutch and couldnt figure out why it wouldnt seat where the rod normally seats. Fucking with it for a good hour I figured out I cant get it to seat normally becuse its not normal anymore.

Now I have it all setup. The cable is like 4mm too long as I am very close to the max out my perch adjustment, Im thinkign to be crafty and jb weld a washer into the case side to gain me a few more mm.

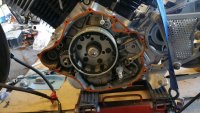
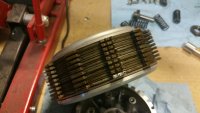
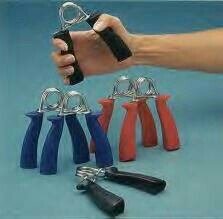
All I can say this new clutch pull is not for the for weak. Now I need those hand grip exersize things from the 80's to train my hands.. lol. 9 puck plus firm springs is a

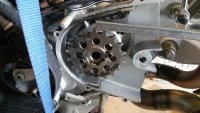
Then after I go to put on the clutch side cover and figure I would test to see if it hits. And of course it does..

https://youtu.be/ox8q-rAFl0s

f0280ae07206acd613f895381e470099.jpg
 

Attachments

  • uploadfromtaptalk1428809196319.jpg
    uploadfromtaptalk1428809196319.jpg
    4.2 MB · Views: 315
So there is an easy way to fix the clutch hitting the cover.. Ready for it???

Customize it!
 

Attachments

  • uploadfromtaptalk1428811155909.jpg
    uploadfromtaptalk1428811155909.jpg
    4 MB · Views: 312
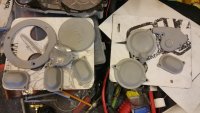
I kind of jumped ahead here post wise... I painted things too.

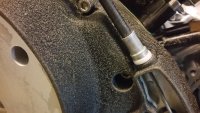
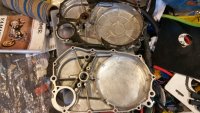
Here is a tip for the virago guys I gasket the one side of the engine case, (tip time) add extra gasket to the lower section. Install all bolts but only turn till very slight resistance starts. Let dry to nect day then tighten.

PS. those are pop tarts in the oven. :)
 

Attachments

  • uploadfromtaptalk1428811804416.jpg
    uploadfromtaptalk1428811804416.jpg
    4.7 MB · Views: 315
  • uploadfromtaptalk1428811474461.jpg
    uploadfromtaptalk1428811474461.jpg
    4.5 MB · Views: 314
  • uploadfromtaptalk1428811428732.jpg
    uploadfromtaptalk1428811428732.jpg
    4.1 MB · Views: 308
  • uploadfromtaptalk1428811405964.jpg
    uploadfromtaptalk1428811405964.jpg
    3.5 MB · Views: 290
  • uploadfromtaptalk1428811353997.jpg
    uploadfromtaptalk1428811353997.jpg
    4.2 MB · Views: 308
  • uploadfromtaptalk1428811281925.jpg
    uploadfromtaptalk1428811281925.jpg
    3.9 MB · Views: 304
Fixed my clutch cable slack issue with some delrin. All fixed up. :)

I didnt like the color of the powder coated engine bits so I soda blasted them.

I also re-did the valve clearance I was off 2mm from some previous info when I did it the first time.

Spent some time on the tracker too.
 

Attachments

  • uploadfromtaptalk1428893221496.jpg
    uploadfromtaptalk1428893221496.jpg
    3.8 MB · Views: 336
  • uploadfromtaptalk1428893173780.jpg
    uploadfromtaptalk1428893173780.jpg
    1.5 MB · Views: 318
  • uploadfromtaptalk1428893145109.jpg
    uploadfromtaptalk1428893145109.jpg
    1.8 MB · Views: 311
So I haven't been working much on this bike. Double vacation, other bikes and a new kind Sheppard pup. It's been busy. But ramping up this weekend and plan to work a little less this summer to get some build time in.

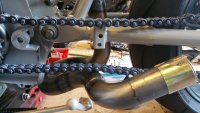
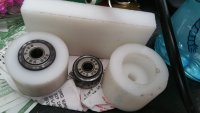
I got my custom offset sprocket and it fits well so I am not dependant on anything else other than my own time. There will be progress this weekend.
 
Carb spacers. Took a while to port match based on spacing and my mild porting. Still need mods to fit the carbs.
 

Attachments

  • uploadfromtaptalk1433742612530.jpg
    uploadfromtaptalk1433742612530.jpg
    2.2 MB · Views: 301
  • uploadfromtaptalk1433742641104.jpg
    uploadfromtaptalk1433742641104.jpg
    5.6 MB · Views: 285
  • uploadfromtaptalk1433742674681.jpg
    uploadfromtaptalk1433742674681.jpg
    4.4 MB · Views: 268
Offset sprocket. Fits straight to the rear. Got bored with the carbs so I spent time on the controls.
 

Attachments

  • uploadfromtaptalk1433742915905.jpg
    uploadfromtaptalk1433742915905.jpg
    6 MB · Views: 277
  • uploadfromtaptalk1433742879832.jpg
    uploadfromtaptalk1433742879832.jpg
    1.2 MB · Views: 286
  • uploadfromtaptalk1433742852295.jpg
    uploadfromtaptalk1433742852295.jpg
    4.9 MB · Views: 294
Well the chain is hitting in multiple places.

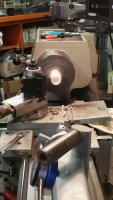
I started building something to overcome it when I realized I could build something easier if I got a few things. I did a bunch of other things that took time but are pretty uneventful for pics.
 

Attachments

  • uploadfromtaptalk1433808880107.jpg
    uploadfromtaptalk1433808880107.jpg
    4.3 MB · Views: 295
  • uploadfromtaptalk1433809020579.jpg
    uploadfromtaptalk1433809020579.jpg
    5 MB · Views: 286
Chain hitting solutions starting ..
 

Attachments

  • uploadfromtaptalk1434044497372.jpg
    uploadfromtaptalk1434044497372.jpg
    1.1 MB · Views: 284
  • uploadfromtaptalk1434044580475.jpg
    uploadfromtaptalk1434044580475.jpg
    1.8 MB · Views: 279
  • uploadfromtaptalk1434044617629.jpg
    uploadfromtaptalk1434044617629.jpg
    3.7 MB · Views: 280
Back
Top Bottom