Kawasaki Z650 Seventies Special

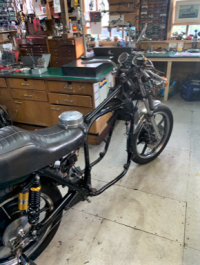
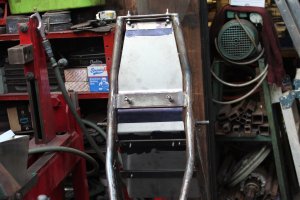
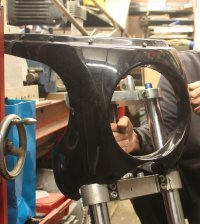
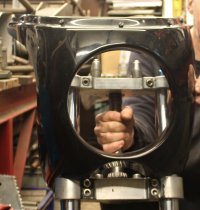
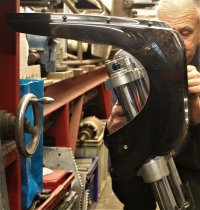
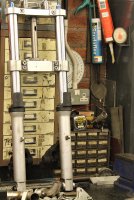
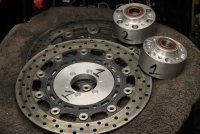
Test fitted the new billet yokes to take the wider 43mm forks in the pic below, after which I decided to machine the underside top yoke so it sits over the adjuster nuts, as it'll look better and give an extra 10mm or so of ground clearance, at the expense of making adjustment trickier.

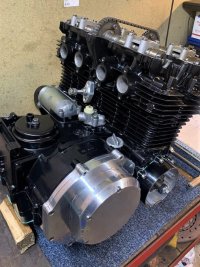
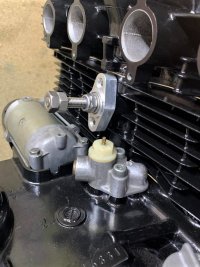
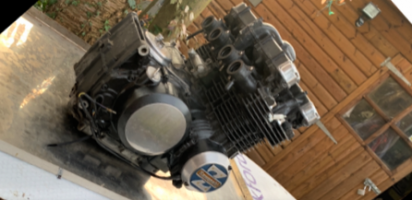
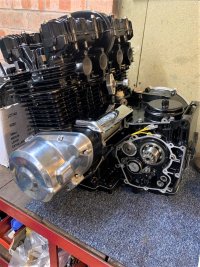
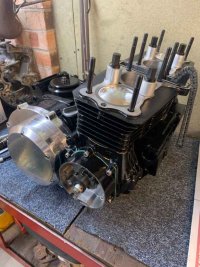
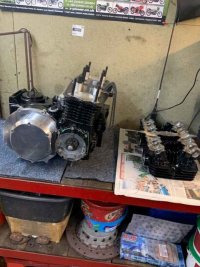
Still not got the head back, I suspect a lot of shops are using C19 as an excuse for poor service.

IMG_9670arrow.jpg
 
I etch my stuff. Saline etching, with copper sulfate and salt, is super cheap, really easy and relatively low toxicity. I use vinyl as a resist most of the time.

index.php
really nice result ! could I have your formula, I do this with 2 acids and water, very toxic !
 
I'd like to learn more about your process too Irk. Never etched, but would like to try
 
It's quite easy to explain, make a negative sticker of what you wan't to etch, dip the part in your solution, wait... ( it "eats" the metal approx 1mm per 30 minutes )

I did it with aluminium copper and brass, it work's with the same mixture, works best with aluminium.
 
I'd like to learn more about your process too Irk. Never etched, but would like to try
1:1 mixture of copper sulfate and salt. I use 500mL of water per 200 grams of salt/copper sulfate mixture. You can adjust your mixture per need. I sometimes go stronger. Dissolve in hot water. If you etch on a warm hot plate, it can shorten etch time. As the aluminum etches, the surface will collect oxide that inhibits the etch, so I take a soft bristle brush and brush off the surface every 20-30 seconds. The oil tank cap is a 10 minute etch.
 
10 minute etch ! That's about 3 times faster than my corrosive mixture ! I'll try it out, thanks
 
The top yoke has been modded to drop it over the adjuster nuts, while work has started on making the adaptor plates to mount the R6 discs to my old billet front wheel. The R6 forks are now ready to go on the bike, though I will be painting the fork lowers black. With the bike being at my mates workshop, it might be awhile before I can go and check up on progress, since we ae in lockdown again.
 

Attachments

  • IMG_9676.JPG
    IMG_9676.JPG
    1.7 MB · Views: 184
  • IMG_9689.JPG
    IMG_9689.JPG
    1.3 MB · Views: 176
  • IMG_9693.JPG
    IMG_9693.JPG
    1.3 MB · Views: 191
The front end is now almost complete, just need to pretty up the disc adaptor plates by machining them to match the discs, and paint the fork lowers black, and maybe also paint the spokes too..
IMG_9699Anot.jpg
IMG_9701 (2).JPG
 
Due to the November lockdown here in the UK, progress has been frustratingly slow, but at least the lockdown ended today. The good news is that the Zed head has returned with new valve guides and reground seats. But before it can go off to be ceramically coated to match the rest of the engine, the welded repairs had to be dressed to make them look a little more presentable. This was done with a hand drill, followed by a Dremel, and finishing off with some fine wet and dry sand paper. That done, I'll be taking the head to Camcoat tomorrow, hopefully I'll get it back before Xmas.

Meanwhile, we made a start on making a fibreglass seat base. It looks very rough at the moment, but a few more layers and plenty of sanding should see it ready for upholstery. Still need to work out the best way of mounting it to the frame, but got a couple of ideas.


IMG_9744 (2).JPG
IMG_9738 (2).JPG
 
The 1170 piston kit arrived this week, so the block has gone back to the machine shop to be bored out to 75mm to fit the new pistons..
 

Attachments

  • IMG_9762.JPG
    IMG_9762.JPG
    1 MB · Views: 178
  • IMG_9765.JPG
    IMG_9765.JPG
    1.9 MB · Views: 190
We are once again in lockdown here in the UK, which makes getting anything done on the Zed almost impossible. The frame is at my mates work shop which I cant visit, while the block still hasn't been bored yet, though I'm told it'll be done next week. However, the internet is still working, so over Christmas I ordered the most expensive part for the bike (so far).. a set of Mikuni RS34 flatside carbs.. They will need some pod filters too, but not sure which to buy. K&N, DNA etc.
 

Attachments

  • IMG_9783.JPG
    IMG_9783.JPG
    1.4 MB · Views: 194
  • IMG_9782.JPG
    IMG_9782.JPG
    1.2 MB · Views: 189
With the cylinder block back from the machine shop, the engine assembly could finally continue. Sadly I cant go to my mates workshop (due to our lockdown) where he's doing the build, but he did send me a few pics of progress. Also the head has been rebuilt with new valves, seals and guides..
 

Attachments

  • IMG_1423.jpg
    IMG_1423.jpg
    149.2 KB · Views: 173
  • IMG_1425.jpg
    IMG_1425.jpg
    60.4 KB · Views: 181
  • IMG_1424.jpg
    IMG_1424.jpg
    61 KB · Views: 166
  • IMG_1426.jpg
    IMG_1426.jpg
    152.8 KB · Views: 163
The standard GPz1100 head gasket wouldn't work with the 1170 pistons, so another gasket had to be bought, this time from Cometic. That done the head could go on, and the build finally completed.

Except...

Turns out the cams I had weren't from a B2, even though they came out of the B2 engine.. Nope, they are out of a Z1100A motor. Kawasaki ID the cams by machining various grooves in the obsolete tacho drive area of the cam.

What to do ?

Wait to source a good pair of B2 cams, or go with the Z1100 cams and get the blooming engine finished asap? I decided to use the Z1100 cams for now. If I find the power lacking, I can always fit different cams in future. The B2 cams having more lift and duration.

vknftG3.jpg
 
Found a good set of cams, so the engine is now almost done. Also fitted a homemade manual camchain adjuster, as the original auto ones tend to stick and allow the camchain to be too slack. Next is to source a set of manifolds to suite the RS34 flatslides, then they can be test fitted.

Oh and just bought my next project.. another old Zed in bits :)
 

Attachments

  • IMG_1474.jpg
    IMG_1474.jpg
    225.9 KB · Views: 161
  • IMG_1475.jpg
    IMG_1475.jpg
    173.8 KB · Views: 159
The 1170 engine is finally back together, just need new manifolds to test fit the RS flatslide carbs.. but no pics yet.

However, I'm about to start a new, and hopefully quick project, as another Z650 is inbound. Its been dismantled, but looks ok. Since it was a gift, and one good turn deserves another, when its finished, I'll surprise a good friend who is bikeless, by giving it to him. Should be collecting it in a couple of weeks.
 

Attachments

  • thumbnail_image1.png
    thumbnail_image1.png
    182.2 KB · Views: 147
  • thumbnail_image6.png
    thumbnail_image6.png
    243.9 KB · Views: 161
The fibreglass seat base proved to be tricky to get right, in the end we cut away the most uneven section and used an aluminium plate glassed into the underside, to both support the threaded mounting studs and give a smoother, straighter edge to the seat base. Its now gone off to a local upholsterer, who said it'll be done in about 4 weeks. He specialises in camper vans, and he's never been busier than the last year.

The frame is having a stainless splash guard and undertray made at the moment, and once that's done, just need to tidy up some of the welds, before it can finally go for powder coating.

The engine is finished, the one off outrigger wont be fitted until the engine is back in the frame, as need to check the chain alignment.
 

Attachments

  • IMG_1564.jpg
    IMG_1564.jpg
    317.8 KB · Views: 152
  • IMG_8709 (2).JPG
    IMG_8709 (2).JPG
    1.1 MB · Views: 161
  • IMG_9901.JPG
    IMG_9901.JPG
    5 MB · Views: 159
The frame has been cleaned up ready for powder coating, and an undertray and splash guard have been made from stainless plate. In the pic below they still have engineers blue on them, while the neater fasteners will be used in the final build.
 

Attachments

  • IMG_9985.JPG
    IMG_9985.JPG
    1.2 MB · Views: 160
Bought a fibreglass replica of a BMW R90S cockpit fairing, seems to fit the front end ok, without the need to modify the fairing. Still got to make its mounts, along with completing the mounts for the 7 inch Z1 headlight.
 

Attachments

  • IMG_0023 (2).JPG
    IMG_0023 (2).JPG
    813.4 KB · Views: 198
  • IMG_0024 (2).JPG
    IMG_0024 (2).JPG
    487.9 KB · Views: 195
  • IMG_0026 (2).JPG
    IMG_0026 (2).JPG
    880.7 KB · Views: 190
Took awhile but finally got the correct inlet manifolds to fit the Mikuni RS34 carbs, along with a Dyna S ignition. The frame is away being powder coated, so when its back, the engine can go in the frame and the final assembly can begin.
 

Attachments

  • IMG_1622.jpg
    IMG_1622.jpg
    212.6 KB · Views: 146
Back
Top Bottom