Follow along with the video below to see how to install our site as a web app on your home screen.
Note: This feature currently requires accessing the site using the built-in Safari browser.
We noticed you are blocking ads. DO THE TON only works with community supporters. Most are active members of the site with small businesses. Please consider disabling your ad blocking tool and checking out the businesses that help keep our site up and free.
Check valve tips are hard when you get them, guy over on Honda Twins has had 2 sets of intakes 'pocket' and break. Hasn't had issues with exhausts but still worth checking (just use an old file, if it cuts they are 'soft') I've never seen anything like it and without access to running motor can't be a lot of help as there is always a possibility her's doing something wrong?
Thanks for the valve tip PJ, will check when they arrive
In the meantime i’m thinking i should replace the chain tensioner, but i cannot remove it.
The spring loaded arm moves ok, can push it down with a big screwdriver and it springs back up smoothly.
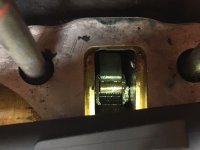
But i cannot pull the tensioner out of the socket in the sprung arm. Photo attached shows what looks like a thread inside the curved end of the tensioner, is it bolted in place ?
Has anyone seen this before?
If it is bolted in place then i’ll have to split the cases if i want to renew the tensioner, how hard is this, looks simple in the manual?
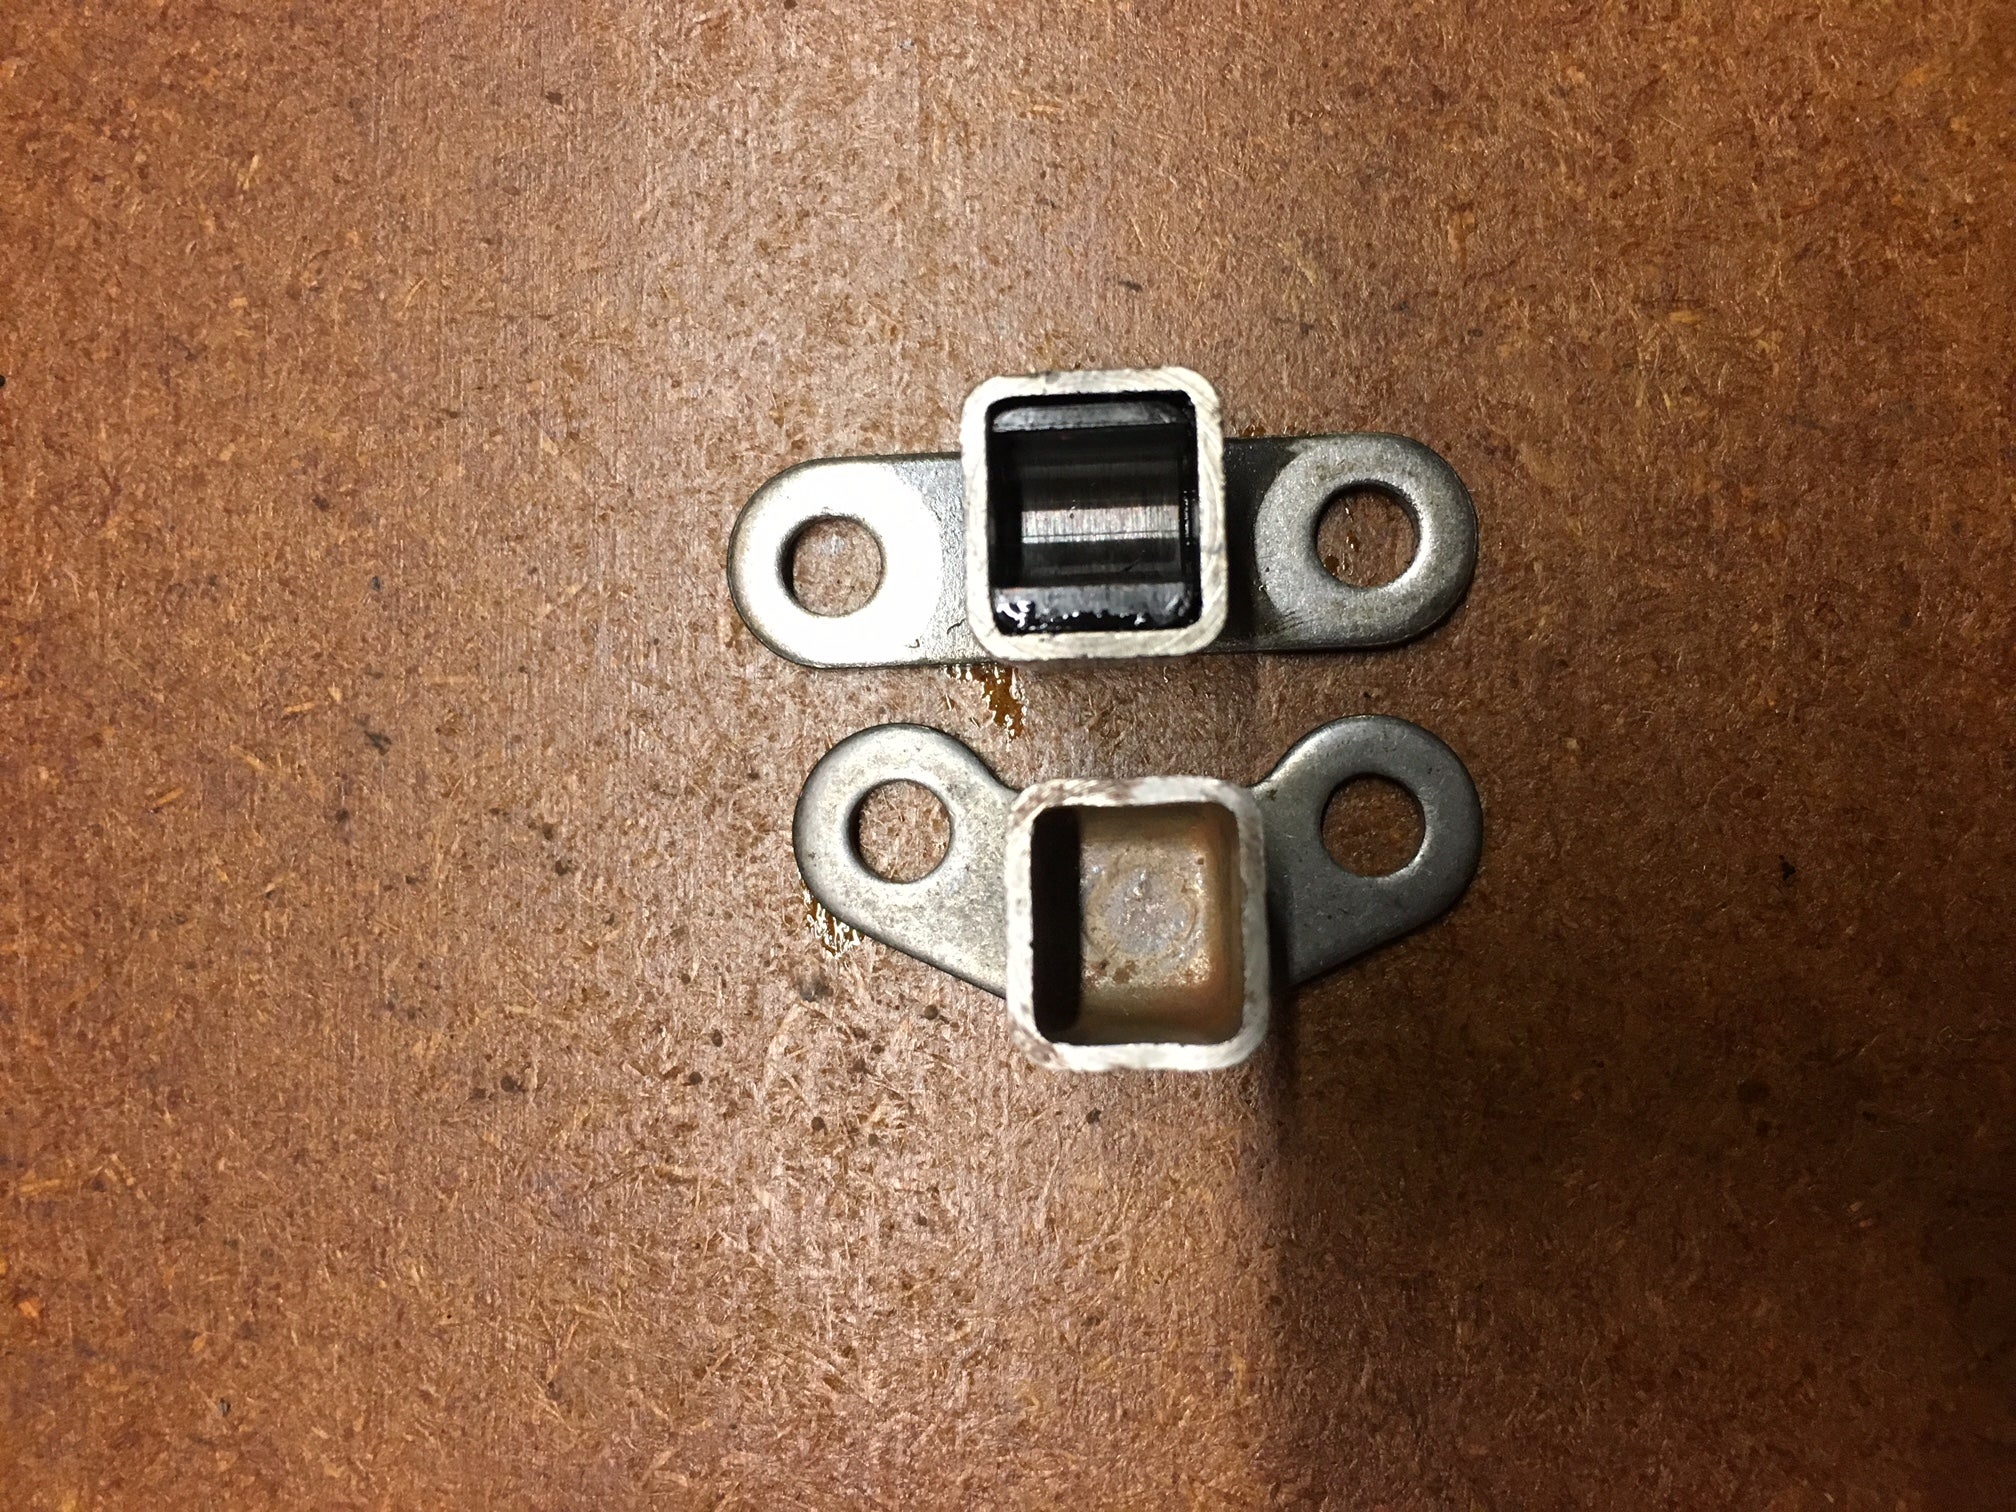
That pic of yours is sort of confusing. What I think I'm looking at in the pic is part 15 in part 10, with the tensioner (part 1) removed. Is this not correct?
I wonder if MiniatureNinja called it. The cam gear bolt. It makes sense that the chain dragged it down into the tensioner holder and just pounded it in place. Regardless, the tensioner is really hard to figure out by that pic. I'm not seeing the tensioner at all.
that was my thinking but I dont know why the hell someone would do that, or how they would get it back together properly once done - looks like the left side there is a head there but it would rub on the case?
I think it is a bolt that someone has tapped into no10 to ‘secure’ the tensioner through its eye, i agree you can see a slim bolt head in the pics.
Its not the cam sprocket bolts as i have them, and the tensioner would not pull out before my mishap with the sprocket
The clutch springs were ‘walker’ brand from NZ, avoid those!
So.... how much of a job is it to split the cases?
Looks like both side covers off, engine out, undo all the bolts?
Are there any complexities?, i’d hate to have bolts shear or other unforseen problems but think i need to get to the bottom of the cam tensioner.
Its really no big deal to split the cases. Pull all the bolts.
Flip it upside down. Pull out the bolts on bottom, Remove bottom case.
Flip it rightside up. As you pull the transmission parts from upside down top case. Flip em and drop em right back in bottom case.
That way you wont get anything confused and turned around.
I didn't bother disassembling or removing kick start shaft from the top case. It will just stay where it needs to be.
If I recall I don't think I had to pull the rotor off the crank either. But the oil cup probably needs to come off. Its been a long time since I did it.
take good pics of the gear shift stuff around and behind the clutch basket.
Shouldn't you be able to leave the guts in the upside down top half of the case and just pull the bottom off and then when you fix the tensioner arm, put it back on and bolt together?
Shouldn't you be able to leave the guts in the upside down top half of the case and just pull the bottom off and then when you fix the tensioner arm, put it back on and bolt together?
No reason they would break. I use a piece of cardboard and draw a basic outline of the cases as you're looking at it upside down, punch some holes and stick the bolts in so you know where they all go on reassembly.
You will want to take care as there are some retainer pins in a few of the journals that may come with the bottom end and have the possibility to fall out.
Unfortunately I do not have a spare guide, the ones I replaced in my current project were original and terrible. I bought the upgrade set from sparkmoto
This site uses cookies to help personalise content, tailor your experience and to keep you logged in if you register.
By continuing to use this site, you are consenting to our use of cookies.