Raask Rearsets installed! finally

Kuyarico

Coast to Coast
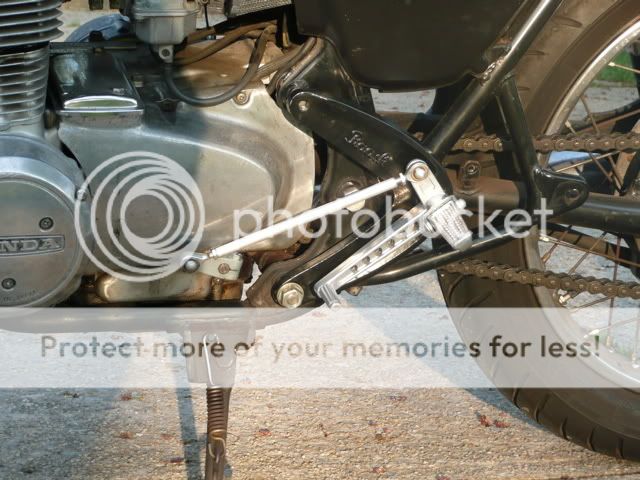
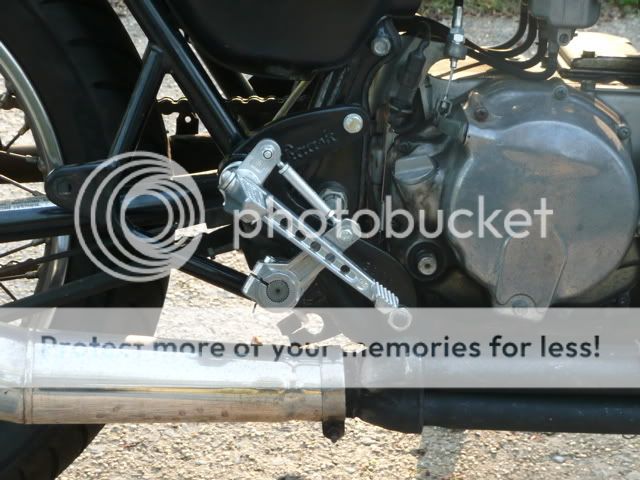
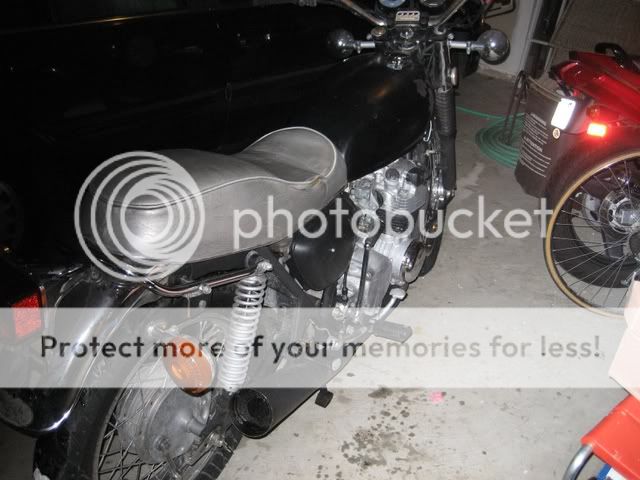
Special Thanks to Allie for selling me these awesome rearsets. Anyways, I finally had time to solve this puzzle. The installation was not straight forward, but it was not difficult either. The rearsets are indeed bolt on, but one of the bolts was not long enough(the brake side, top bolt). Thankfully I was able to find an appropriate bolt at Sears Hardware. After I bolted everything on, I found that there wasn't enough clearance for the linkage. The linkage was actually making contact with the brake arm. I remedied this by adding a few thick washers to the bolt that connects the footpeg. This gave me the clearance necessary to actuate the brake properly. The shifter side rearset was easy peasy. This setup works great. I put 100 miles on it in the last two days with no problems. These pics aren't the best. The sun was starting to go down and the lighting was bad. And the bike is dirty. But you get the picture.


P1000520.jpg
P1000519.jpg
P1000517.jpg
P1000518.jpg
P1000521.jpg
P1000522.jpg
 
nice work Kuyarico...
I told ya that the install was not so simple...
I had the same problems when I put them on RudeBoy's bike...
Infact the cheap aluminum brake actuator broke due to airbubble in the casting.
So I just routed it directly to the brake pedal using an 8mm rod that I threaded and put a clevis on, instead of using the stock 5mm flimsy rod.

I'll put up some pics soon, so you can see the difference between "as per design" & "improvise" with the same kit.

I do have to say, the riding postion with the Raask mounting brackets is much MUCH more comfortable than on my cb550 with the rearsets mounted on the passenger peg!... I feel like Im doing sit ups when I ride...(its ok... at least there's a chance that Í'll get buff riding that bike) ;D
 
Derek4Real3 said:
nice, now hack off them passenger peg mounts ;D

That's definitely on my list of things to do. This bike is running so strong that I think it deserves the works. I will probably strip it down to the frame next winter, do a little nip/tuck and powder coat. I plan on relocating the electronics and battery among other things.
 
Im glad they were ok. They look realy nice.. all you need now is an old RC style race tank in red or a long aluminium.... that woudl look cool. ;D
 
miss alliekat said:
Im glad they were ok. They look realy nice.. all you need now is an old RC style race tank in red or a long aluminium.... that woudl look cool. ;D

If you have one to sell me, I'll buy it ;D
 
locO leoN said:
nice work Kuyarico...
I told ya that the install was not so simple...
I had the same problems when I put them on RudeBoy's bike...
Infact the cheap aluminum brake actuator broke due to airbubble in the casting.
So I just routed it directly to the brake pedal using an 8mm rod that I threaded and put a clevis on, instead of using the stock 5mm flimsy rod.

I'll put up some pics soon, so you can see the difference between "as per design" & "improvise" with the same kit.

I do have to say, the riding postion with the Raask mounting brackets is much MUCH more comfortable than on my cb550 with the rearsets mounted on the passenger peg!... I feel like Im doing sit ups when I ride...(its ok... at least there's a chance that Í'll get buff riding that bike) ;D

Well here's what I did on Rudyboy's bike.
The brake actuator that came with the kit snapped in pieces, so I had to rig up, tap & die a brake bar and connect it to the brake pedal:
IMAGE_00102.jpg


Since there is no bracket for the rear brake light switch, I just made one and hooked it up directly to the pedal:
IMAGE_00101.jpg


So here's the progress on Rudy's bike:
Before:
Disco5504.jpg


After:
IMAGE_00103.jpg


Sorry.. Cheap cell phone pics...
 
Please do not bend those actuators. I don't believe that they were meant to be bent. If you do need to do this install, use spacers and washers to adjust the fitment.
 
Kuyarico said:
Please do not bend those actuators. I don't believe that they were meant to be bent. If you do need to do this install, use spacers and washers to adjust the fitment.

No it wasnt bending the upper tab that snapped it, it was puttin it on to the spindle that it broke...
 
Kuyarico said:
Yes, it is the handy work of DTT member Flipperboi aka Benji from BCR. I love the seat.

cool, thanks...took a look-see and indeed it's the same.

mind sharing where i might be able to score a pair of these rear sets for a 71 cb500?
 
rockwell500k said:
cool, thanks...took a look-see and indeed it's the same.

mind sharing where i might be able to score a pair of these rear sets for a 71 cb500?

I got lucky because DTT member Allie was selling these particular ones. But I believe that you can score some from Omar's : http://www.rearsets.info/rearsets.html
 
Kuyarico said:
I got lucky because DTT member Allie was selling these particular ones. But I believe that you can score some from Omar's : http://www.rearsets.info/rearsets.html

thank you again.

i contacted them, and their price is very fair.

hopefully i can get the ball rolling and order a set. ;D

i forgot to ask...do these rear sets interfere with the original kickstarter? i noticed yours is missing...
 
No, they don't interfere with the kick starter. I just prefer it without the kick start. More comfortable for me.
 
Love the finish of the setup. Are the rear brakes easy to function?! Aren't they too hard to press?!

I've tried a somewhat similar setup and if I use the brake spring, the lever is impossible to move. Even if I do remove it, the brake pedal hardly moves and doesnt brake quite effectively.
 
Back
Top Bottom