
Eastcoastmod
New Member
I can't beleive I forgot about this site....I just rattle canned the wifes cm400...and could have avoided so many little issues had I re-read. Thanks again for the fantastic information.
Colin
Colin
crazypj said:Personally, I see no point in Matte finish?
It ain't a stealth fighter and the first time you touch paint you 'polish' it slightly. really difficult to clean unless it's thick enough to wipe down with 1500 grit wetordry
")
tWistedWheelz said:I am no professional painter, however I am very experienced in using can spray paint for various purposes on a variety of surfaces. I have done everything from small bits and pieces to full mural art. I have painted cars, motorcycles, boats, and much more all using “rattle cans”. I decided to post this in order to help anyone who may not have experience using the “rattle can” method. I have seen various posts where someone gave some advice on painting, some using rattle can and some using professional equipment. I intend on covering every step in this thread. I hope anyone who has experience, will elaborate or criticize any of my method they see fit in order to prefect a collaborative method. The main reason I wanted to do this thread is I have seen where lesser experienced people have struggled with “rattle canning”. I hope they can use this as a reference.
Keys to a great rattle can job:
1. Start with good body work
2. Buy good quality brand paints
3. Learn to move in one direction with long even strokes
4. Create a make-shift paint booth(good lighting, sealed off from bugs/dusts/wind)
5. GOOD PAINT TAKES TIME!
Tools and supplies needed:
1. Dual action sander, preferably variable speed or at least a variable speed trigger
2. Sand paper for DA sander, 400 grit / 800grit / 1200grit / 2000grit
3. Denatured alcohol
4. Liquid soap
5. Lint free cloths (clean)!
6. Filler primer ( I like the gray rustoleum brand)
7. Body color paint
8. Clear enamel paint
Intro:
As stated in the keys above, the body work must be smooth and seamless, I cannot stress that enough! (Maybe someone who is handy with the body filler and finishing techniques will create that tread) I still like to prep the body work for paint by using the DA sander and the 400grit followed by the 800grit turning it on a high speed. If you are painting on fiberglass, be careful around edges not to cut in too deep. You are looking for a smooth surface with no noticeable transitions from filler to metal or resin. Never work in your paint booth unless painting body color or clear coat, even the primer will create a dust in your booth!
The following are prep methods that you will refer back to in many stages of the process, so from this point forward each method will be sited by its title.
“Wash Prep”:
Wash object with running water and soap. I like dish washing liquid. Make sure you use a rag. Rinse thoroughly with running water. Wipe dry with shamy or lint free cloth. Allow some time after to air dry.
“Tack prep”:
Move object to paint booth. Using a clean/dry lint free cloth, wipe down entire object with liberal amounts of denatured alcohol. Be sure you do not touch the object with anything (especially your fingers) after wiping down.
Prep:
When ready to begin painting you should start with a light coat to check your body work. This first coat will show you any imperfections before you waist too much time. Begin by “wash prepping” your object, then spray a light coat of the primer on the object. You should be holding the can 16 to 20 inches away from the object, waving it back and forth lightly while intermittently releasing and pressing the nozzle. You want to slowly cover the item with a light even coat, barley getting the object covered in color. Allow this coat to dry for 15-20 minutes. Visually inspect the object for imperfections in the bodywork. If you see definite lines where two layers meet or pitting, your body work is not done and you are not ready for paint. Once you are satisfied with you visual inspection coat move on to priming!
Priming:
Start by “dust coating”. This means hold the can about 20 inches from object and rapidly depress and release the nozzle until you have covered the entire object in a dusty looking coat. This coat should have a texture to it, which is what allows you to build a heavy coat without getting running or sheeting. Never let this “dust coat” look wet; you are laying it to heavy if it appears wet. Allow the “dust coat” 5 minutes to set then begin “covering”. “Covering” means to lay fairly heavy coats of paint using the longest stroke possible. (EXAMPLE: if you were painting a flat square you would start across the bottom and work to the top by moving in horizontal strokes. Aim the nozzle more toward the unpainted surface and away from the freshly painted surface. Depressing the nozzle before your come over the edge and releasing after passing over the opposite edge, painting in both directions.) You should hold the can 12 to 14inches from object and overlap each previous pass by about 2 inches. Don’t try to get it to cover everything, just move at one constant speed and keep it all even, you will be making many passes over the object so it will get covered. After you first “covering coat” you can start over with another “covering coat”. That should be done about for times before pausing. After the forth coat, stop and allow a 15 minute tack time. After the time has passed you can lay on another four coats of “covering”, wait 15 more minutes then repeat covering again! At this point you have 12 coats on your object, it needs to cure, primer dries fast but when you lay it heavy it will take a while for it to cure. Place the object in your booth or other safe place and allow it to cure for at least 48 hours. After curing you may find that your primer has a gritty texture or even some egg shell or orange peel finish, this is ok. In fact if you did it all right, it should! Time to do some sanding! With your DA sander on a low speed, wet sand the surface using 1200grit. DO NOT sand corners with sander, save them and do them by hand very lightly. (TIP: mix up some wet sanding solution by using one tea spoon of baby shampoo in a gallon of water) Once the primer coat is all smooth, time to lay some color! If you sanded through your primer coat, :-[ do it all again, and sand lighter!
Color painting:
It is crucial that you have a good grasp of the “covering” technique for laying color. Begin by doing the “wash prep” followed by the ”tack prep”. Once you are ready and feeling confident with your “covering” technique, begin your “dust coat” of the color. Allow that 10 minutes to tack then go with the “covering” method. Just as above do the “covering” method by doing four full passes, wait 15 minutes, repeat, and repeat again. This again should be twelve coats, give this 24 hours in the booth. After the set time, go straight into another “dust” coat followed by the same 12 coat “covering” process. Curing time, allow the object at least 48 hours to cure before continuing. After curing, DA wet sand the object lightly with the 1200 grit paper, again stay away from edges, they will have to be done by hand. Make sure you start with clean paper. Sand until orange peel finish is removed all the way down to smooth color, but not through to primer! Once sanded, complete a “wash prep” followed by“tack prep”. DO NOT “dust coat” this time, just lay two passes of “covering” coats and wait 15 minutes then lay two “covering” coats of clear paint. Allow this to cure for 48 hours. Now you’re ready to clear.
Clear Coating:
Start by “tack prepping”. After you have prepped, lay four passes of “covering” coats with the clear, wait 15 minutes, repeat, then repeat again. After that you must cure for 48 hours. Wet sand using clean 1200 grit at low speed, “wash prep”, “tack prep”, repeat the entire “covering” coat steps again. Cure for 48 hours and repeat wet sanding, after wet sanding with 1200 grit move to 2000grit and smooth out more. You are almost there! “Wash prep” again then begin buffing.
Buffing:
Using a high speed buffer and a fine buffing compound, buff clear coat on high speed applying light pressure over entire object. “Wash prep” and wax using a quality wax and hand applicator. Apply and remove wax by hand, two or three coats really gets a nice bling.
I hope you find this helpful, the above is for gloss paints only, see page two for the flat method.
Cheers! And happy “rattle canning”!
Hoosier Daddy said:Haven't seen tWistedWheelz on in a while... last visited May 31, 2012.
Might want to send him a PM. He may have a notification e-mail setup.
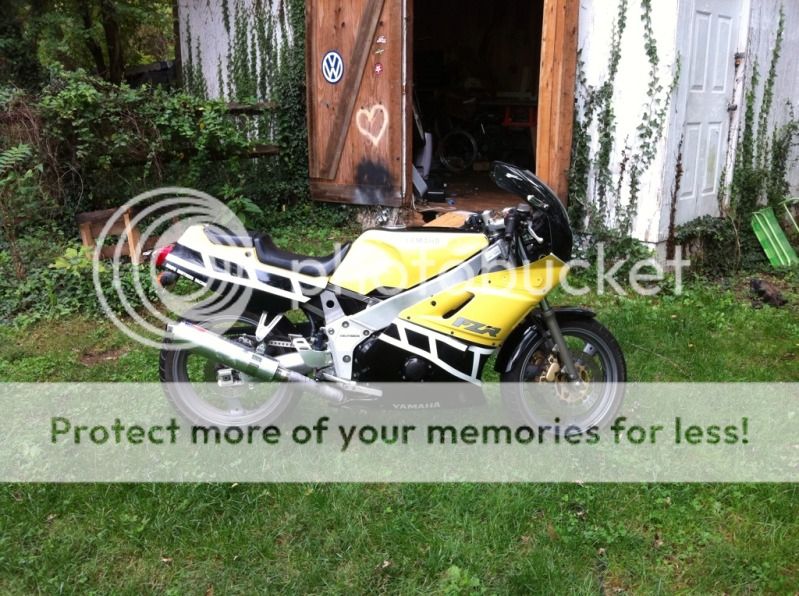

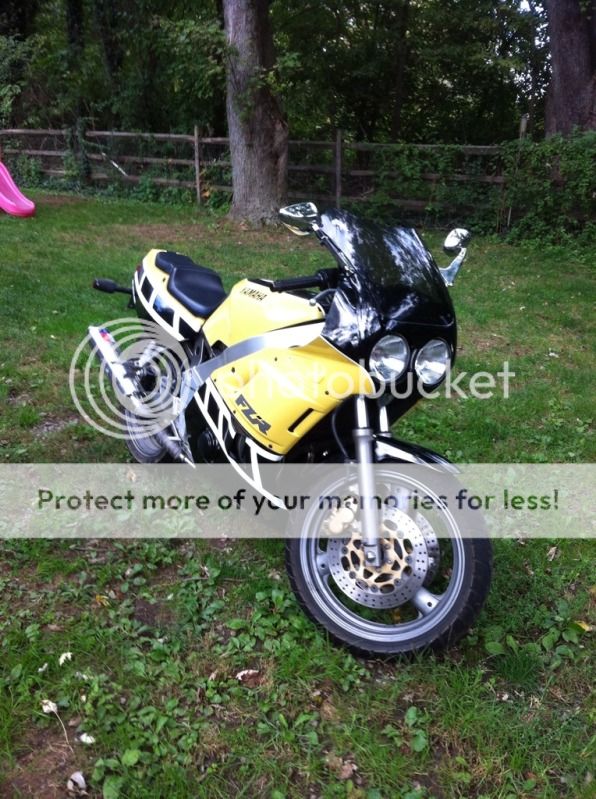
JustinLonghorn said:All done with Rattle Can using TwistedWheels methods:
I spilled a small amount of gas on my well cured Duplicolor cleared tank and wiped it off right away... still stained it a milky color. :-\New2meCB said:Is Duplicolor clear really THAT bad? I'm close to clear coating my tank and don't want to waste time with it if it's not worth it. I've used Duplicolor paint so I assumed the DC clear would be best but............after reading this thread (or at least parts of it) it would seem that most are using Spraymax 2k?


