Follow along with the video below to see how to install our site as a web app on your home screen.
Note: This feature currently requires accessing the site using the built-in Safari browser.
We noticed you are blocking ads. DO THE TON only works with community supporters. Most are active members of the site with small businesses. Please consider disabling your ad blocking tool and checking out the businesses that help keep our site up and free.
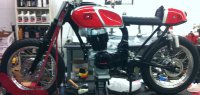
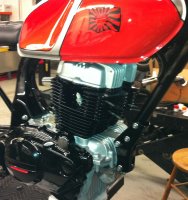
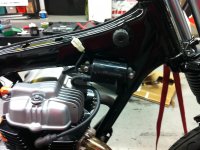
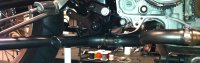
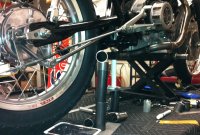
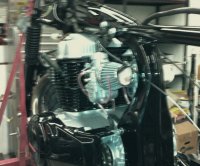
So we took a major step today with the Bike. The Motor is finished assembly and in the frame. I think it looks really good. Everything went well and easy install.
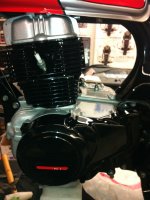
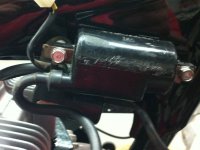
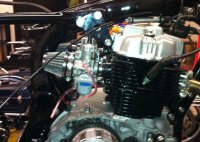
Originally the clutch cover and stator cover had "made in Japan" in the casting on the sides. I didn't like having that on the covers like that so I used the bridgeport to mill out this script. This left an approx 1/8" by 4" groove on the side. Also above that the was "HONDA" written. I also milled this out. So I had the idea of having a custom vinyl sticker made for the space where it used to say honda. I am in the process of getting those made. Its going to say 400CR. For 400 cafe racer. And in the space below that I mixed up some paint and filled it in to match the red in the paint job. Let me know what you think.
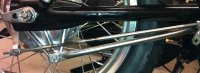
I still had an hour or so before closing up shop for the day so I decided to tackle the rear brake linkage. This was easy enough but I did have to add a bend in the linkage arm. Originally I was going to use the stock arm and just modify it a little bit but after modifying it, it was just to flimsy and would stretch at the bends. So I had some 5/16" steel rod. I turned down one end to accept the stock nut on the drum end. The other end was easier because I didn't have to turn it down just run a die over it for 5/16 24, to fit into the heim joint I am running (from a Harley Davidson) I know I know
quick update.
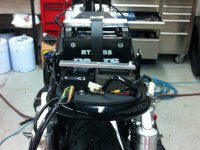
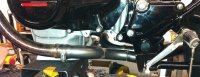
Over the last couple days I have been making misc aluminum spacers on the lathe and finally mounted the shocks permanently. I mounted the headers and got a pair of mufflers fitted to where they need to be. I am just waiting on a piece of 1 1/2 pipe to connect the 2 pieces together. I got the tab welded on the shifter peg for the shifter linkage and thats all set. Today I took all the body work off and started to get organized with all of the wiring and placement of electrical pieces. Also I hope to get the triple tree finished so I can get the headlight and brackets, speedometer, and handlebars mounted. When that happens I can get started on making all of the cables the right length. As most of you know this is where things slow down a little bit because there are so many small jobs that need to be accomplished. But I am plugging away at it.
Just got news that a Connecticut Cruise News is going to do a feature on the Bike as soon as its done. Looking forward to that!
Hello everyone, so this week I was able to do some good work on the bike.
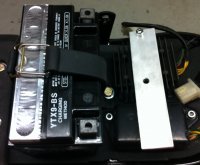
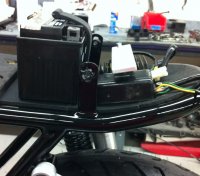
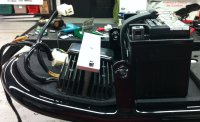
I was able to place and install all the different electrical components on the bike. All the components are hidden and will look as though not even there when the bodywork is installed. I put the battery, regulator, and CDI under the seat hump. I also made a plate under the hump to mount all the fuses to when I get into wiring. I also layed down battery tray pad under all these parts to keep them from vibrating.
Just a note, the aluminum fuse plate looks crocked and is.... this is cause I only have 1 of the bolts holding it down tightened. They are pretty long and I only had one on hand.
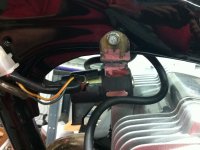
I also needed to install the starter relay. Originally I wanted to put it under the hump but that would be one hell of a long battery cable to connect it to the starter. So I decided to move it forward under the tank so it would split the difference between the battery and the starter. It fit nicely and has plenty of clearance. I was also able to retain the stock rubber mount for the relay which wasn't totally necessary but was nice that it worked out.
I just noticed the last picture of the bracket I made. I wanted to say that this bracket will be getting powder coated when I send out my last box of parts for powder. Even though it is hidden I want everything to be perfect so don't think I am leaving it bare. Haha
I also started work on the exhaust as noted in the last update. Well I scrapped that exhaust idea....lol
Stay tuned for a sick looking exhaust. Gathering the tubing and the plan is to run it under the transmission and frame in the space where the center stand originally mounted. Then it will kick out on both sides of the rear tire. Stay tuned for pics of that, hopefully end of next week!!!!!!!
Im not sure about the price for just the cases because I sent a bunch of stuff out and lost the breakdown of the individual parts but I can tell you that the place i sent it too was the best powder coating prices I have ever received. He was on this forum at one time. It was from a place called "the powder pro" And I will say its also the closest to paint looking powder coating I have ever seen. And I have been getting powder coating done from many different shops for many years. Cheers
That's JRK5892. He's definitely still around. They're doing powdercoating for my bikes this winter...got some bodywork for the Vulcan right now. He and Tim are definitely great guys and very helpful. I'd never had any PC done before and Tim was very patient showing me the different options and samples and how they could layer different colors for various effects
Its been a busy week at the shop. I've been working on the 400 CR and also juggling getting stickers made for Sin City Vintage Cycles, for this motorcycle, and also bought a potentially rare motorcycle (more on that in a bit)
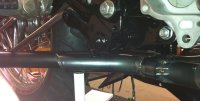
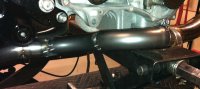
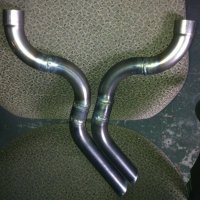
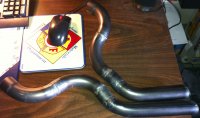
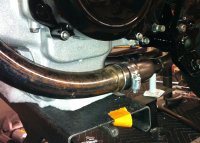
This week I was able to do some wiring for a day. I was able to get the stator and all the wires from it and the pickup run to the battery compartment. The next day my exhaust tubing came in so I put the wiring aside and started to concentrate on making the exhaust. The new plan was to utilize the stock head pipes from the heads and run down either side of the bike. Where they end I was going to build an exhaust that then swung under the transmission and kicked out on both sides in front of the rear wheel. After laying it out it became apparent that the pipe on the left side of the motorcycle was going to interfere with the kickstand. I wanted to keep the exhaust as symmetrical as possible (for performance and ease of tuning) and this wasn't going to happen with the kickstand being right in the way. In the end the next best course of action (short of relocating the kickstand) was to have the left pipe cross over and exit out of the right side of the bike parallel with the right exhaust. Here is what I ended up doing
In some of the pics on the bike the rear pipe is left longer. I decided to leave it longer until it was all tacked together and then make a final slash cut so both pipes would have the same angle.
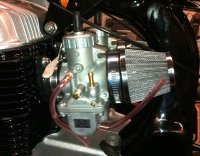
I also installed the carburetors. I decided to go with Mikuni VM30's as many others have. I will sync these and adjust when the time comes and also put the bike on the dyno to help with tuning and performance. (no way I'm riding this bike with the salt and sand on the roads in the northeast) A little manifold massaging and they fit perfectly. Of course there isn't a left and right carburetor so one of the chokes is/will be hard to get at. The plan for now is to leave it as it is and after the bike is tuned see if the bike will start with one of the carbs on choke. I want to see how the motor and plugs handle that. If the bike warms with no problem on one carb choked then I will allow that but if its not perfect then I will build a one piece choke bracket that will activate both chokes, so we shall see
Re: Sin City CM400 Cafe Racer **New Exhaust and Carb Pics**
I still have to finish the top tree I keep putting it off! So that is now the #1 priority because I need to get the handle bars on and run the cables and hand controls. The wiring is going to be put off until I send the small parts out for powder because I can finish the wiring then while waiting for the parts to return.
Earlier I mentioned buying a rare bike. Right now it seems I was able to buy a 1958 Ariel cyclone. It is a basket case but all the major parts are there including the gas tank. There are many documents supporting the cyclone classification, which is a rare bike, I just want to confirm it all with an expert because its one of those things where it seems just to good to be true. But we shall see. If anyone knows an ariel expert let me know!!
This site uses cookies to help personalise content, tailor your experience and to keep you logged in if you register.
By continuing to use this site, you are consenting to our use of cookies.