We noticed you are blocking ads. DO THE TON only works with community supporters. Most are active members of the site with small businesses. Please consider disabling your ad blocking tool and checking out the businesses that help keep our site up and free.
You are using an out of date browser. It may not display this or other websites correctly.
You should upgrade or use an alternative browser.
You should upgrade or use an alternative browser.
ST2 DuCafinated
- Thread starter knumbntz
- Start date
knumbntz
Been Around the Block
Small update
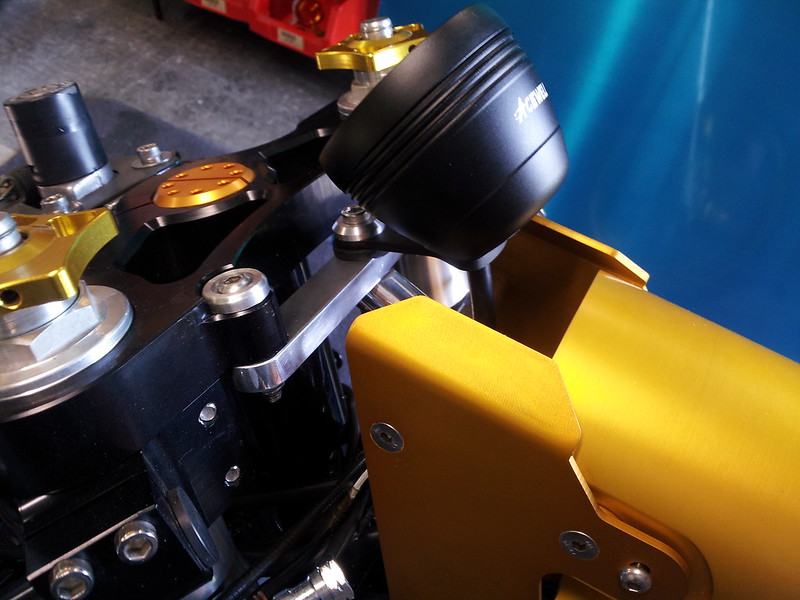
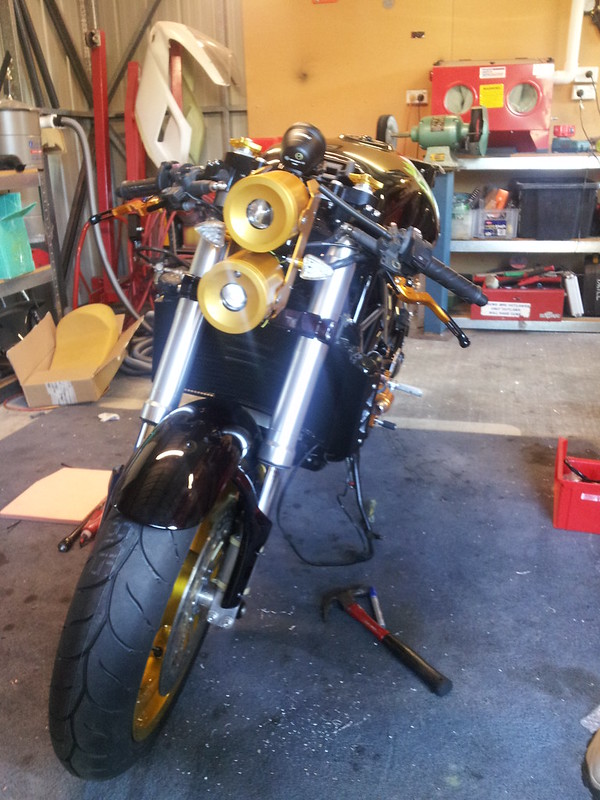
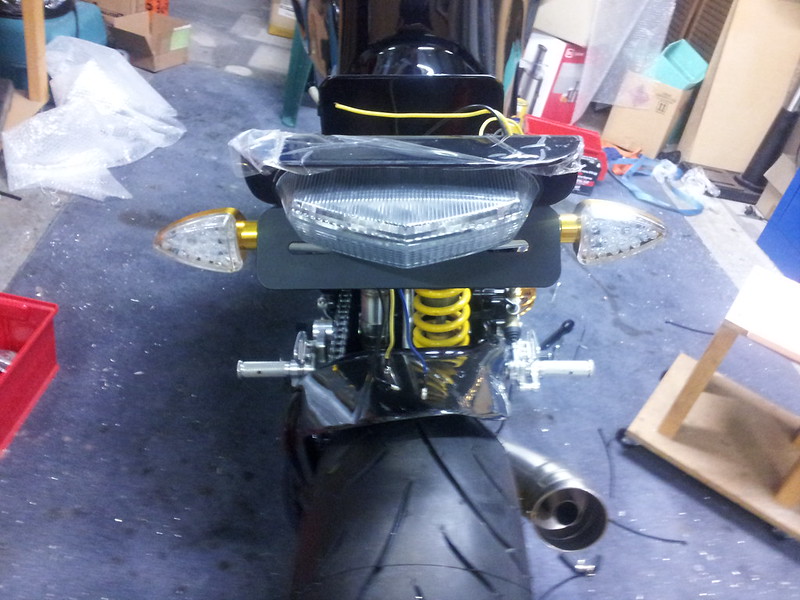
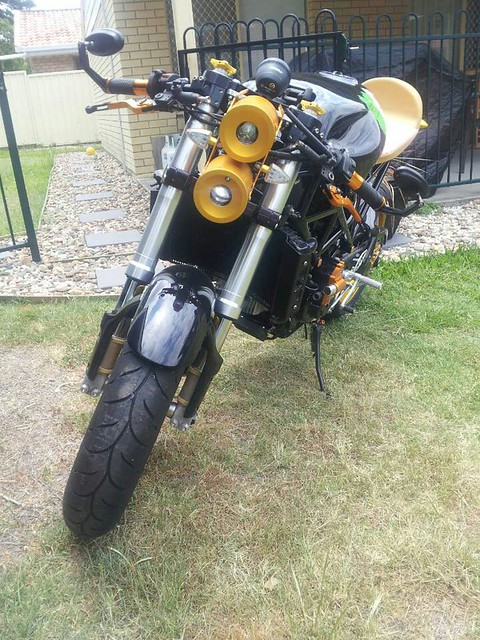
I think the lights seem to be a odd in the photos, but its strange because the photos show them really standing out but when your standing in front, they are actually quite a lot smaller than the photos make out.
I think it is because I am using a camera photo and the blacks dont show up and the lens on the camera is wide angle making things stand out. Anyway....
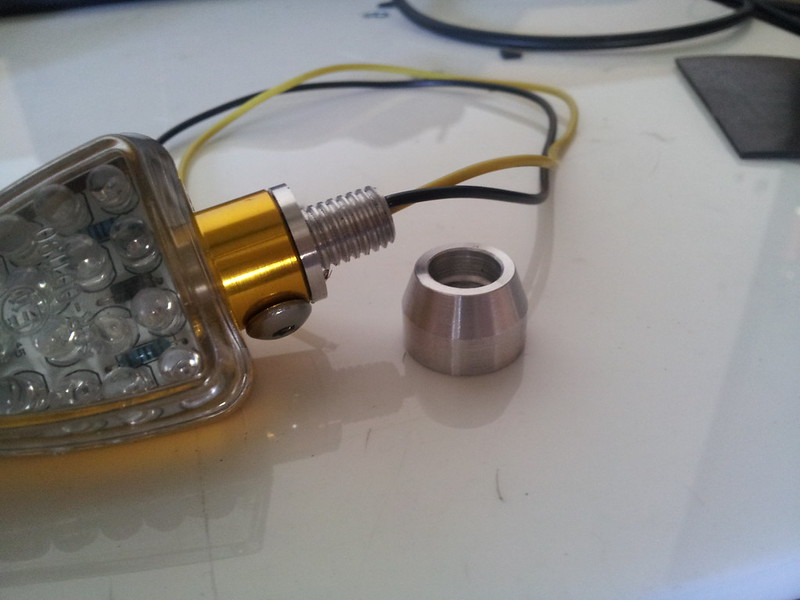
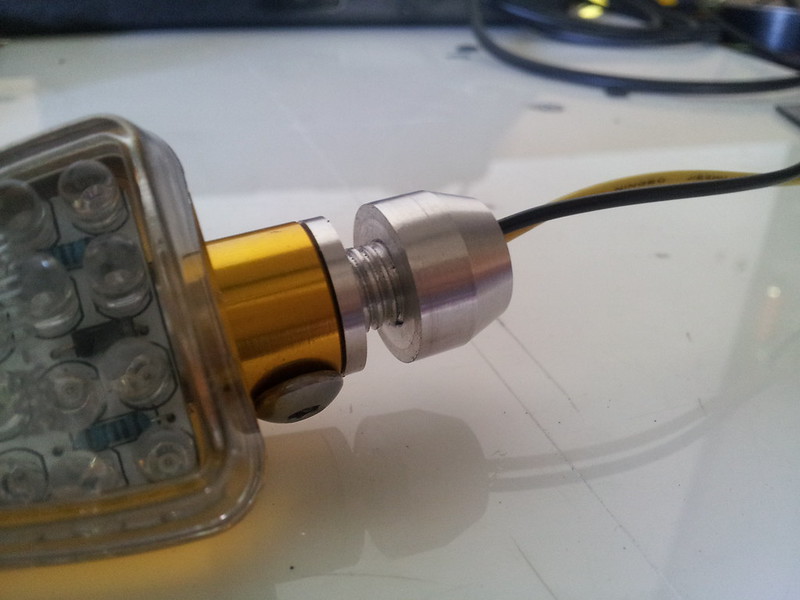
As someone pointed out, the indicators have a rubber piece with a bit of thread as the mount, but i was effortlessly able to pull the rubber out but it didnt look so good with the crap rubber anyhow.
So i lathed up some 20mm rod and replaced the rubber with these machined pieces and threaded a 5mm locking screw in to the base to secure them in. I was originally going to glue them in but these slipped in and after I put the screw in I though the glue was really superfluous in the end. I use glass and window silastic which if you didnt know etches into aluminium and bonds extremely well. I then threaded the ends and made a nice little round nut to go on and used a little silastic to keep it from untightening like you would locktite.
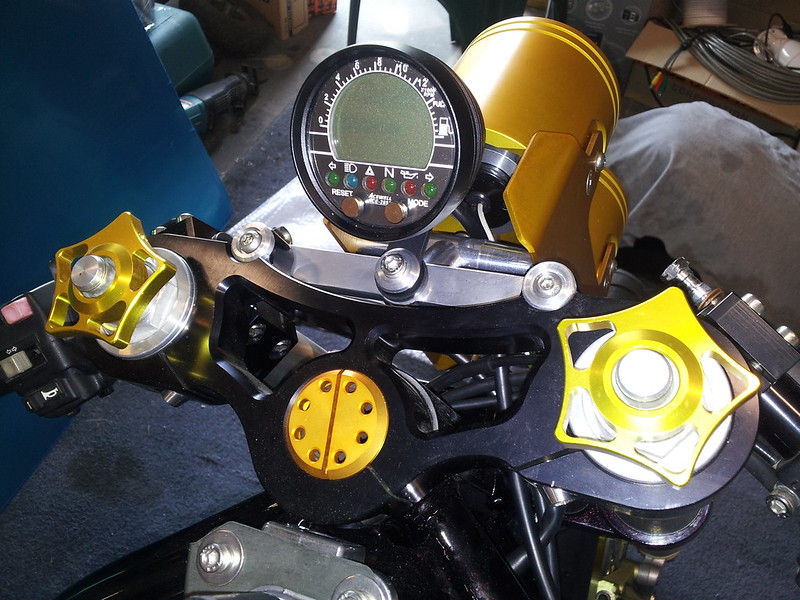
so in this, you can see that the EP radiator guard has these funky triangles cut out, so because the guard is for a S4R and my radiator is an ST2, there are two issues.
1. is the S4R radiator is 16mm wider, so i had to add spacers on to the radiator to fill the gap.
2. is that the S4R radiator has threaded holes so to can mount a guard, i think they had a small guard side thing from the factory, so any guard I needed to mount needed some threaded holes to replicate that.
I used 10mm aluminium plate and made the same cutouts to match the EP guard and also a few extra holes just to trim the weight a bit. It just took ages to drill, hacksaw and file the pieces down.
In the end, you wont even see them as the guard covers most of it and I have some carbon pieces that cover the back.
I think the lights seem to be a odd in the photos, but its strange because the photos show them really standing out but when your standing in front, they are actually quite a lot smaller than the photos make out.
I think it is because I am using a camera photo and the blacks dont show up and the lens on the camera is wide angle making things stand out. Anyway....
As someone pointed out, the indicators have a rubber piece with a bit of thread as the mount, but i was effortlessly able to pull the rubber out but it didnt look so good with the crap rubber anyhow.
So i lathed up some 20mm rod and replaced the rubber with these machined pieces and threaded a 5mm locking screw in to the base to secure them in. I was originally going to glue them in but these slipped in and after I put the screw in I though the glue was really superfluous in the end. I use glass and window silastic which if you didnt know etches into aluminium and bonds extremely well. I then threaded the ends and made a nice little round nut to go on and used a little silastic to keep it from untightening like you would locktite.
so in this, you can see that the EP radiator guard has these funky triangles cut out, so because the guard is for a S4R and my radiator is an ST2, there are two issues.
1. is the S4R radiator is 16mm wider, so i had to add spacers on to the radiator to fill the gap.
2. is that the S4R radiator has threaded holes so to can mount a guard, i think they had a small guard side thing from the factory, so any guard I needed to mount needed some threaded holes to replicate that.
I used 10mm aluminium plate and made the same cutouts to match the EP guard and also a few extra holes just to trim the weight a bit. It just took ages to drill, hacksaw and file the pieces down.
In the end, you wont even see them as the guard covers most of it and I have some carbon pieces that cover the back.
knumbntz
Been Around the Block
update.
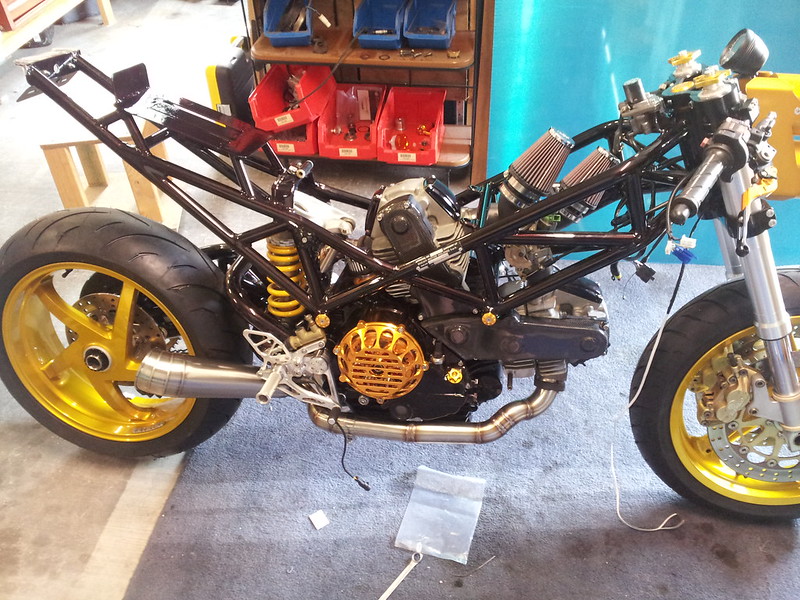
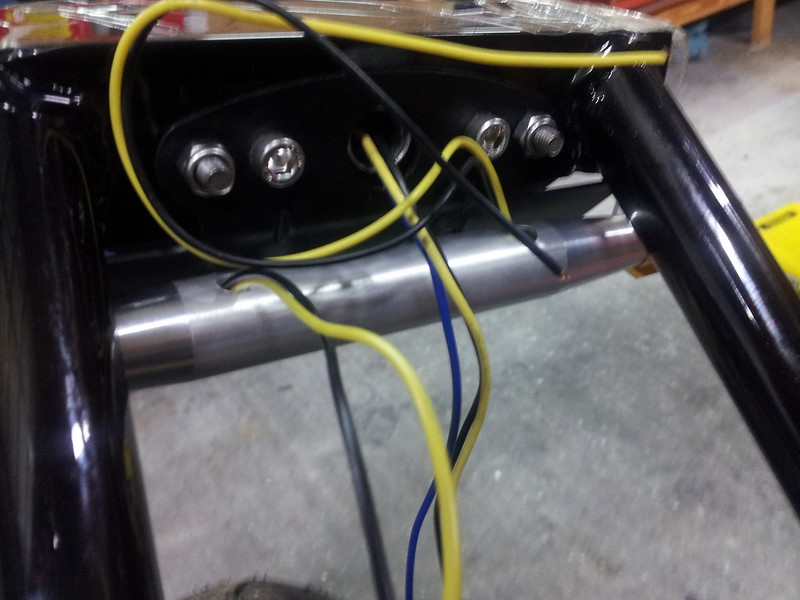
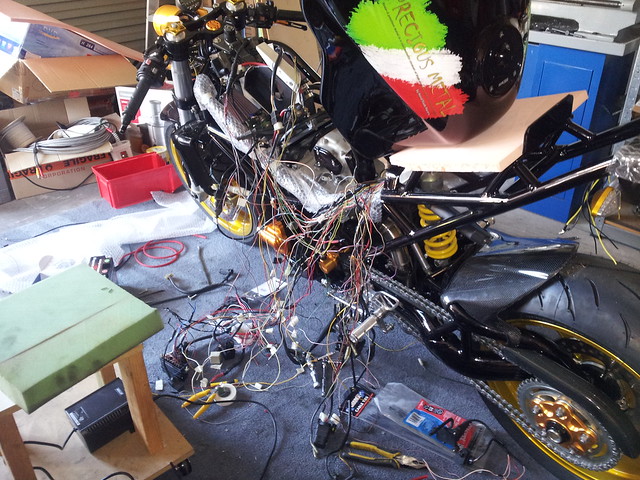
Since the last post i have totally rewired the bike moving the relays and fuses etc under the seat cowl and mounting the rechipped ECU under the seat.
It took 7 days to wire it up as i made brackets to mount bits along the way. What a major task that all was.
So on the 2nd of Jan I finally go it to a stage where I could start it and after a rewire, removing a side stand relay, rebuilding the motor i was anxious to see whether it would start.
Gladly first crank and it fired straight up, big relief ! Sounds great too.
Heres a couple of pics
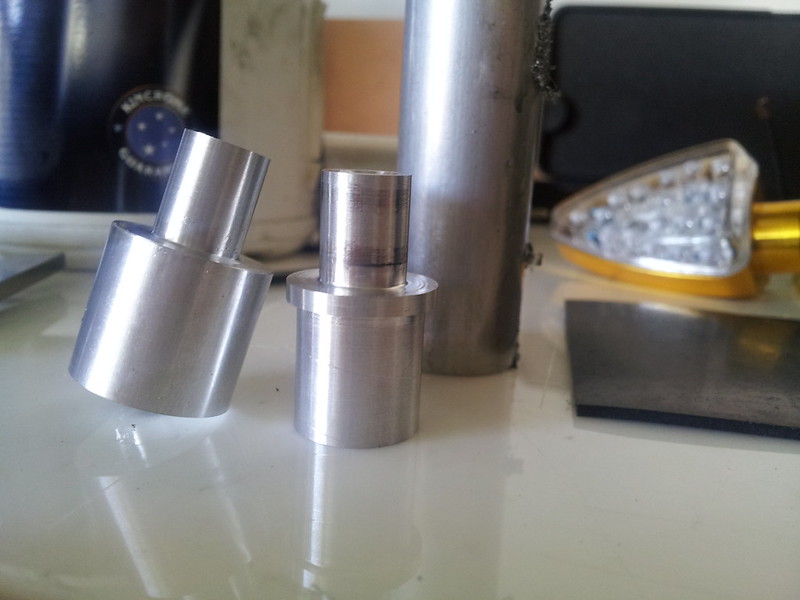
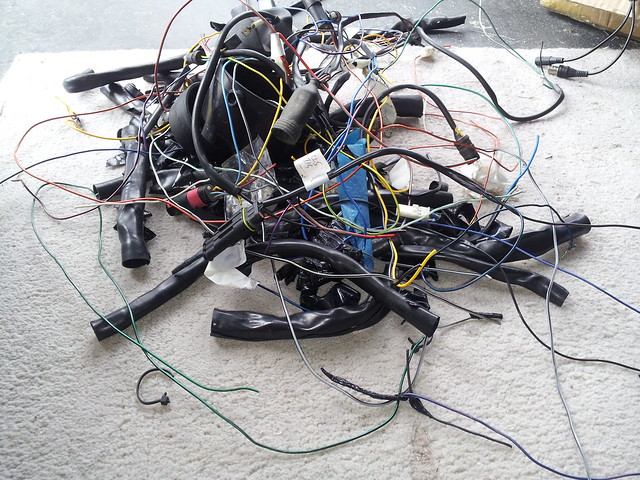
some left overs....
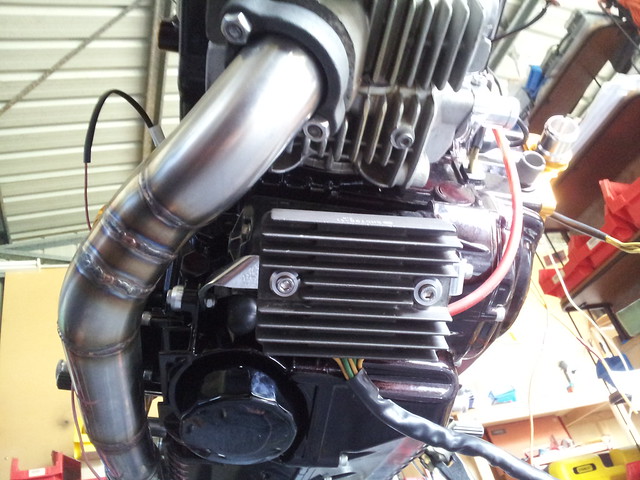
found a place for the regulator
so currently i am waiting for brake lines and radiator hoses and to paint the seat

With some luck the hoses will come this week. I have to take the bike to get the lines measured wednesday and I'll take the seat to get painted tomorrow and finish off the seat base and take that for upholstering this week as well. If all goes to plan, the bike should be rideable monday~tuesday next week
Since the last post i have totally rewired the bike moving the relays and fuses etc under the seat cowl and mounting the rechipped ECU under the seat.
It took 7 days to wire it up as i made brackets to mount bits along the way. What a major task that all was.
So on the 2nd of Jan I finally go it to a stage where I could start it and after a rewire, removing a side stand relay, rebuilding the motor i was anxious to see whether it would start.
Gladly first crank and it fired straight up, big relief ! Sounds great too.
Heres a couple of pics
some left overs....
found a place for the regulator
so currently i am waiting for brake lines and radiator hoses and to paint the seat
With some luck the hoses will come this week. I have to take the bike to get the lines measured wednesday and I'll take the seat to get painted tomorrow and finish off the seat base and take that for upholstering this week as well. If all goes to plan, the bike should be rideable monday~tuesday next week
knumbntz
Been Around the Block
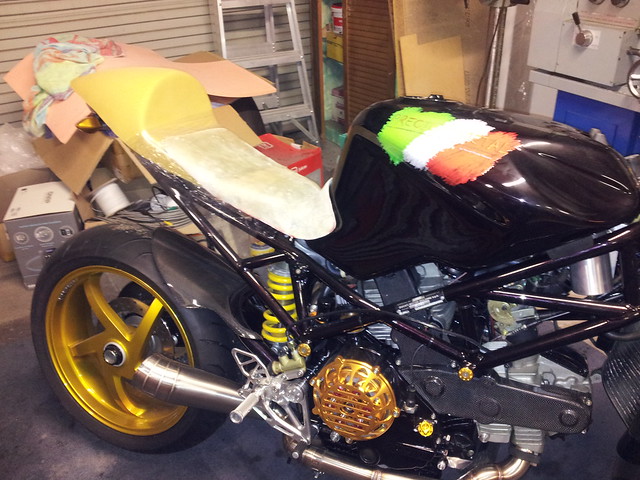
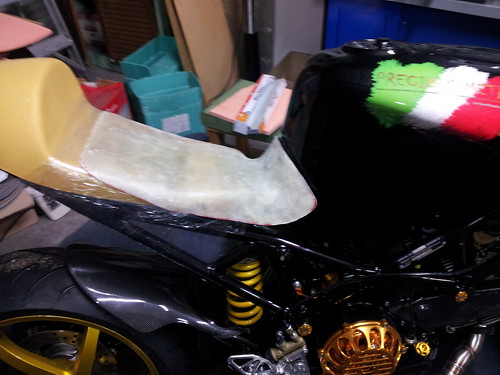
So I made the seat base today. I cling wrapped the area and then just glassed over it
After it went off, I then do a thin layer of 2part Bog and sanded it down. Just do this to smooth out the lumps and bumps but its not really needed although it does strengthen it quite a bit, its more to get rid of the sharp bits that occur when you fibreglass.
Trimmed it using a pair of tin snips and scissors. Turned out super. (not that you can tell in the phone camera pics...) ps.. and to think I am a photographer too... just a very lazy one
 [/QUOTE]
After it went off, I then do a thin layer of 2part Bog and sanded it down. Just do this to smooth out the lumps and bumps but its not really needed although it does strengthen it quite a bit, its more to get rid of the sharp bits that occur when you fibreglass.
Trimmed it using a pair of tin snips and scissors. Turned out super. (not that you can tell in the phone camera pics...) ps.. and to think I am a photographer too... just a very lazy one
knumbntz
Been Around the Block
knumbnutz;3305673 said:Hi Everyone.
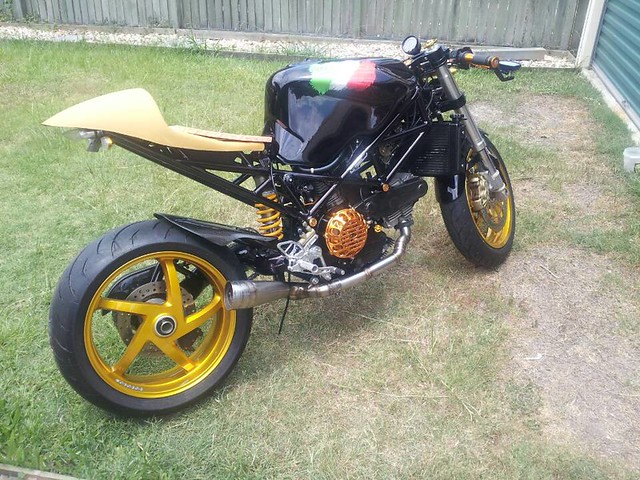
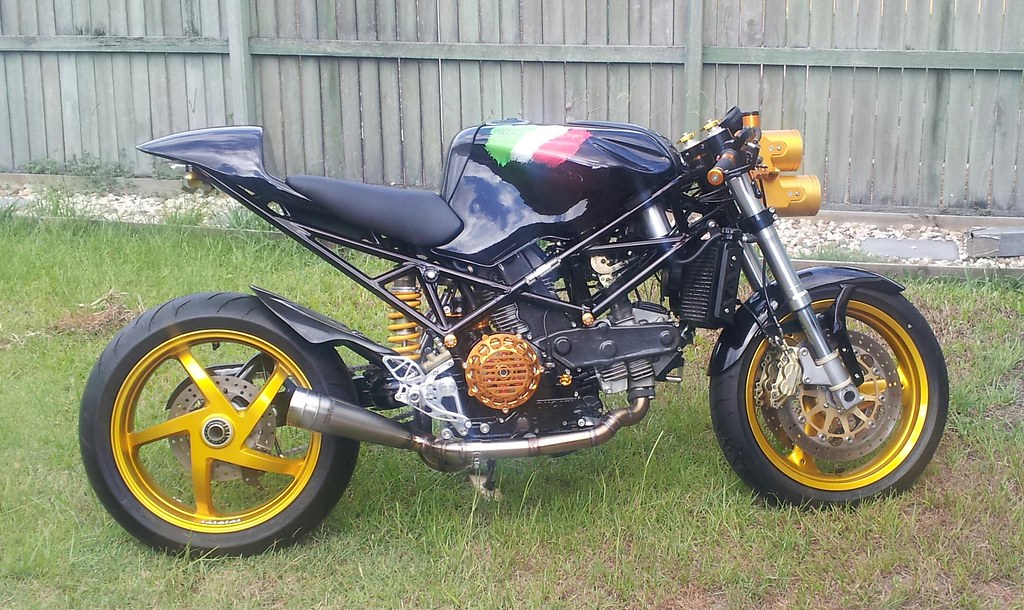
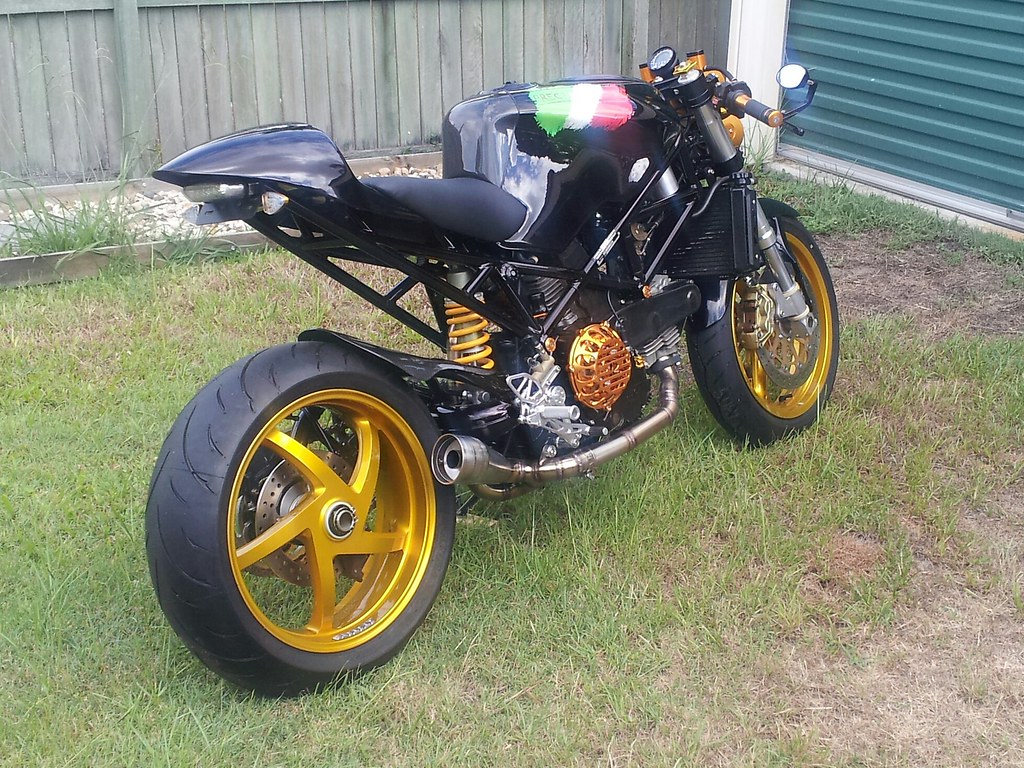
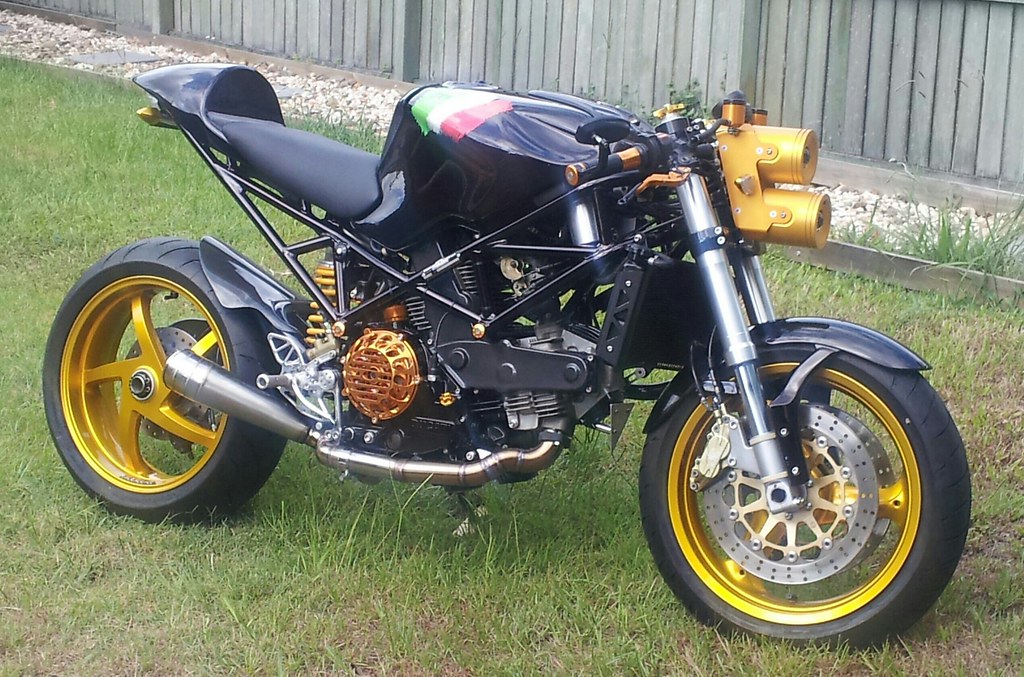
So... its done. Finished. Got the ducktail today from painter, the thermostat yesterday from Ducati and this afternoon after work, got is running and took it for a test ride around the block.
Handling is spot on, nothing to do there, rear brake lever needed rising up a bit, clutch needed a smaller plate swapped in. Doesnt like to idol and needs tune under 2500rpm - a little lean, above that it goes like a dog shot in the ass. Sounds perfect too, not too loud but just plain angry when you snap the throttle open.
Very happy.
knumbntz said:Thanks, I am happy that the lights are either loved or hated, it means theyre different.
Yes, much better than having the same thing as everyone else! Just so that you know I do appeciate the workmanship on the lights though
")


